
When I made the cigarette trousers I decided to document the extensive fitting process to the best of my abilities. Of course these are methods that works for me, and your mileage might vary as we all have unique bodies. But hopefully you can take something useful from my process and incorporate it for your own pants fitting.


My starting point
I used the Burdastyle 04-2016-117 slim fitting trouser pattern. The Burda size 38 is quite close to my own body lower body measurements (apart from me being much shorter) so I didn’t have to do tons of stuff with the sizing, which made my work easier. That said, I still made a lot of alterations
So let’s take a look at my pant fitting process!
Making the trousers petite
I shorten my trouser patterns at two spots: mid thigh and mid calf. On each spot I draft two lines, with a 2 cm (4/5 inches) distance between.
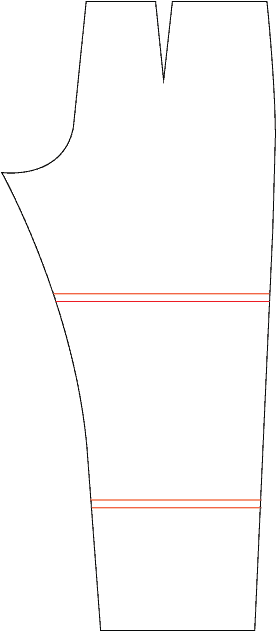
I then fold the patterns so that the lines meet. My legs are 4 cm shorter than Burda’s legs, but I don’t have to shorten the crotch depth, since mine is the same length as the regular size. So that is a great tip when sewing petite or doing any other alteration, that just because you are taller or shorter doesn’t mean that everything is shorter or taller compared to the pattern sizing.

Byt the way don’t ever shorten the trousers at the hem if you are petite. This will throw off the balance and might make the hem wider as well. You want the trouser to taper off at the same spots as the pattern is intended. Trust me on this one! (but feel free to disagree :-)) And as I said earlier, it is important to figure out exactly where you are shorter in the lower body and adjust accordingly.
I assume the same principles applies if you are tall, that simply lengthening the trousers at the hem won’t yield the same result as a proper alteration.
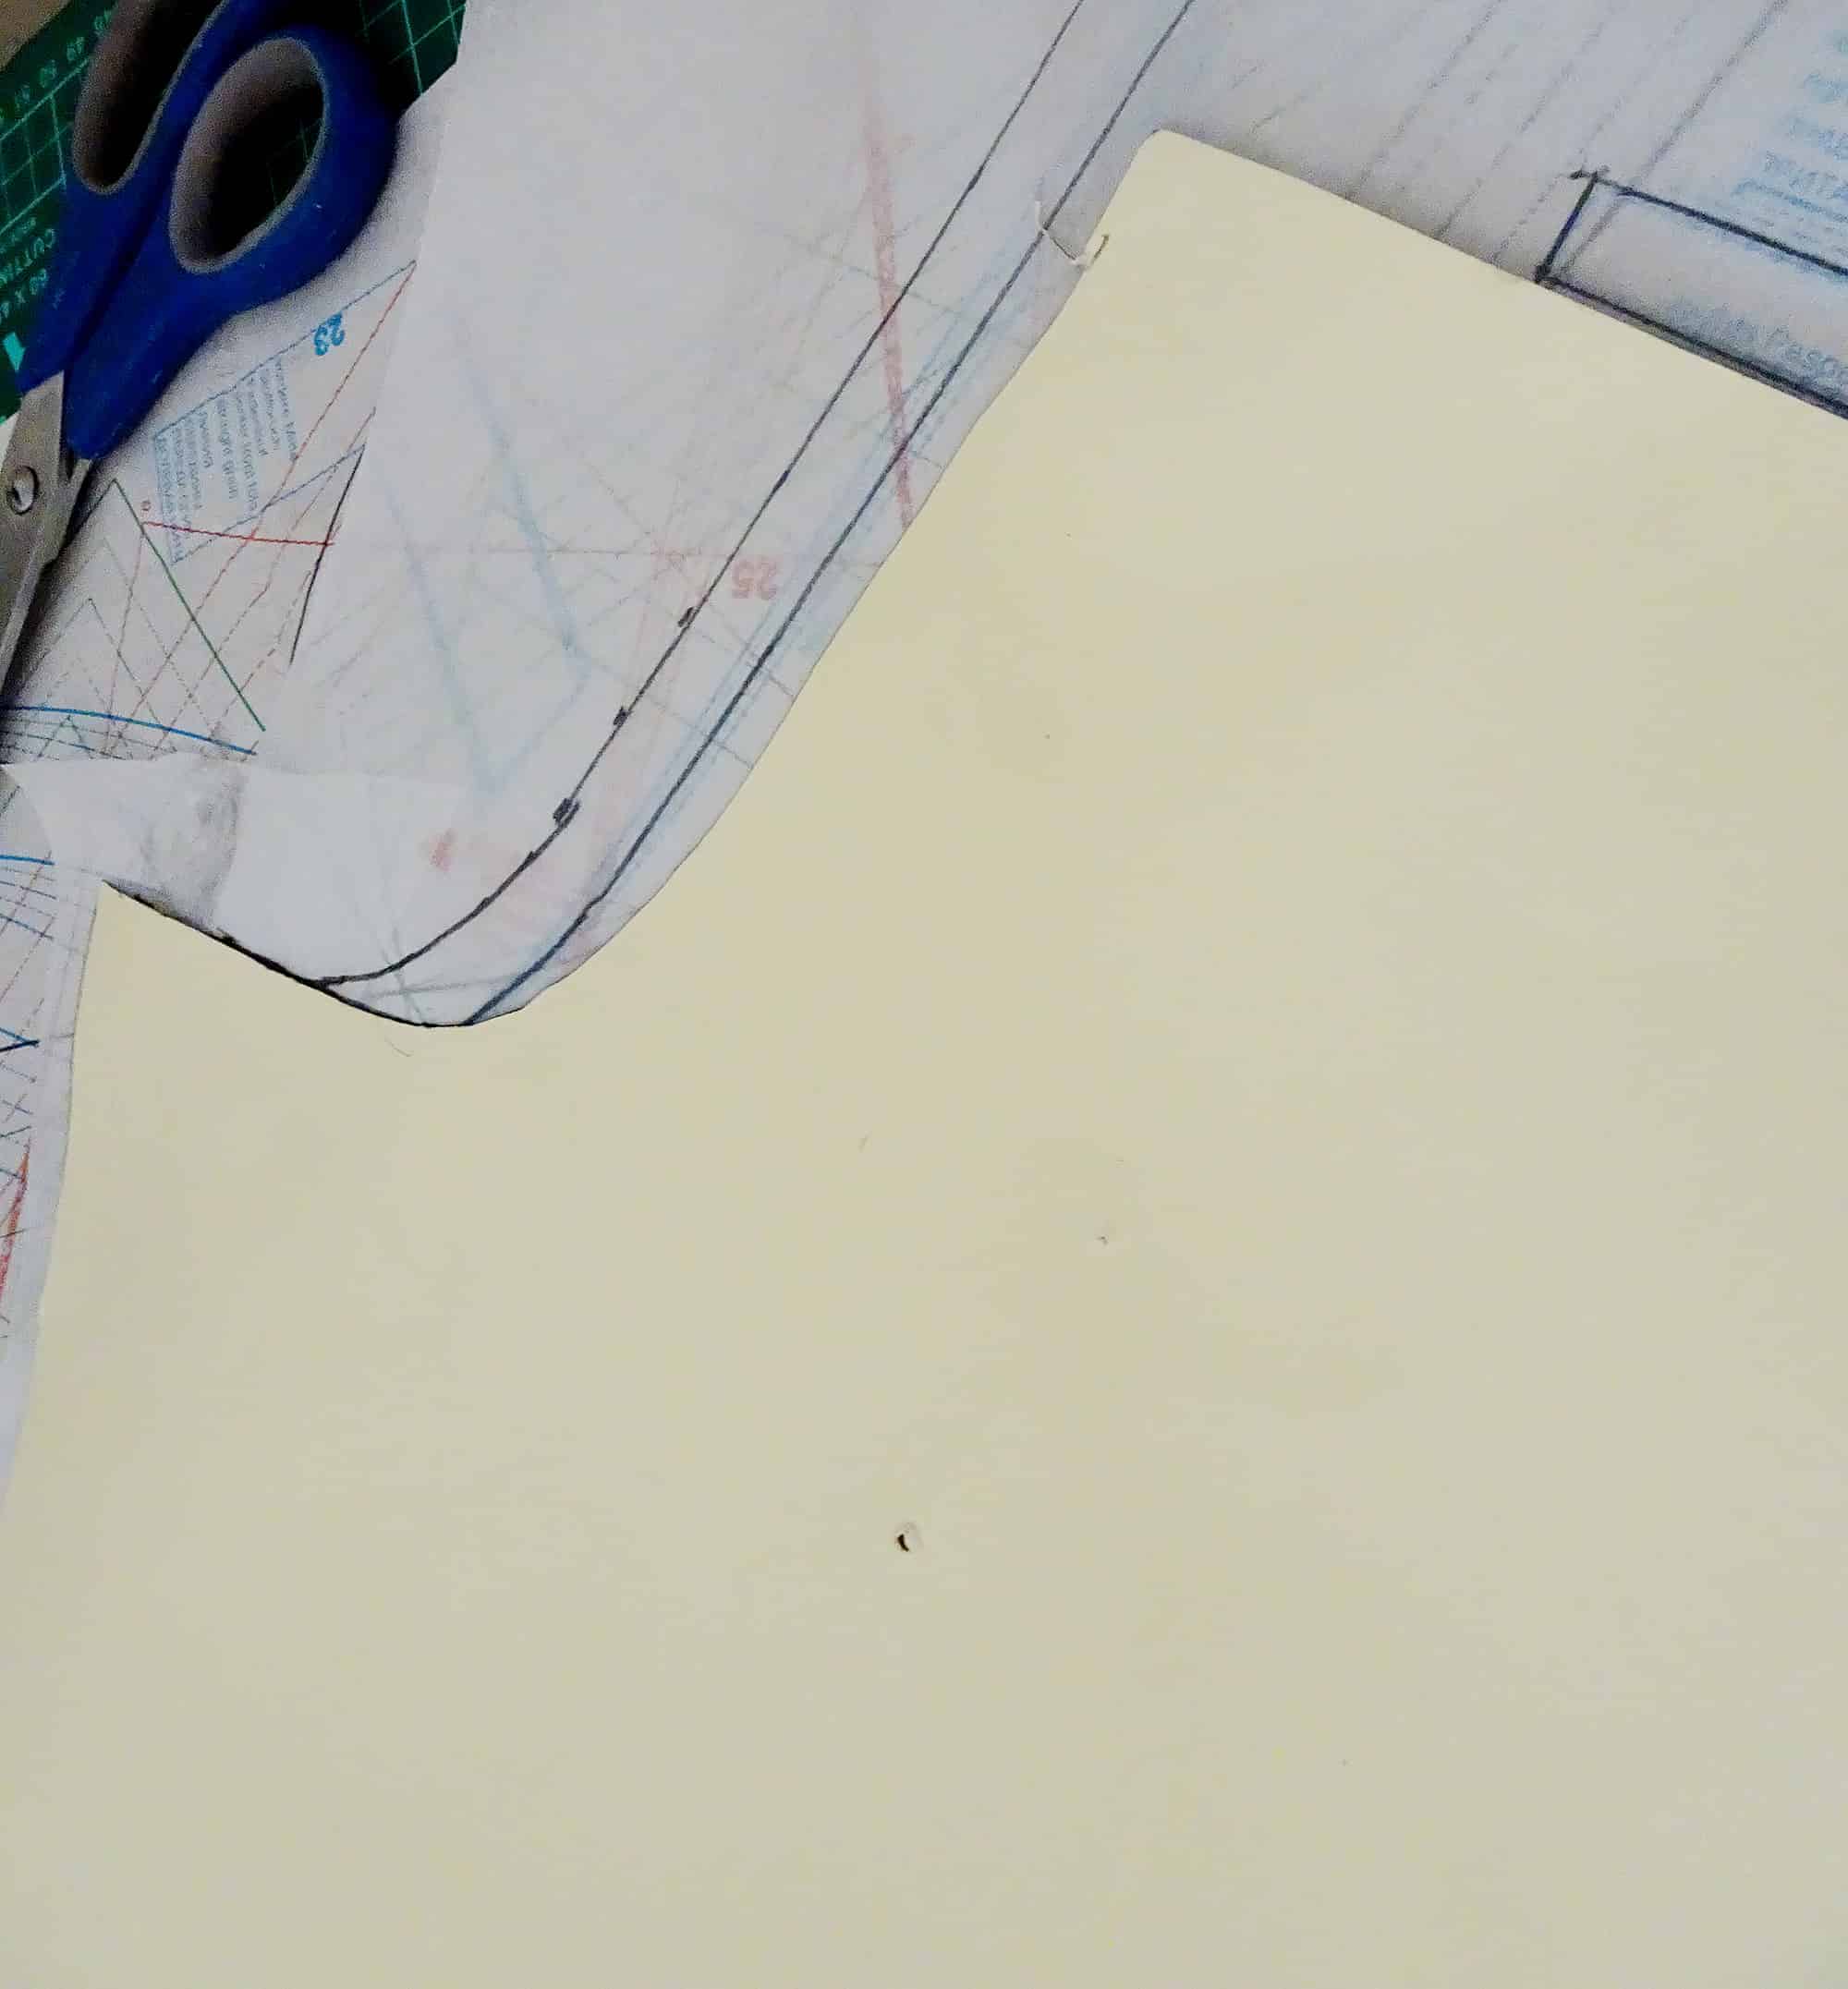
Once I folded and taped the pattern, I even out the curves/true the seams so that they look similar to the original pattern.
Fixing the crotch
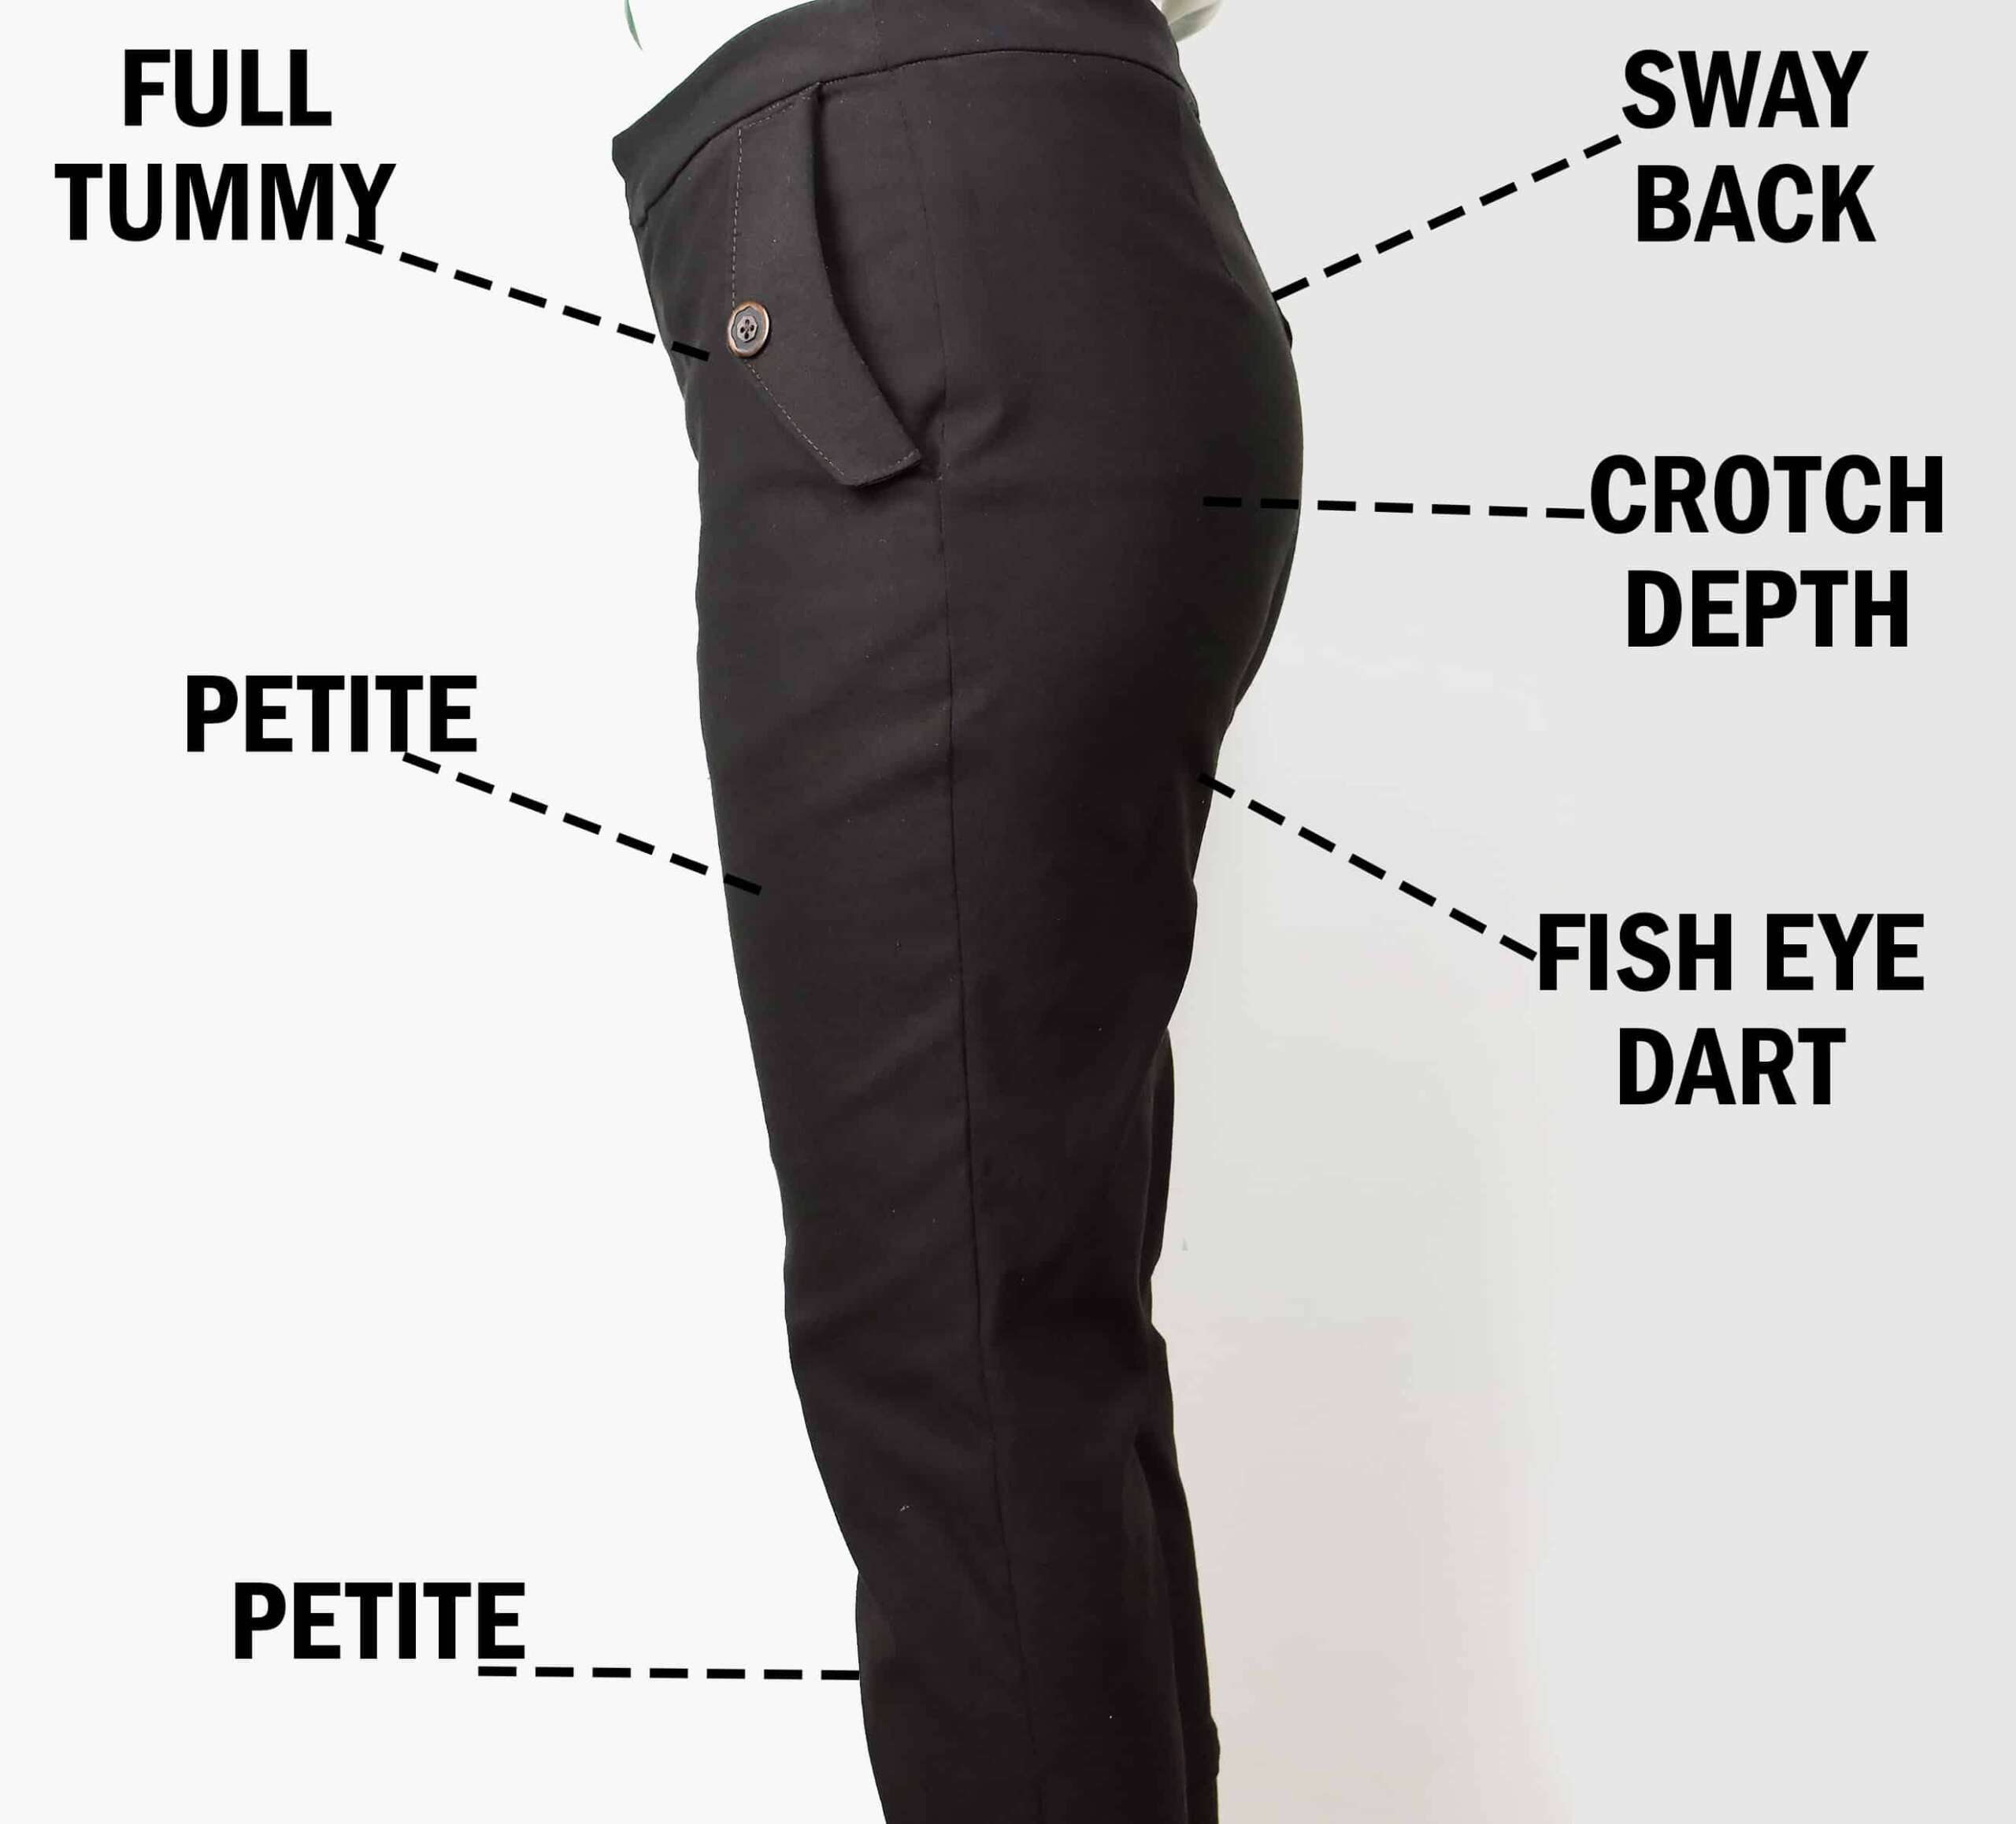
This is key to successful trouser fitting in my humble opinion. My main issue is that I get a lot of excess fabric underneath the bum and that I have a sway back so the waist band always gape in the back.

Goal 1: Changing and extending the crotch curve
I did this in three steps
- Changed the crotch shape from C to more L-shaped. This shape sits so much better on me and I’ve heard many others report the same thing, so if you are struggling with the fit around the bum this might be a option to explore.
- Extended the crotch inseam a little bit. I need do that so that the trousers won’t ride down when I sit.
- Lengthened the upper crotch seam a little. Again to make sure the trousers won’t ride down.
Luckily I already had a block pattern for a pair of well fitting jeans that I made back in 2009. I always use the crotch from that pattern as my starting template when adjusting trouser patterns.
Goal 2: No gaping back waist
This achieved by doing a sway back adjustment, i.e removing fabrics in the upper back crotch seam. I draw a slanted line from where the crotch curve ends up to the edge of the trousers, I usually take in around 2 cm. Of course I also had to remove 2 cm from the back waistband to make them match. By the way I only use contour waistbands with a back seam these day as they are so much easier to fit compared to a straight waistband.

Sway back/small back adjustment.
You can remove the excess fabric either from the back seam or from the darts if there are some. Or perhaps you’ll get the best result doing both? Have not tried this myself. Also note that you might need to add more width to the side seam so the trousers won’t be too tight on the hips (see below)
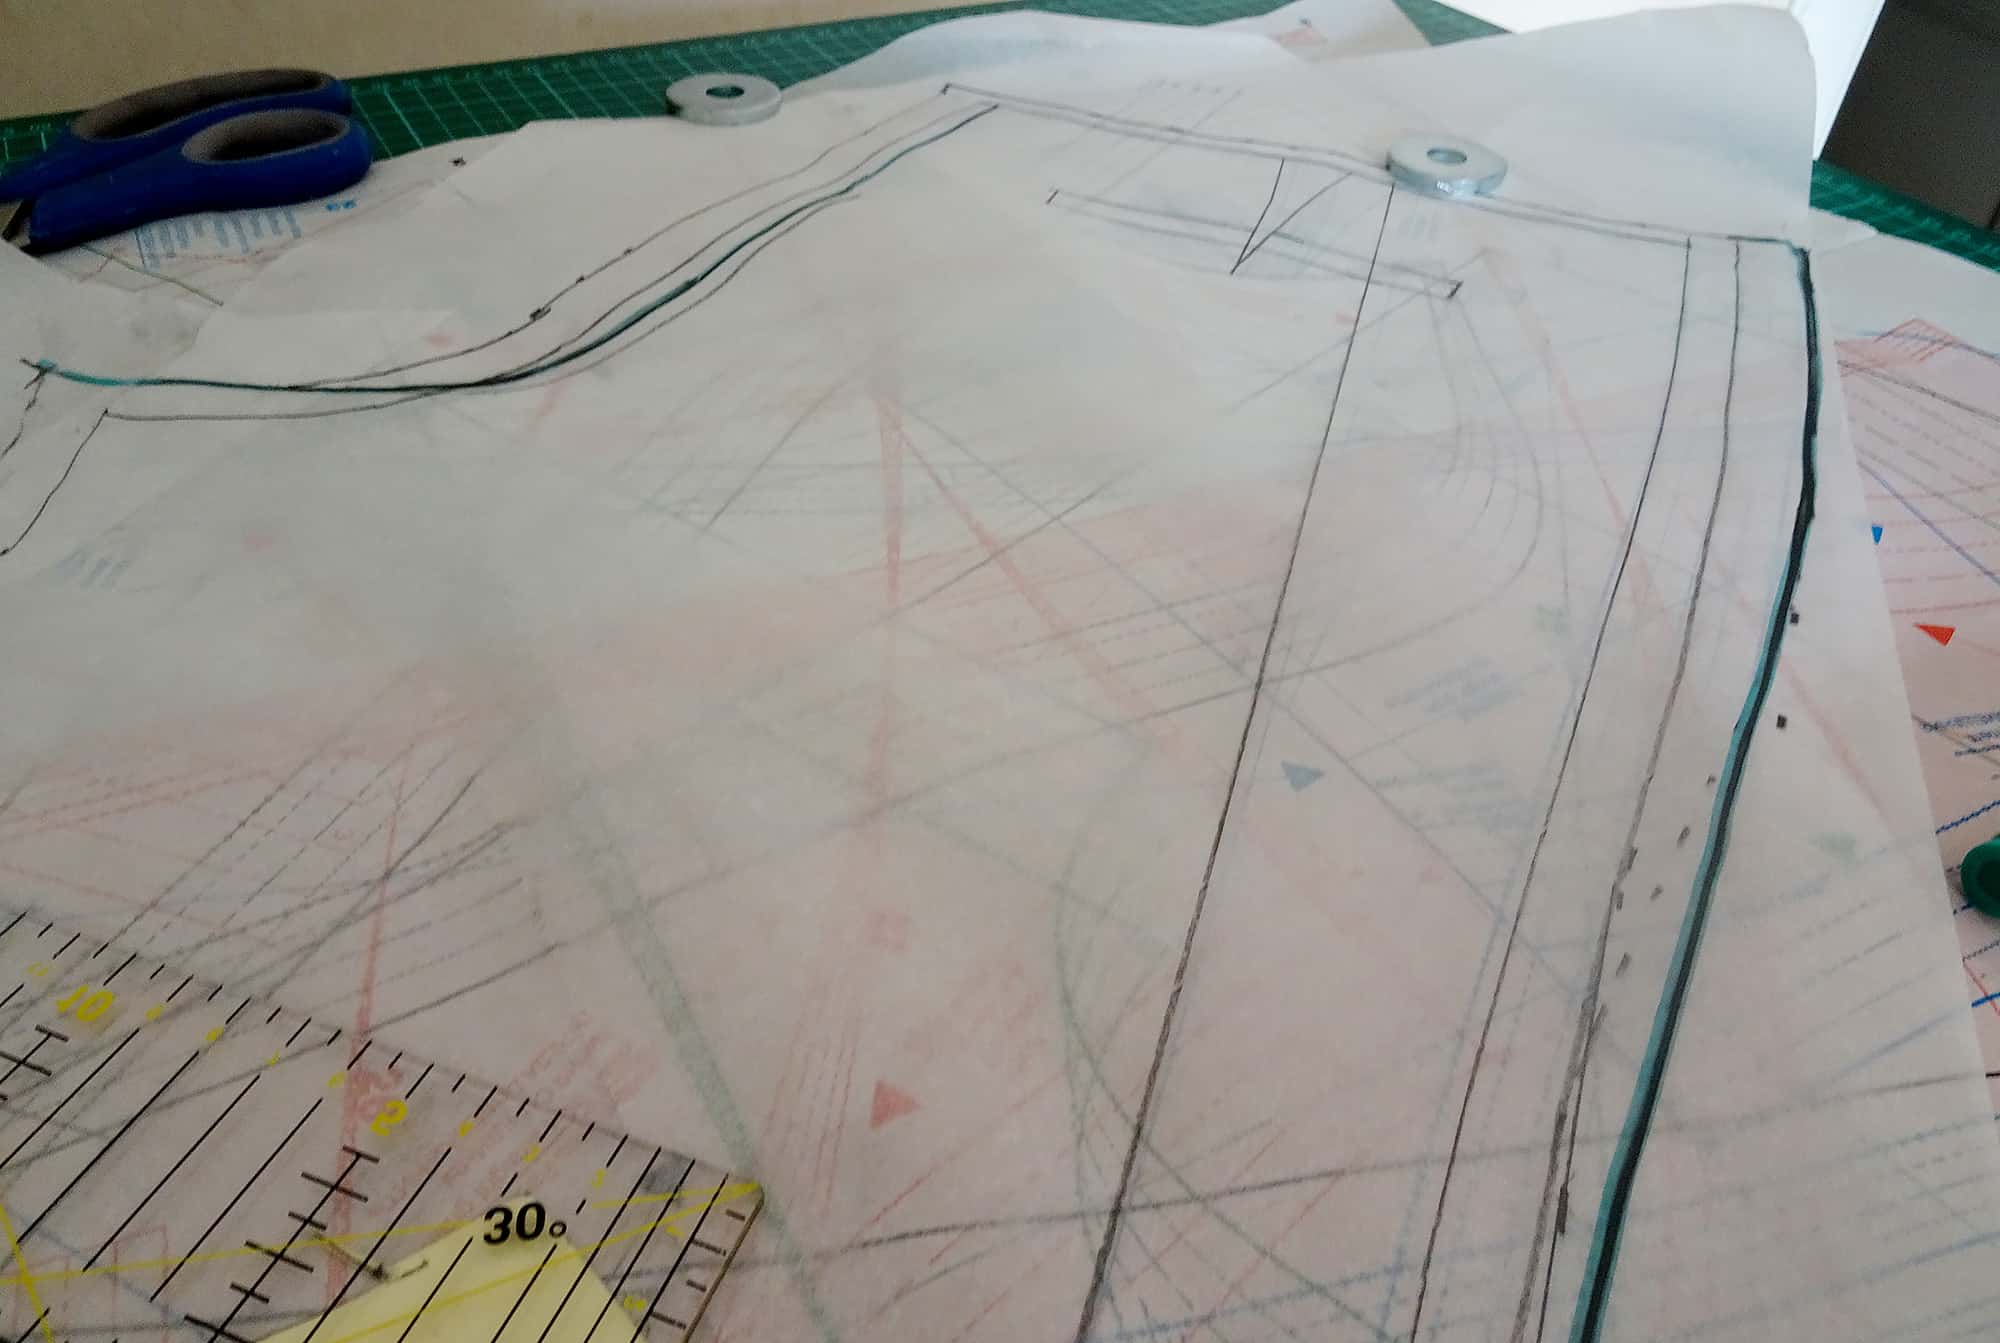
Adding width to the side seams
(yes my patterns always looks really shoddy during the alteration process, but I don’t care!)
I added more width to the sides in order to compensate for the width I had removed during my crotch and sway back adjustment. The reshaping of the back seam meant I lost some valuable width so the trousers would sit too tight in the waist and bum.
I also added a little extra width in the front as my tummy on some days is bigger (damn you PMS!) than the Burda measurements for size 38.
Goal 3: Remove excess fabric underneath the bum
This is the thing I’ve struggled with the most when it comes to pants fitting. I’ve tried many techniques to eliminate the excess fabric, but so far only one has yielded good enough results: The fish eye dart technique described Ann Rowley.
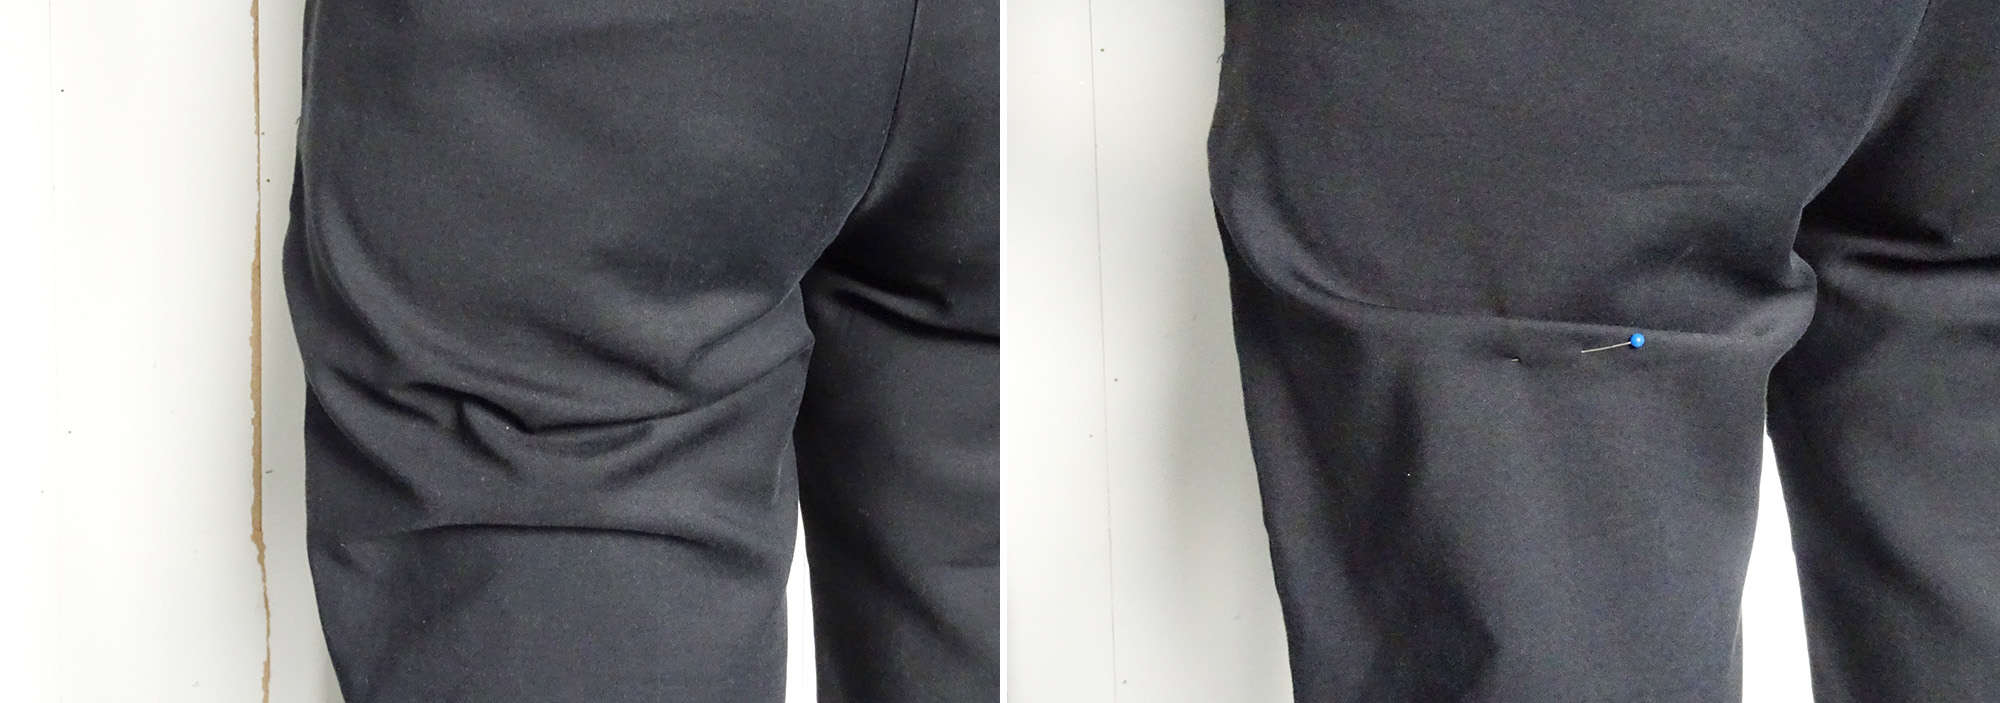
Baggy fabric in full force underneath the bum. These are a RTW pair that I bought because they fit me relatively well. Relatively being the key word here! In the right image, you can see how I pinned the excess fabric. We will now remove that baggy fabric thingie using the fish eye dart on the pattern.
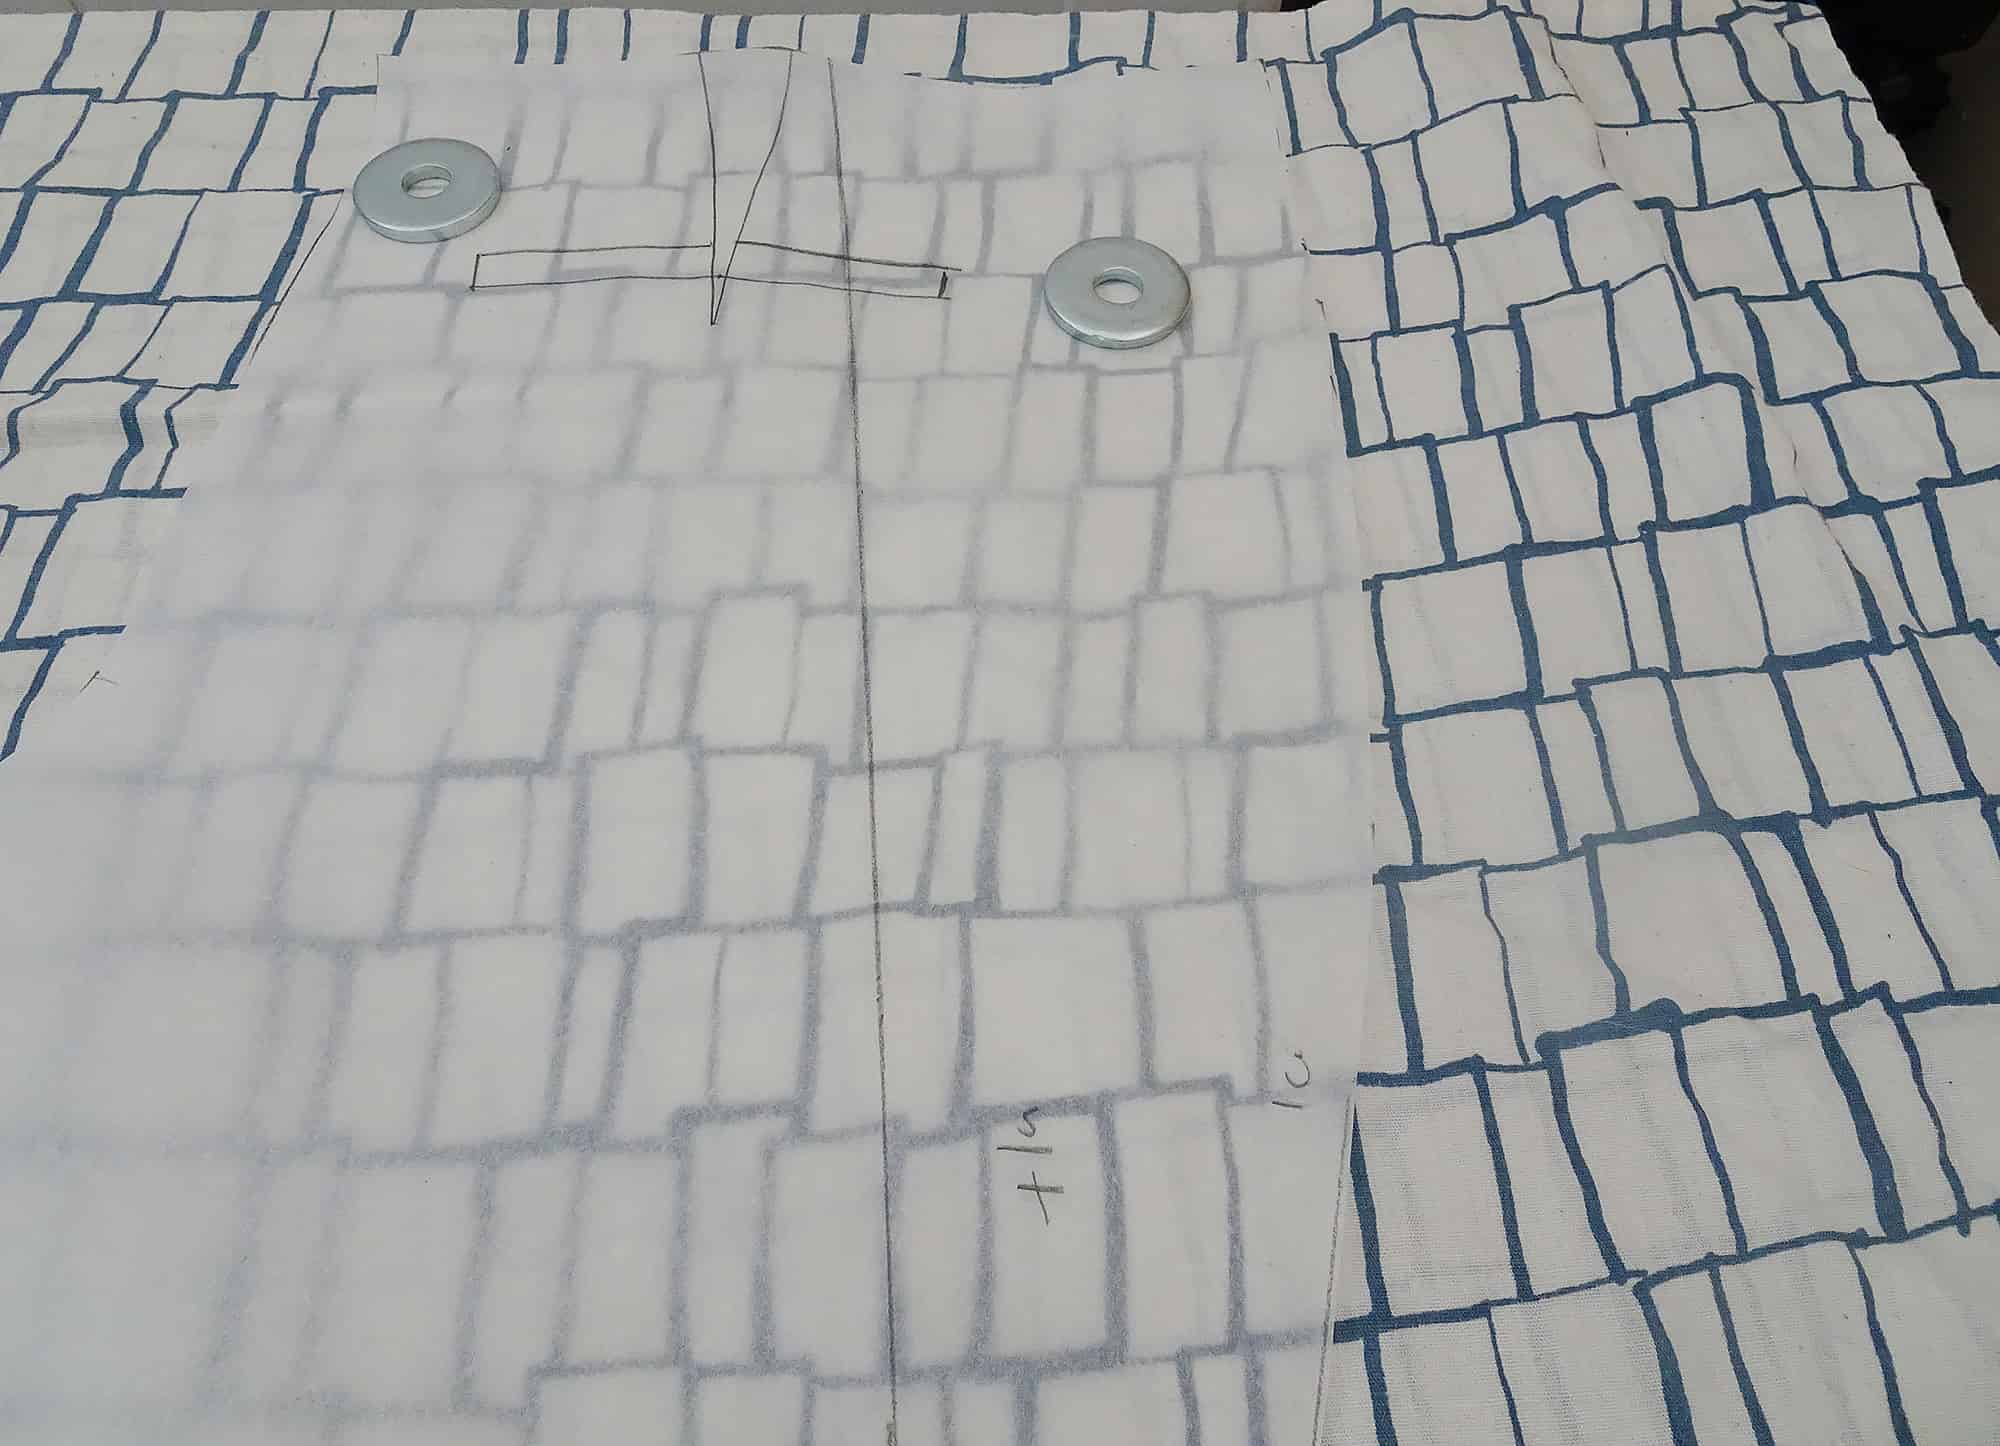
To transfer the fold to the pattern you create a corresponding fold on the pattern underneath the crotch and to make this possible you also need the slice up the crotch.

Again, shoddy execution, but Ann Rowley’s tutorial will explain this much better. Again check out: The fish eye dart by Ann Rowley .
But hey, what about making a muslin before you start altering the pattern?
Yes, normally the process would be to make a muslin first and then make the alterations. But I’ve been making my own trousers for a very long time and have learned some fundamentals about what alterations I need, so I don’t feel the need to start from scratch each time. But if you are just starting out doing pant fittings, making a test garment would be a good idea. But be mindful that it won’t look and behave the same way as the pair you make in the chosen fabric, unless you are actually using the same fabric.
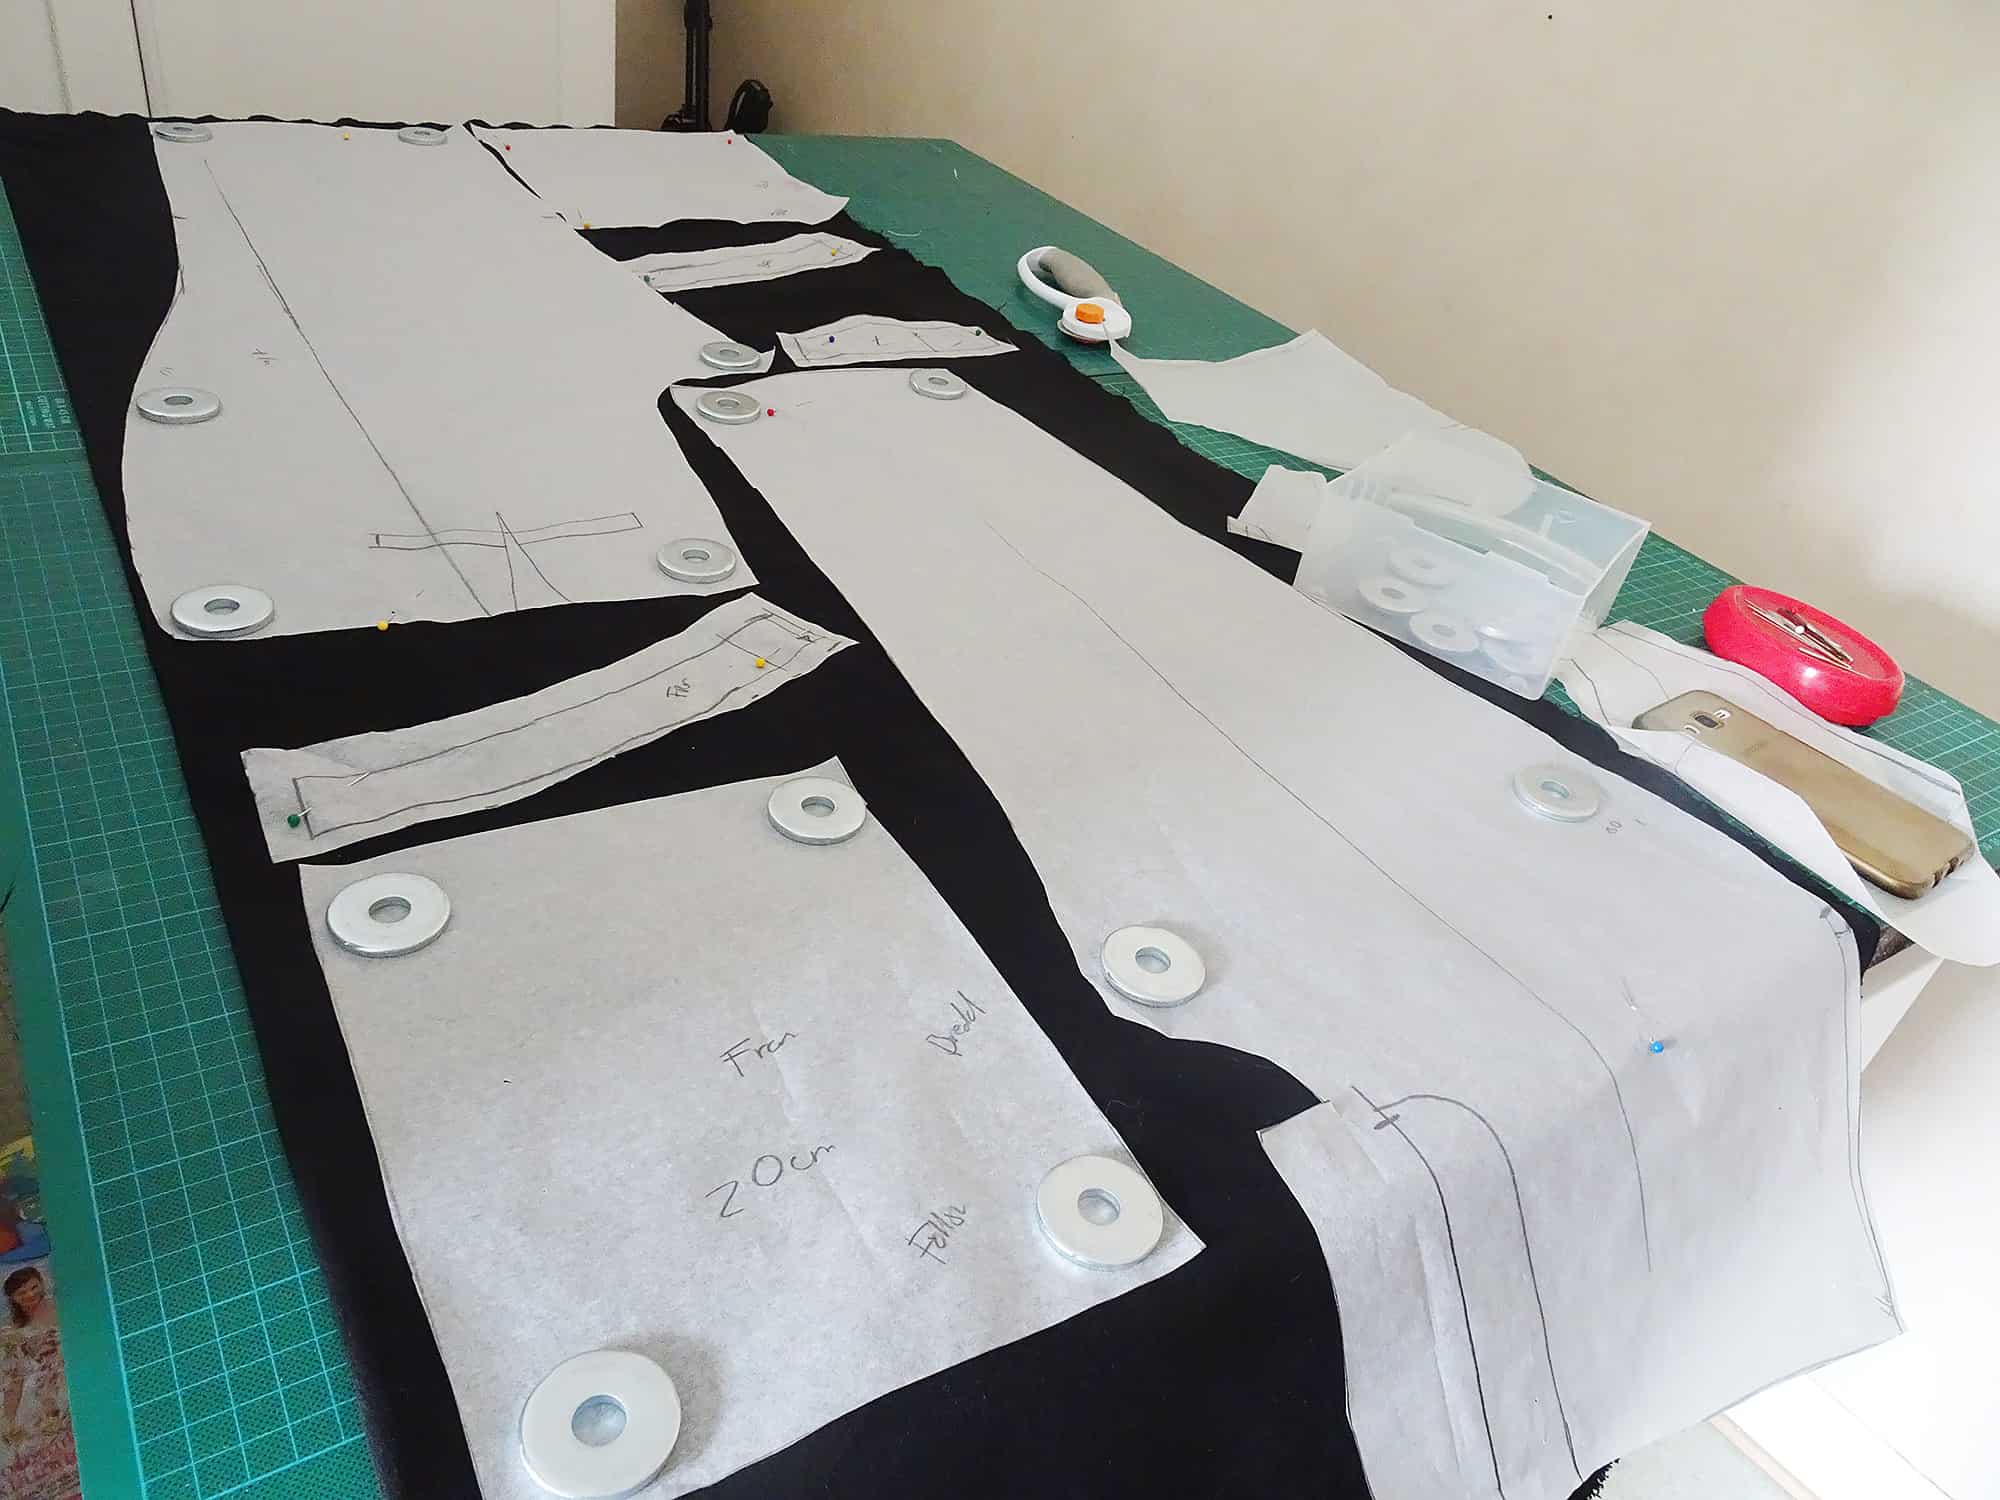
Okay, now lets take a look at my muslin
Pattern pieces are now retraced and looks less shoddy!
Yes I did do a muslin, but only after I had done all the alterations I mentioned above. I was pretty shocked when I tried the muslin on – I hadn’t expected it to fit this well! This made me feel very excited about the finished product. After the muslin I removed some more excess fabric in the back waist and added some more width in the front to give proper room for my tummy.
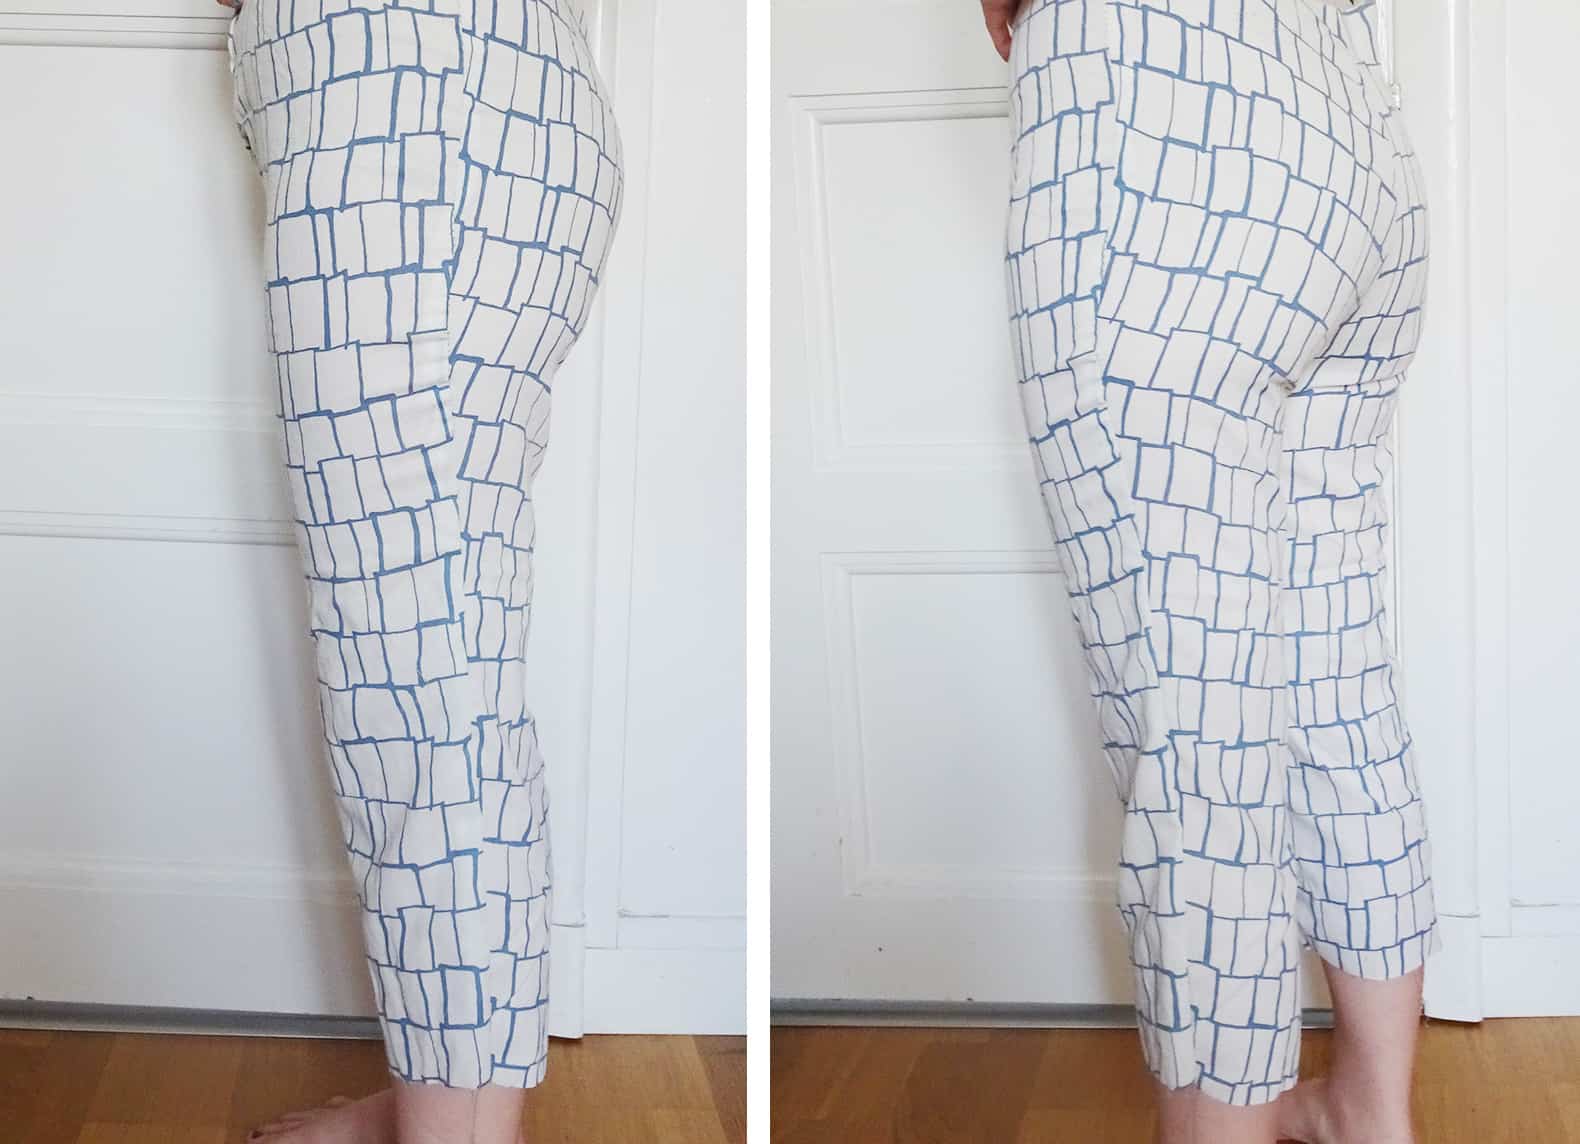
Finally ready for the real thing
And here is the finished product


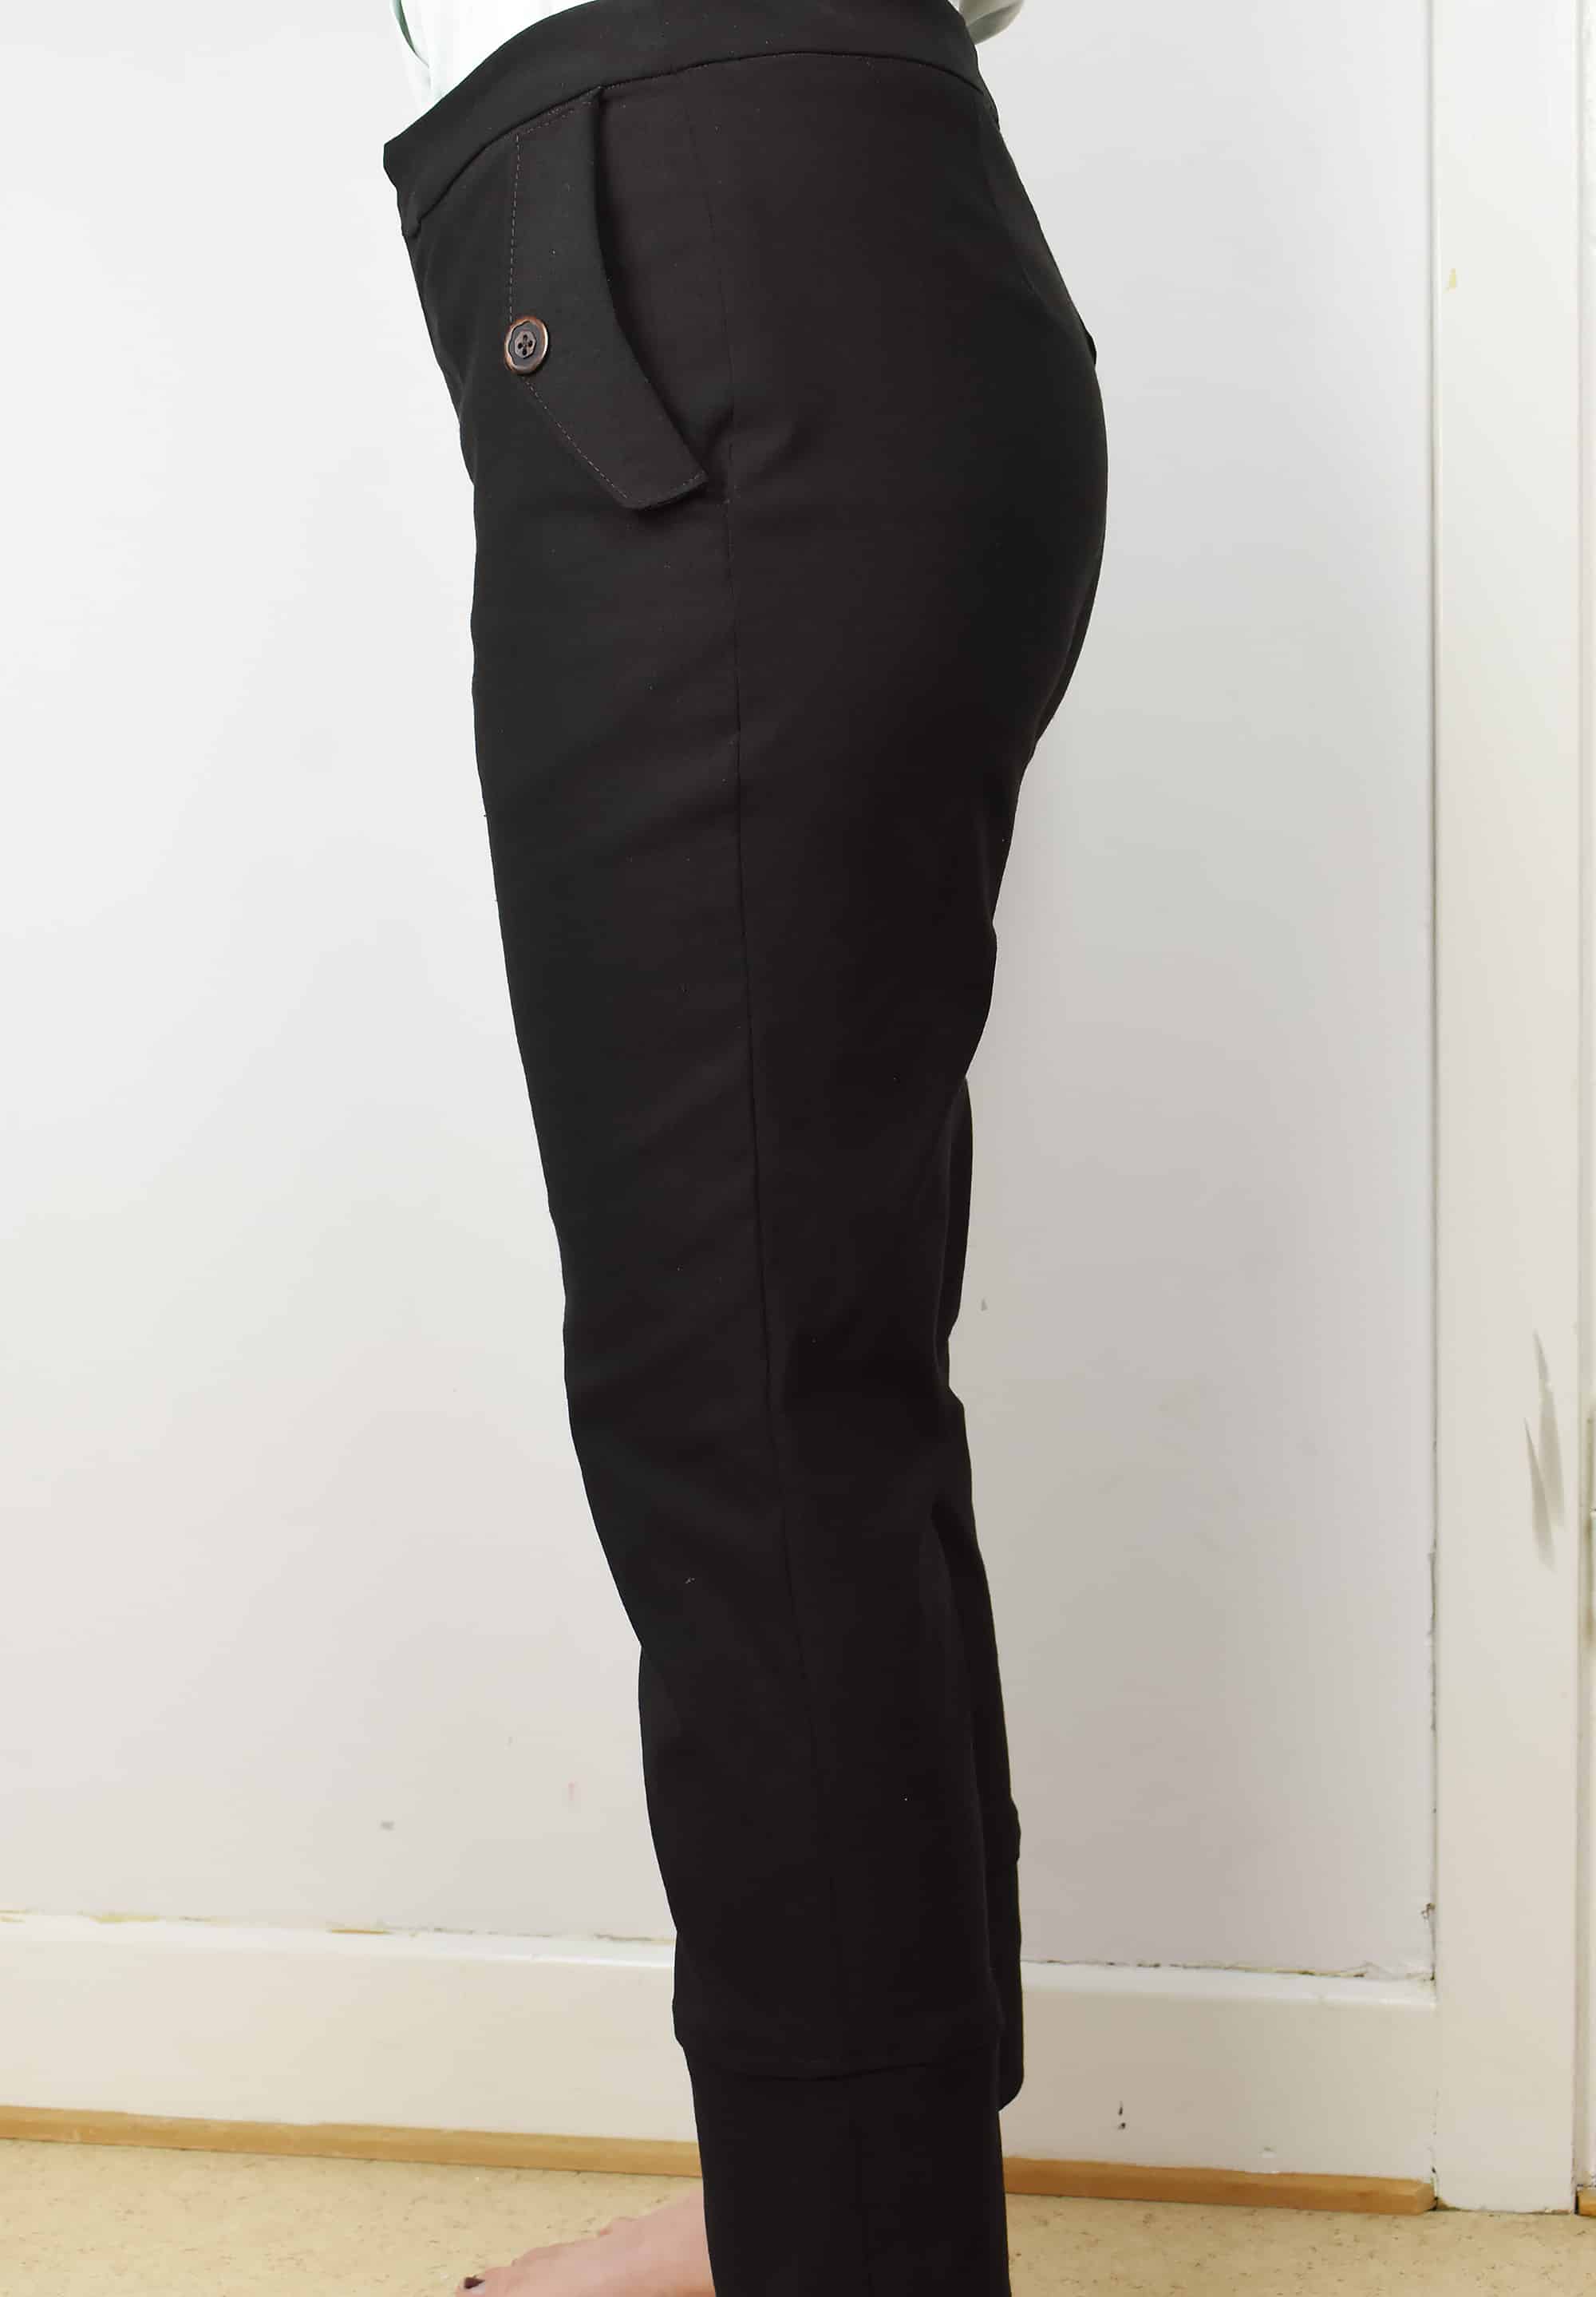
Compared to all the other trousers I’ve made (and I have made dozens) this is by far the best fitting pair. Granted the muslin fit me even better, but as I said every fabric has it own quirks and is a living thing that will grow and sag and wrinkle. Yes there might still be little bit excess fabric, but if I had removed more the trousers would have ended up being too tight, which is not a good idea obviously. Also the finishing could be better, but this fabric is very stretchy and is not really made for dressier trouser.
Phew, this was a meaty post! Hope you found this useful! It also made me realize that I have never really talked about making petite alterations and picking suitable patterns. I might do a separate post about this in the future, as there are quite a few things that one needs to consider, stuff that I wish had known when I began making my own clothes. And I’m sure I’m not the only short sewist out there!

27 Comments
Adrianne
I really like your pants Johanna! You did a great job! I would be interested in a post on petite alterations. In a recent post you recommended Sandra Betzina’s book Fast Fit, so I bought it and have been reading it with the hopes of getting a better fit for my body. I never thought to shorten a pattern above the knee as well as below until I started reading this book and now I see that you did that and got a wonderfully balanced pair of pants! Thank you, I very much appreciate all of your posts!
Johanna
Yes it really does make a big difference! Many trousers are drafted to start taper around the knee area, so in order to mimic that shape that we need to alter above the knees as well, unless we have very long thighs I guess!
Natasha
Thanks for this post. It’s very helpful. Your pants look great! Are you planning to make more? Happy sewing.
Johanna
Oh I will make more for sure, but need a rest now from this. When I get my mojo back I will make a second pair using the same pattern and picking a more stable fabric so that I can work more on making the detailing look better.
PsychicSewerKathleen
I’ve been thinking a LOT lately about tackling pants again 🙂 I signed up on Craftsy for both of Sandra Betzina’s classes and made my first pair following her instructions (you need to sign up for both to get the full benefit but they are all on sale right now so well worth the money if you want to do pants). My first pair were TERRIBLE in a cotton that I wouldn’t wear in a million years anyway but the result was so awful it threatened to derail me forever from ever attempting pants again! I bought a pair of jeans at the depths of my hopelessness and of course they are as ALWAYS such an annoyingly bad fit! So after a year I’m ready to go back at it again 🙂 I think like most women there is this fantasy of having for once in our lives a GREAT fitted pair of pants. Like yours for example! What a beautiful pair of pants you’ve made Johanna! They are stylish and fit you perfectly (sigh!) I’ve bookmarked your blog page for future reference – I ordered a pair of the Sage pants by StyleArc along with the brown Bengaline and I’m going at it again this fall for sure. Thank you for another exceptional post!
Johanna
I will be here cheering you on! Taking a break I think is a good thing when it comes to trouser making, because it can be so disheartening when things don’t work out. Plus sometimes maybe we need our knowledge to sit for a bit? So even though the pants from class didn’t work out, there were probably some lessons learned anyway that you can take with you the next time. I think what has worked for me now is that I lucked out with finding a pattern that fitted my body decent to begin with and then I altered the rest. I’ve found in the past that some trouser patterns are not made for my body, so regardless of alterations they still don’t look right. The Sage looks like they would be a perfect choice for bengaline and looks like they could be pretty universally flattering
dawn
Arg! I’m working on pants fitting right now too. I’ve done the fisheye, rear crotch seam extension, scooped out the front, and tucked length out of the legs. I think this is my final version though! I’m hoping to get a basic pair of pants that I can add features to in the future.
Johanna
Fingers crossed Dawn, I know the struggle! As you say, all we want are a pair of wardrobe staple trousers that fits like we want them, which doesn’t seem too complicated, but it sure is! Being stubborn helps though and that is a trait that many of us sewists share, so I’m sure you will end up with a good pair of pants!
Chris
Thank you for posting that breakdown. It’s helpful to see what others do to achieve a great fit.
Johanna
Yes I agree it really helps even though we might need to do other alterations for our own body. And hopefully I can inspire others to do (another) stab at pants fitting 🙂
Jan Chance Blankenship
Johanna, everything makes sense to me except the fisheye dart and the crotch dart. Do you make the darts only on the pattern, or do you actually mark and sew them in the fabric? Once I know how this is done, I’m ready to go for it! Thanks for the details. Jan
Jan Blankenship
Updated email address
Johanna
Post is now updated so you can see the baggy fabric in full force and how it is pinned to be transfererad to the pattern using the fish eye dart 🙂
Faye Lewis
I know first hand just how tricky pants fitting can be. You put a lot of work into fitting this pair and wrote a wonderful post about the whole process. Your pants look wonderful – enjoy wearing them!
Johanna
Thank you! I dreaded this for a long time since I got so burned out last time I tried to make trousers fit me well, but now I have made two pants that I really like so it was worth it 🙂
Susan
Thanks for posting such a comprehensive breakdown of your fitting process. Our issues are similar, so the information will be hugely helpful in my long-running pursuit for a great fitting pair of pants. Yours look wonderful!
Johanna
Thank you! That is awesome to hear, because my hope was that my post could help someone else doing this journey, since pants fitting can be such an abstract thing and there are so many things to tweak!
Kylie
I’m about to embark on making a pair of pants after reading this blog post, thank you for posting, it looks AMAZING and very inspiring! When you make your muslin, do you attach the waist band or only sew the legs up?
Johanna
I used to, but not anymore. Now I only use pattern with curved waistbands that comes in four pieces and adjust them according to my pattern alterations plus I tweak the waistband in the side seams as I sew too, because different fabrics and interfacing will result in different fit, so you can’t trust the muslin alone when it comes to waistband.
Jane
Hi Johanna I stumbled across your blog while searching for reviews of the Burda 117 pants as I have already started making these. You and I have very similar fit issues and I’m pleased to see how well yours tuned out. I was surprised at how reasonably well they fit with no alterations. I have a much shorter rise than you though so have had to cut quite a few cms off at the crotch.
I like your blog by the way and look forward to reading about some of your other makes.
Johanna
Cool! I really like this pattern and I’m happy to hear that I’m not alone in my experience that these trousers are well drafted pattern with a good fit. Sometimes Burda doesn’t get the buzz that other pattern companies get I think, but they have a lot of gems among their patterns.
Lisa
This is great – your tips and the fit you got! I had to remove 6 inches from the length of a pair of pants and it would have been better to do it in 2 places. I also have the excess fabric in the back.
judy m mancini
Johanna
Having just made 4 muslins for a jeans pattern I’m about ready to give up!
But now that I see how you fixed your fabric-under-bum issue, I’m going to give it another try.
thank you!
Judy
Katie
What a wonderful post. When I saw your lead in photo with all of my problems listed, oh the excitement. I had given up on closer fitting pants and made only easier to fit trousers but now there is hope. Thank you so much for the post.
Comments are closed.