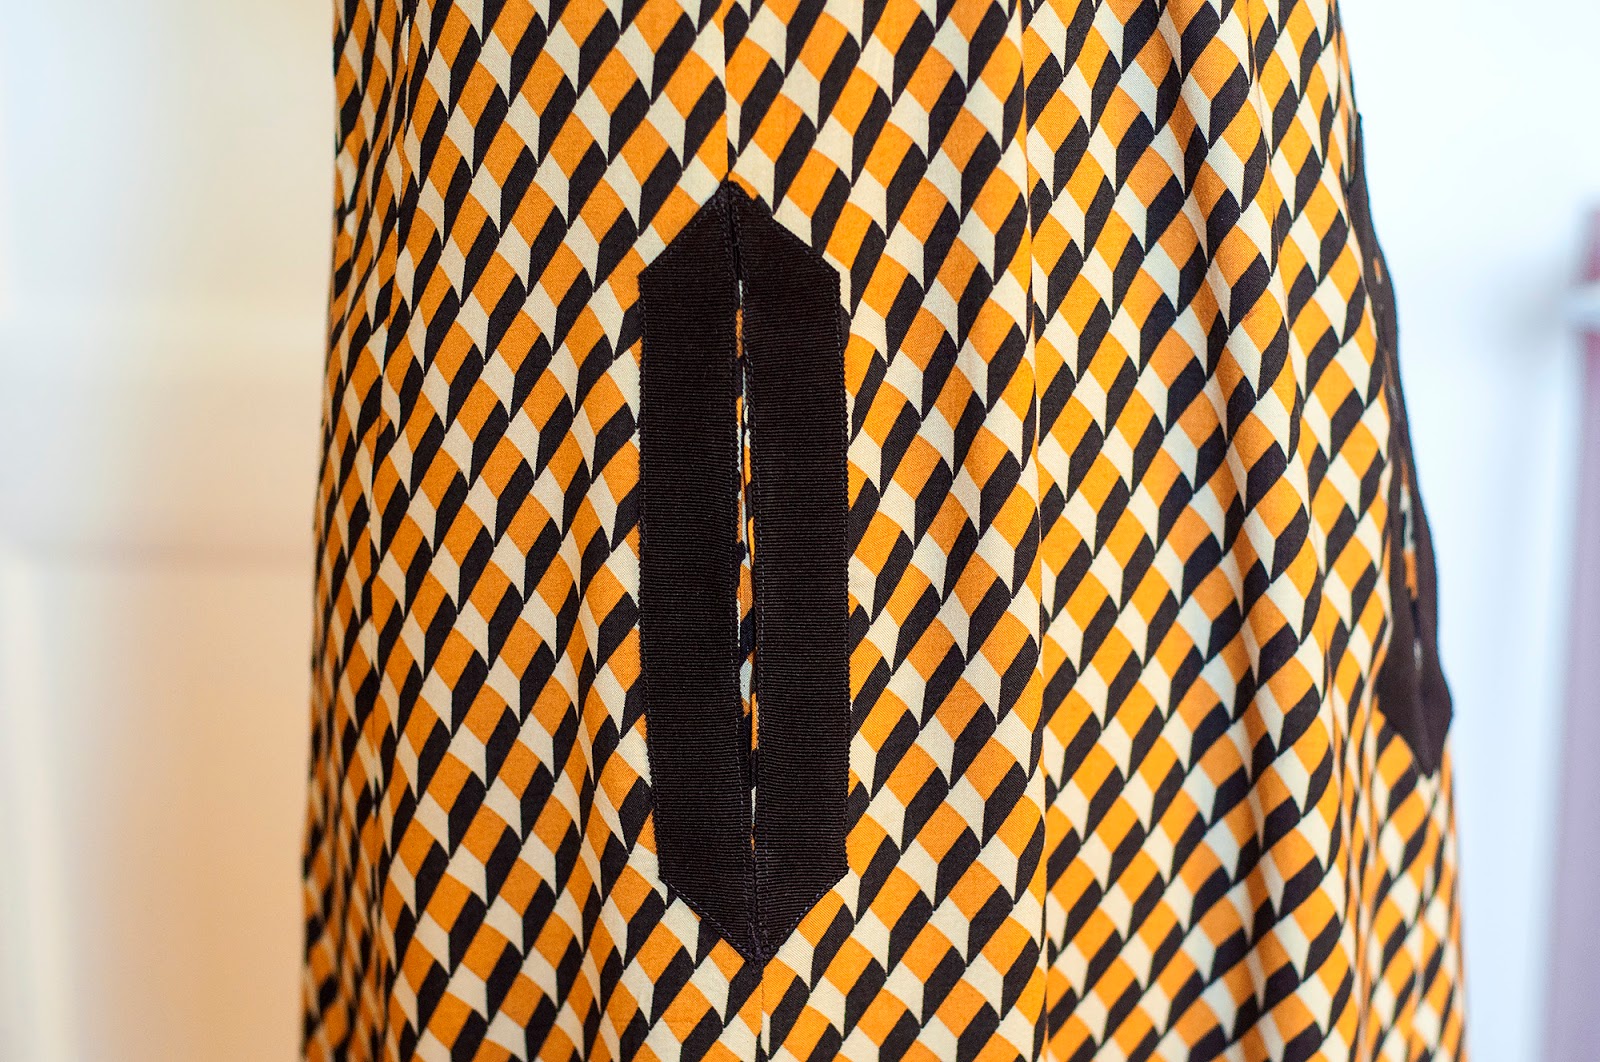
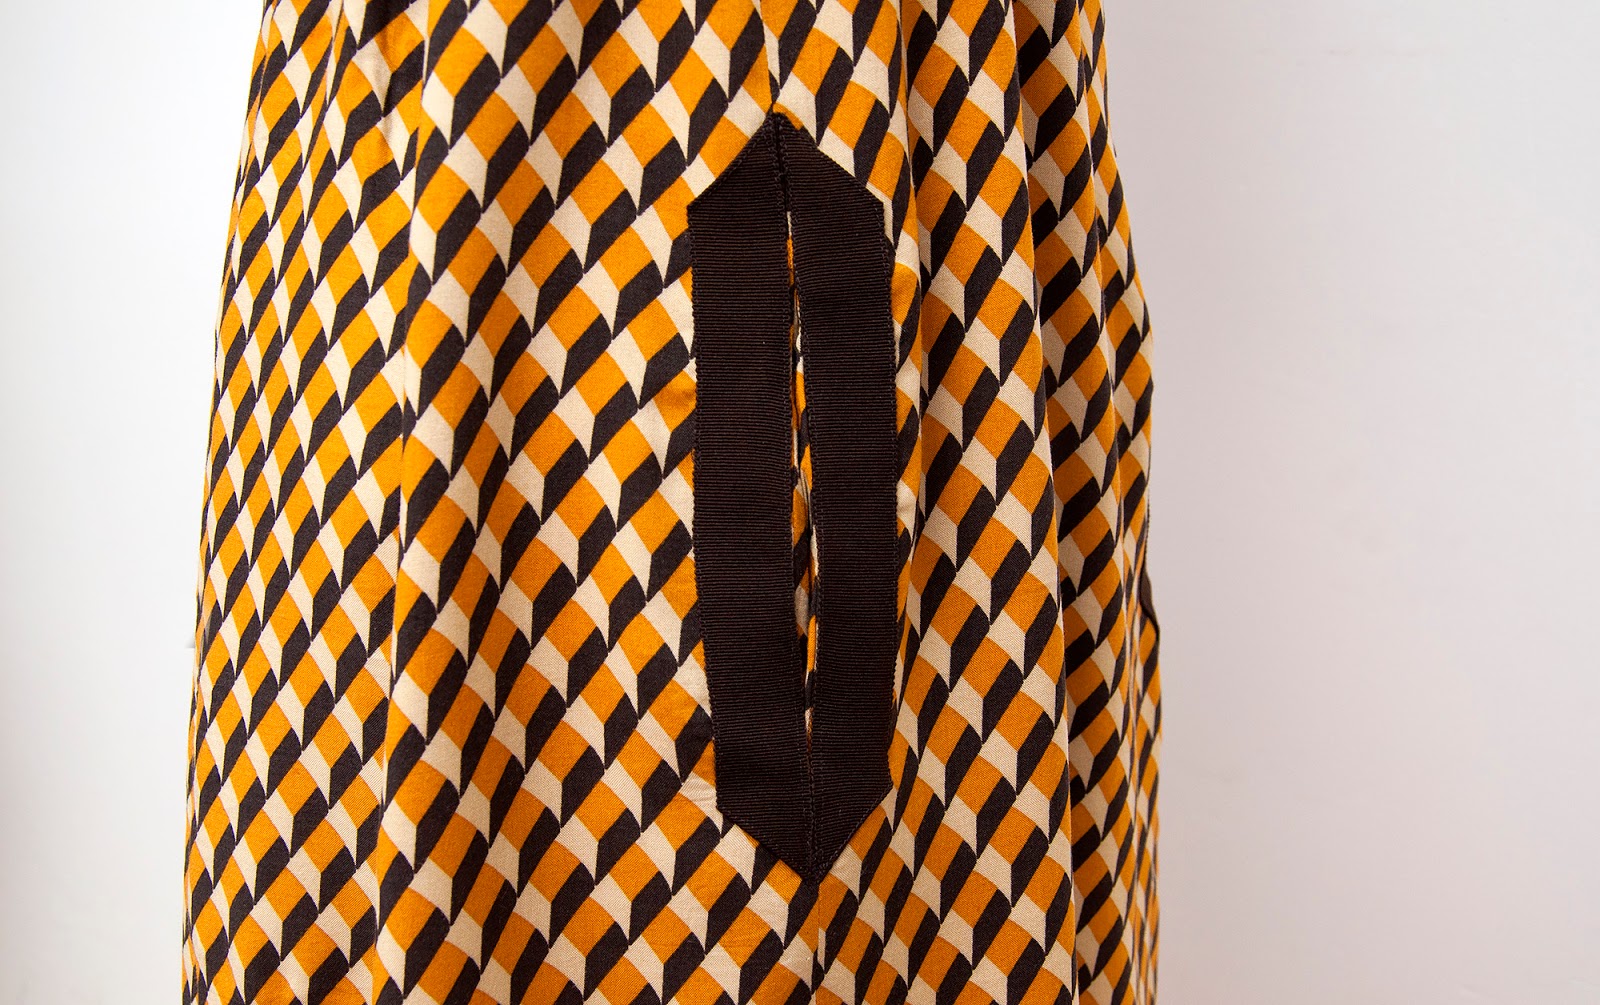
Grosgrain application on slit pockets
Curious on how to make the grosgrain applications on slit pockets on the Burdastyle empire dress? While the Burdastyle’s instruction are okay, I used a quicker method that requires less fiddling and no marking on the fabric. So without further ado, here is the fast way to make a grosgrain application on slit pockets:
What you’ll need:
2 pieces of grosgrain ribbon (preferable synthetic). For the pockets for this particular dress each piece should be about 45 cm long (approx 18 inches)
A lighter
Needle and thread for basting
A blind hem presser fot.
To prevent the grosgrain from fraying melt the edges using a zip lighter. This assumes the ribbon is synthetic.

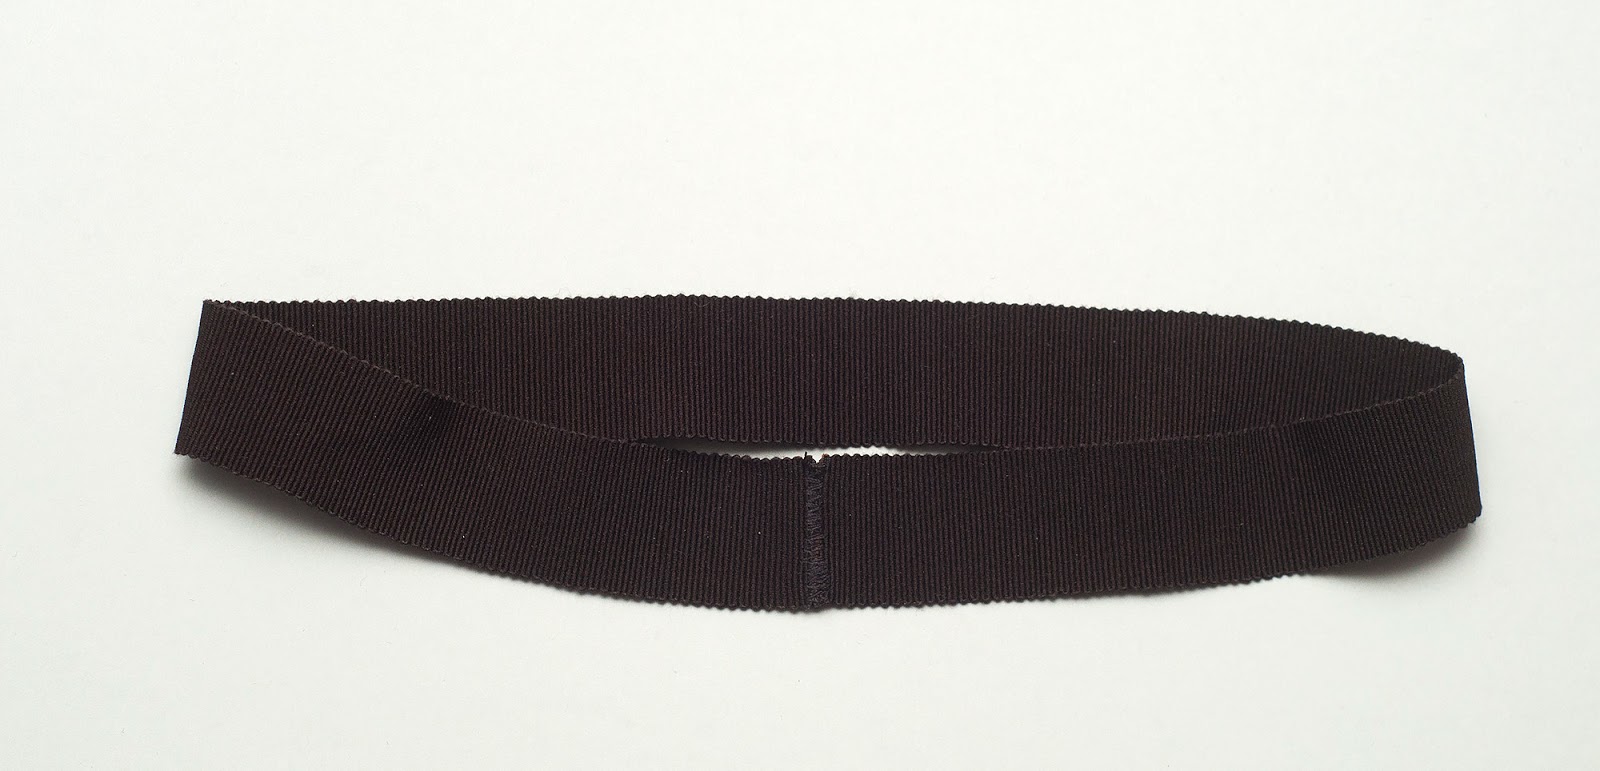
Close the edges to make a circle using narrow a zigzag stitch. The edges should not overlap, the zigzag will be enough to keep the edges together.
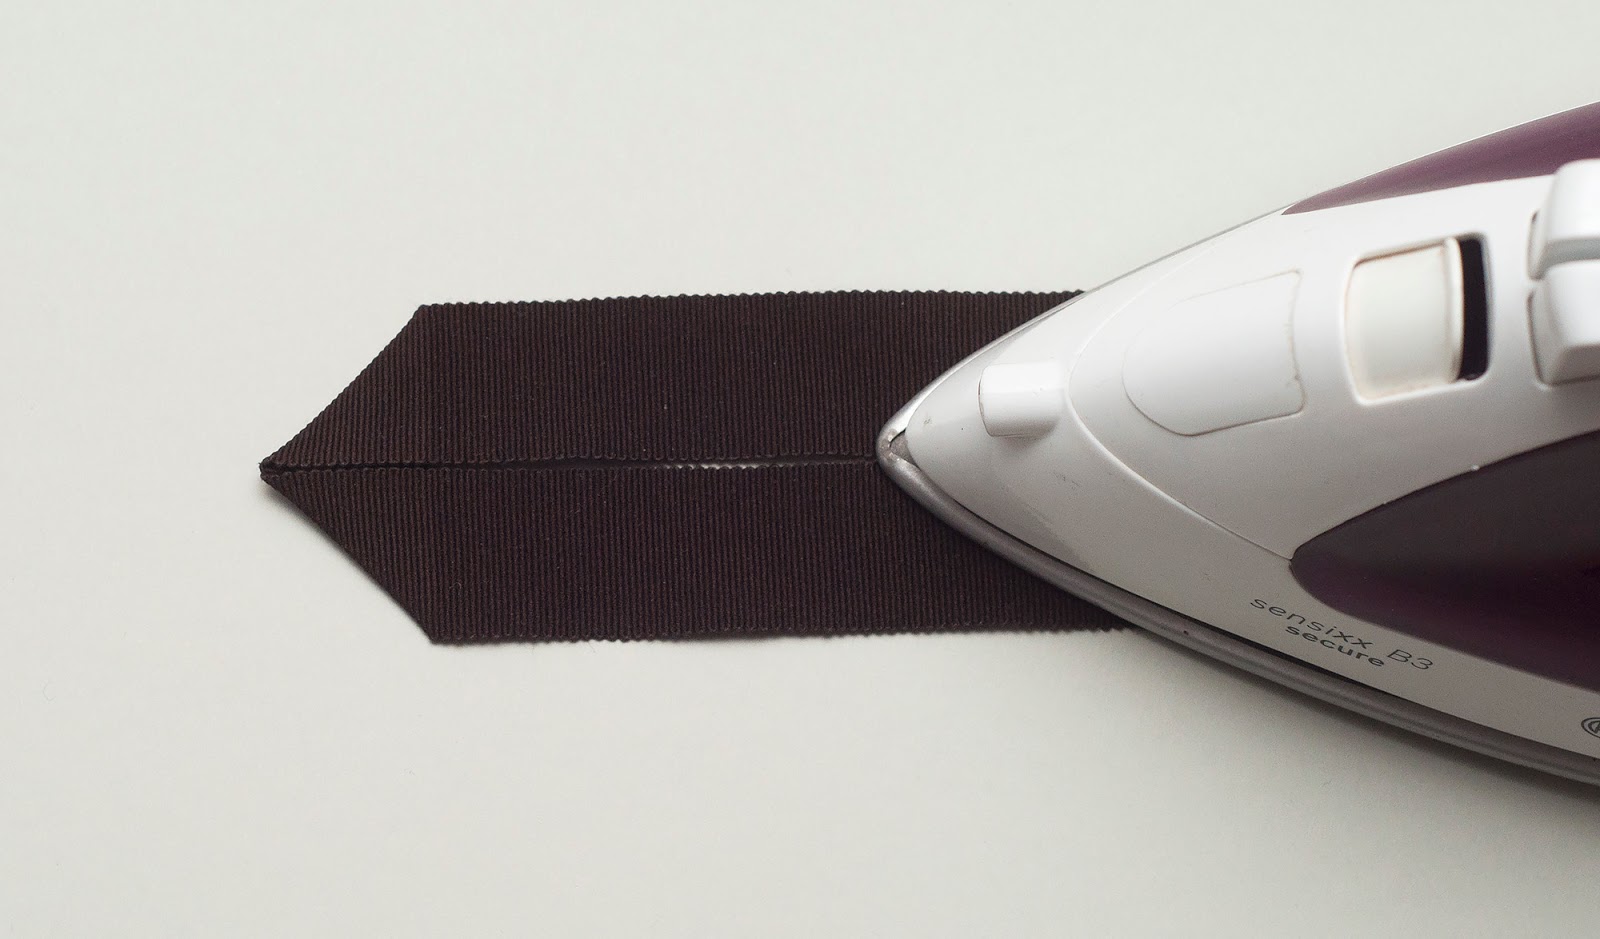
Fold and press the ribbon to create the corners.
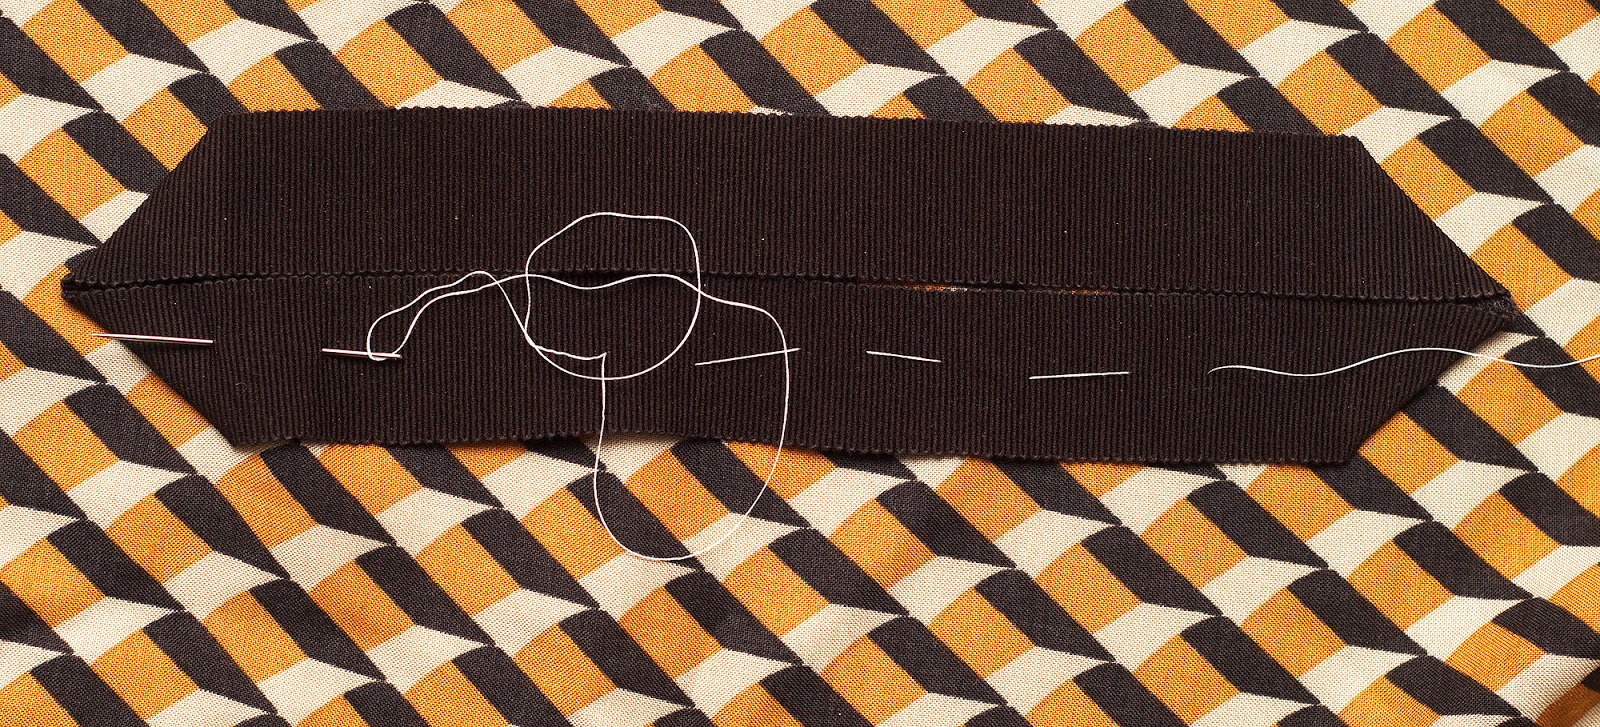
Baste the application on the fabric. Burda recommends attaching the application before sewing the pockets. I did this tutorial after making the dress and just used a regular fabric piece for the tutorial, so hence why no inseam pockets are visible on this sample.
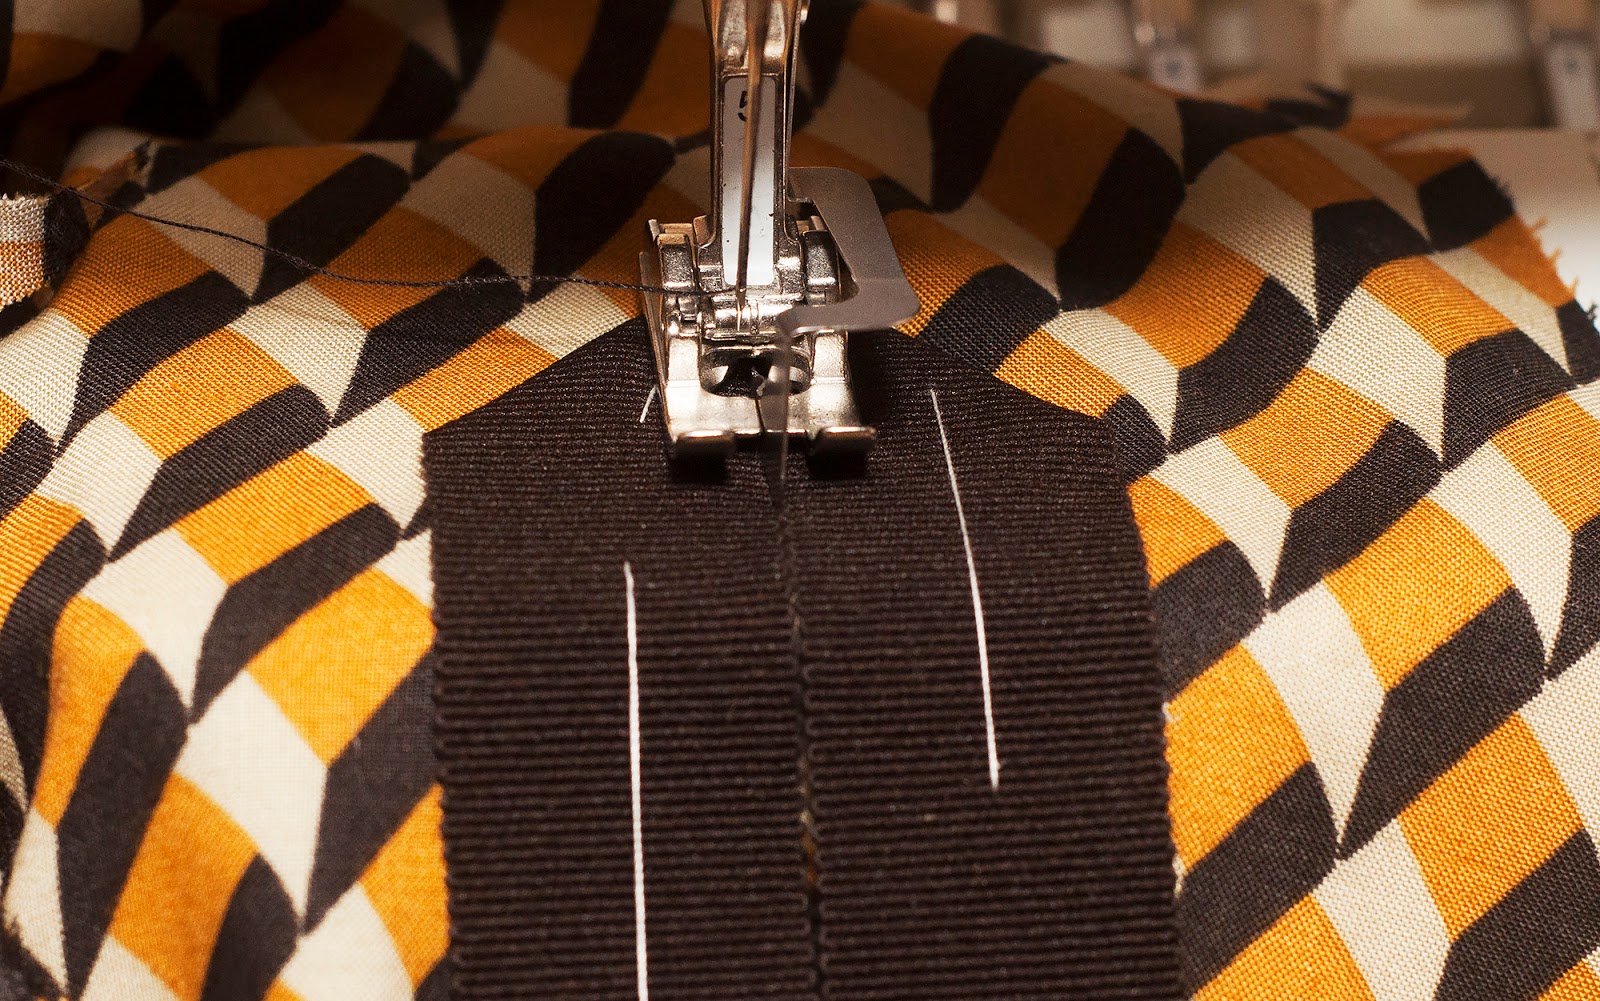
Using the blind hem presser feet as a guide, topstitch the application in place and be careful not snag any seam allowance or parts of the pockets if you already have begun sewing them.


2 Comments
BeccaA
Thank you for explaining and showing this. It is so simple and clear and I wouldn't have thought of it on my own. Gorgeous!
<div class="apbct-real-user-wrapper"> <div class="apbct-real-user-author-name">Johanna</div> <div class="apbct-real-user-badge" onmouseover="apbctRealUserBadgeViewPopup('apbct_trp_comment_id_2336');" onmouseout="apbctRealUserBadgeClosePopup(event);"> <img src="https://www.thelaststitch.com/wp-content/plugins/cleantalk-spam-protect/css/images/real_user.svg" class="apbct-real-user-popup-img" style="align-self: center;"> <div class="apbct-real-user-popup apbct-trp-popup-desktop" id="apbct_trp_comment_id_2336"> <div class="apbct-real-user-title"> <p class="apbct-real-user-popup-header">The Real Person!</p> <div class="apbct-real-user-popup-content_row"> <div> <img src="https://www.thelaststitch.com/wp-content/plugins/cleantalk-spam-protect/css/images/real_user.svg" class="apbct-real-user-popup-img"> </div> <div> <span class="apbct-real-user-popup-text">Author <b>Johanna</b> acts as a real person and verified as not a bot.</span> </div> </div> <div class="apbct-real-user-popup-content_row"> <div> <img src="https://www.thelaststitch.com/wp-content/plugins/cleantalk-spam-protect/css/images/shield.svg" class="apbct-real-user-popup-img"> </div> <div> <span class="apbct-real-user-popup-text">Passed all tests against spam bots. Anti-Spam by CleanTalk.</span> </div> </div> </div> </div> </div> <div class="apbct-real-user-popup apbct-trp-popup-mob" id="apbct_trp_comment_id_2336"> <div class="apbct-real-user-title"> <p class="apbct-real-user-popup-header">The Real Person!</p> <div class="apbct-real-user-popup-content_row"> <img src="https://www.thelaststitch.com/wp-content/plugins/cleantalk-spam-protect/css/images/real_user.svg" class="apbct-real-user-popup-img"> <span class="apbct-real-user-popup-text">Author <b>Johanna</b> acts as a real person and verified as not a bot.</span> </div> <div class="apbct-real-user-popup-content_row"> <img src="https://www.thelaststitch.com/wp-content/plugins/cleantalk-spam-protect/css/images/shield.svg" class="apbct-real-user-popup-img"> <span class="apbct-real-user-popup-text">Passed all tests against spam bots. Anti-Spam by CleanTalk.</span> </div> </div> </div> </div>
Thank you! I wish Burdastyle would do more pictorials and use less fussy techniques and difficult to understand instructions. But I guess we get what we pay for when it comes to pattern magazine, so better instructions would most likely raise the price.
Comments are closed.