
So let’s take a look at my new Burdastyle trousers. The pattern is from issue 1/2010 and has the sort of classic shape that I’m very fond of.

Picture of the original Burdastyle pattern.
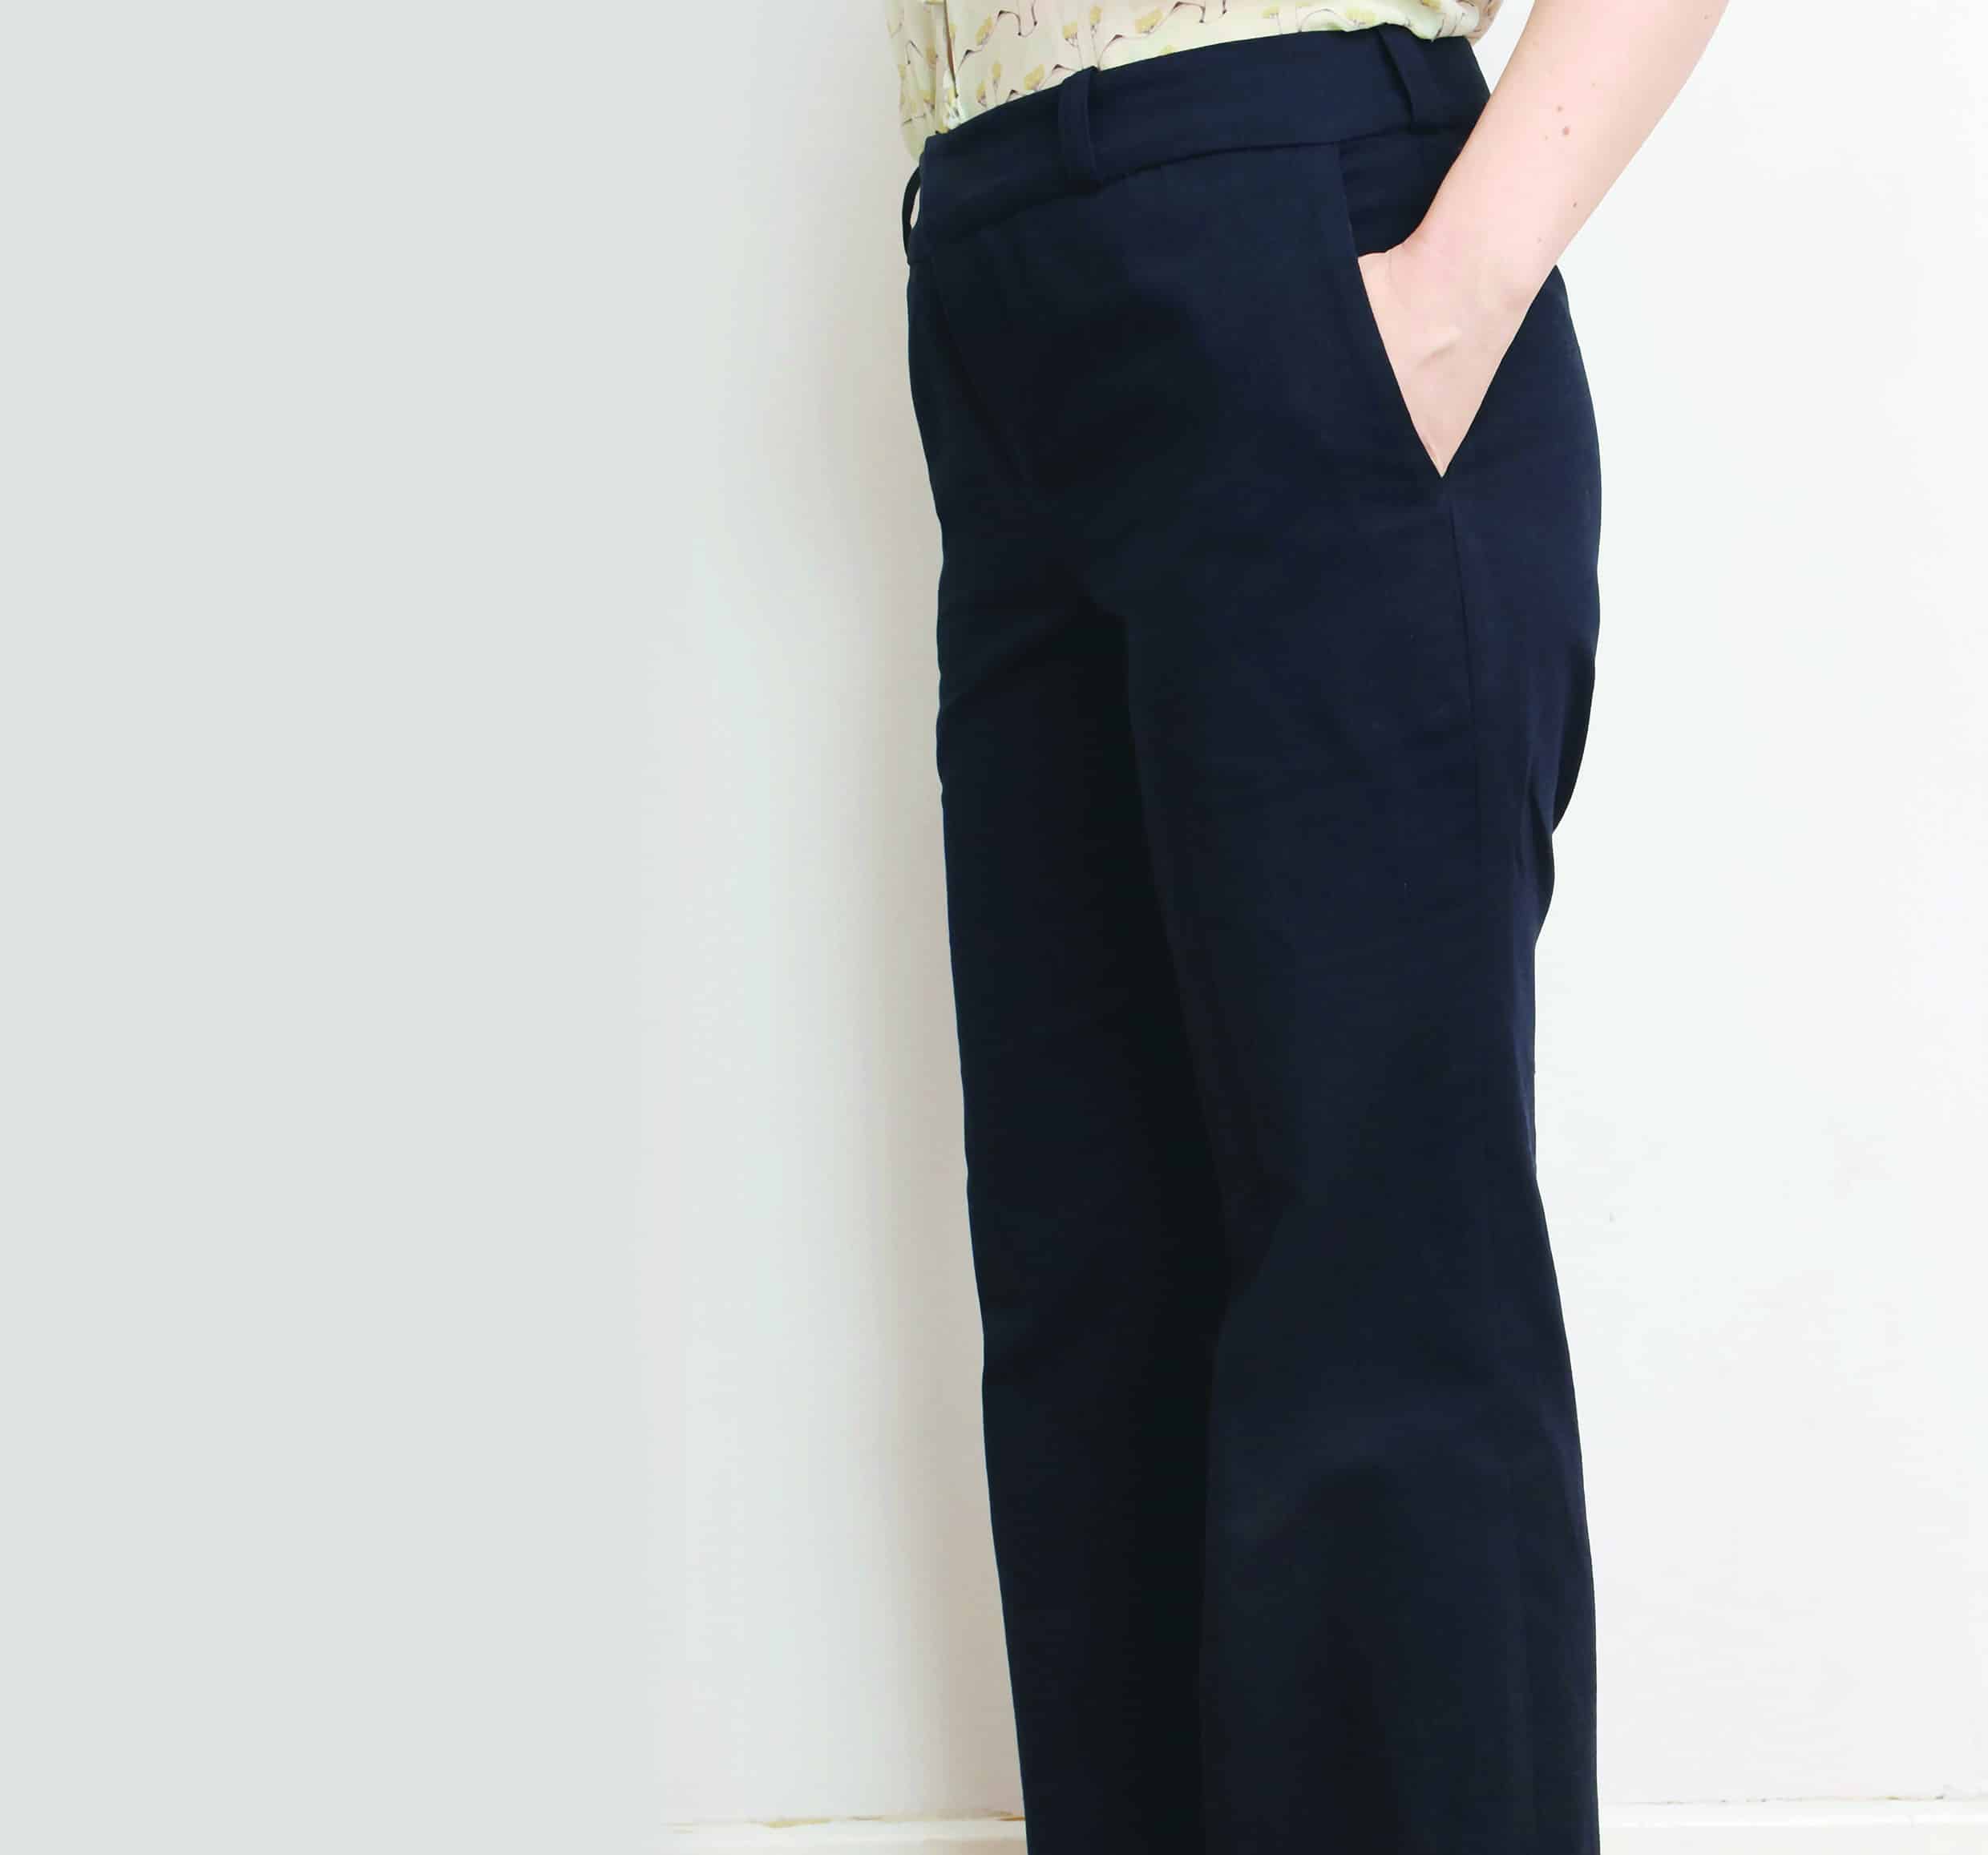
The pants are fitted around the hips and upper tights and from the knee down they are straight legged. I have tried sewing so many different trouser shapes over the years and I’ve found that this is the shape that fits me the best. My legs can look a bit short and stocky in some trousers, but I don’t feel that this is an issue with these pants.
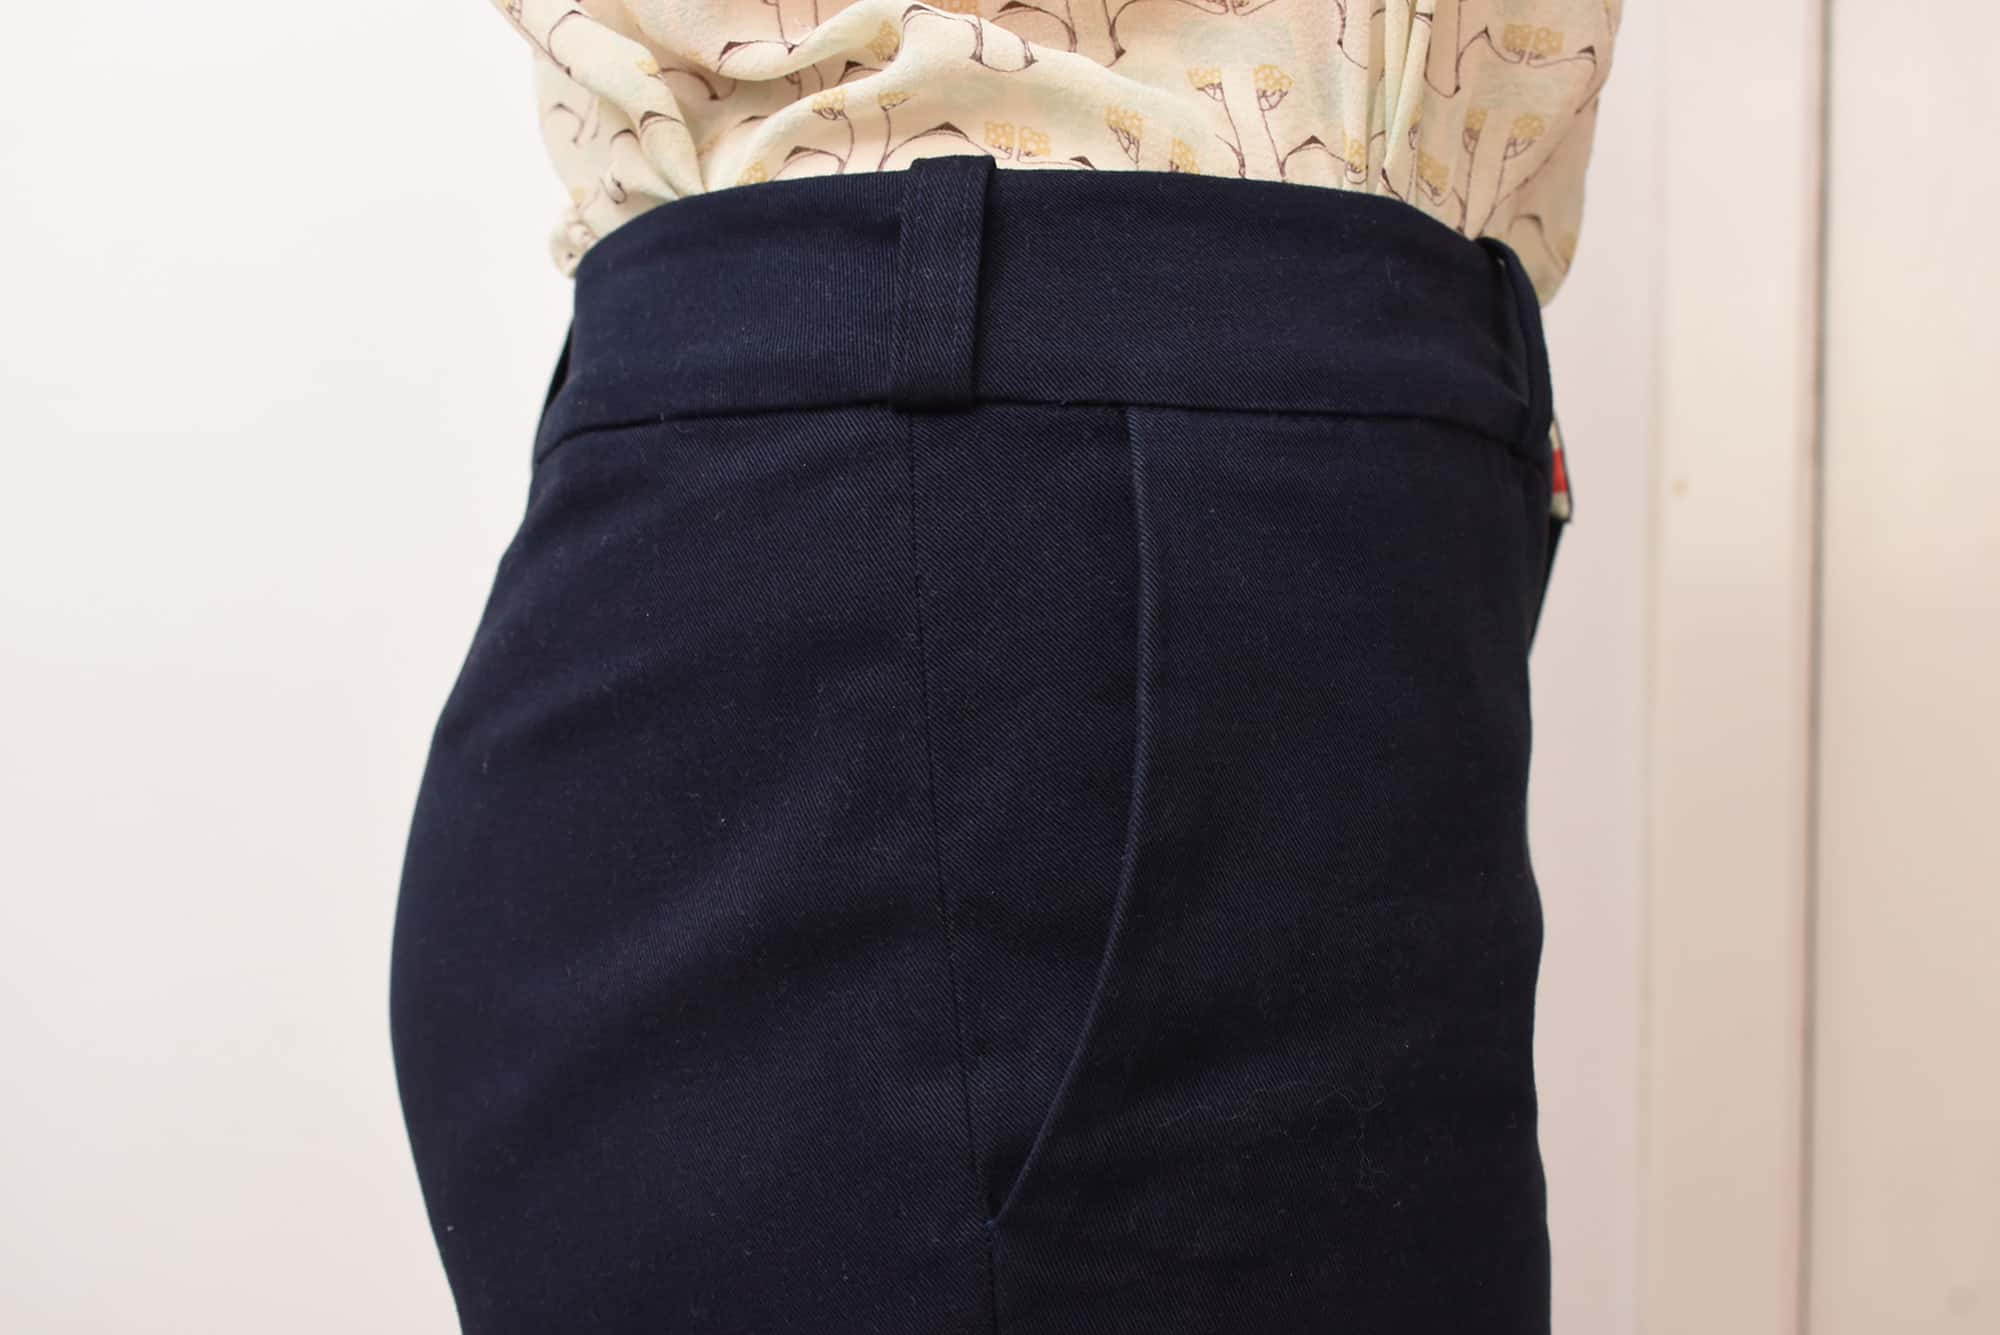
I spent a lot of time trying to get the fit right around the bum and waist. I have a sway back and always have to take in a fair amount of fabric in the back seam.
The fabric I used is an organic cotton twill and so obviously it is quite wrinkly. I think the best trouser fabrics are either wool gabardine or bengaline (a rayon/nylon/lycra mix). Bengaline is a very popular fabric in Sweden both among home sewists and in RTW because it is easy to work with, hangs beautifully and is easy care. For my next pair of trousers I probably use bengaline instead.

As for my main fitting issue, which is excess fabric underneath the bum, I didn’t manage to completely get rid of it. One problem was that I didn’t have enough fabric for truing the side seams after I had done all the alterations on the trousers. Could that perhaps be the cause of drag lines, that the inseam is a little tight? Anyways, it is still a huge improvement compared to how the trousers fitted initially. I will make a separate post sharing some progress pics of the fitting process so that you can see the changes.
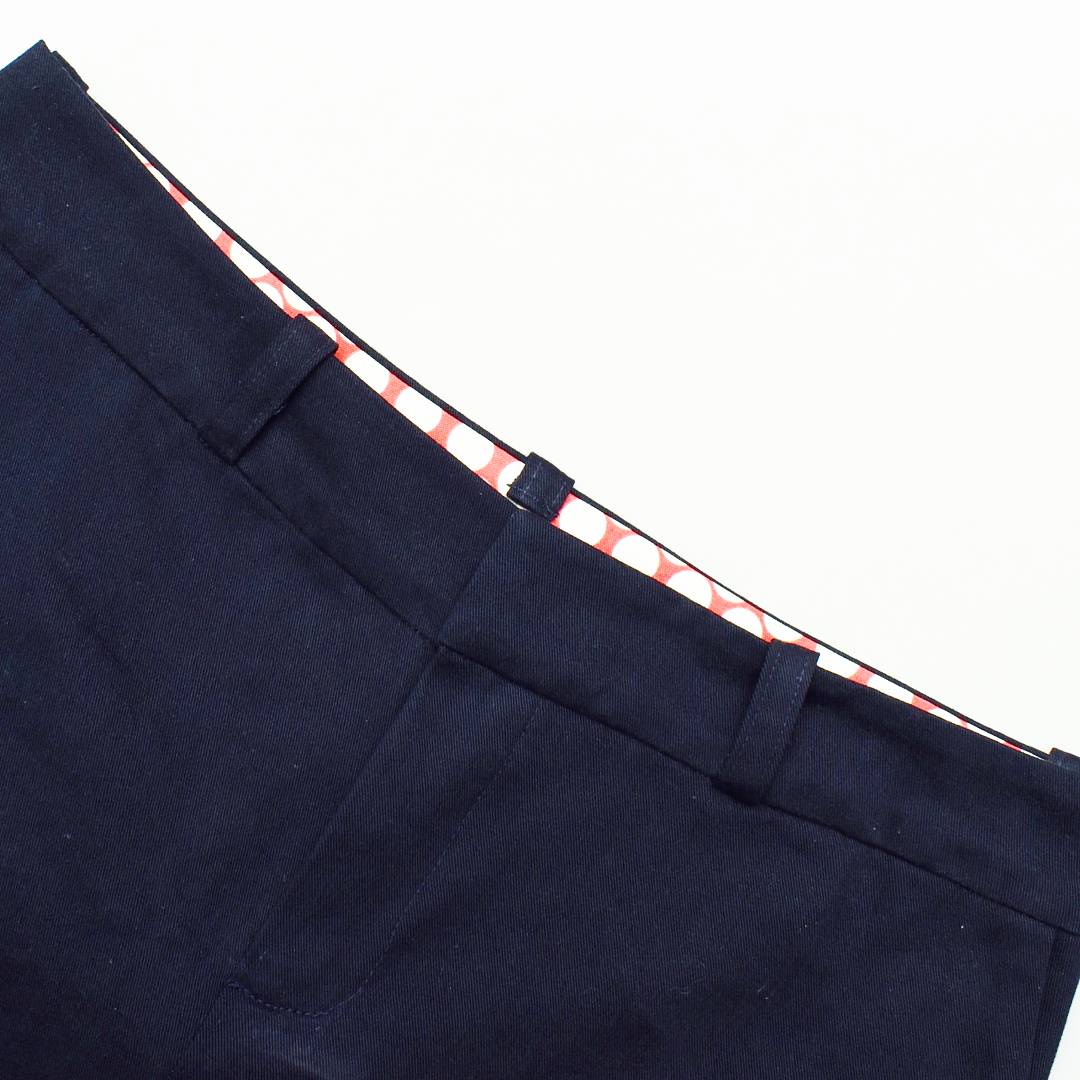
I added contrasting fabric for the waistband facing to make it more fun! It is a cotton quilt fabric from Amy Butler. Quilt fabrics are really great for these kind of details!
If you look closely you’ll see that the belt loops have not been stitched in place on the outside. I tried this technique for the first time with these trousers and loved it. I found the method in the Pants for real people book (Amazon affiliate link) and it is pretty genius! I really like the clean look of these belt loops. The waistband is kept in place using the stitch-in-the-ditch technique and while I didn’t achieve a 100% accurate finishing on the inside, it was the best application so far.

The inside seam of the facing. Since I sewed over the belt loops the seam got a bit curved on these spots, it was just to bulky for my machine to able to sew a straight line. I also used wondertape to keep the facing in place (my waistband wondertape tutorial).
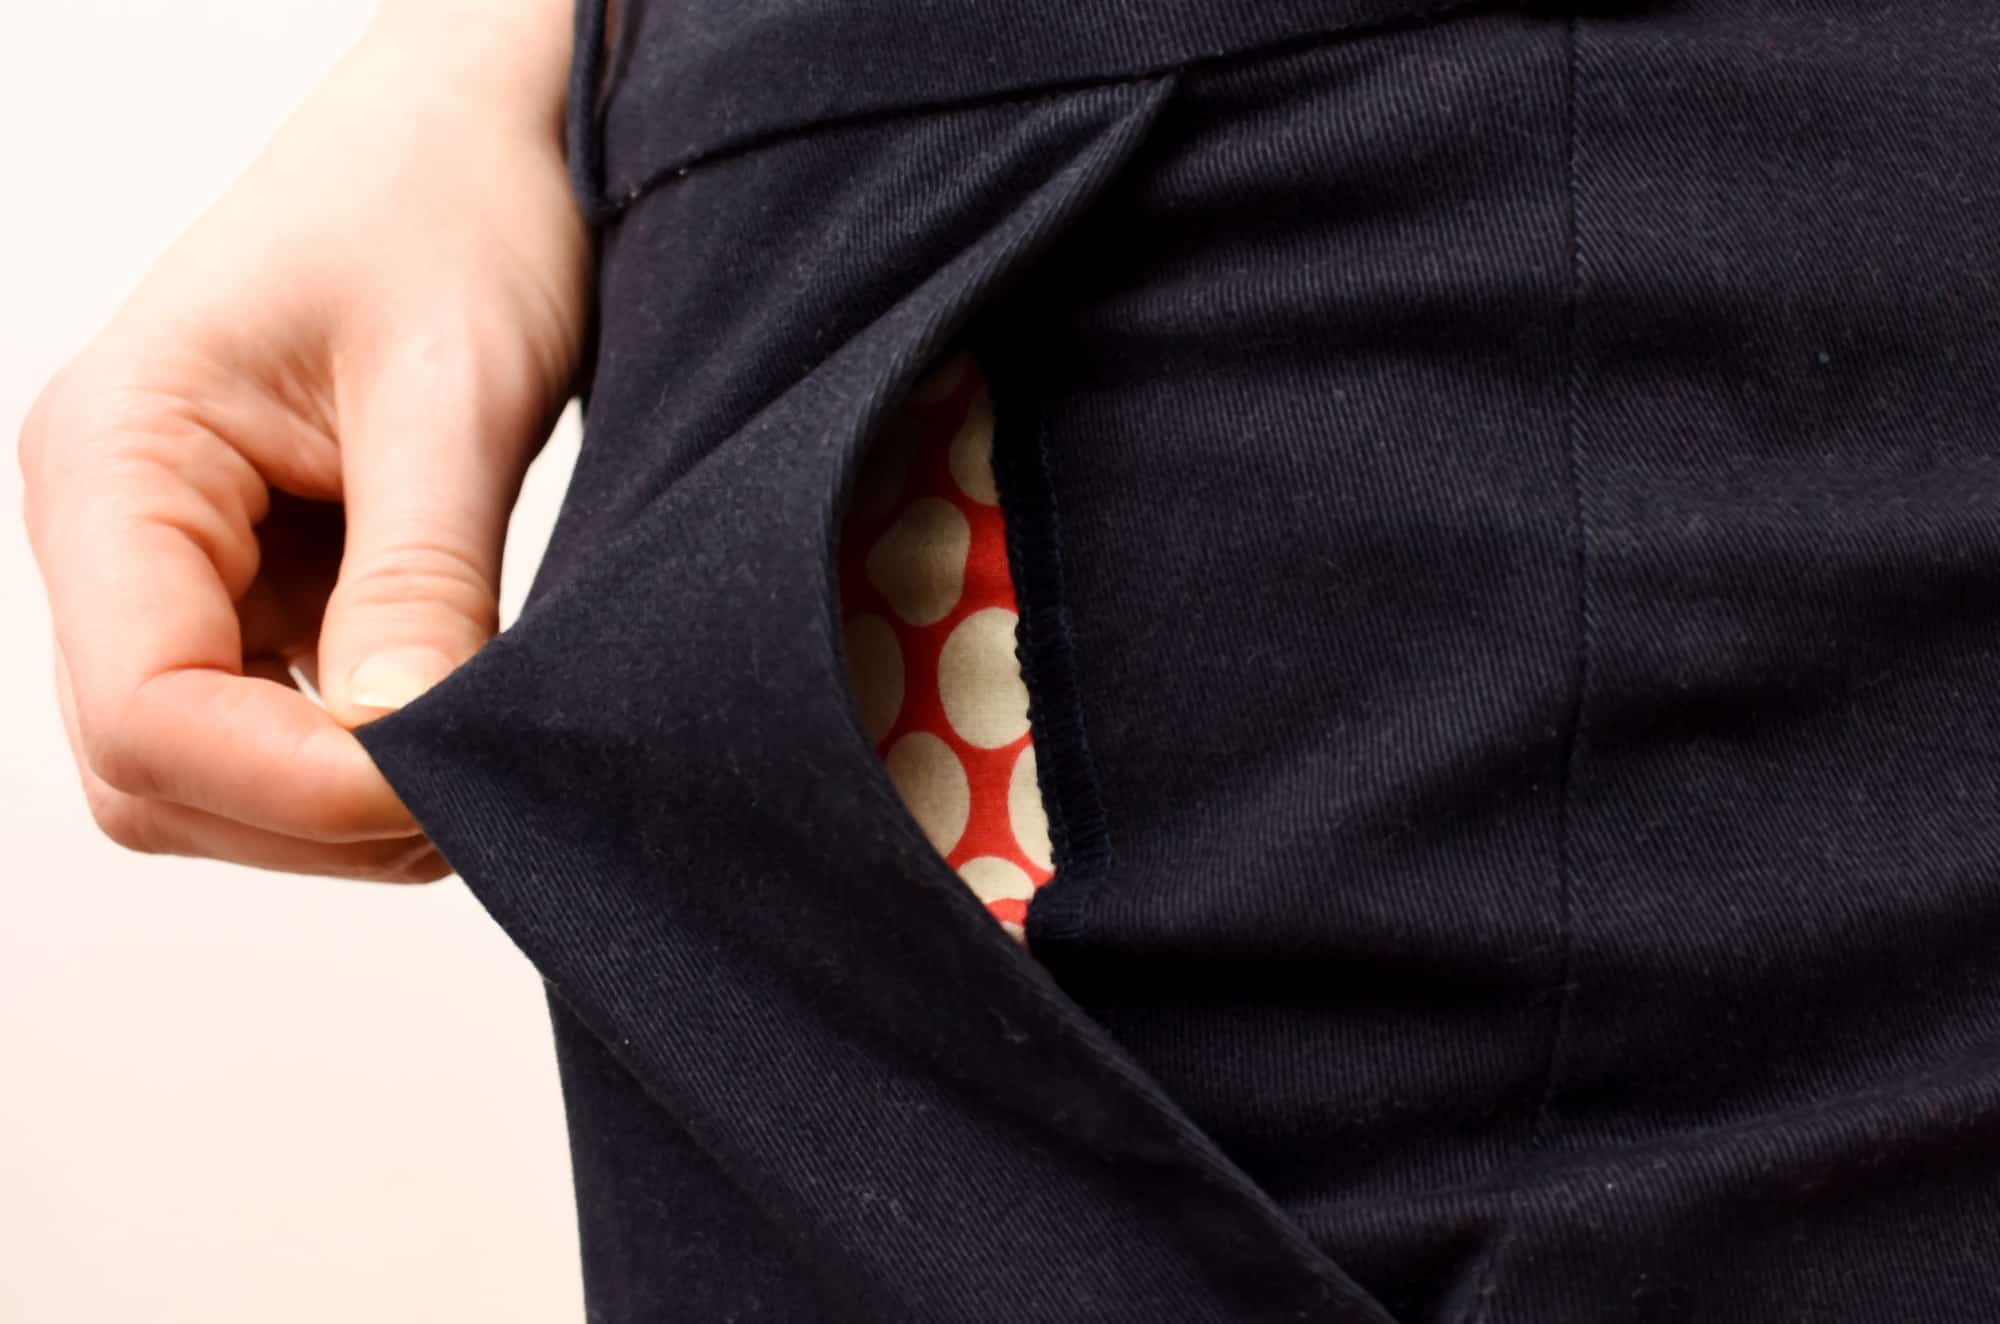
I also used the same dotted fabric for the pocket lining. I have done a tutorial on how I did the faced pockets if you want more details.

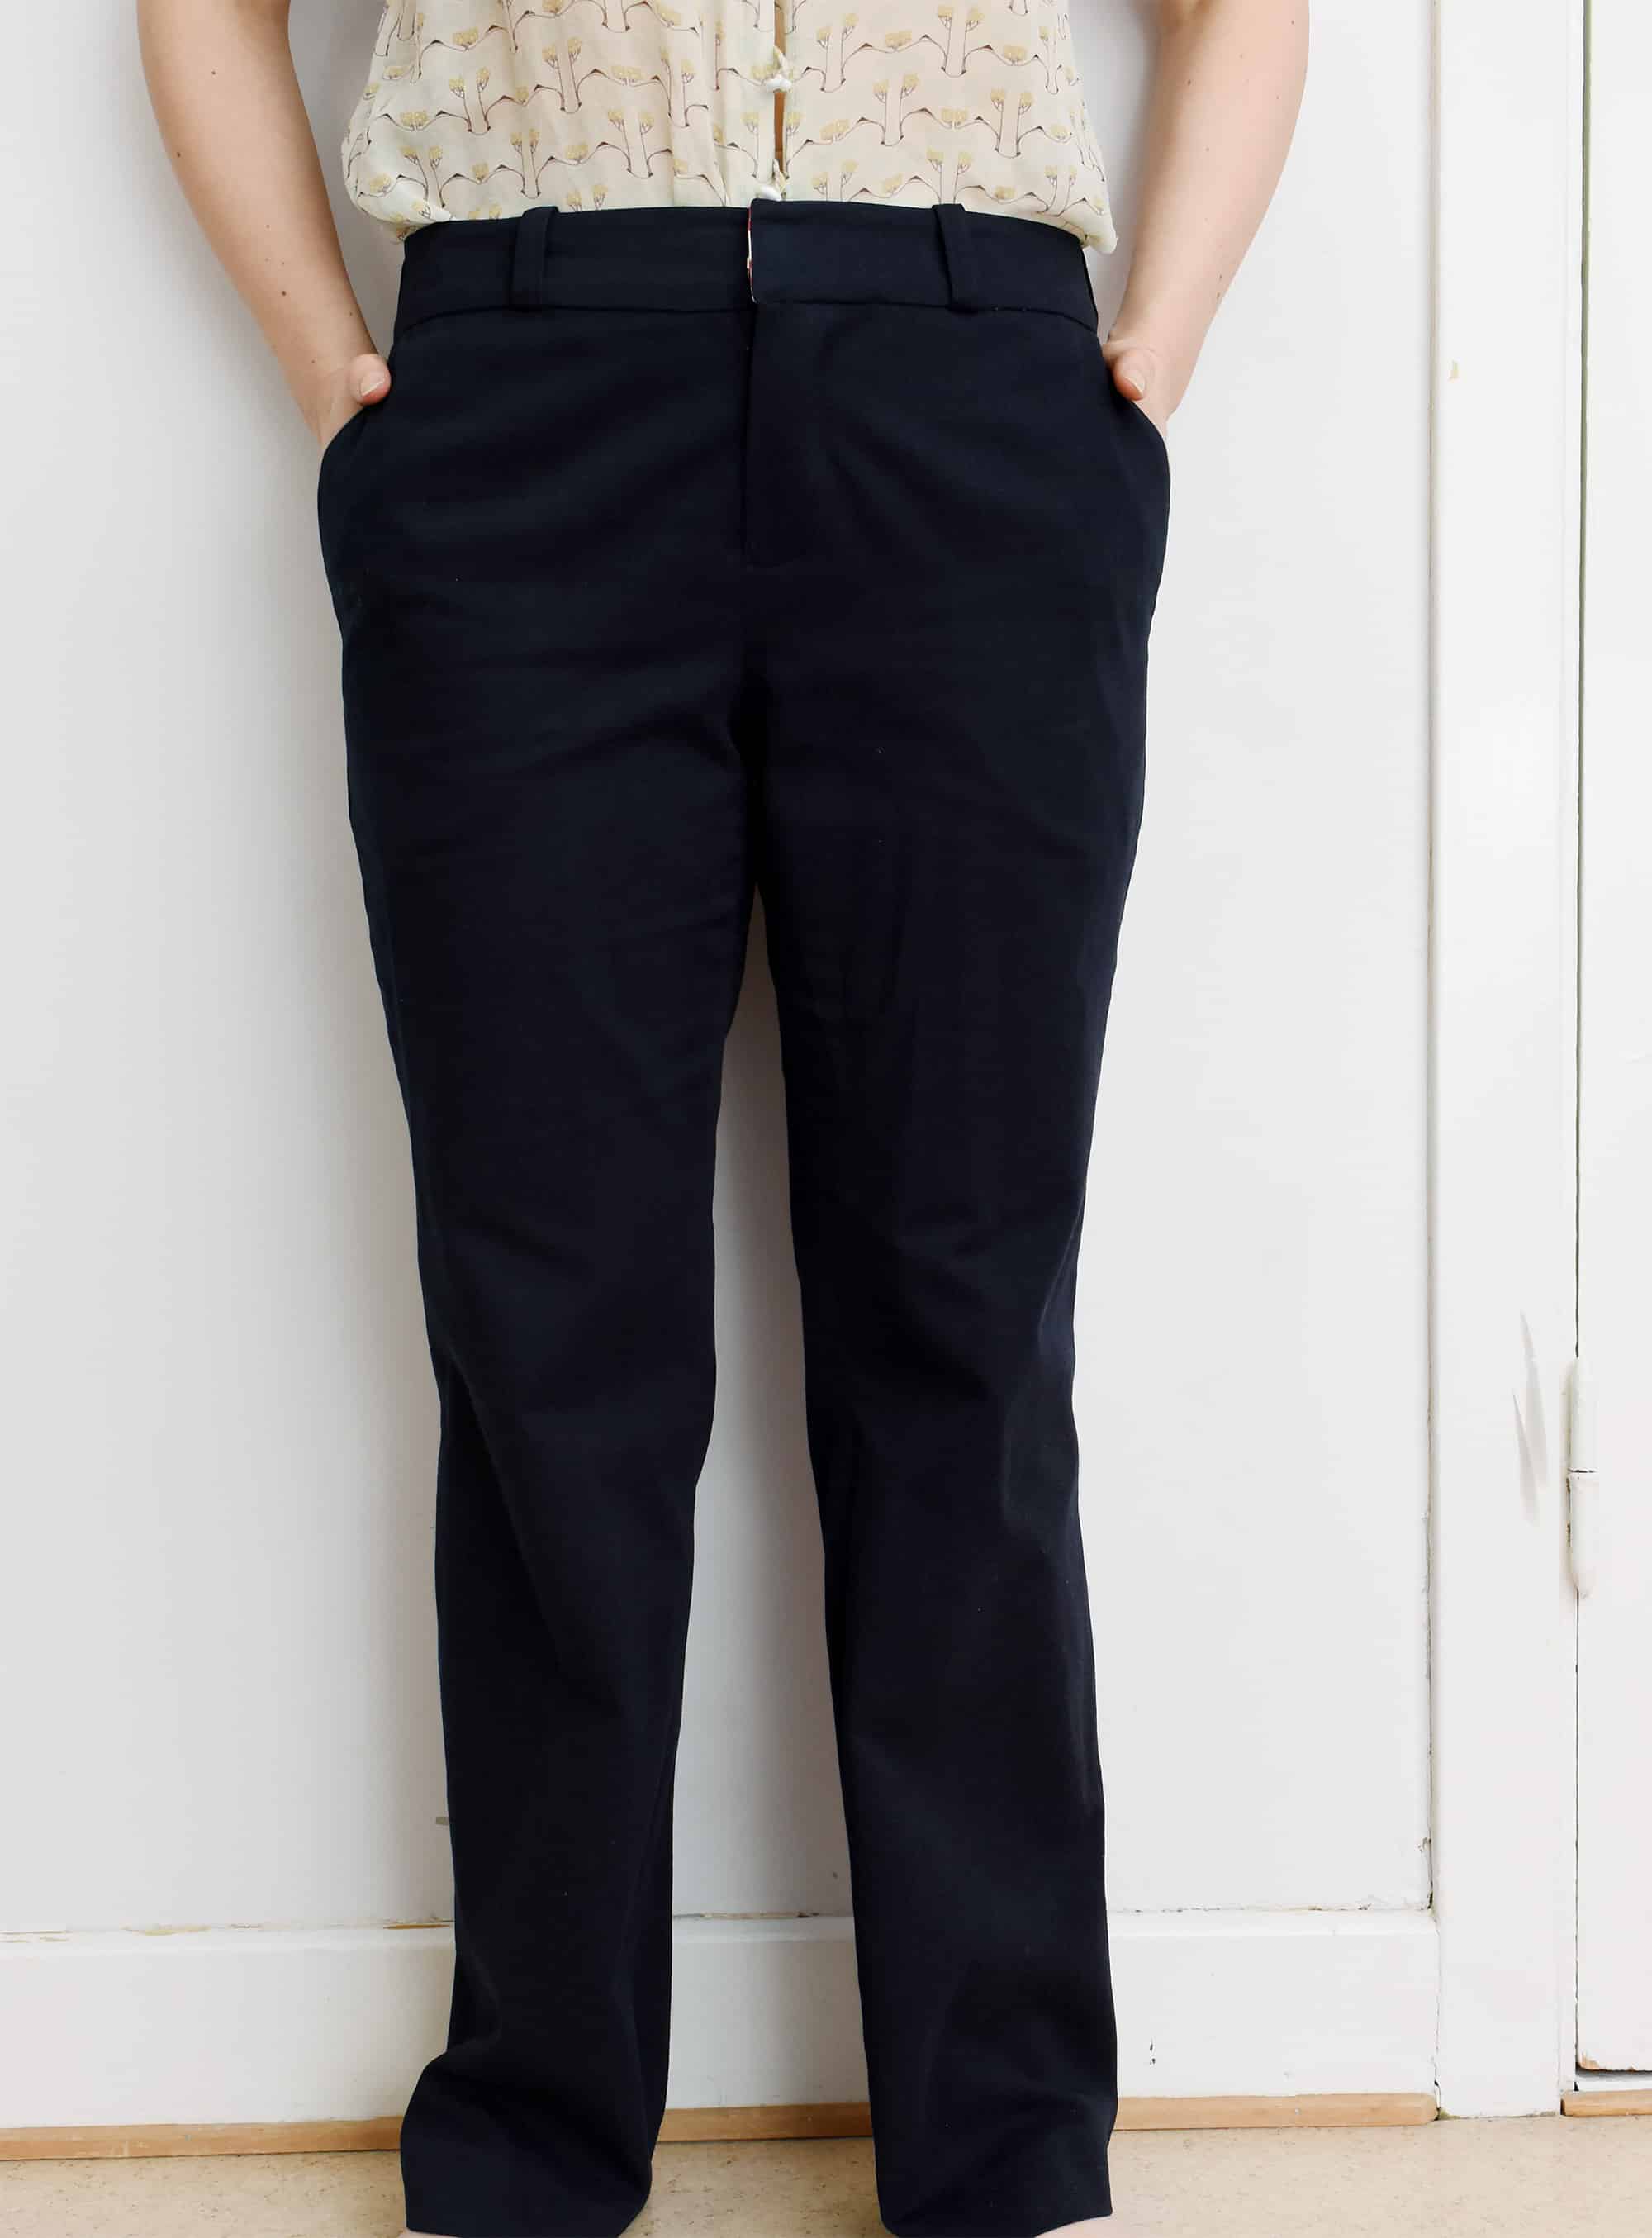
So here they are, my first pair of me-made proper trousers since 2009. I used to make tons of trousers back in the days, and I was happy to discover that I still had some skill-set left in me. Plus I think that my new mindful approach to sewing really payed off on this project as I spent a lot of focused time working on the different elements plus trying out a few new techniques too.
For more details on the Burdastyle pattern: see my review over at Pattern Review. Others who have reviewed this pattern has also given it five stars. So a truly great pattern!
8 Comments
Christine S
I have been watching Peggy Sagers you tube videos om fitting pants. She shows that the wrinkling under the bum is caused by excess fabric across the back . She takes a dart of fabric, larger in the center and tapering to nothing at the side seams. You need to make this adjustment before cutting the fashion fabric. If you search her name and pants fitting you should be able to find it. She is Silhouette Patterns…good luck! I tried it on my last pair and the wrinkling did disappear, so me plan this weekend is to try it in final fabric.
Johanna
Thank you for the tip! I did not use the fisheye dart this time as it wasn’t suggested in the Palmer/Pletch book on fitting the trousers, so I thought maybe their methods would be enough. In hindsight that was not enough and as you say I need to tuck that fabric away too. Next time for sure! I have heard so many rave about Peggys videos, so I need to find the time to check her stuff out. Thank you for the helpful tips!
Jessica
You need to squize the pattern a bit in this area. For example 1cm at the middle seam and nothing on the side seams, before you cut the fabric.
I always make a pair of test trousers (when using a new pattern) out of unbleeched cotton (ikea). Make the corrections in the pattern. And then cut and baste (with sewing machine on big lenght stitch) in the real fabric, while every fabric is different, before sewing the pants for real. It’s perhaps more work, but it pays of in getting a better fitting garment.
I have done a course to learn how to draw your own patterns and since that I never use other patterns then self drawn ownes, while they sit much better.
Johanna
Agree! I used to do this back when I last fitted trousers, but in the Palmer/Pletch this method isn’t suggested and instead they have a different modus operandi for this issue. In hindsight I should have done as you said and tucked the excess fabric away and transferering that alteration to trousers.
LinB
You can also get rid of underbum excess by sewing the back crotch seam as more of an L than a C. This simple alteration gets rid of the extra fabric where it shows up — and does not require alterations to any other part of a pant. Try basting this change on an existing garment: keep the center back seam the same from the waist down to where the crotch curve starts. Keep going straight down until you are almost at the bottom of the curve, then make a sharp curve to meet the existing crotch seam.
If the fit is markedly improved, sew the new crotch seam and cut away excess fabric, and finish seam edges as you prefer. If fit is not helped, remove the basting and try another solution.
As I age, and my once-plumper derriere flattens out, I find I need to make this alteration on every trouser and jean that I make or buy.
Johanna
That was my primary method, scooping and reshaping the crotch to make it more L than C but in hindsight I should have shaped it more but I ran out of fabric in the sides to true/compensate for the removed fabric in the hips/thighs (yes I did it on the actual pant fabric, not perhaps the brightest idea!) I am a big believer in this method, and it was also suggested in Pants for Real People, but to be honest I have yet to nail it. Next time I’ll shape it even more like an L and also try the fish dart suggests by other commenters. Thank you for all your helpful advice. Next time I’ll be more methodical just like you suggest! And word on the flat butt, and I even spend a lot of time lunging in the gym, but I don’t think it helps much!
H2ogurl
Johanna, I find you so brave and honest. Thank you for posting and showing us your successes as well as letting us know your troubled spots. I have been waiting to hear how this project went and I truly love that facing fabric! I am wanting to make a pair of trousers but I am so intimidated that I just keep coming up with other things to make first and not getting to them. You have inspired me, but… As I read through these comments I am not fully understanding the processes described, I find them more confusing, except “LinB” this one does make some sense to me. So I am left excited and confused. I think more homework is required before I even begin. Do you think the book you used is a good resource? And I will check out Peggy on YouTube as well.
Thank you again <3
Johanna
Your post really touched me! Trousers can indeed feel intimidating and in the sewing world we talk so much about achieving that elusive “perfect” fit that I think it can make that feeling worse. I know it did for me, hence why I went on an 8 year long trousers making hiatus. But I hope to see you make the plunge soon, trouser making can be very rewarding when it comes to sharpening our skills. And also I think most of us will agree that me-made trousers tends to fit considerably better than store bought ones, even though the fit might not be “perfect”.
I would highly recommend the Pants for real People. The fit section is good, but the sewing instructions and illustrations are A+++ so worth buying for that purpose alone. I used several of their methods for these trousers and was super happy about the result.
Also what the other commenters are referring to is that you make a horisontal dart (fold) on the pattern piece or muslin to remove the excess fabric and then you trace those changes on the altered pattern. It will alter the seam lines a bit and compensate for the excess fabric. It is sometimes called a fish eye dart and I’m sure there are many versions of this.
Comments are closed.