
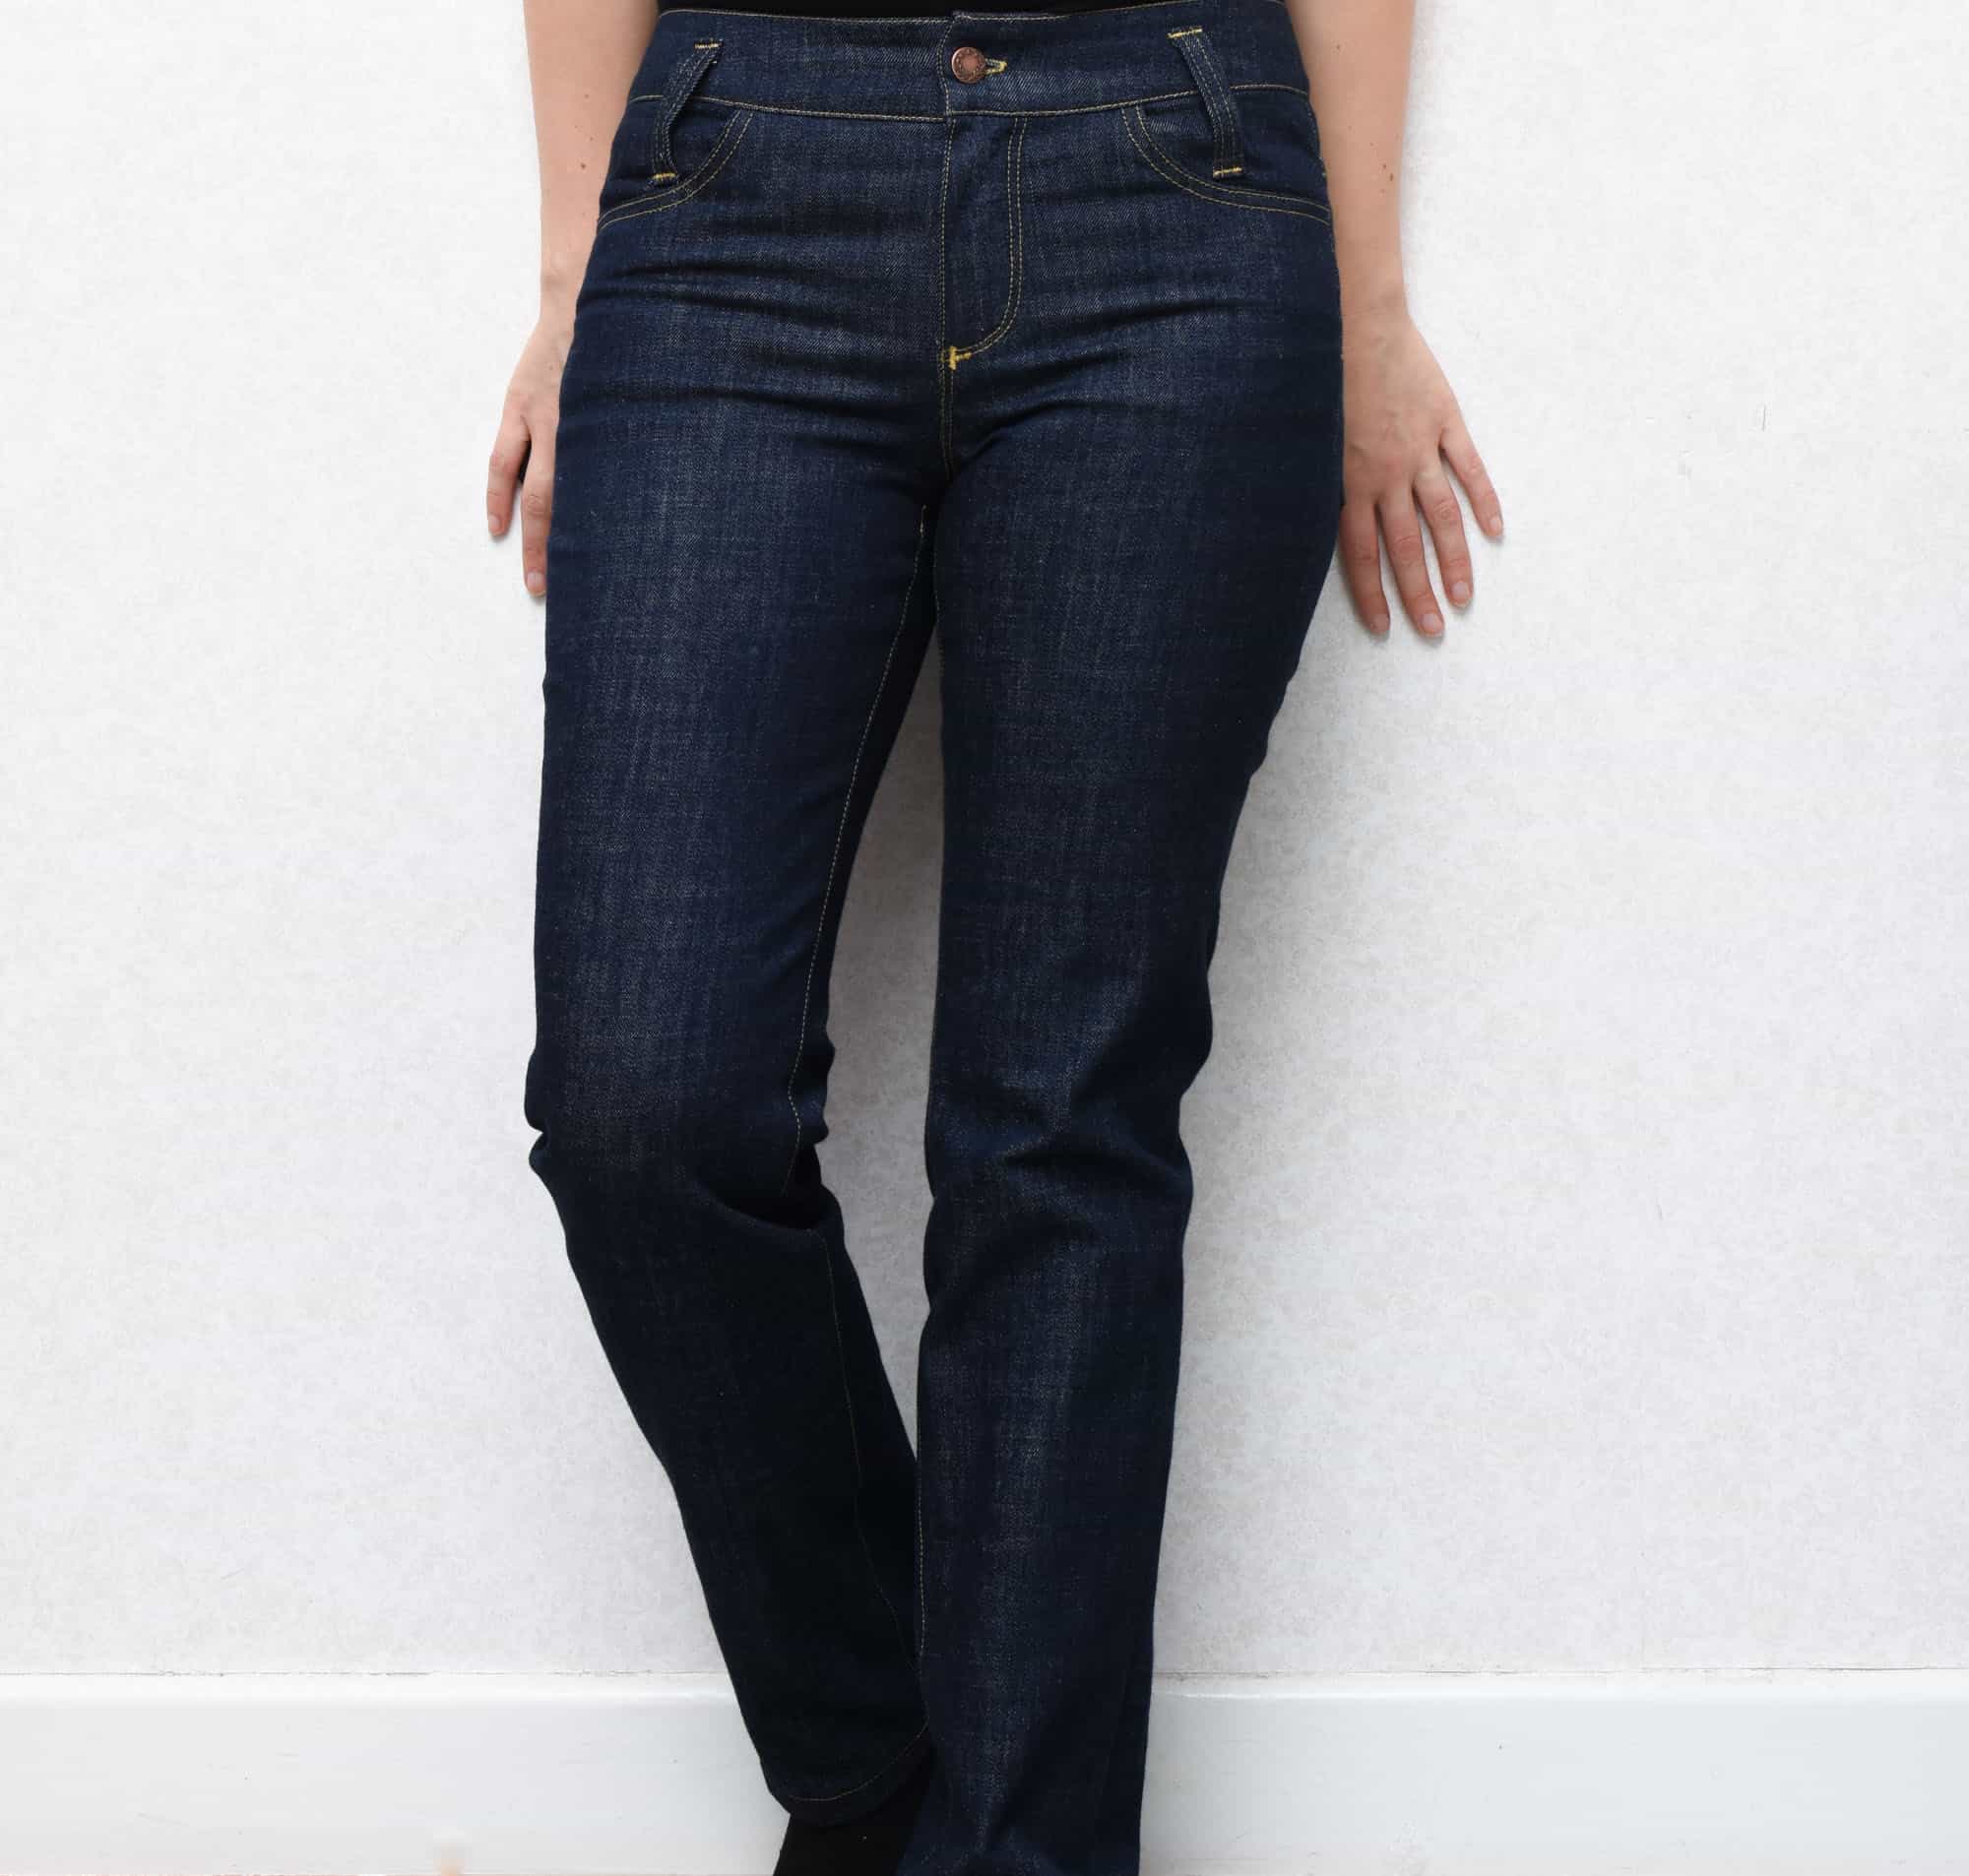
Here is version number 1 of the Anita Burdastyle jeans that I’ve been working on this fall. I’ve done this pattern two times before and am very fond of both the fit and style. That said have done a fair bit of changes, to make them look more traditional jeans, as I want my jeans to look similar to the ones made in the garment industry and the Anita jeans has a few “home-sewing” details, that I’m not fond of.
I’m a little bummed though that I seem to have put on a bit of width around the midsection since I did the alterations and created the jeans master pattern. So next time I will add a some width around the waist area and also raise the back crotch slightly. But apart from these setbacks, the jeans are still very wearable and the stretch of the fabric makes the waist area more forgiving.
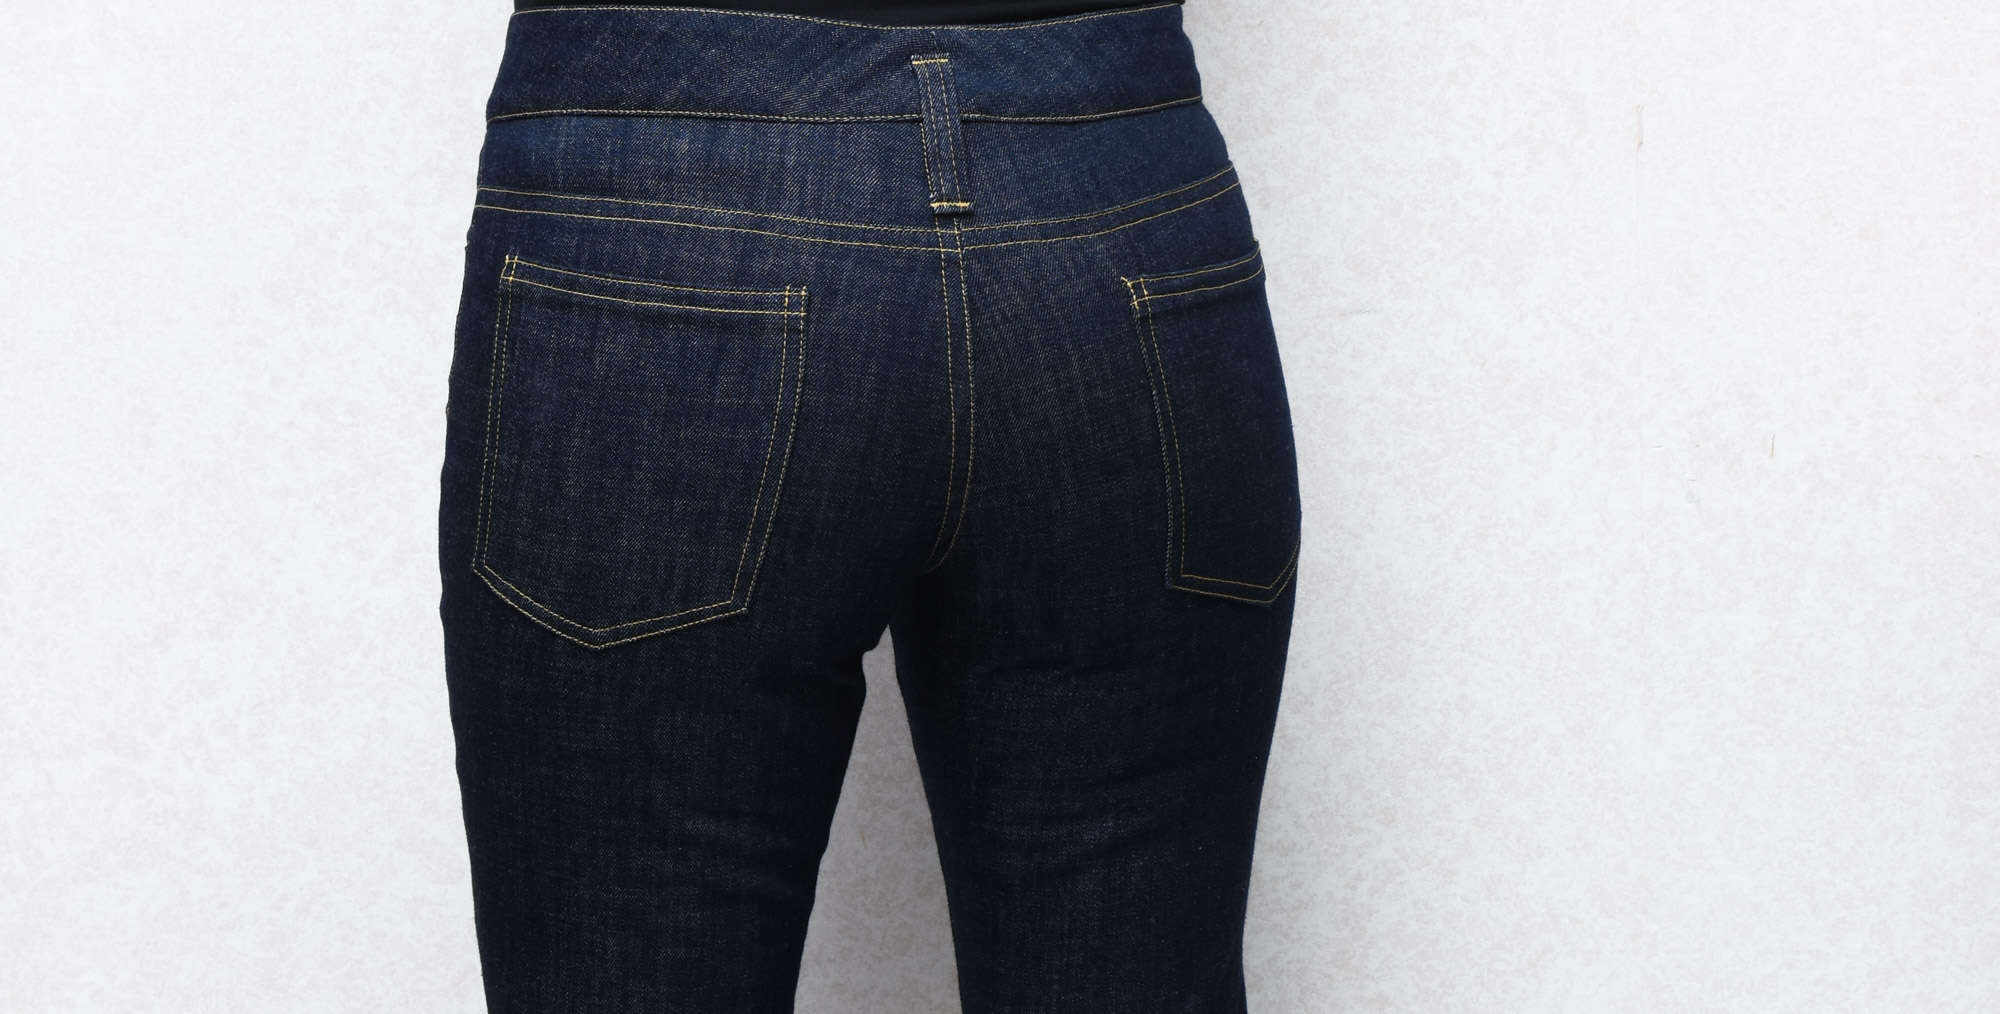
This is the best part about the fit to be honest! Not kidding, when I buy RTW pants and jeans, I always have loads of excess fabric underneath the bum and I’m not fond of that look. I think this is primarily attributed to having a flat derriere. But I don’t think mine is all that flat, so I suspect that it’s also caused by how much taper is needed from the bum to the thighs, at least on tight fitting jeans.
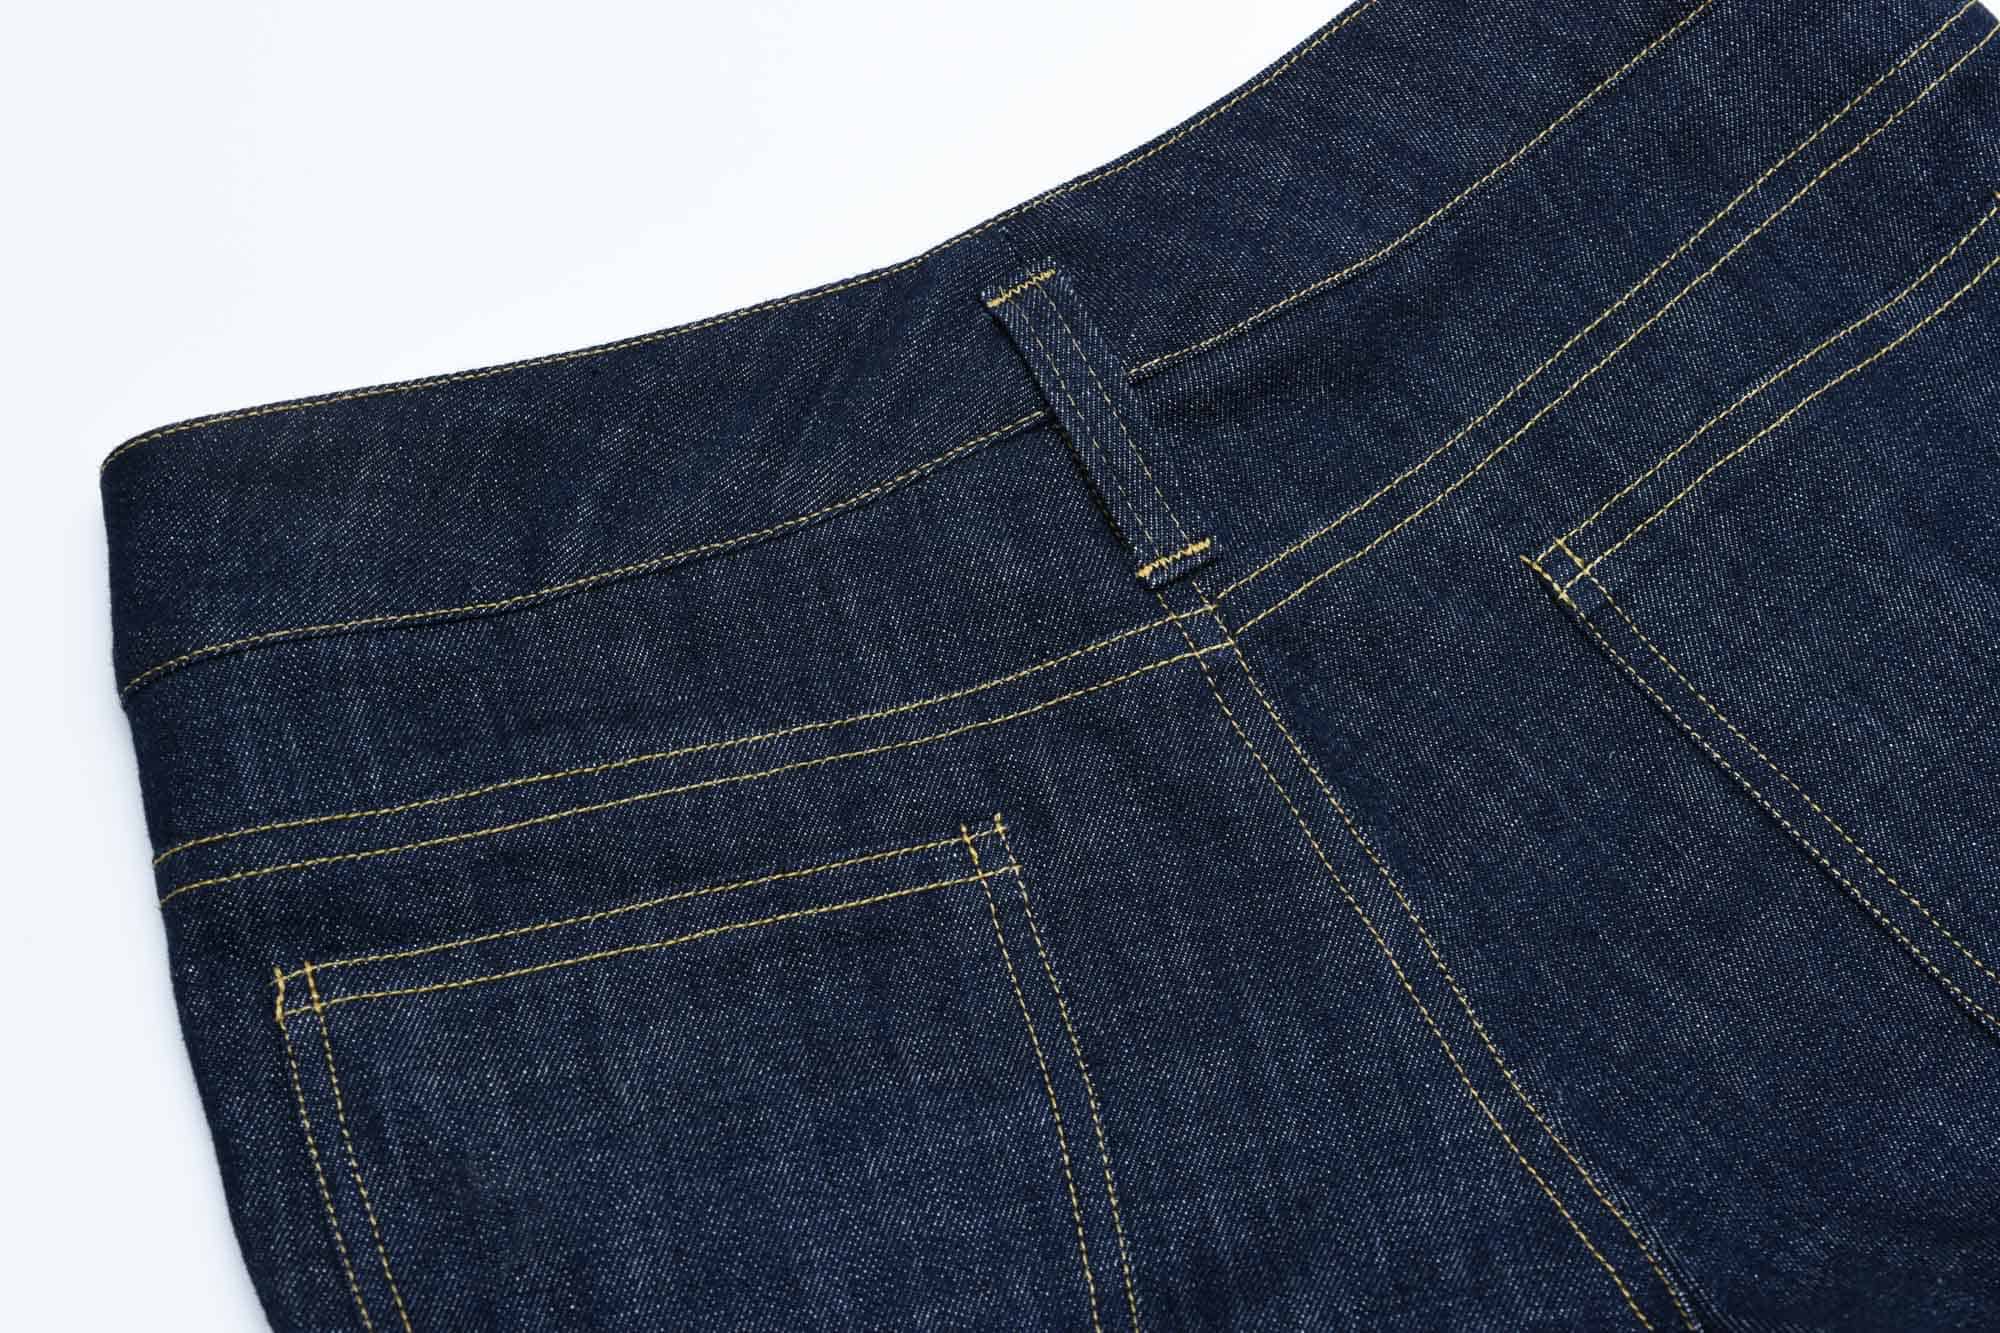
If you are curious on my favourite techniques for achieving good looking topstitching you can check out my post How to sew perfect topstitching.
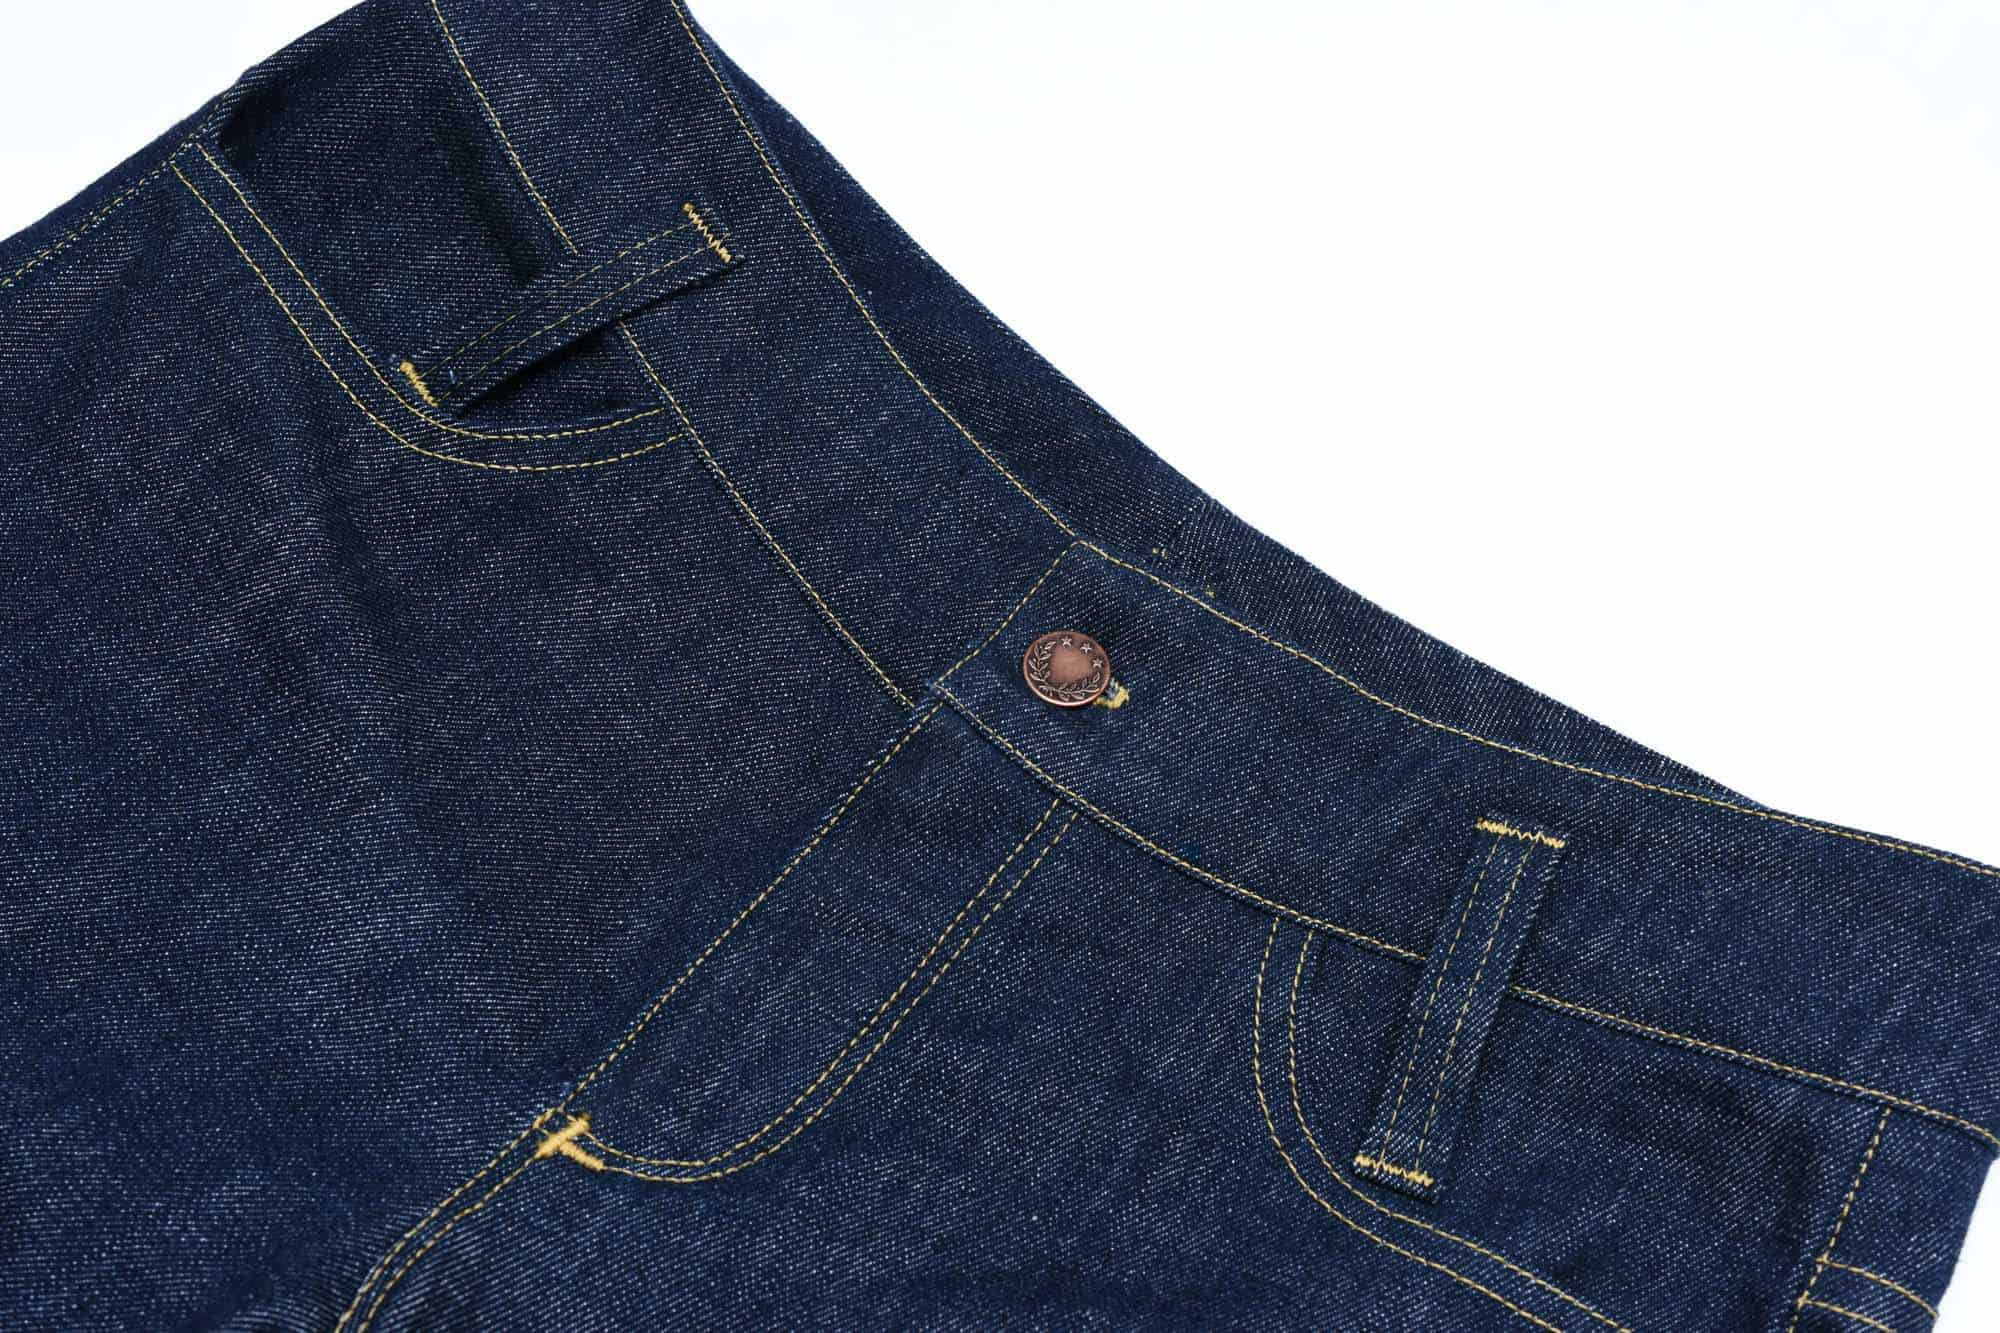
After a cry for help on Instagram regarding having problems with feeding the dense bar tacking stitch on heavy denim, I got the advice to opt for longer stitch length. So I used that for the belt loops and it went like a charm, I didn’t even have to use the hump-jumper!
I also chose a longer stitch length buttonhole stitch, and again it helped a lot. Next time I will do a slightly shorter length though, just to give the fabric better coverage.
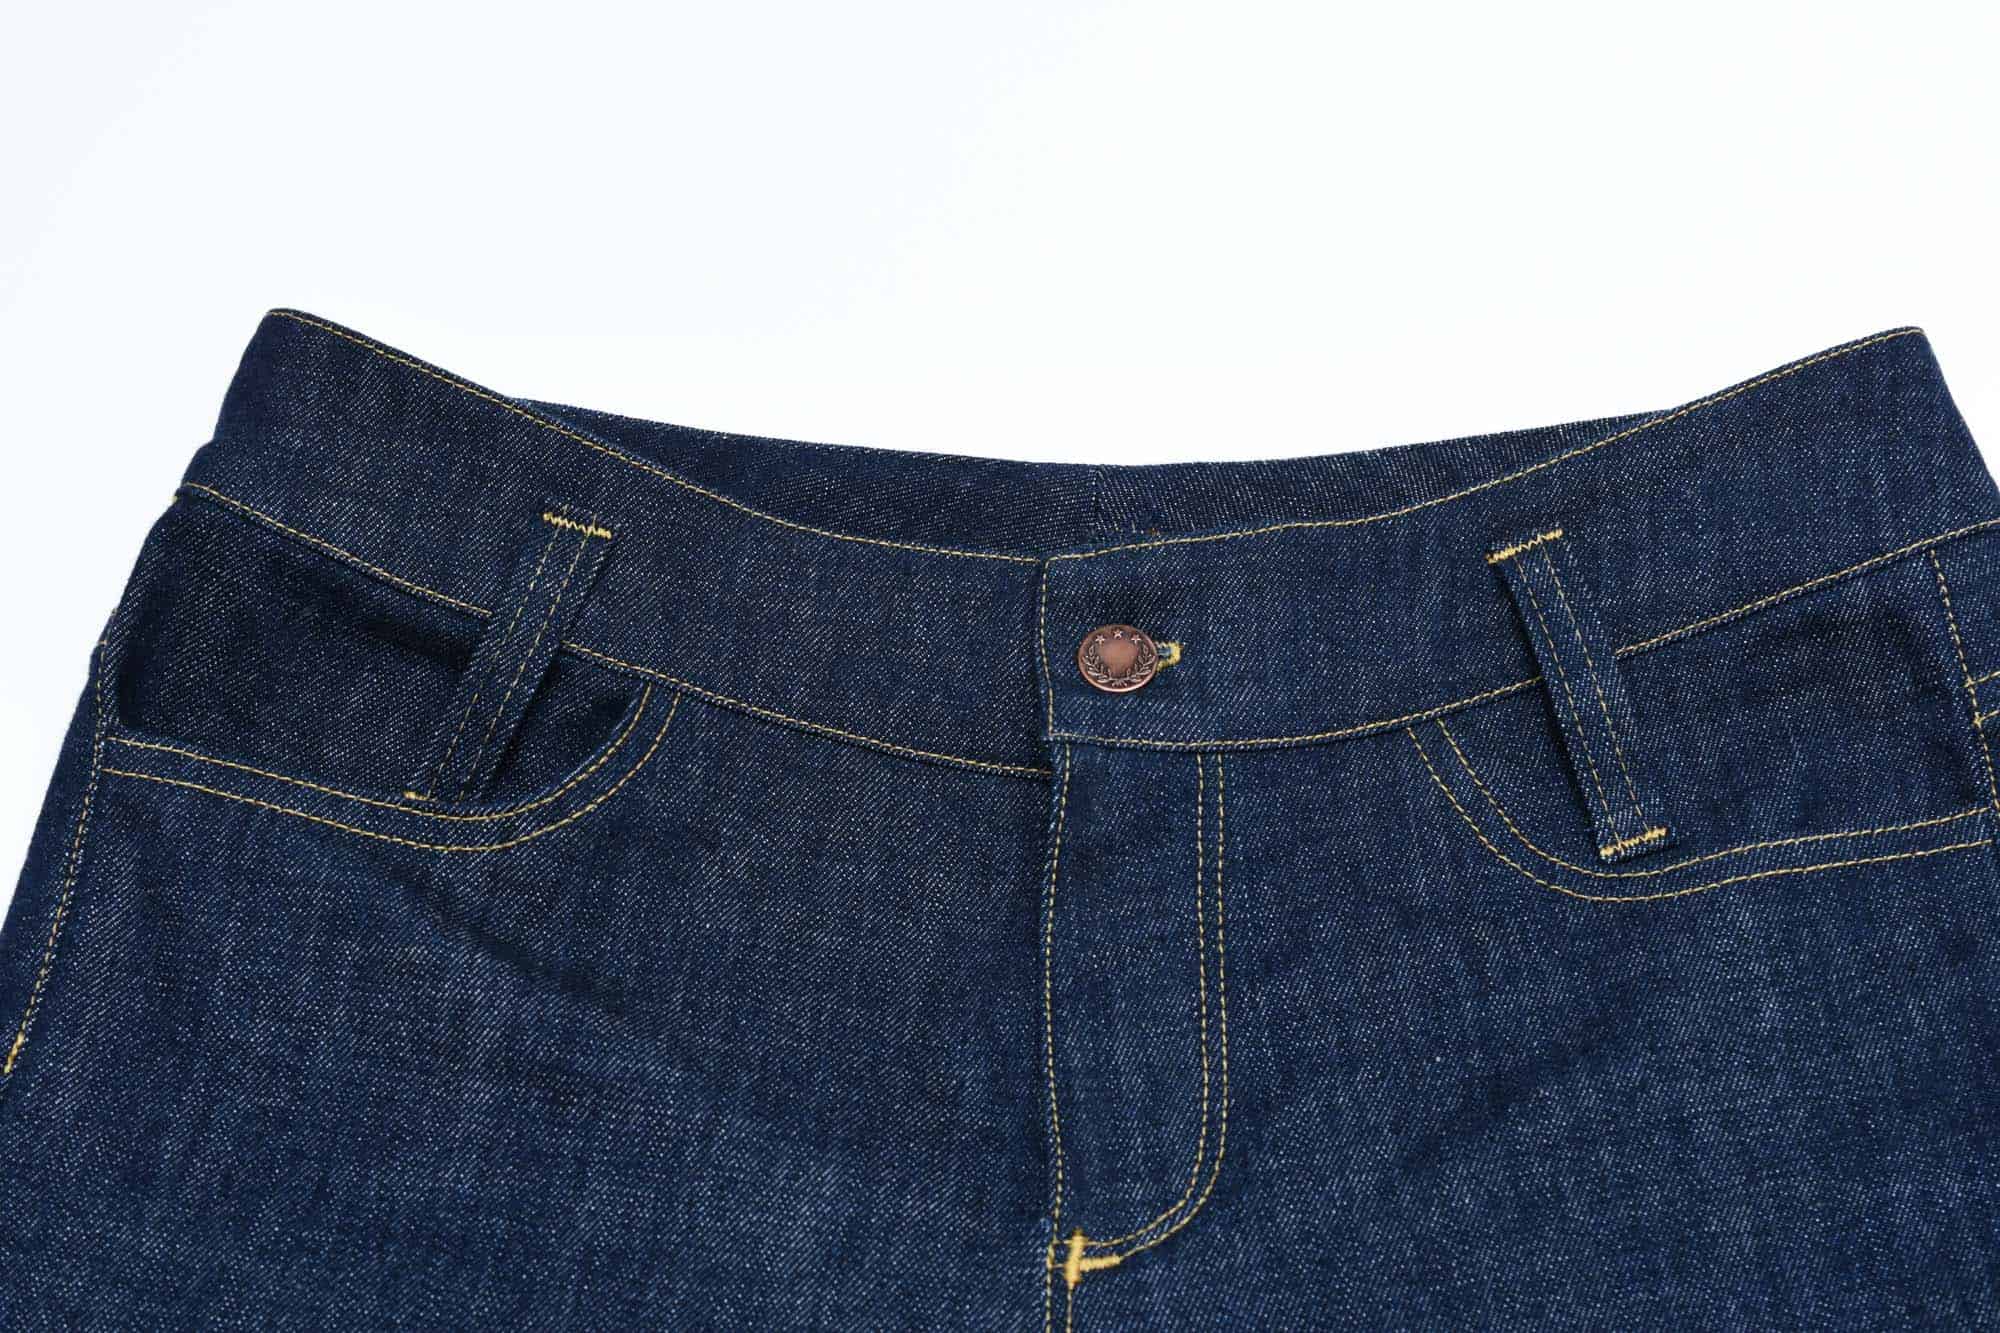
For the inner waistband I used double sided washable wonder-tape, a method that I explain in my post Using double-sided tape for a neat waistband.
As for the fabric, it’s a stretch denim with a slightly rugged/broken surface. As I’ve mentioned several times before, I literally had to travel to another country to get my hands on good denim. because the stuff sold in Sweden is generally useless. In Copenhagen though, they seem to have a better grip on denim fabrics and I managed to get two really nice jeans fabrics there, including this one.

What I also really like about the Anita jeans is that they are slim-fit and straight legged. Now I don’t mind stovepipe jeans, but they do make my already short legs look even shorter, so I in general I prefer a more straight leg style of jeans. Also, the pattern does run slightly large for being labeled skinny jeans, so I would check the measurements before I pick a size (I sized down).
Overall I’m very happy with the result, and I feel that my jeans making skills are getting to the point where I want them to be. I’ve been making my own jeans off and on for almost two decades now, and it has taken me a while to get here obviously. If you want to get more insights to my jeans making process, you can check out the jeans making tutorial series I did back in 2009, when I made my first pair of Anita jeans. I’ve changed a few things since then, but most of the methods I still use.
So these are the first pair, stay tuned for a post about the second pair I did including a few style changes, which involved having not enough fabric!

11 Comments
COREY HILL
Johanna, I left a few comments and links on some previous post that show 2 guys on youtube that put together jeans. One from sweden sells his jeasns/brand and makes. The other fellow from germany also sells his jeans and show you from start to finish how to draft your pattern, and he uses an industrial sewing machine for his construction. Take some time to review these videos and they will “up your game” on making industry/bespoke jeans. Both of these have seriously made my jeans makes look no different from purchased in a store but with a custom fit for me. Let me know if you have any questions. Corey
Johanna
Yes, I’ve meant to check the videos out that you recommended, just have been so busy! I’m especially curious about the Swedish guy and want to see if I could do an interview with him too
COREY HILL
I am sure you will find it such a good learning experience to look at guys (yeah men) making jeans and other clothing items that they sell. As I said, it will really step up your sewing game. The fellow from Sweden is in Gottenburg I believe , his website is: http://lookingglassdenim.com/ Again keep me posted on how your make out and what you learn.
Jan Brown
Hi Johanna, having looked at the link mentioned by Corey I would say you have done a much better job. The back pockets on their jeans are way too low and large even for a man. You’ve cracked it and your finish is superbly professional already. Well done.
Johanna
Thank you Jan for kind words, at times I felt like it was such a struggle, so it’s very validating to hear thus! Regarding the pockets, I think it’s a fashion thing, where some prefer the pockets super low as a design feature.
COREY HILL
I just want to be clear an avoid confusion. I was not commenting on “style” – features such as pocket placement. Having read Johanna’s previous posts an frustration, I wanted to point out the construction techniques by 2 fellows who are making jeans to sell. Lookingglassdenim produces jeans in a style for men that are selfedged with flat felled seam construction. He uses a vintage viking husqvarna 21 green sewing machine. The point of watching both of these guys is to see how they put the jeans together for a professional looking pair of jeans. Fashion and style change and are personal, but the construction process for making jeans is the same. I used these videos and techniques in my own construction process. I hope this clarifies things.
Johanna
100% Corey. That said communicating in written form can be kinda tricky and it’s easy to come across brasher than we perhaps intended. I’m sure you value my work and I take your comments as suggestions, but the phrasing could be read as being a little bit “do what the guys (men) are doing to learn to do it the proper way” Which I’m sure you didn’t intend. Anyhow, I’m confident in my skills so I don’t need validation, but of course totally open to learning from others!
Linda L
Great looking jeans!
Sarah T
I was looking for this jeans pattern to try out, as your versions look so nice, but it seems to have vanished. I am guessing it was lost when the Burda Style website was taken over. Does anyone know if it was a magazine pattern, or online only? I have afeeling that the named patterns were online only, but I’m not a Burda Style expert.
Comments are closed.