
Hemming stretchy knits on a regular sewing machine can be quite tricky. Seams can pop, get twisted, expand and just not look as neat and professional as you might have hoped. But the good news is that a twin-needle can solve a lot of those issues, especially if you use the right techniques and tools.
So in this guide, you’ll learn how to use it properly, options to try and finally get the answer on the most effective ways to avoid tunnelling, which is very common when using a double needle to hem thin, stretchy knits.
This post contains Amazon affiliate links, meaning that a commission is earned from qualifying purchases.
What is a twin-needle?
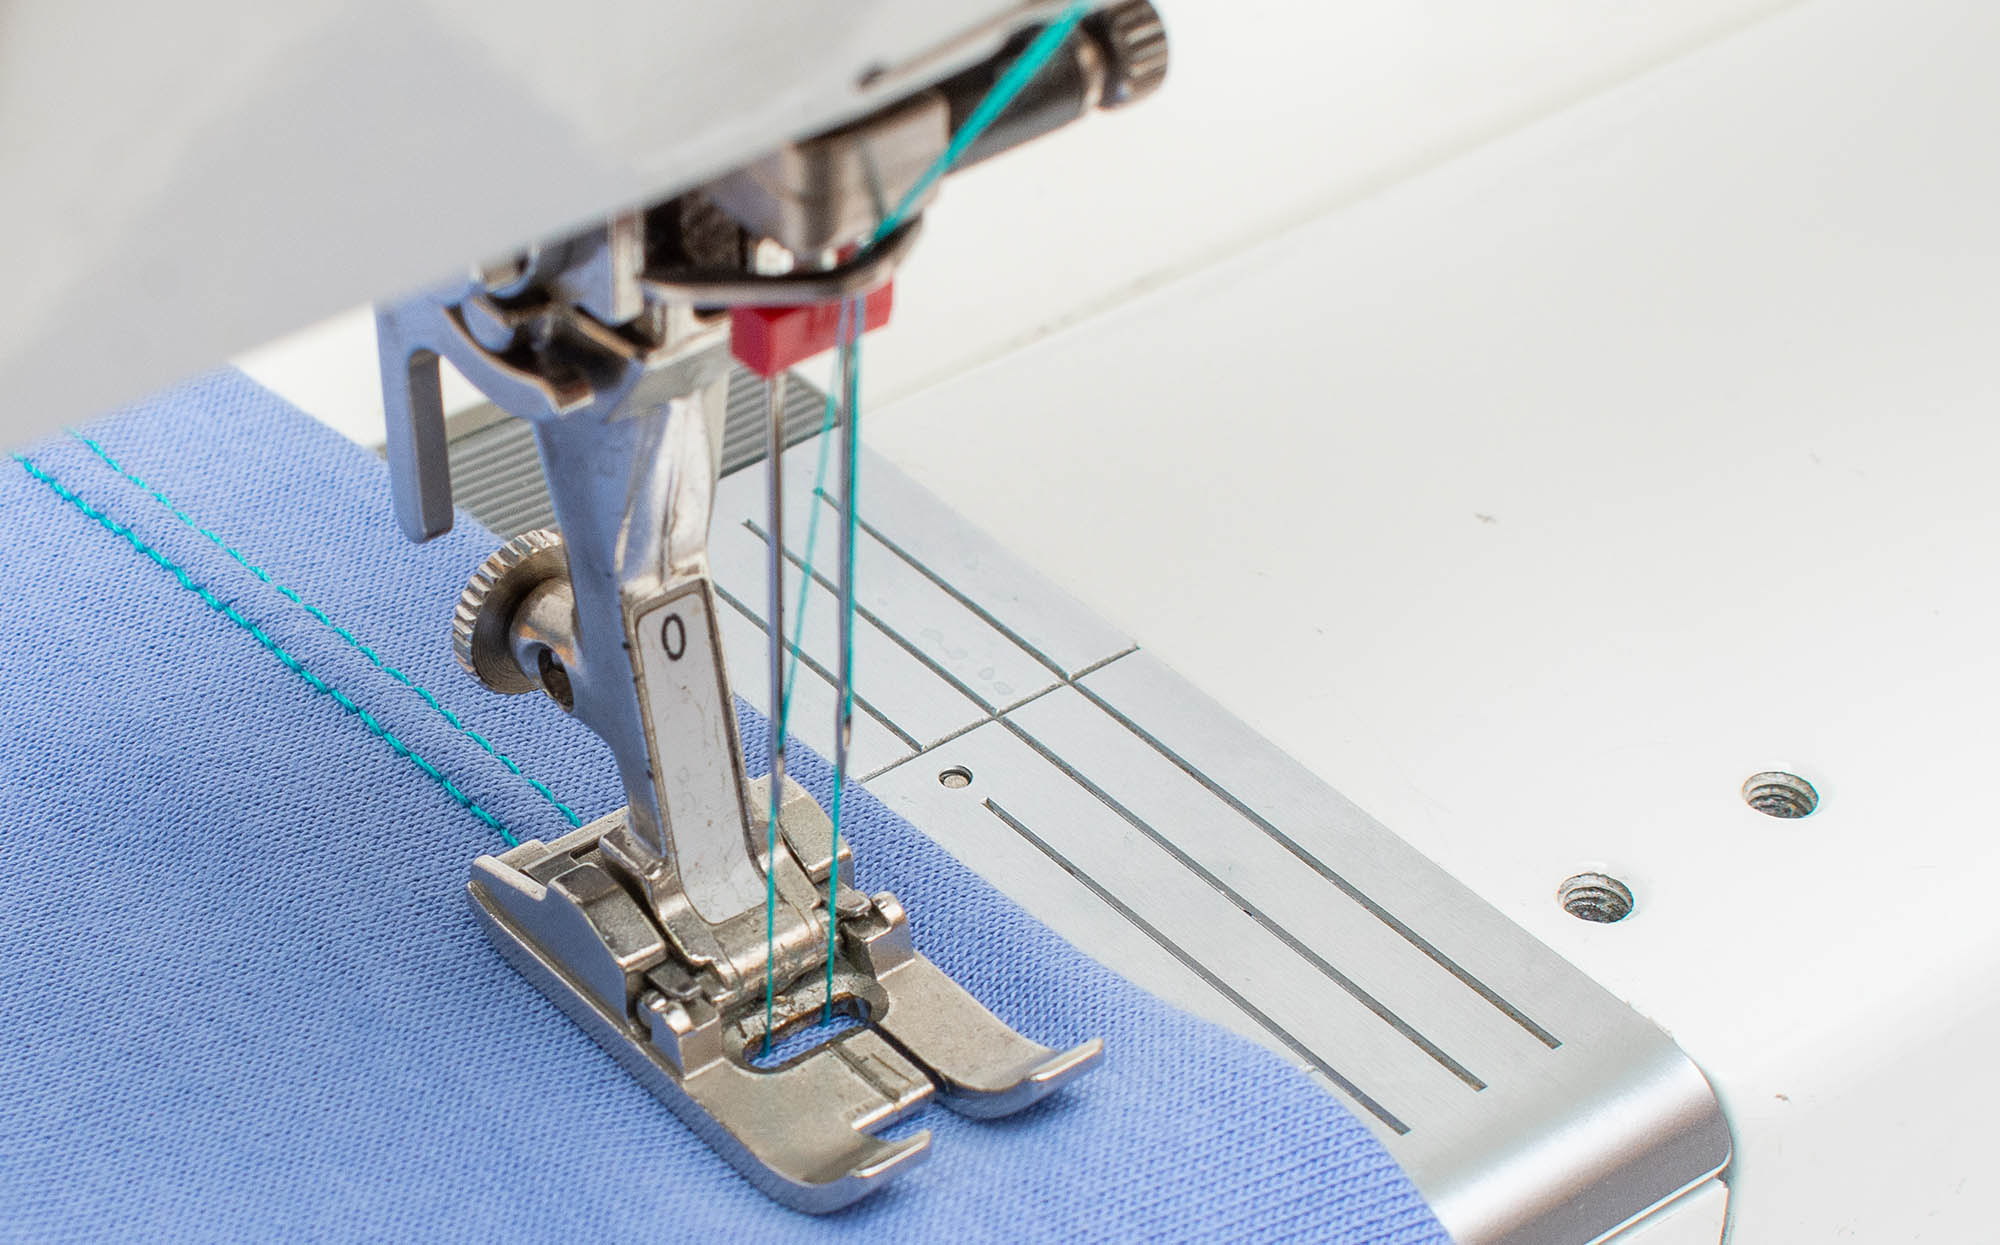
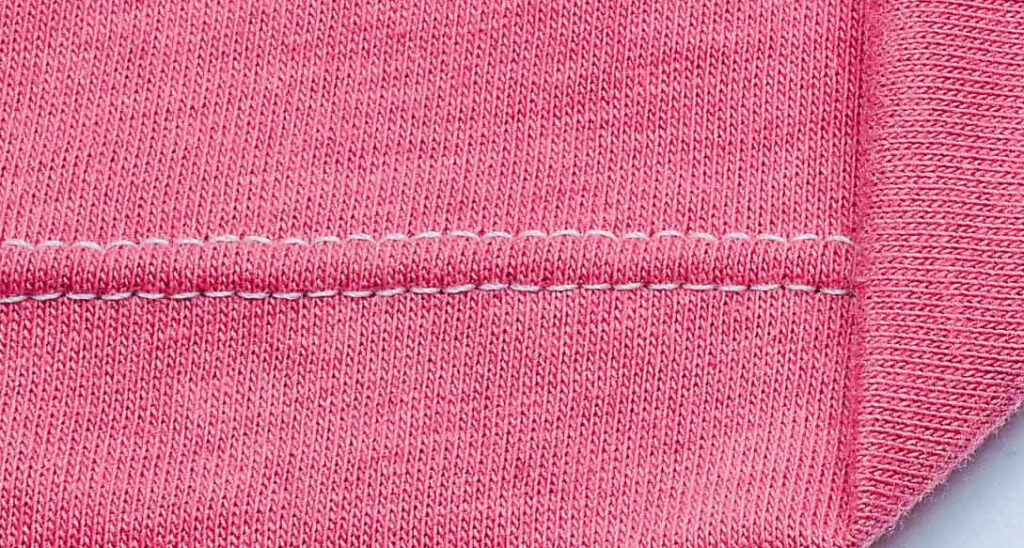
A twin-needle has, as the name implies, two parallel needles that sew two rows of straight stitches on the upper side and underneath a zigzag-like pattern is formed. The stitch will stretch out nicely, thanks to the zigzag, so you can use a double needle to hem even very tight-fitting garments with negative ease.
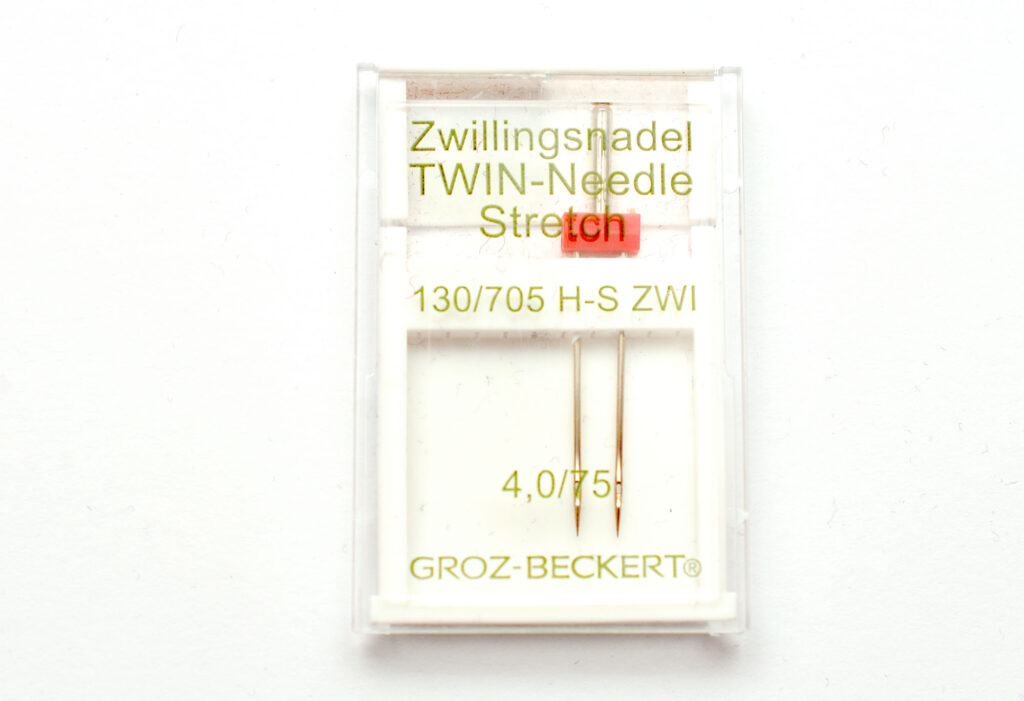
There are special ballpoint needles for sewing knits, and that’s what we are going to use in this tutorial. The advantage of using a stretch knit twin-needle is that it is designed to pierce through the fabric without breaking it and it can also help prevent skipped stitches, which is a pretty common issue when sewing densely knitted fabrics on a sewing machine.
Pick the right needle size
On delicate knits, opt for a needle in the 60-75 (8-11) range. But if you are sewing thicker knits or over elastic, you might need to go up to 90/14.
Twin-Needle width
Twin-needles come in several different widths, the standard for stretch twin-needles seem to be 4.0 mm but you can also find a 2.5 mm option. In this tutorial, I’m using the 4.0 width which looks nicer in my opinion, plus there is often a bigger risk of ridges forming when using a more narrow twin-needle, but test and see for yourself.
Threading the machine
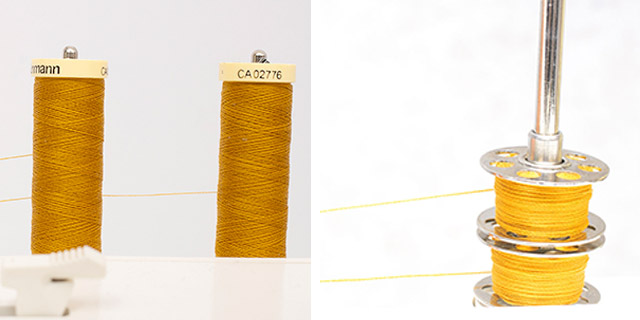
If you have two pins on your sewing machine, just place one thread spools or winded bobbin on each pin. If your machine only has one pin, wind two bobbins and stack them on top of each other.
Also, check your manual if there are additional settings to adjust on the machine. Some machines even have a special button for twin-needles, so it’s worth investigating before you start sewing. Thread the machine like you normally would, but be super careful not to tangle the treads as this might result in poor stitch quality. Also, make sure both threads are placed firmly between the tension disks.
Important: Always raise the presser foot when threading the machine, as this will release the tension disks.
Some machine has two separate thread guides above the needles if so, use them as this will also prevent the thread from getting tangled.
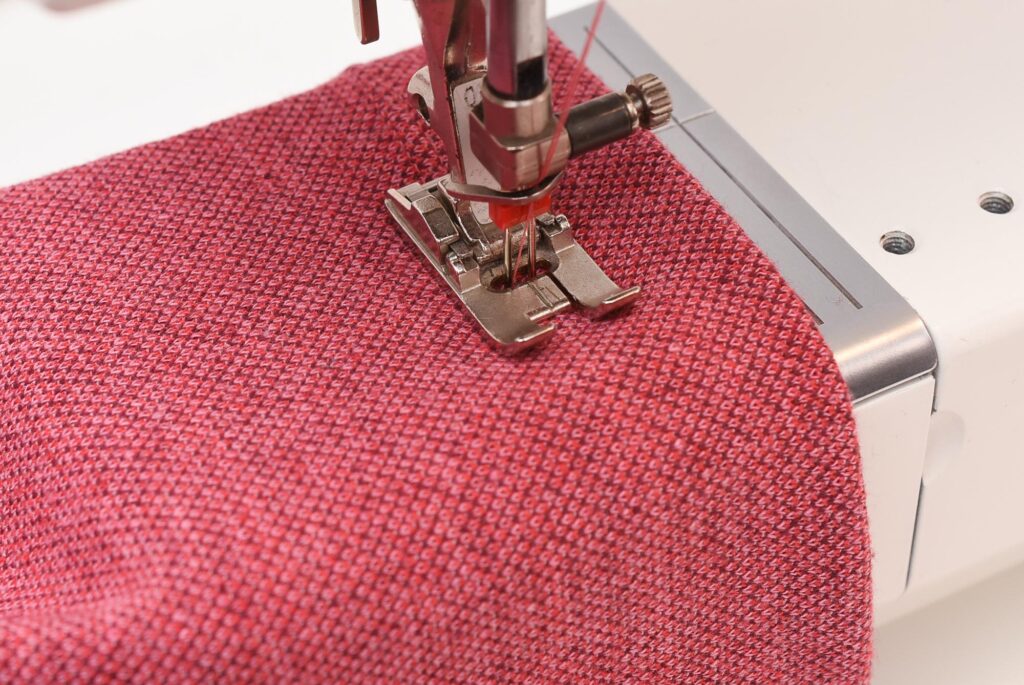
Sewing with a twin-needle
Set up your machine for a regular straight stitch (unless your machine has a special twin-needle setting).
Stitch length
A good stitch length to start with is around 2.5 to 3 mm. Remember it’s the zigzag that adds stretch, so a longer stitch length means less stretch since there will be fewer zigzag intersections, i.e. fewer points than can stretch out. So keep that in mind when picking a good stitch length.

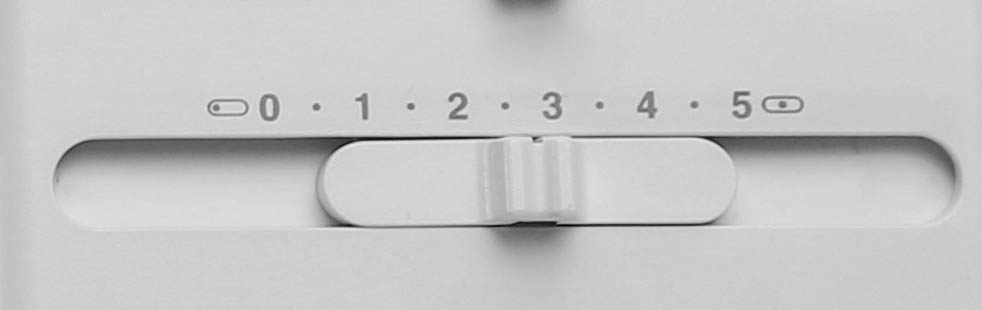
Needle tension
A slightly lower tension setting usually looks better, as it makes the stitch look flatter with no puckering and minimal tunneling.
Let’s look at some samples to see the difference:
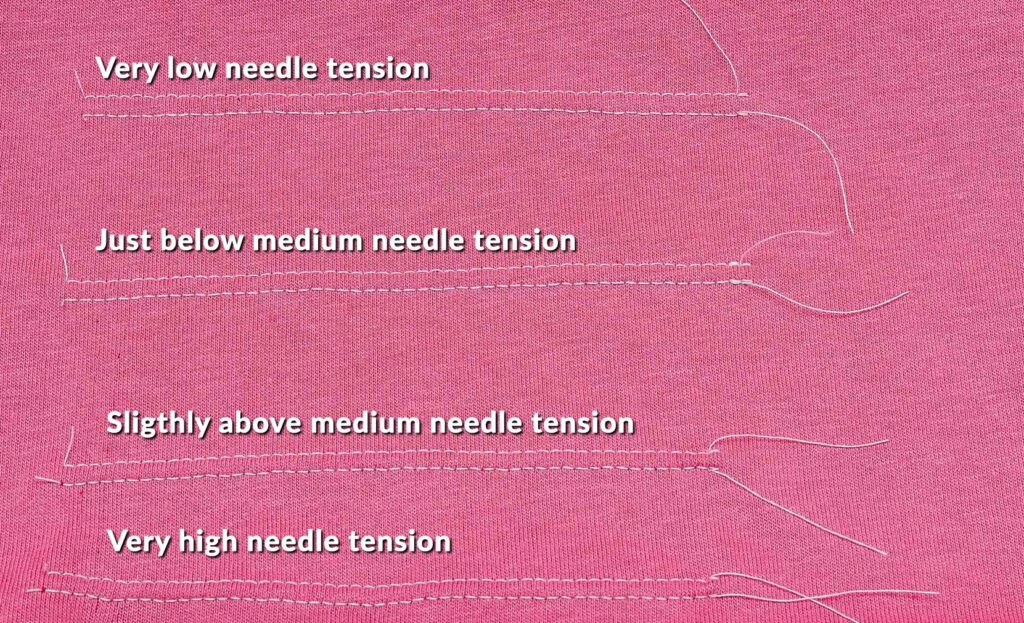
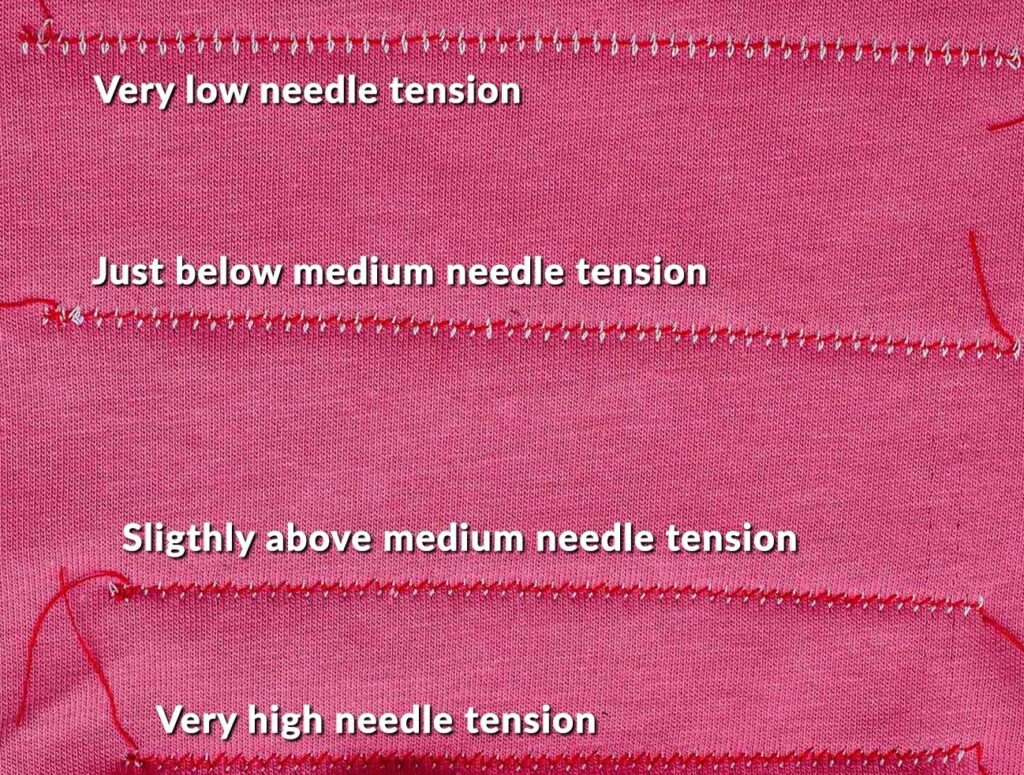
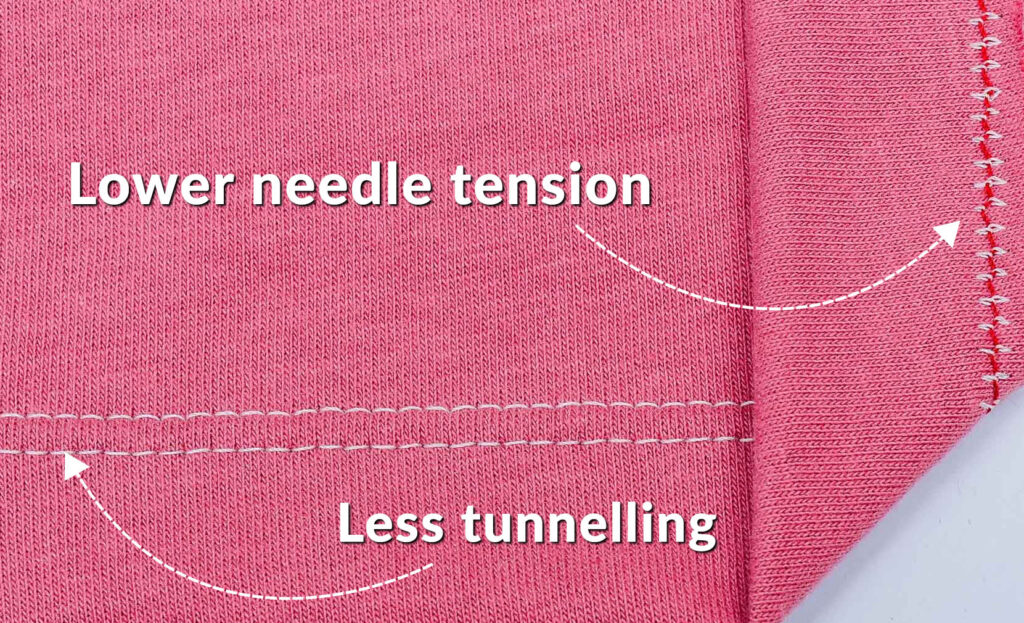
As you can see there will always be some trade-offs. A lower needle tension settings look better on the right side. But on the reverse side, there are some pretty pronounced needle thread loops.
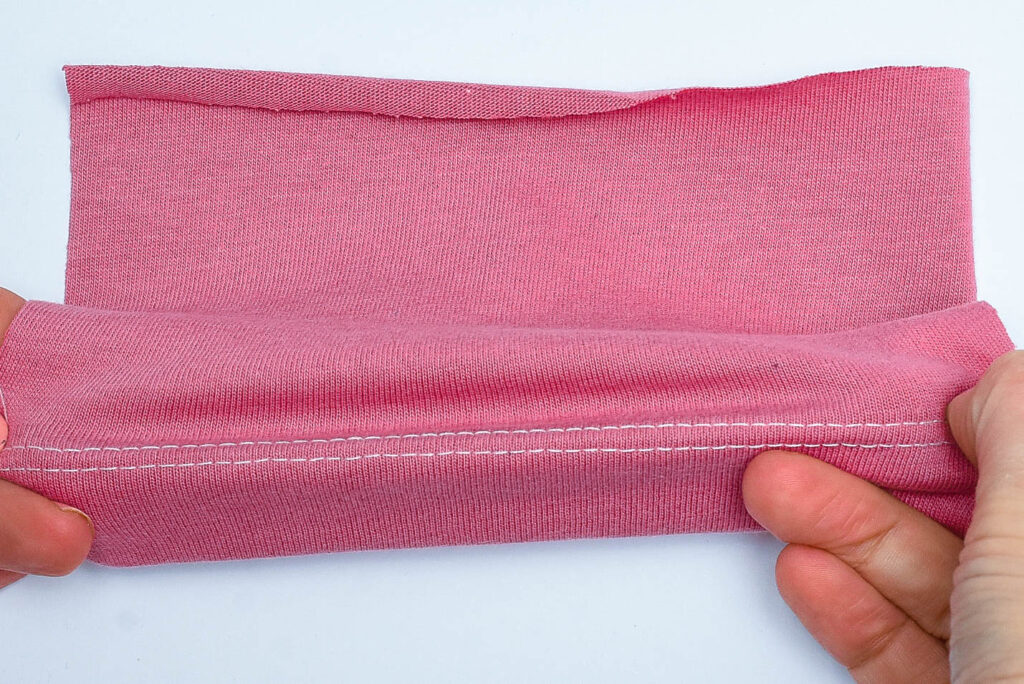
I’m personally not obsessed with achieving a perfectly balanced stitch on both sides when sewing with a twin-needle. Instead, I do a pull test to see how the seam behaves. If there is enough stretch, no popping, and minimal tunneling, then this trumps perfect tension in my humble opinion.
A word on back stitching
It’s sometimes advised to not backstitch when sewing with a twin-needle. I’ve personally back stitched over tricky areas with zero issues, for instance when I’m topstitching pockets. My guess is that this advice is based on the fact the threads can get easily tangled and that can mess up the stitch big time, which is why it’s super important to pull the threads back before sewing and do proper threading to make sure nothing wonky happens. But if you have any more insight on this advice, please share!
Troubleshooting common twin-needle problems
Stretched out fabric
A regular sewing machine tends to feed the upper layer slightly unevenly, especially when sewing knit fabrics since they are so malleable. This means that the seam can look a bit wobbly and stretched out, or there might be draglines (twisted fabric) along the edge, due to the uneven feeding.
That’s the main reason why a coverstitch machine will be superior for stretchy knits since you can adjust the feed dog speed with the differential feed setting. But by trying out the following suggestions, you will be able to at least reduce this issue.
1. Use double-side washable tape or stabiliser
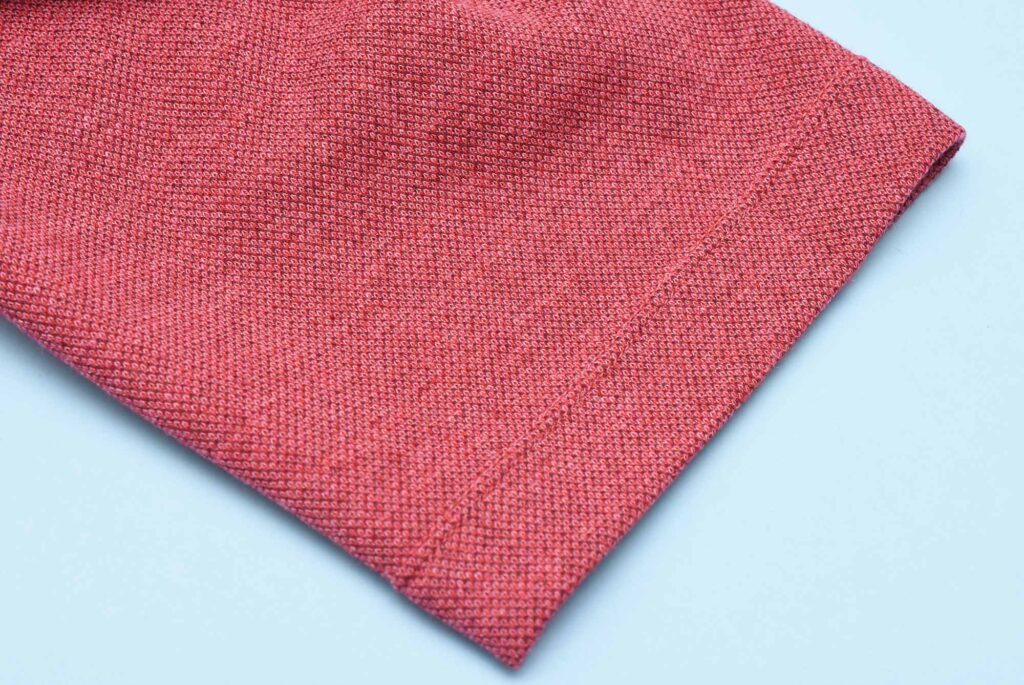
Thus can make a HUGE difference and is one of my favourite “hacks” to mitigate this issue. Check out our complete guide to Wonder-Tape to learn more about using washable stabilisers when sewing knits. If you don’t believe how effective Wonder-Tape can be, check out this pocket that I topstitched using washable tape:
See how smooth it lies, totally flat with no wobbly bits, despite the fact that the fabric is quite stretchy and has Lycra in it.
Get Wonder-Tape
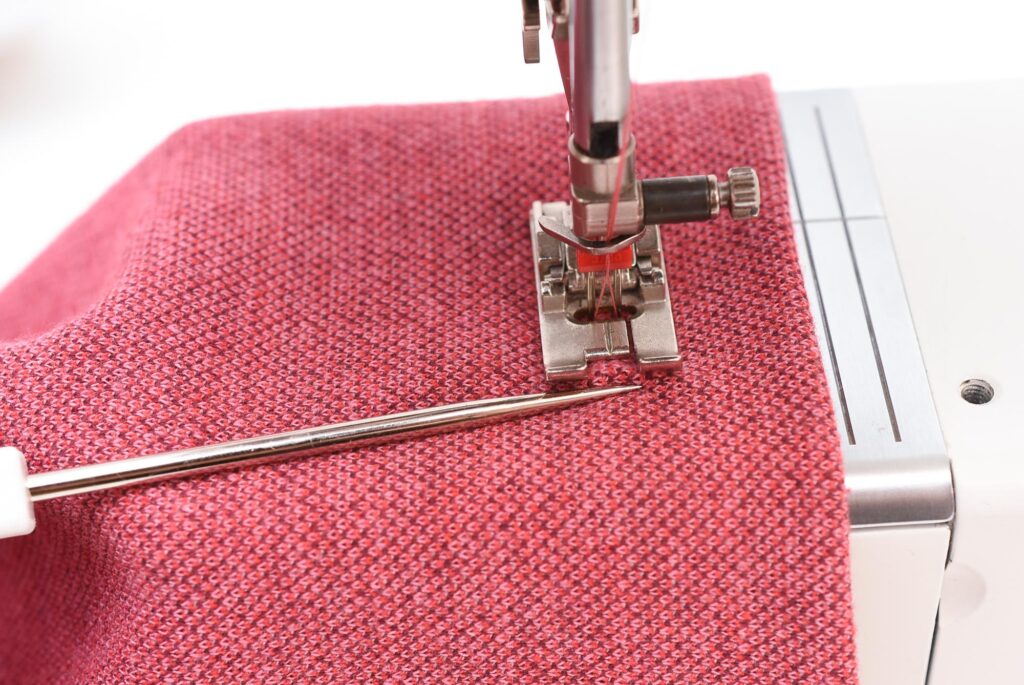
2. Feed the upper layer using an awl
This is another favourite technique of mine that’s so effective, it’s like magic almost! When stitching over the fabric, gently push the upper layer towards the presser foot in a rhythmic motion using an awl or another long and sharp device. This requires a little bit of practice since you’ll have to coordinate several things at once, but it’s so worth it!
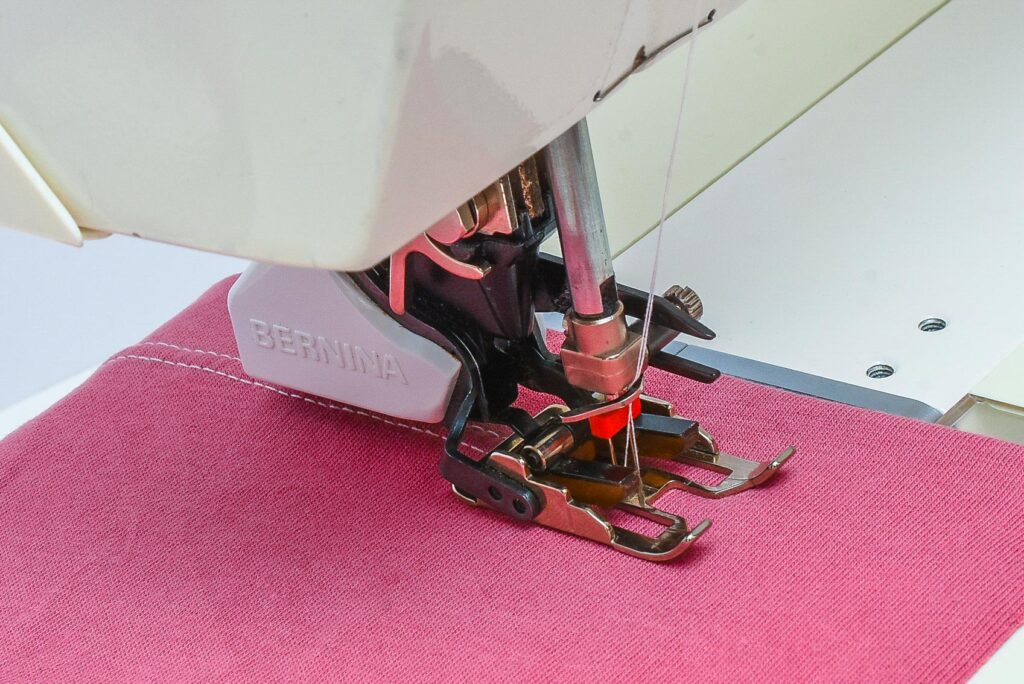
3. Use a walking foot
A walking foot essentially achieves the same thing as the awl method, as it feeds the upper and lower layer more evenly compared to a regular presser foot. I personally prefer the awl method since it gives me total control of the feeding, but many love the walking foot for hemming knits.
Tunnelling when sewing with a twin-needle
This is probably the number one complaint about the twin-needle, that you get this ridge between the two rows that almost looks like a pin-tuck, albeit unintended.
First, a little reality check, if you are sewing tight-fitting clothes in a thin, stretchy Lycra jersey, there is no way you’ll be able to get rid of the ridges completely. Even if the fabric looks flat enough while sewing, once you put the garment on and it’s stretched out, there will be some tunnelling. However, there are methods to minimise the issue, so let’s take a look at the options
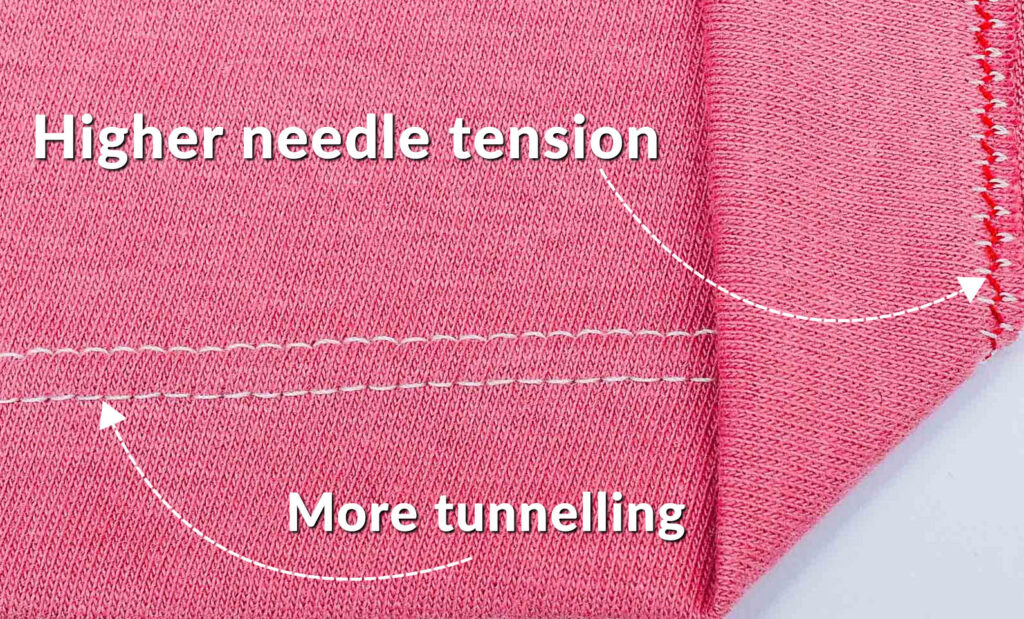
1. Reduce the needle tension
This will cause the fabric to lie flatter, as shown in the section above. But it will also make the tension look more uneven on the reverse side.
2. Stitch over the same amount of layers
While a twin-needle stitch that covers the edge of the fabric looks really neat on the reverse side, it will also increase the amount of tunnelling, since it’s sewn unevenly.
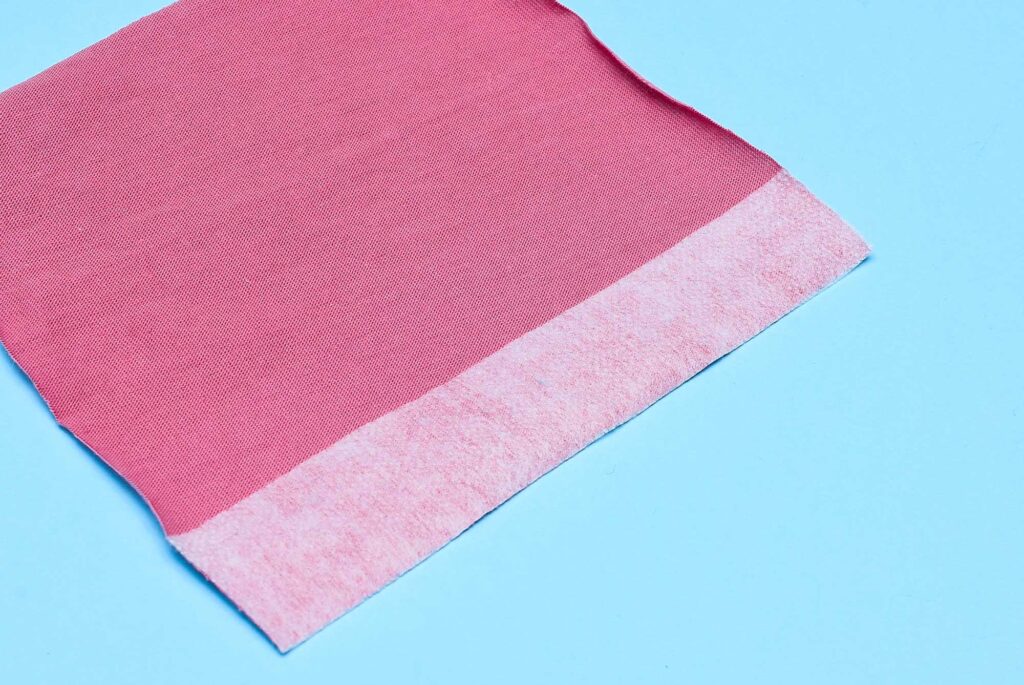
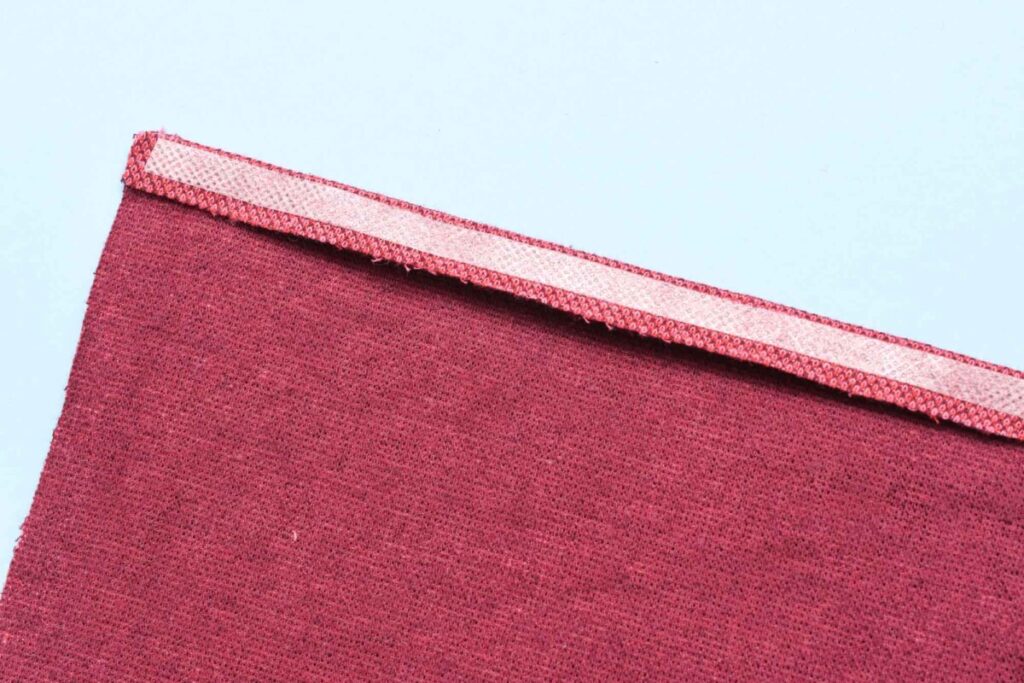
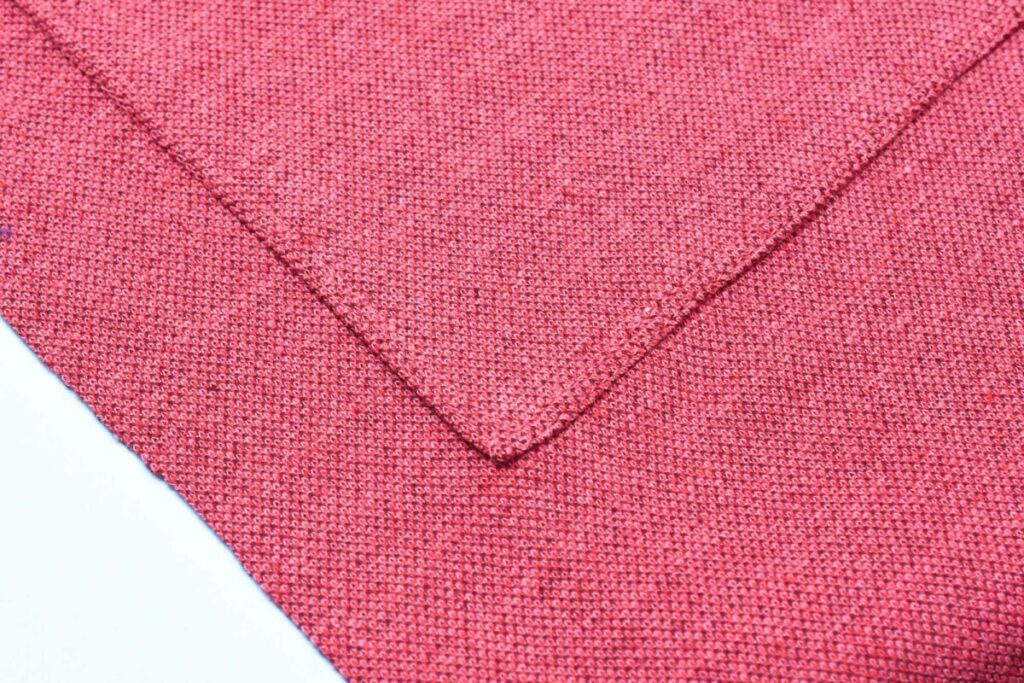
3. Use fusible stretch interfacing on the folded hem
This is extremely effective when it comes to preventing tunnelling. It will not work as well on synthetic fabrics or on super stretchy Lycra knits, but it’s worth testing out. To learn more, check out our guide to fusible stretch interfacing.
4. Experiment with the bobbin tension
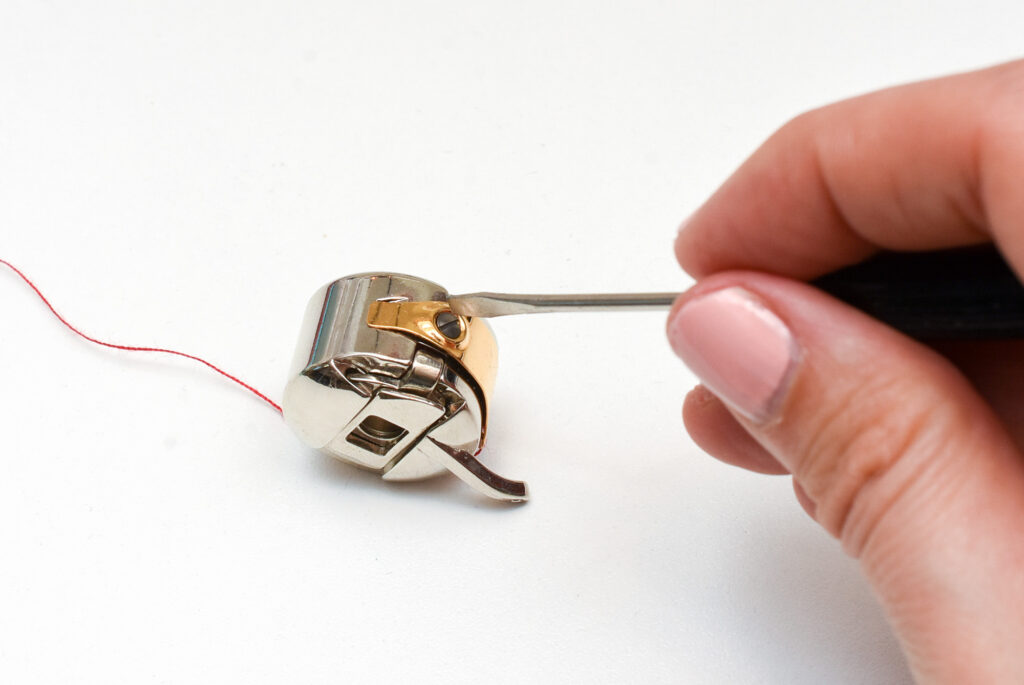
This should be a last resort and is only recommended if you have a spare bobbin that you can experiment with. So if the above suggestions are unsatisfactory, try adjusting the bobbin tension to see if it helps to remove the ridges. Usually, there is a screw that adjusts the tension, but be careful since a very small adjustment is normally enough.
What about washable or tear-away stabilisers?
To be honest, these are just a temporary fix for the most part. Because once you remove the stabilisers, ridges will likely still form when the fabric is stretched out. So before you start using them, do a sample, remove the stabilisers and stretch out the sample to see if there are any tunnelling.
Seams that pops
This is an easy fix. Just decrease the stitch length to get more stretch out of your twin-needle stitch.
Skipped stitches
Super annoying, but oh so common. Luckily there are several ways to fix this issue.
1. Use a stretch knit ballpoint twin-needle
The special ballpoint tip will penetrate knit fabrics better and reduce the risk of skippe stitches.
- Schmetz Stretch Twin-Needle
- Organ Stretch Twin-Needle
- Groz-Beckert Stretch Twin-Needle (Amazon affiliate links)
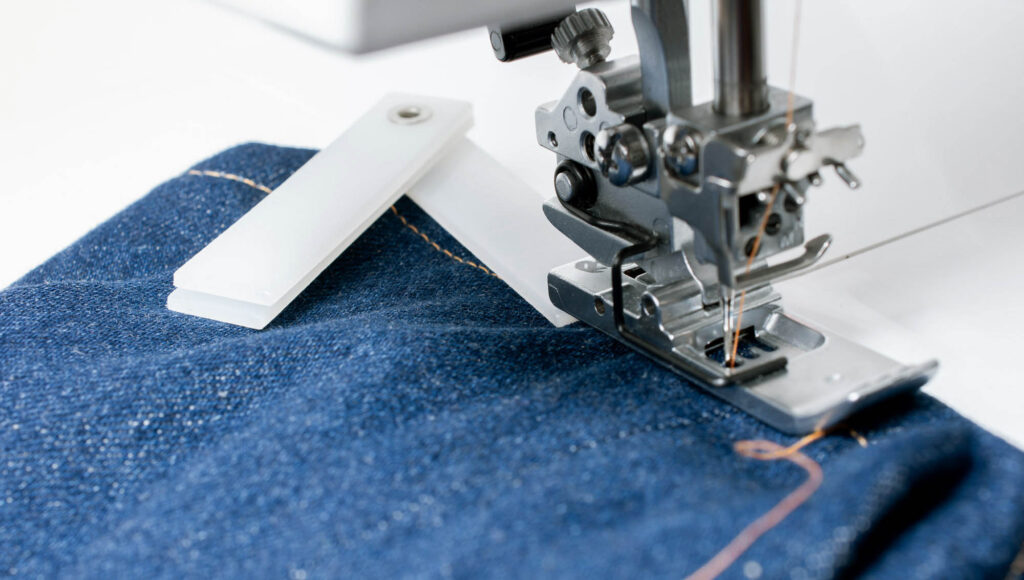
2. Flatten uneven surfaces
Skipped stitches usually occur when the presser foot is elevated, such as when you stitch over bulky seams. Try these methods to flatten the surface.
3. Clip the seam allowance
Cut a small snip in the seam allowance and fold it in opposite directions. This will balance the surface.
4. Hammer down the seam
Using a rubber mallet, gently hammer on the seams to remove bulk and flatten the seams. This is perfect of areas where several seams intersect, and just clipping won’t cut it, so to speak
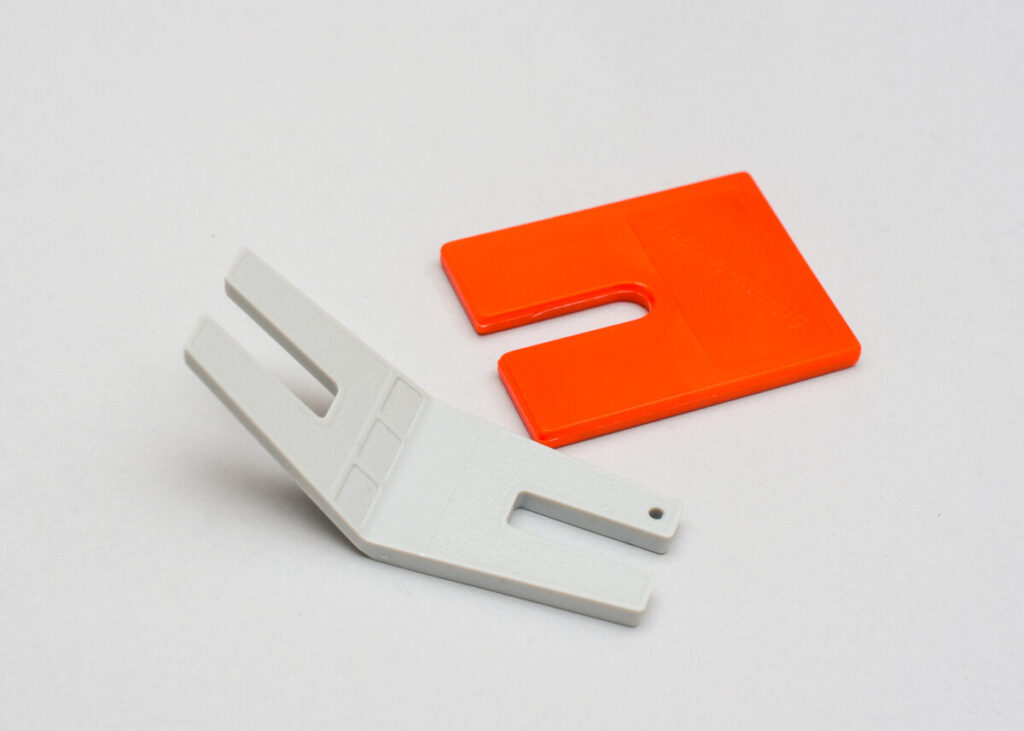
5. Use a height compensation tool
Also, called hump-jumper, insert the tool underneath the presser foot so that it stays horizontal, even when sewing over uneven areas.
Get a height compensation tool
- Hump-Jumper/Button tool
- Jean-A-Ma-Jig (Amazon affiliate links)
- Bernina Height Compensation Tool (has three levels)
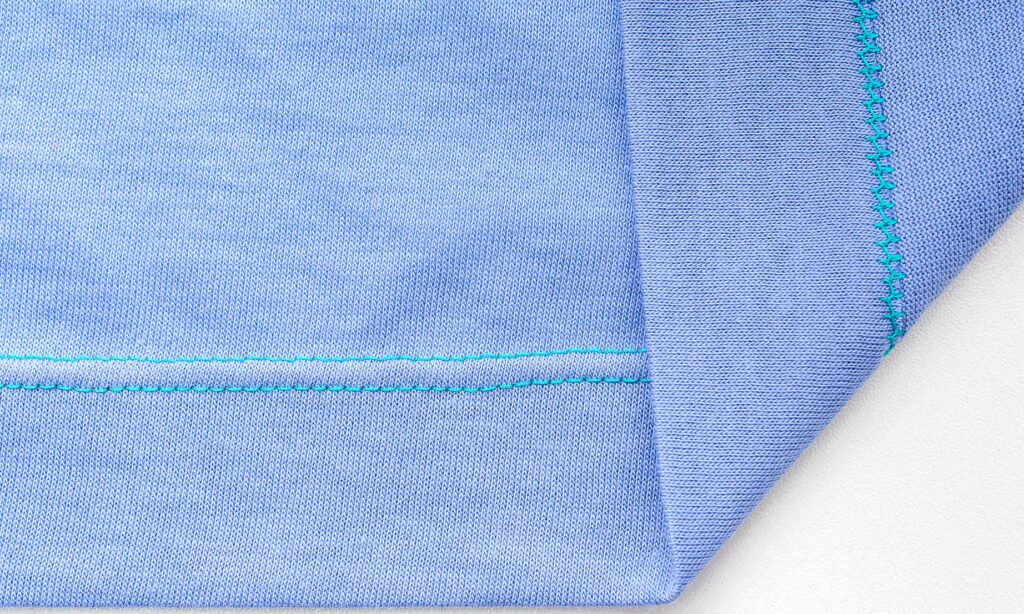
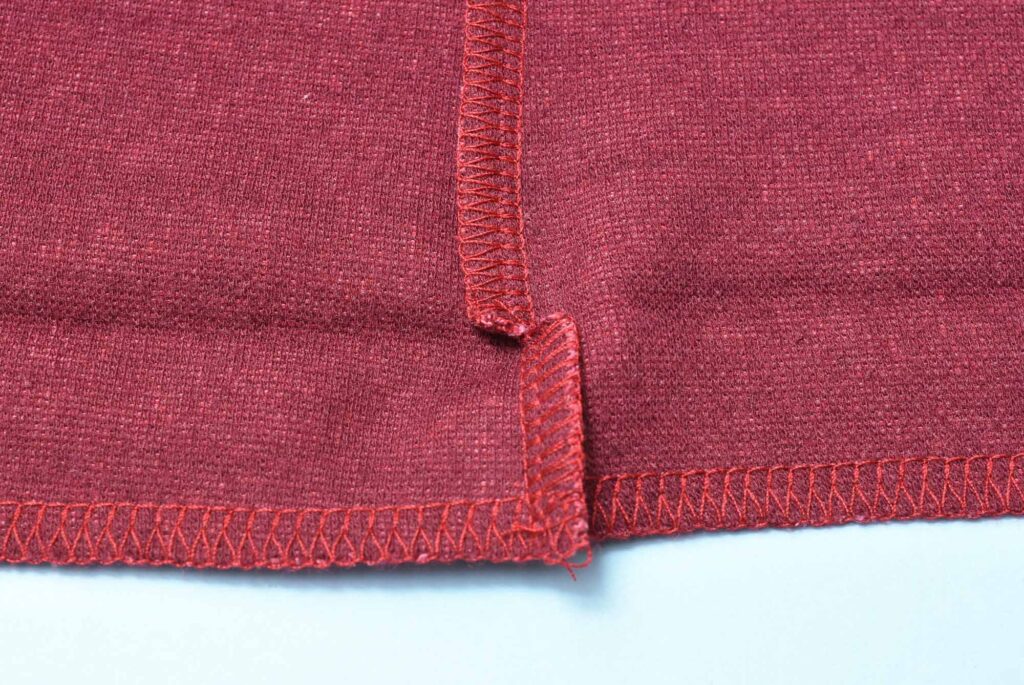
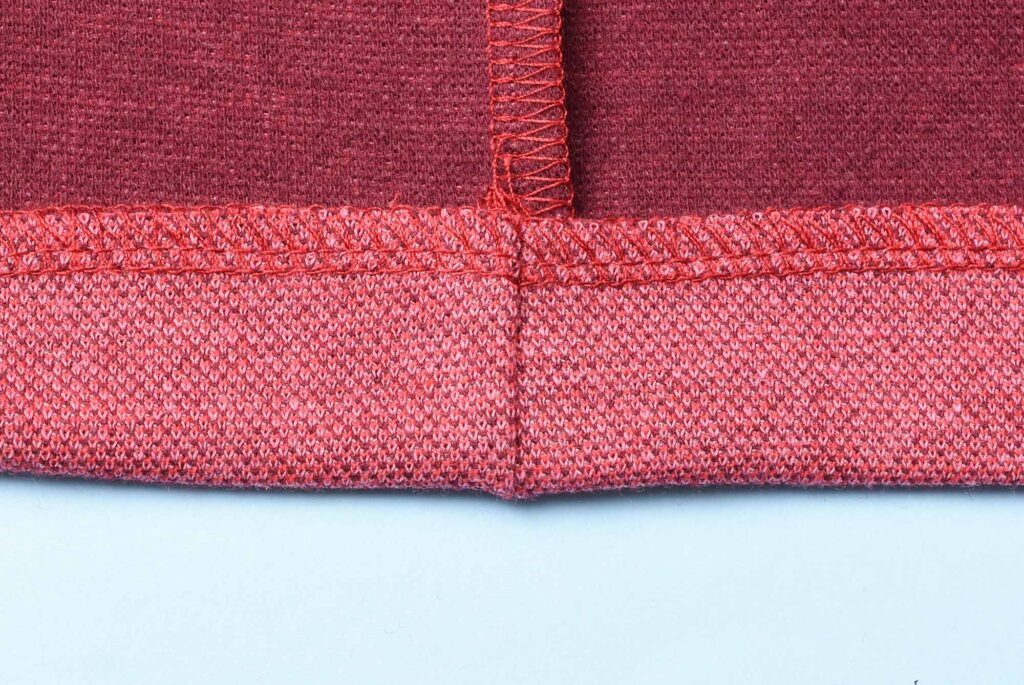
Make it look professional
Do you have a serger? Then I strongly recommend that finish the edges with a wide 3-thread or 4-thread overlock stitch before using the twin-needle. This will make the inside look super neat and pretty, plus it prevents the fabric edge from curling. Plus I find it can prevent some tunnelling too. So this is the perfect combo if you have a serger but not a coverstitch.

And speaking of coverstitching, check out our guide to coverstitch machines if you want to take your hemming to the next level.
Want to learn even more about sewing knits with a twin-needle? Then check out this video, that is packed with useful tips
Hope you found this guide to sewing knits with a twin-needle useful. By following the suggestions in this tutorial, you’ll achieve a really great end result, even on really stretchy knits.
This post contains Amazon affiliate links, meaning that a commission is earned from qualifying purchases.

12 Comments
Esther Lara Suriñach
Thanks Johanna! Very useful! I will try again next time I sew a knit garment. Until now, twin needles and I haven’t got along well at all!
Sarah T
This is very helpful. I have one tip to add: when troubleshooting, try swapping the order of your two thread sources. I was getting tangles and swapping the reels of thread around fixed it. Of course I forgot to write down which way round it was or take a photo – whoops!
Maureen Blair
Hi Johanna,
Love you tutorials.
My number one tip for sewing with a twin needle – make sure the needle position is in the middle before you start! I have wrecked two twin needles and the timing on my machines because I failed to do this.
Regards
Maureen Blair
Angela
Can you do this with any kind of sewing machine?
Elizabeth Rowe
Hi Johanna, I love working with knit fabrics and making t’shirts etc. I have experienced problems with getting the perfect result with hemming on sleeve hems and hem on the t’shirt. Have been practicing on t’shirts that I have had for awhile and been worn a number of times. What I am experiencing is the hemming is causing the fabric to get waves in it and I have tried Heat n Bond soft stretch fusible web adhesive lite tape and still happens. Have tried Birch fusible interfacing multi stretch and on my machine used twin needle stretch one, have tried walking foot, have changed the tension and needle settings and still cant find the right way of achieving best results. Have also just used a zig zag and the stretch setting on my machine. My machine is a Janome 2160DC and its a mid range. I think that I will be getting a Cover Stitch machine so as I can get my results before starting out to do new projects. I have been sewing for a very long time and I had a Elna computerized sewing machine along which could do what I wanted but alas can not get parts now for it. I have had this machine since the 90’s it has had a service but quite a long time ago now and not used it again. I do have an Elna Serger which was bought around the same time and still using that also. Love watching your Videos have learnt alot too.
Jan Ins
I have just made my husband t-shirt, using a twin needle for the first time. Being male, he is a bit rough with the way he removes his t-shirts, and I found that the stitches popped close to where I had back stitched at the start of the row. I assume this is because, with the overstitching there is no stretch on that part. Next time, I will omit the overstitching and will knot the threads loosely on the back.
Ellie P
Hello, does using a twin needle stop my fabric from coming undone the way a cover stitch machine does?
Comments are closed.