This tutorial for sewing a jeans waistband closely mimics the method used in the garment industry. But with one little twist; my own fail-proof way to construct a waistband that looks as nice on the inside as it does on the outside. Which is, to be honest, probably the biggest struggle for many of us home sewists. And by the way, you can use this method for any type of trouser waistband, not just jeans.
Tools for sewing a jeans waistband
- Topstitching thread
- Edge presser foot
- Jeans or topstitching needles
- Wonder-tape (water-soluble double-sided tape, Amazon affiliate link)
- A quilting ruler/seam guide (not necessary, but it helps)
- A plier tool (to shorten the zipper)
- Fusible interfacing (light to medium weight)
Learn more: 8 Great Tools and Notions for Sewing Jeans
Preparation and assembly of the jeans waistband
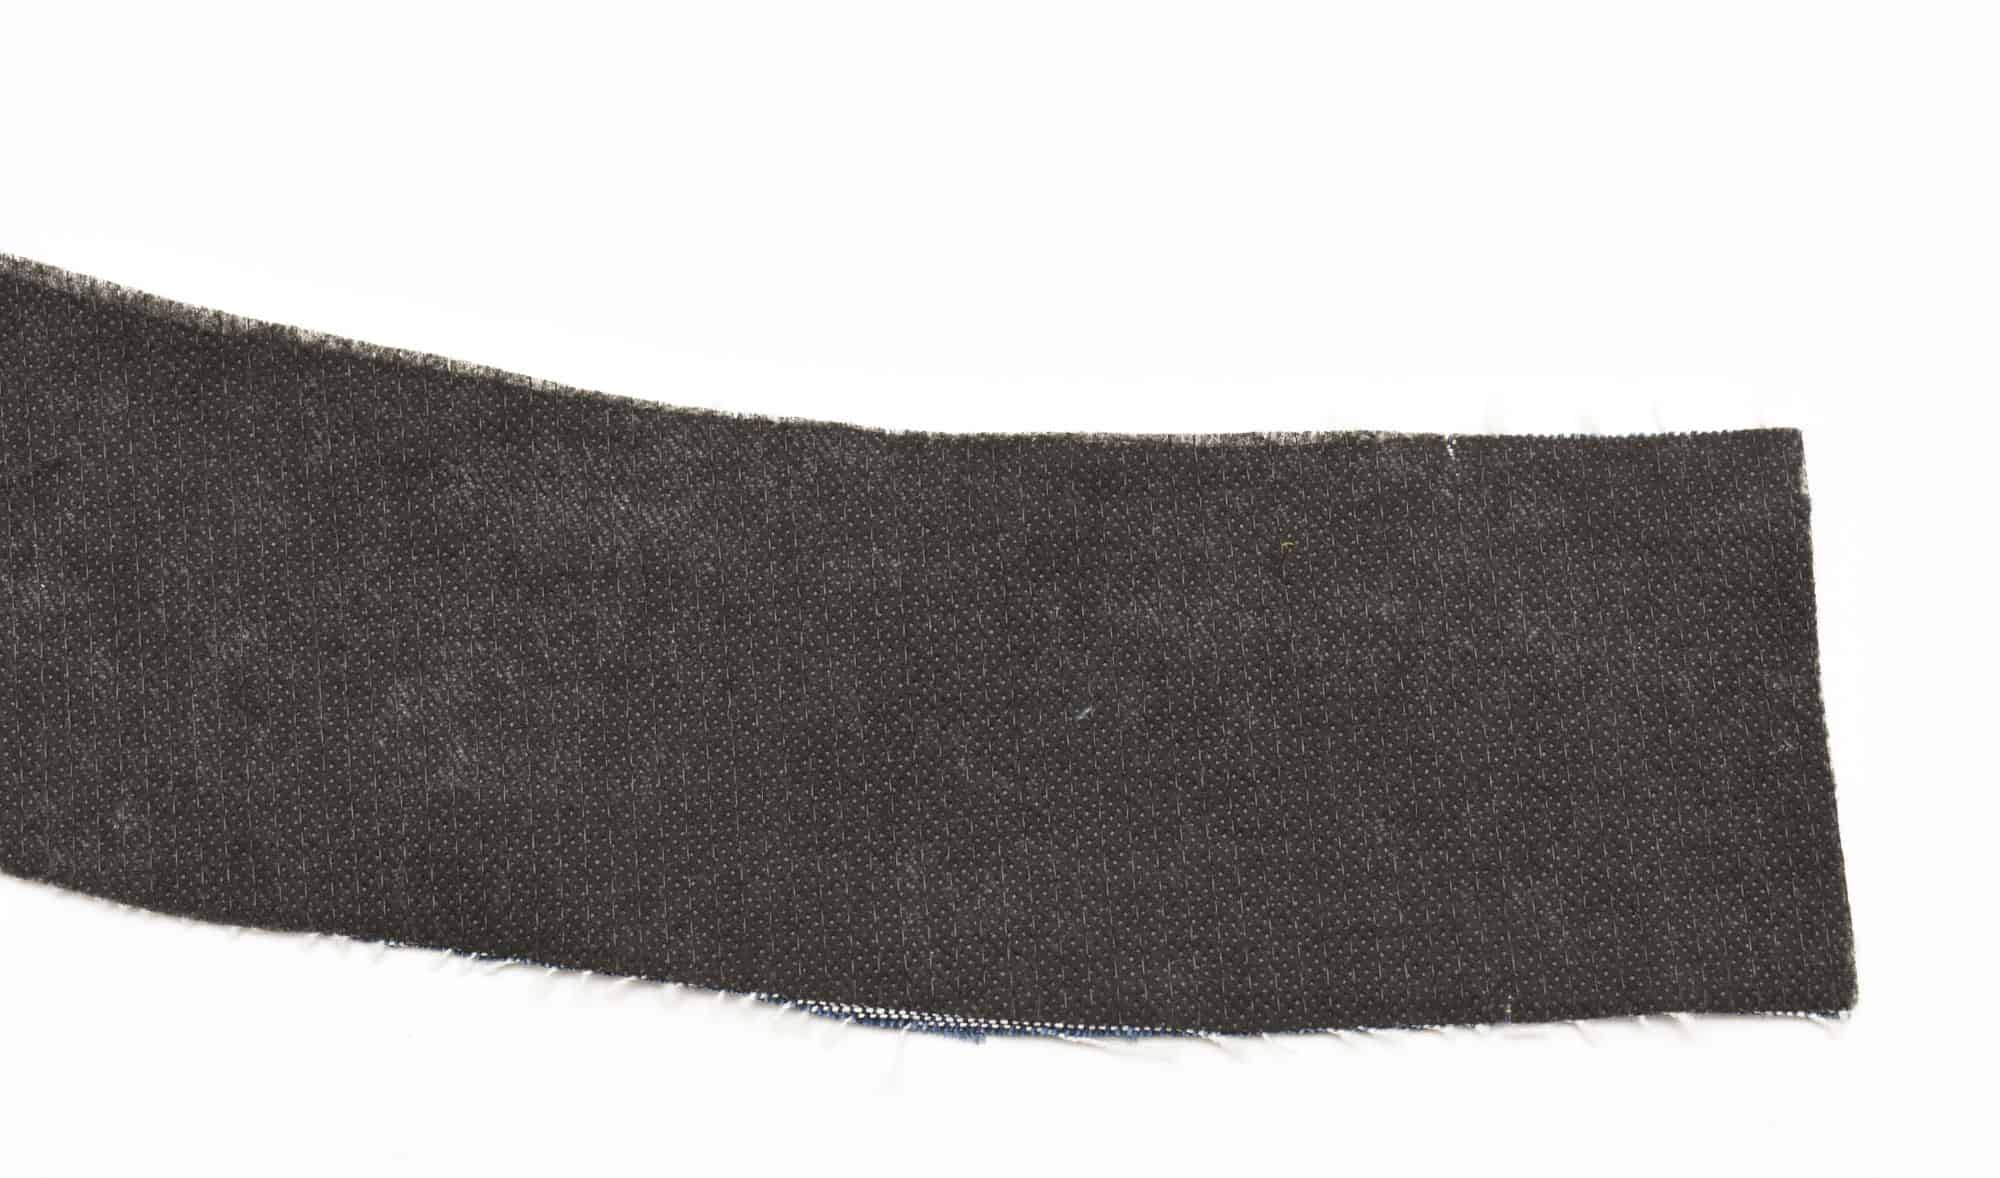
1. Interface the inner waistband pieces
I like to use a fairly lightweight knit fusible with some give, but use whatever you prefer.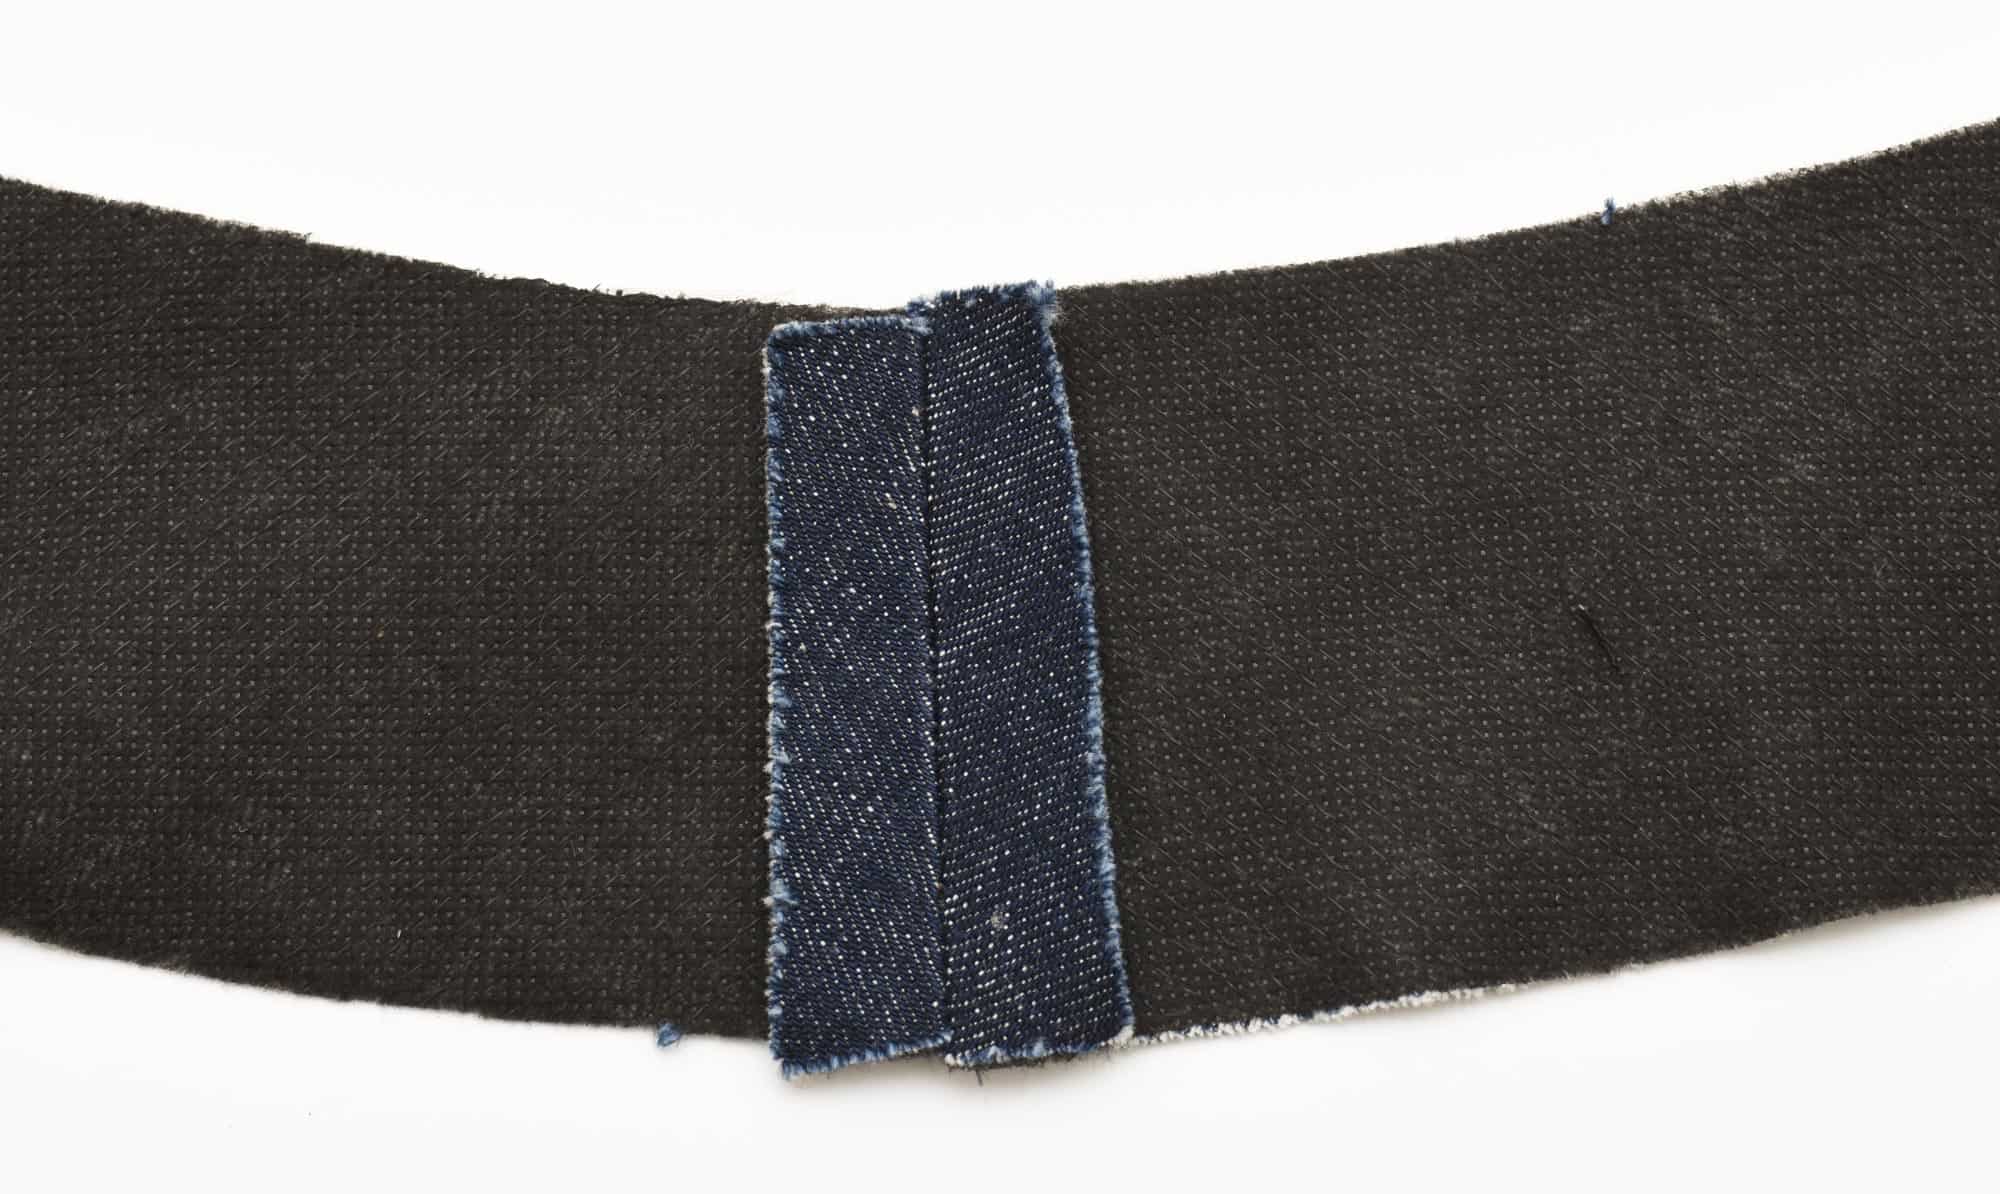

2. Sew the side seams of the inner and outer waistband pieces
I’m using a curved waistband in this example. If you are using a rectangular waistband you will not need to sew any side seams obviously. Press the seams apart. 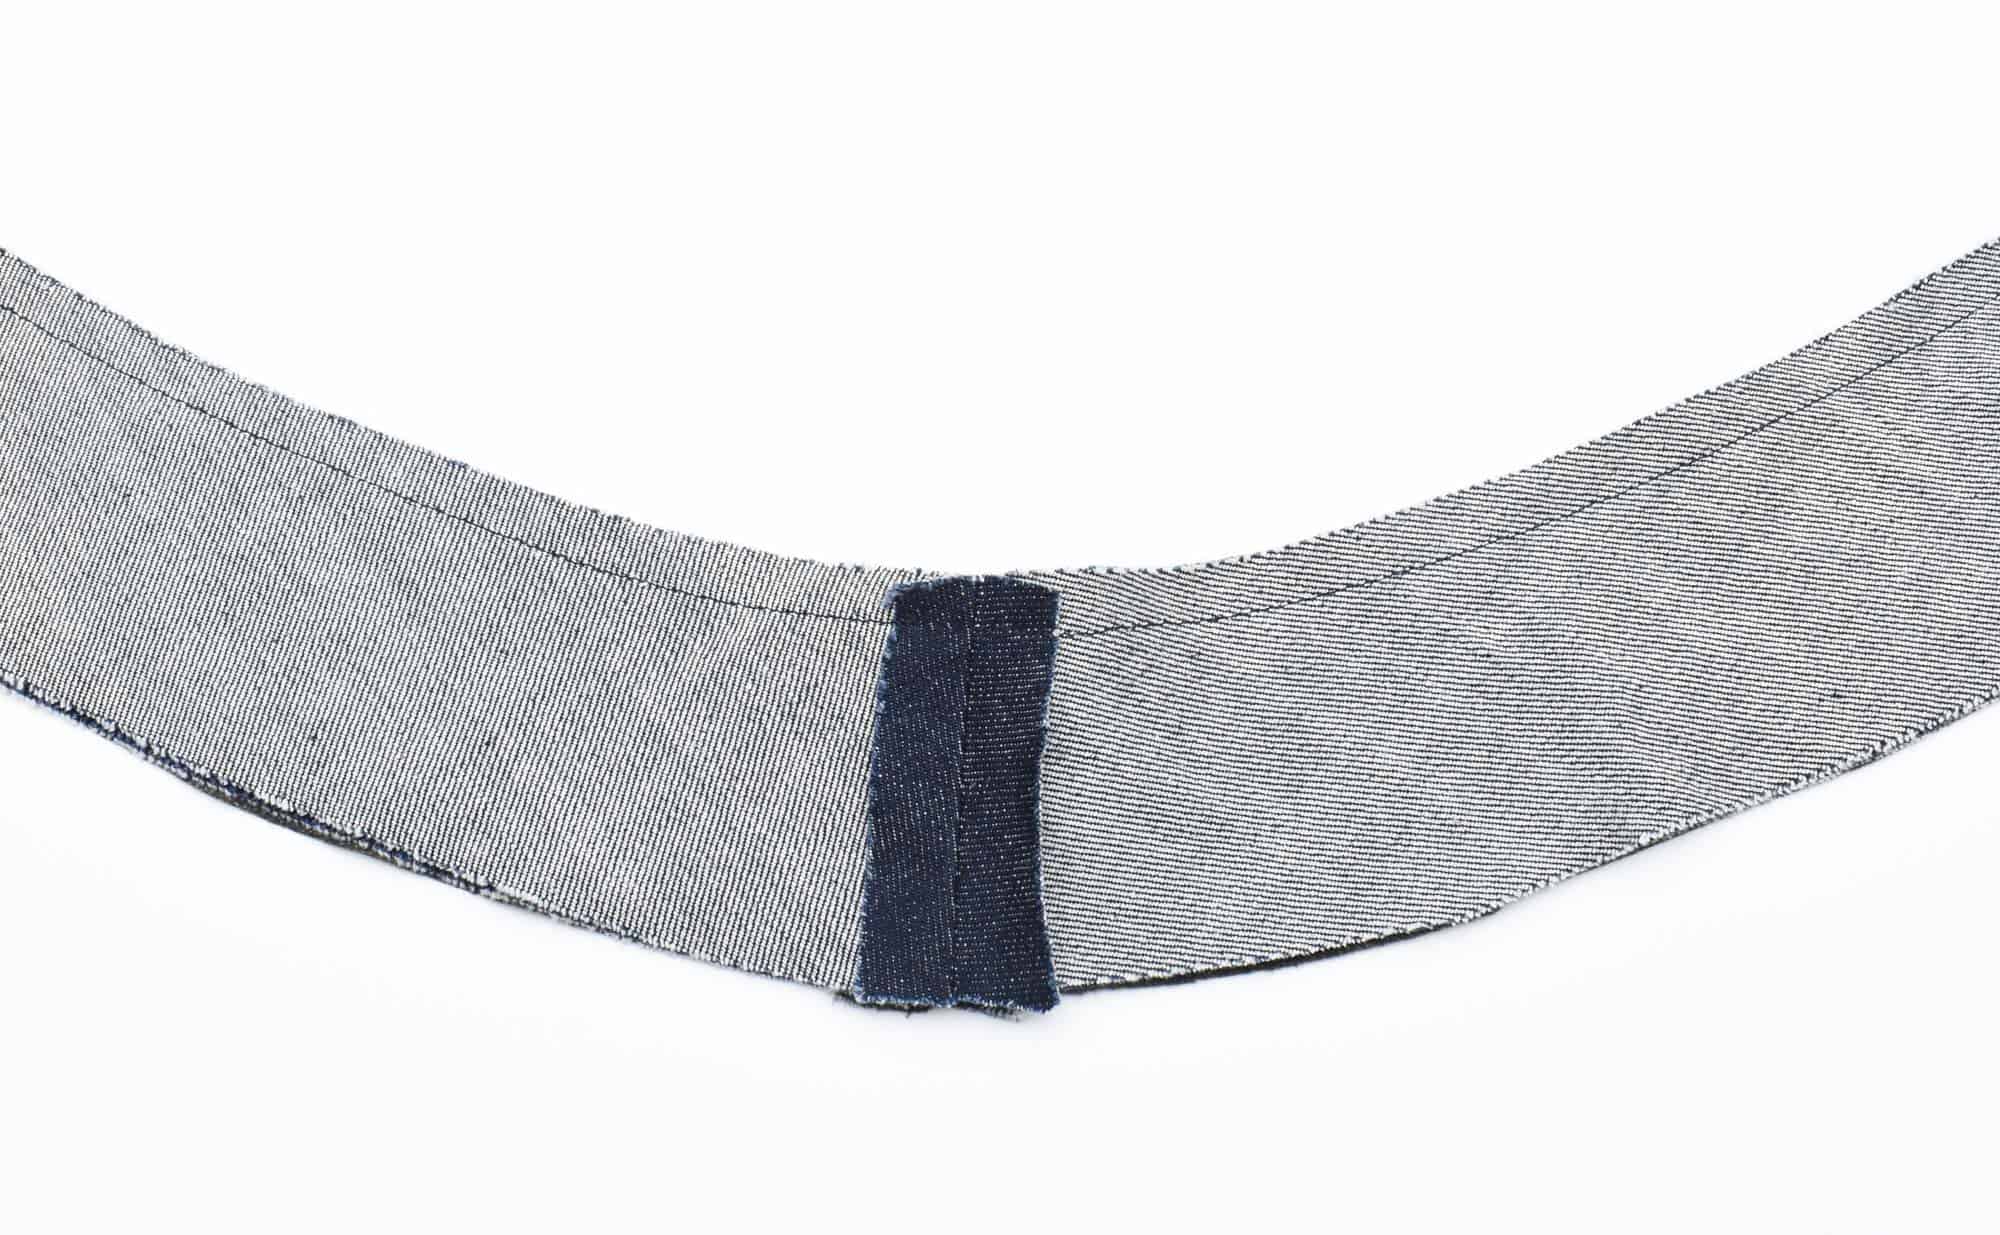
3. Stitch the outer and inner waistband together
I prefer to use a 1 cm (3/8 in) seam allowance on the waistband, more will create unnecessary bulk and less will be harder to control.
4. Press open the seam allowance
This will ensure the waistband will be evenly folded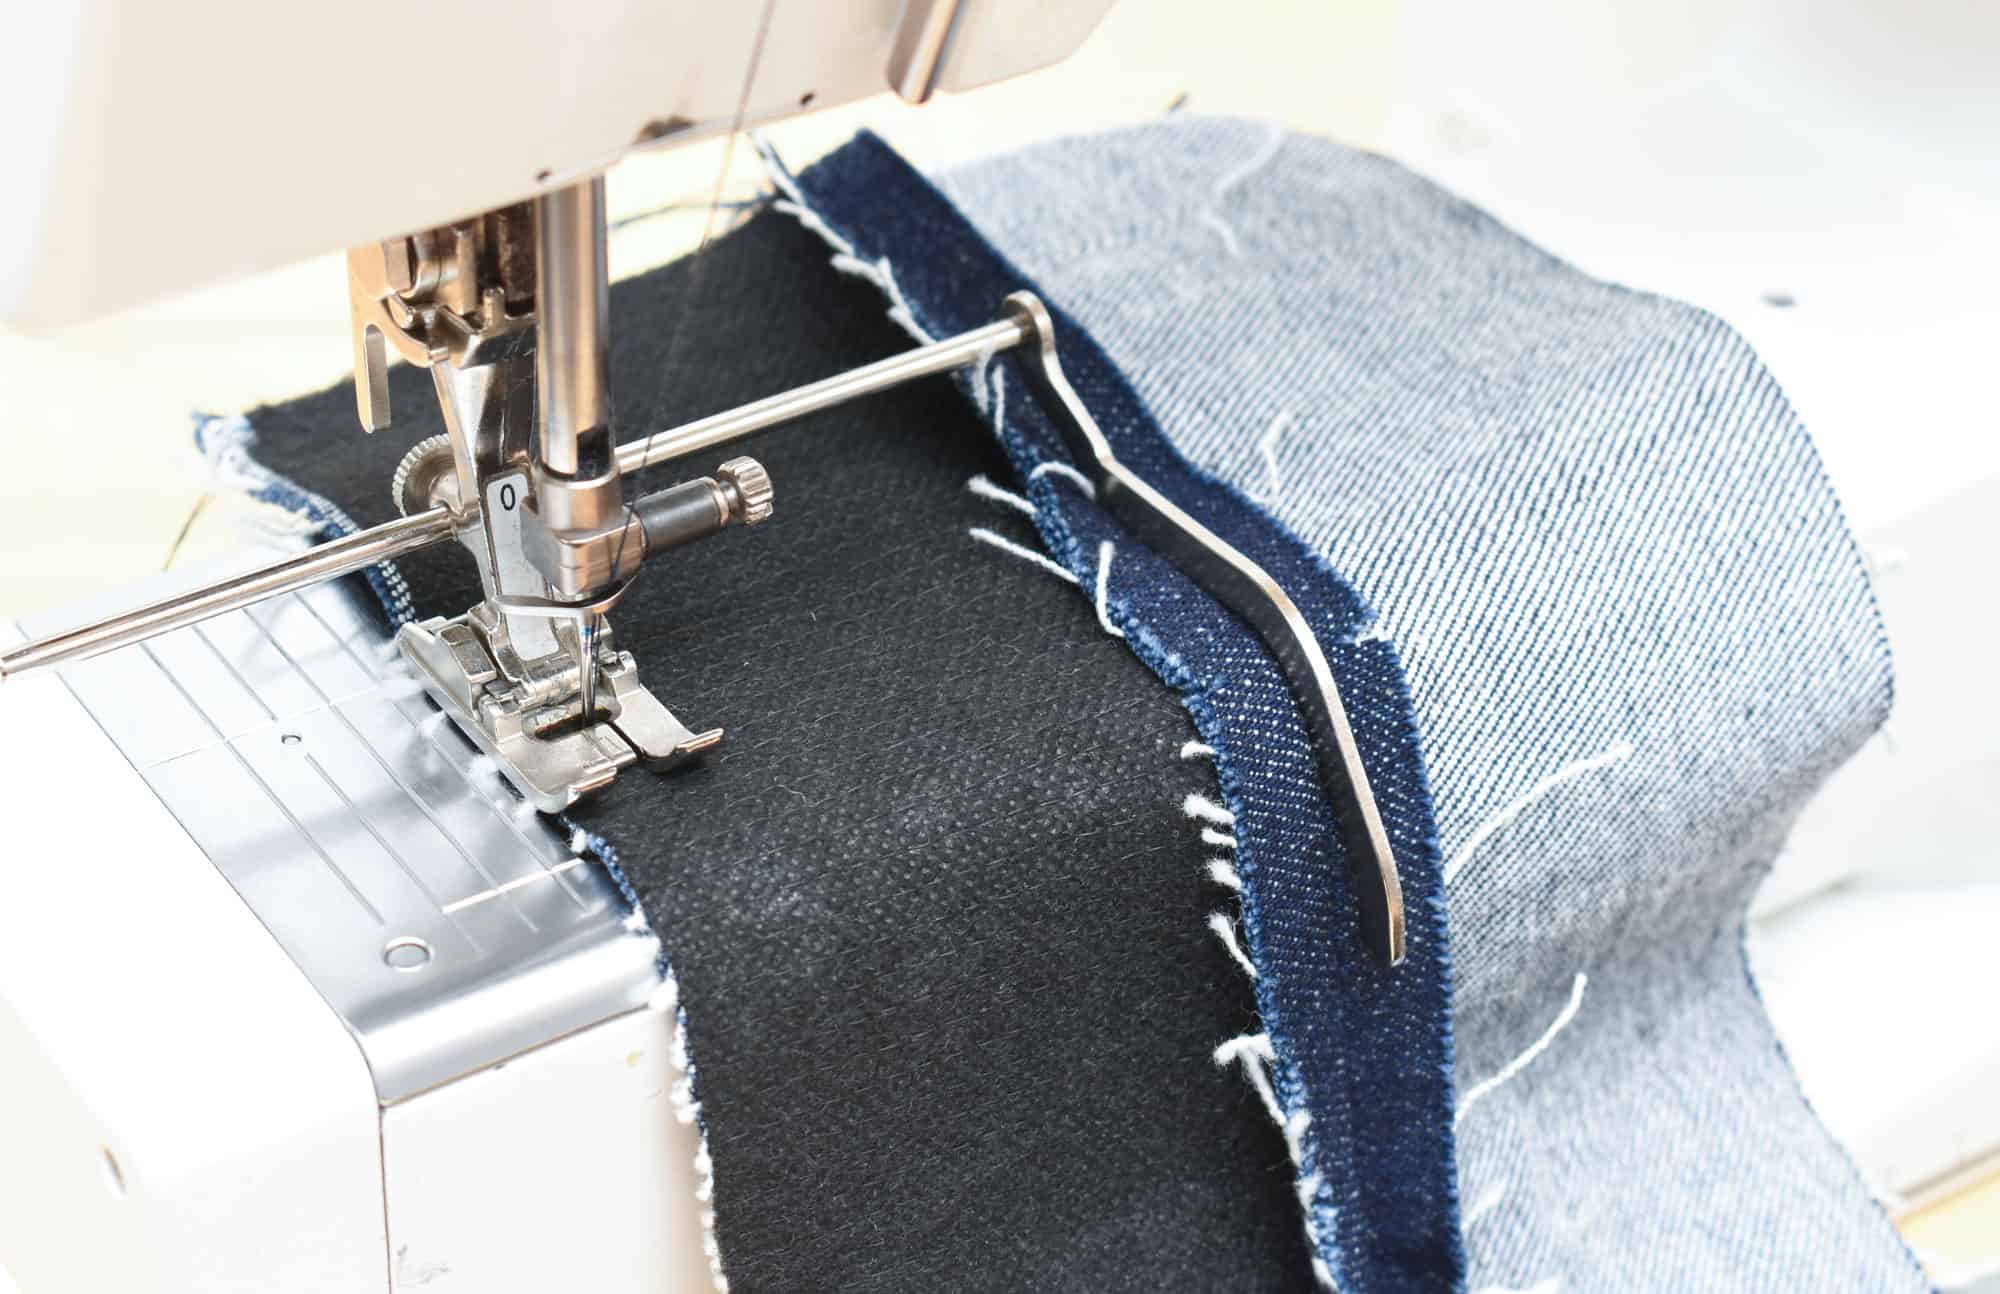
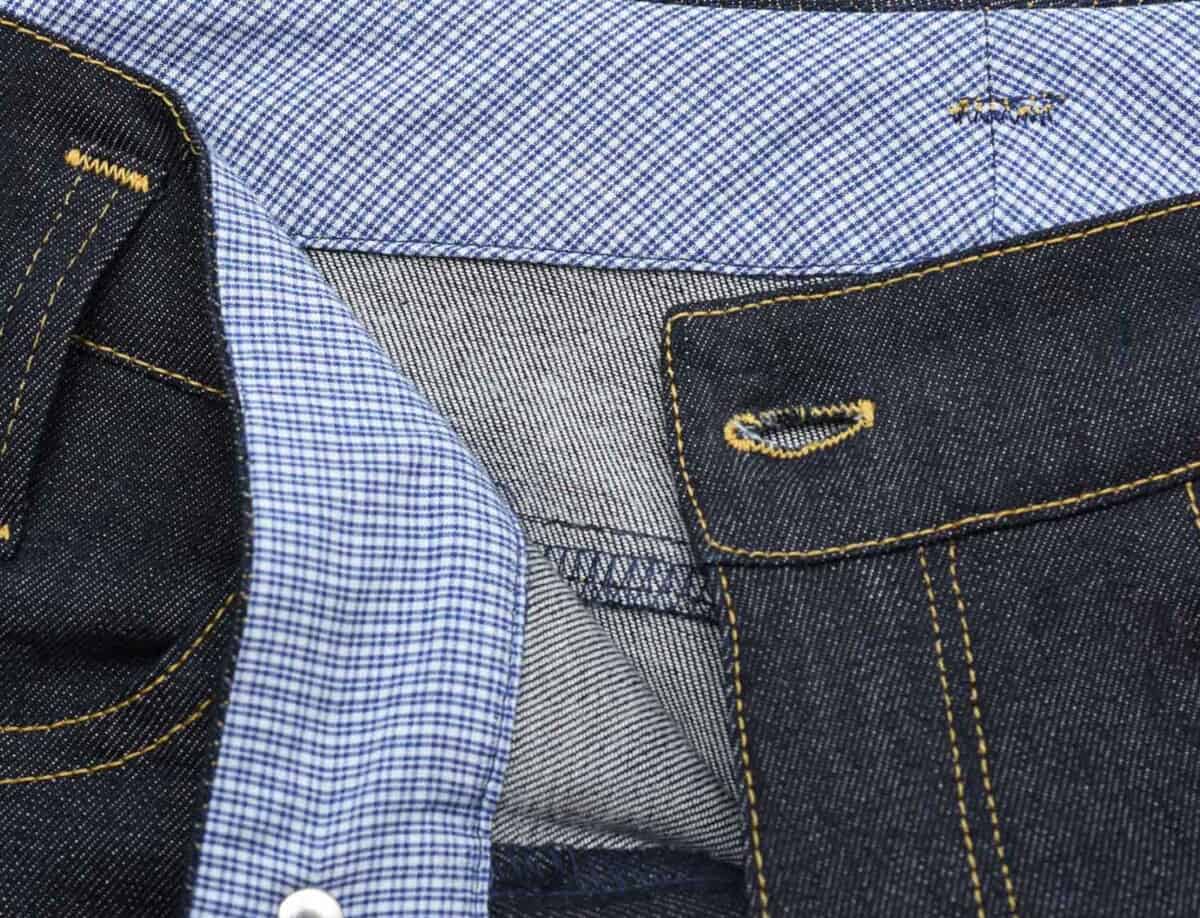
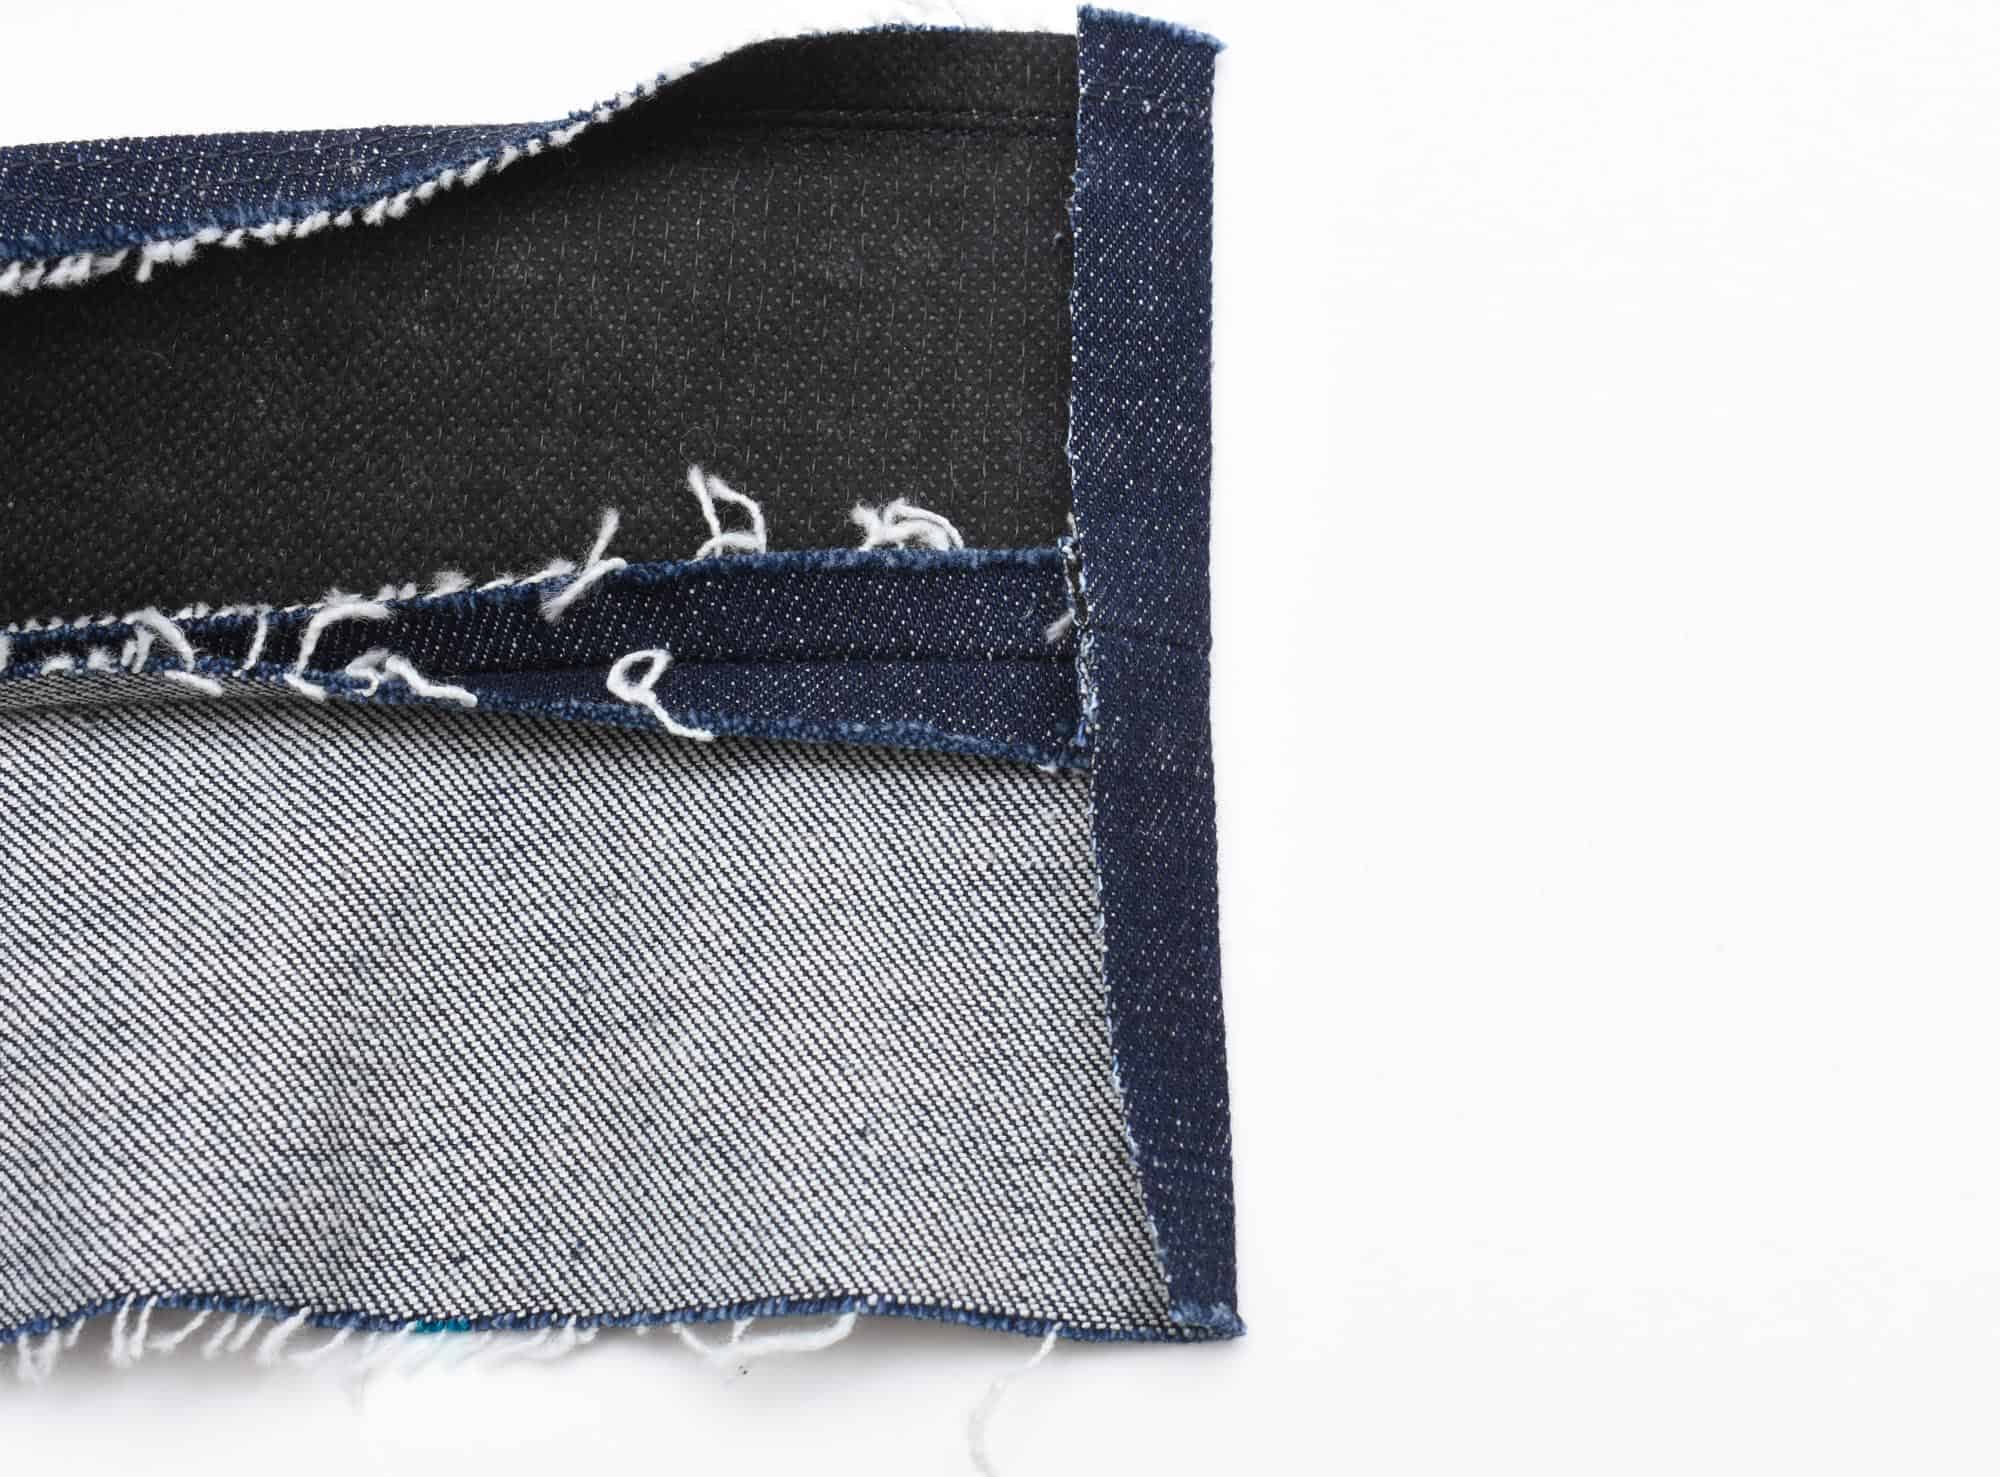
5. Stitch a fold line on the lower edge of the inner waistband
This will help you create an even, crisp fold which will help immensely with the look of the inner waistband. Again the seam allowance should be around 1 cm (3/8 in). Use a regular straight stitch for this step.
Tip: Using a quilting ruler in the ditch of the waistband seam to ensure a consistent waistband width. This is a good tool to use if your waistband has some slight width variations due to uneven cutting or distortion caused by bias cutting.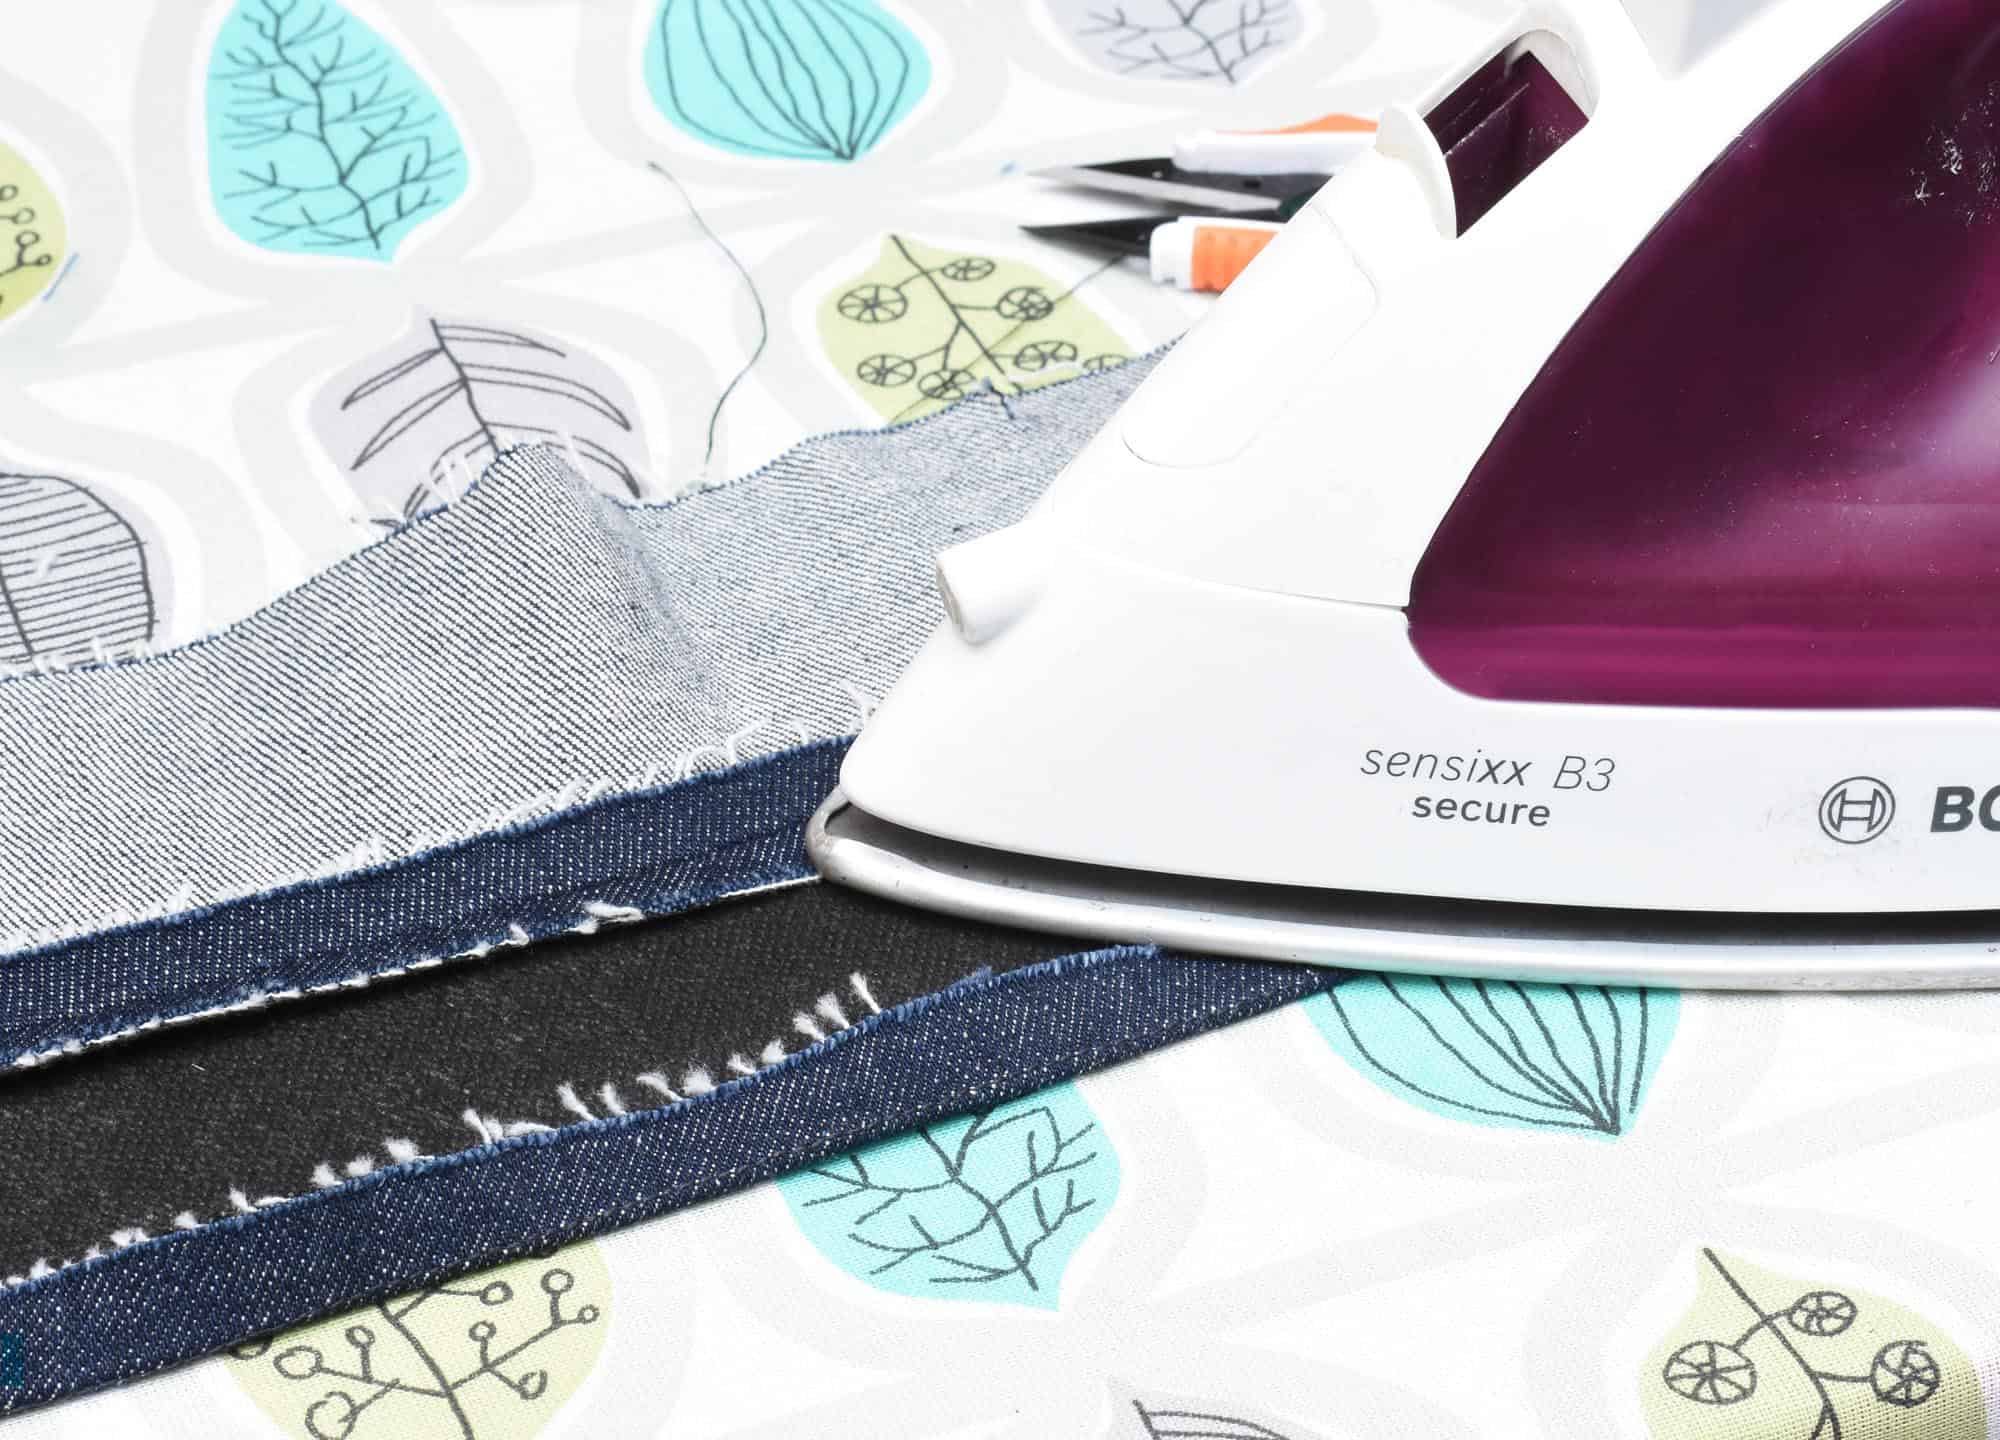
6. Fold and press the seam allowance
Use the stitched line as your folding guide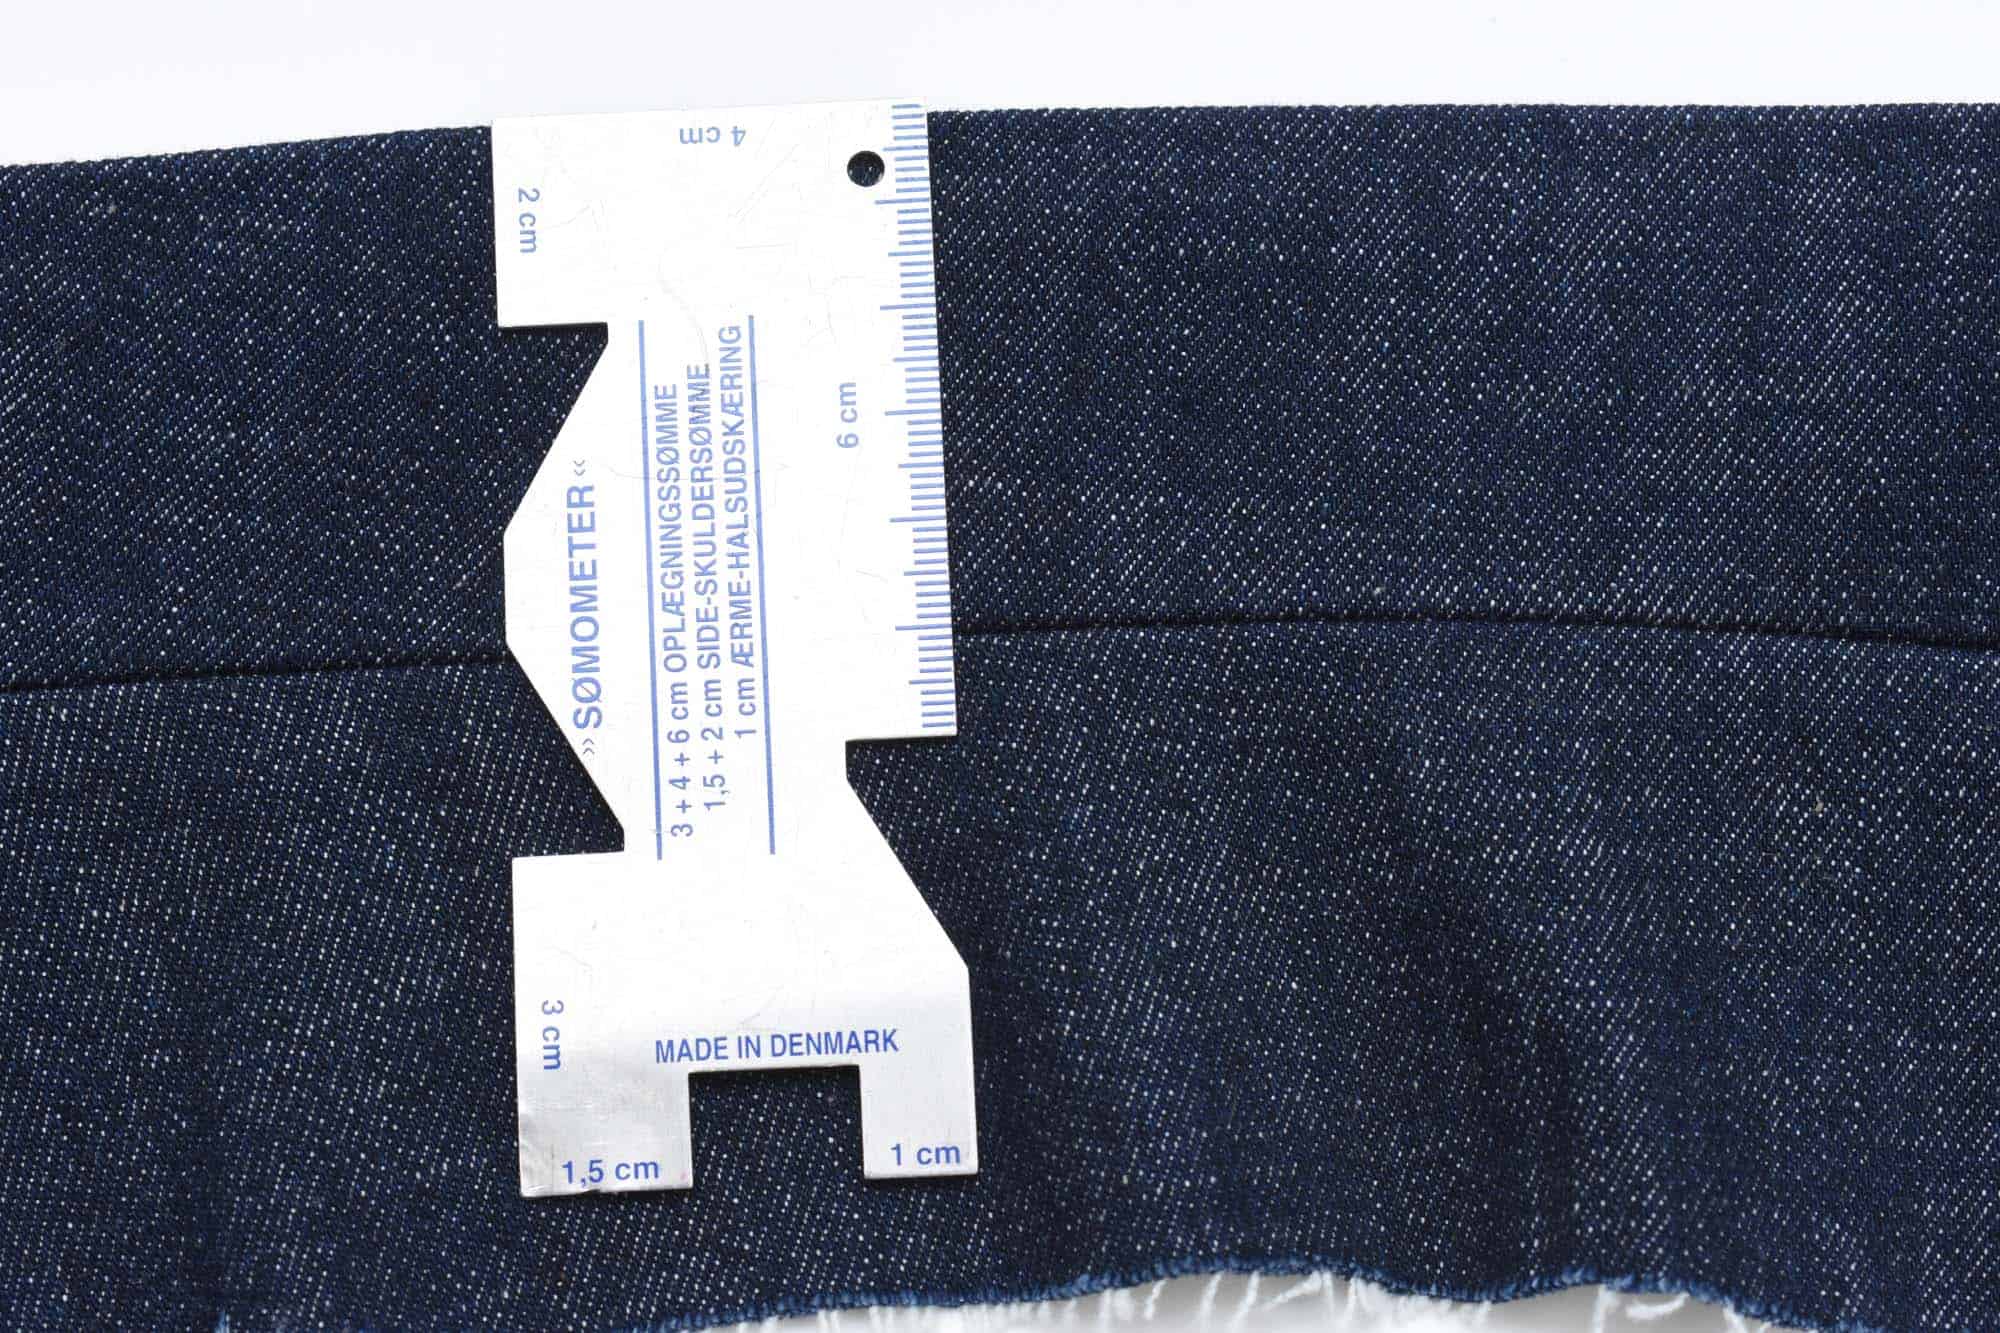
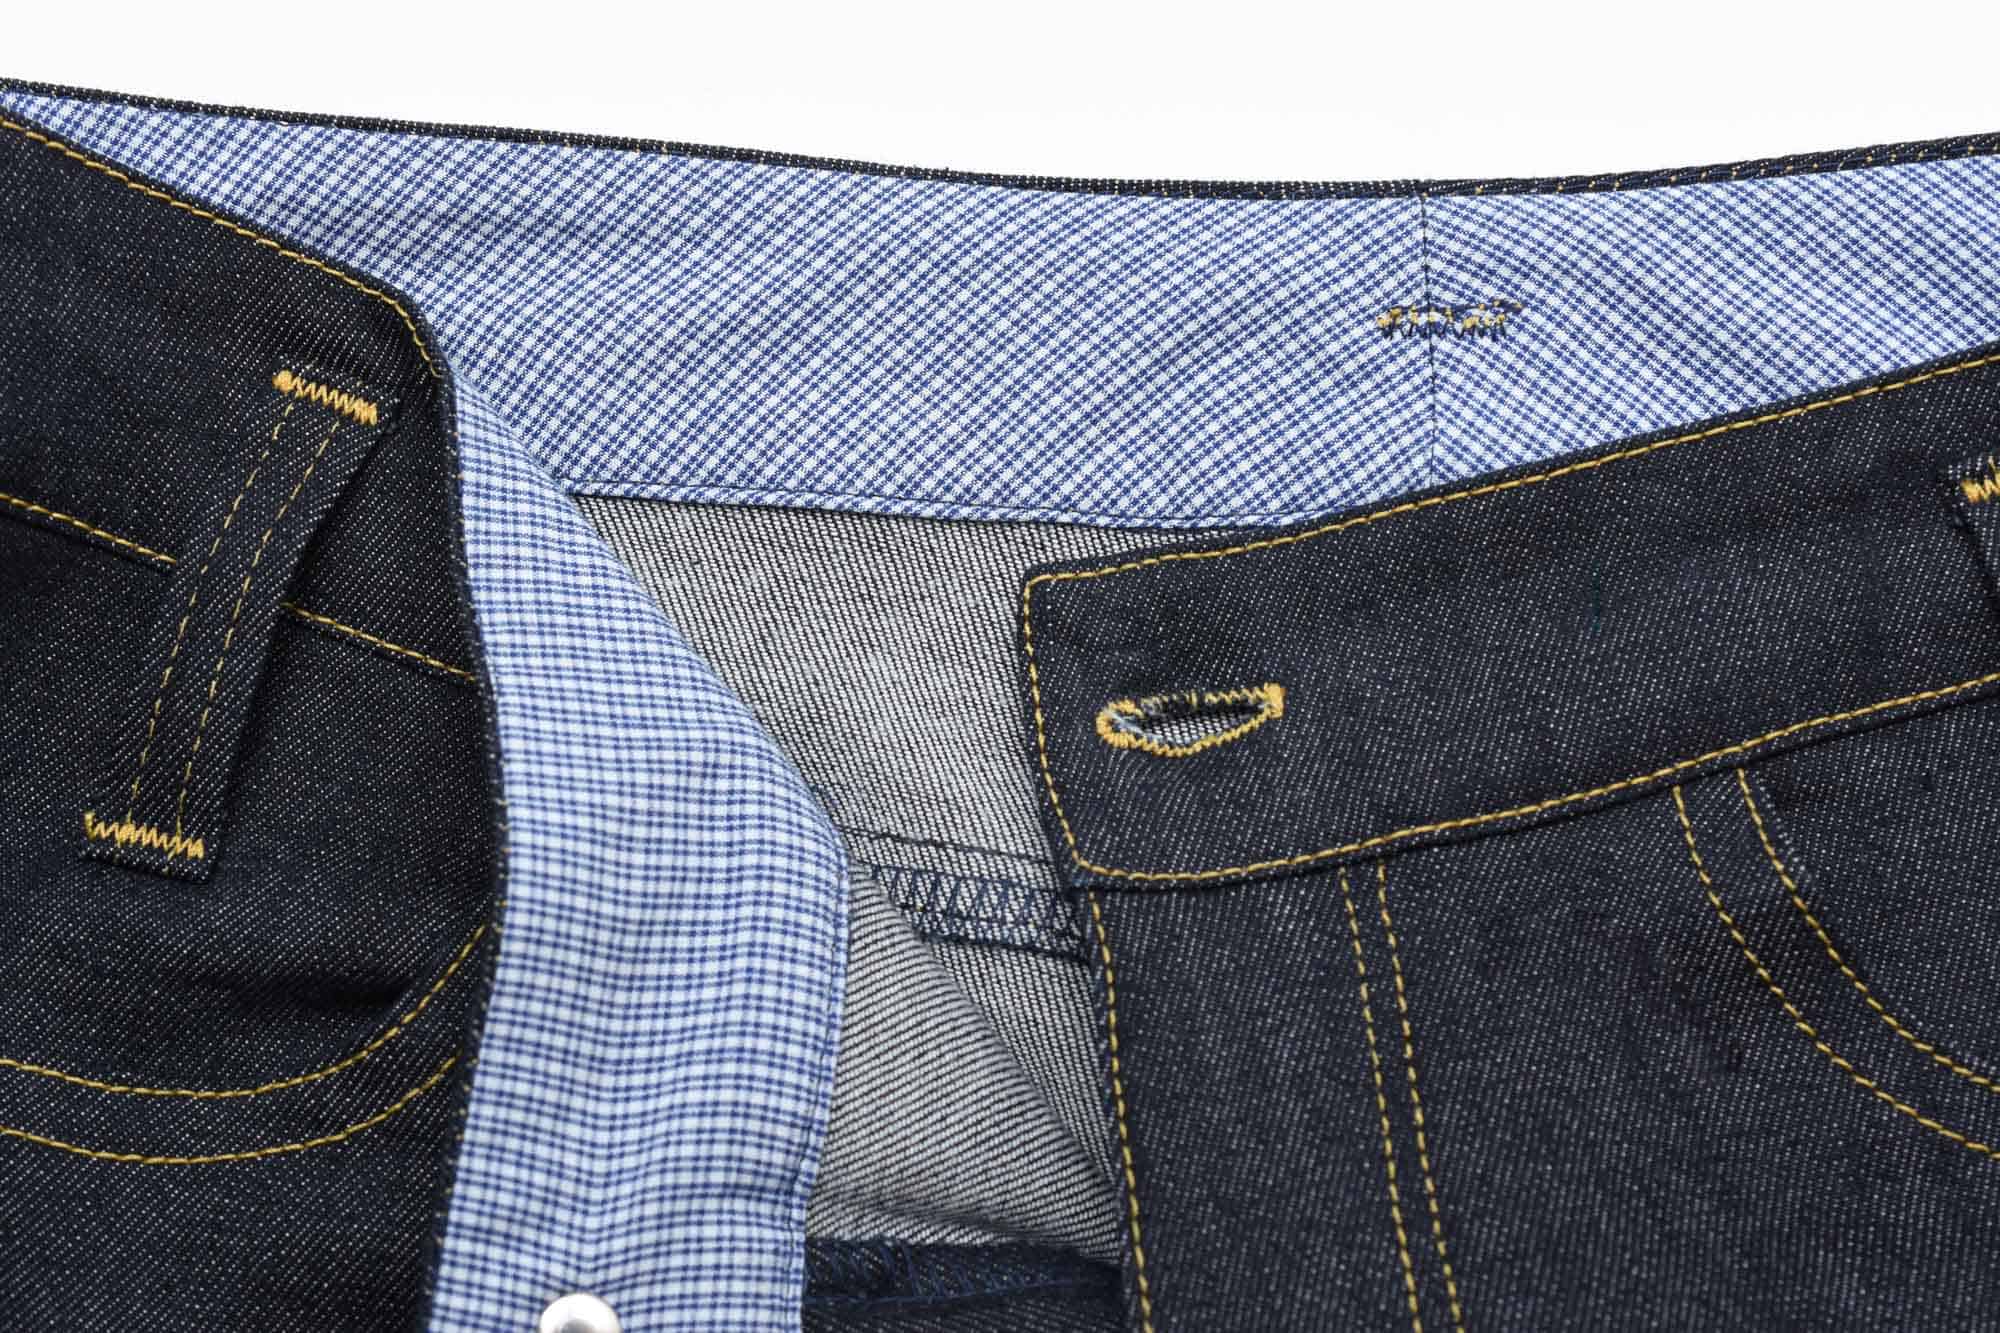
7. Double check the width of the waistband
Make sure the width is consistent around the entire inner waistband after the seam allowance is folded and pressed.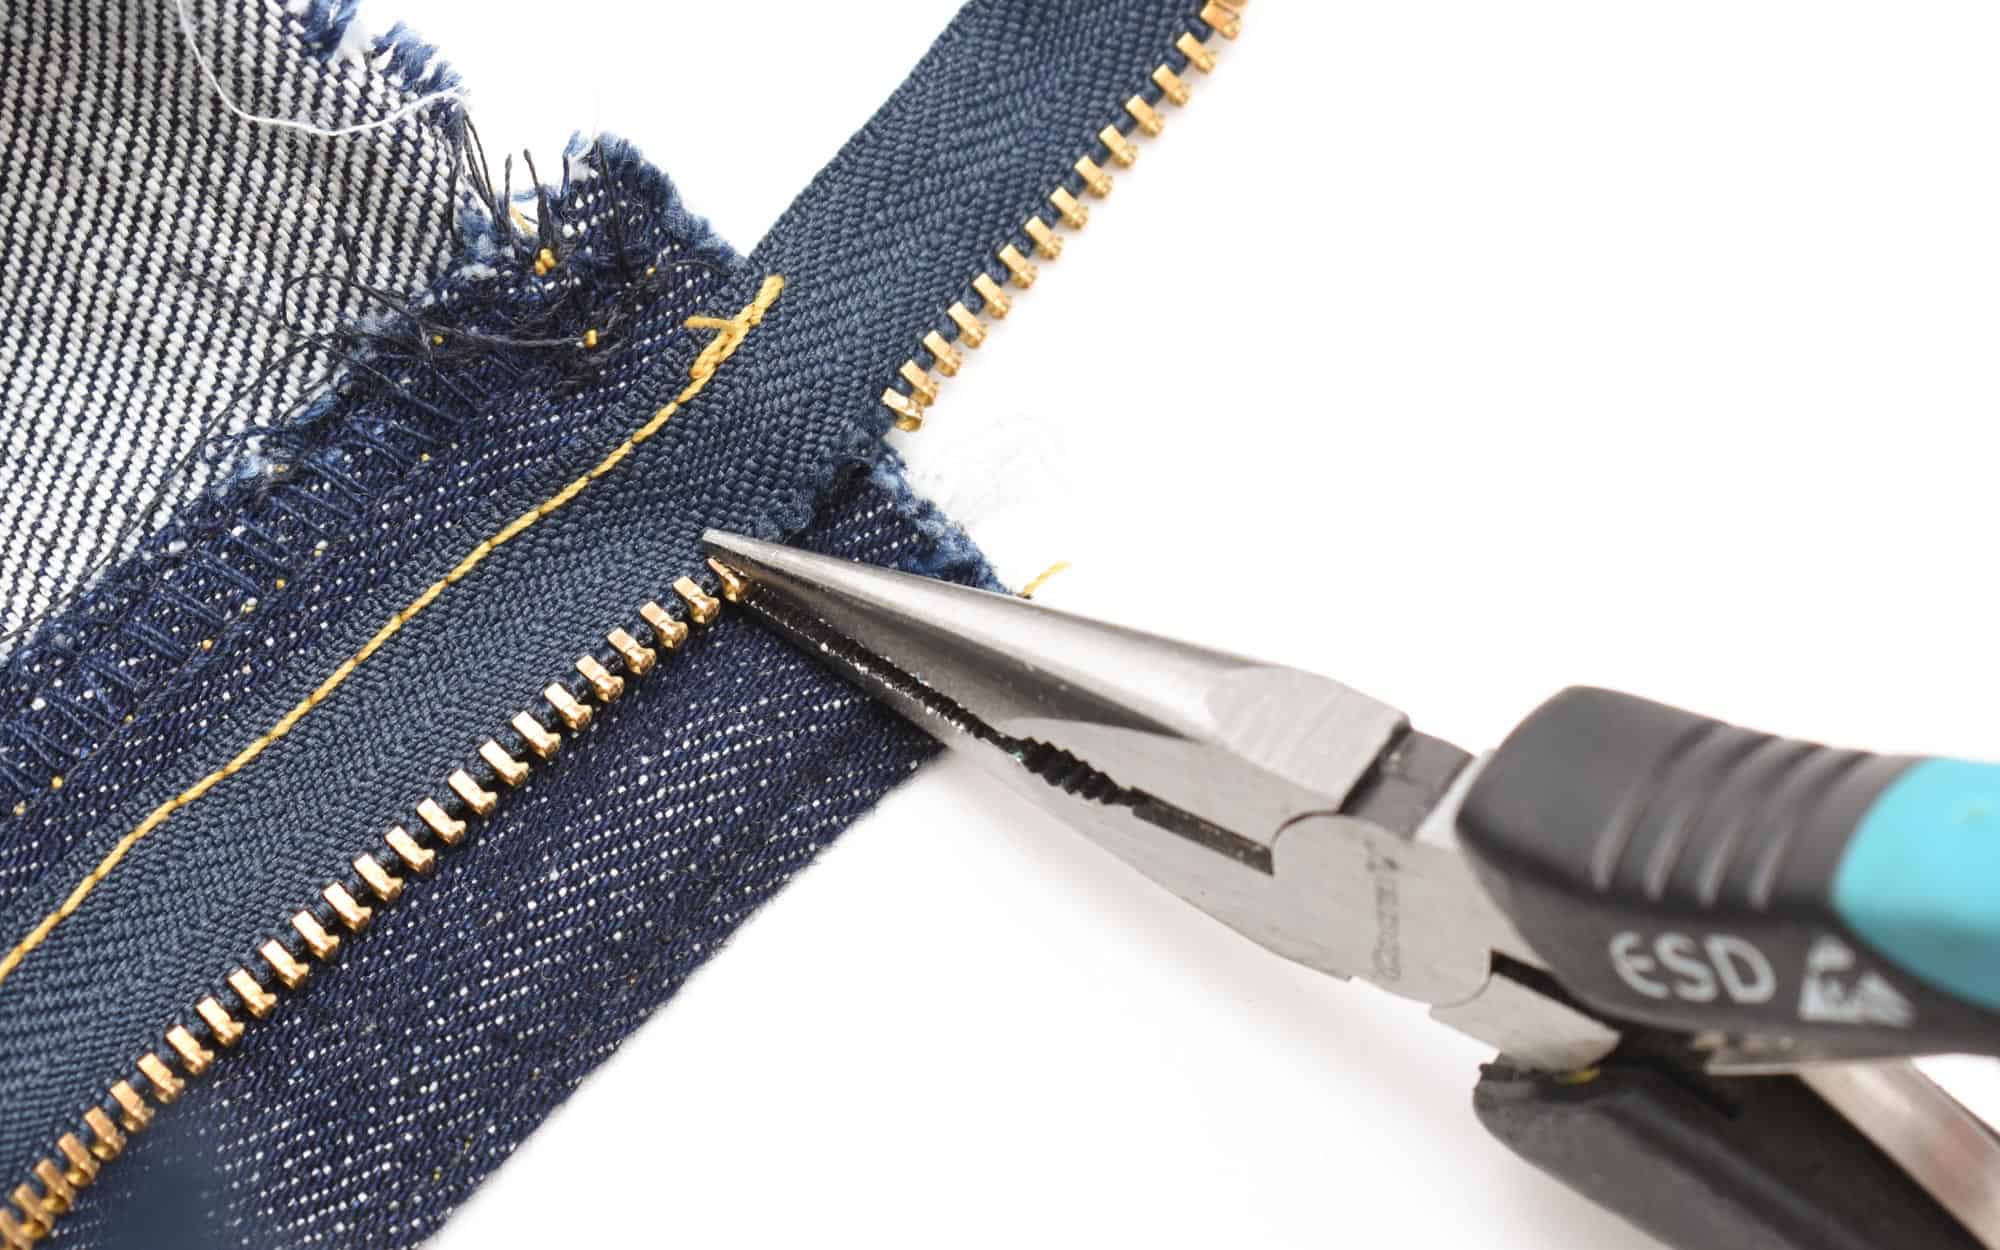
8. Remove zipper teeth if needed
If the zipper is too long remove the teeth that are on the seam allowance area. Use regular pliers and pull the teeth away.
Learn more: 7 Time-Saving Tips For Sewing Jeans
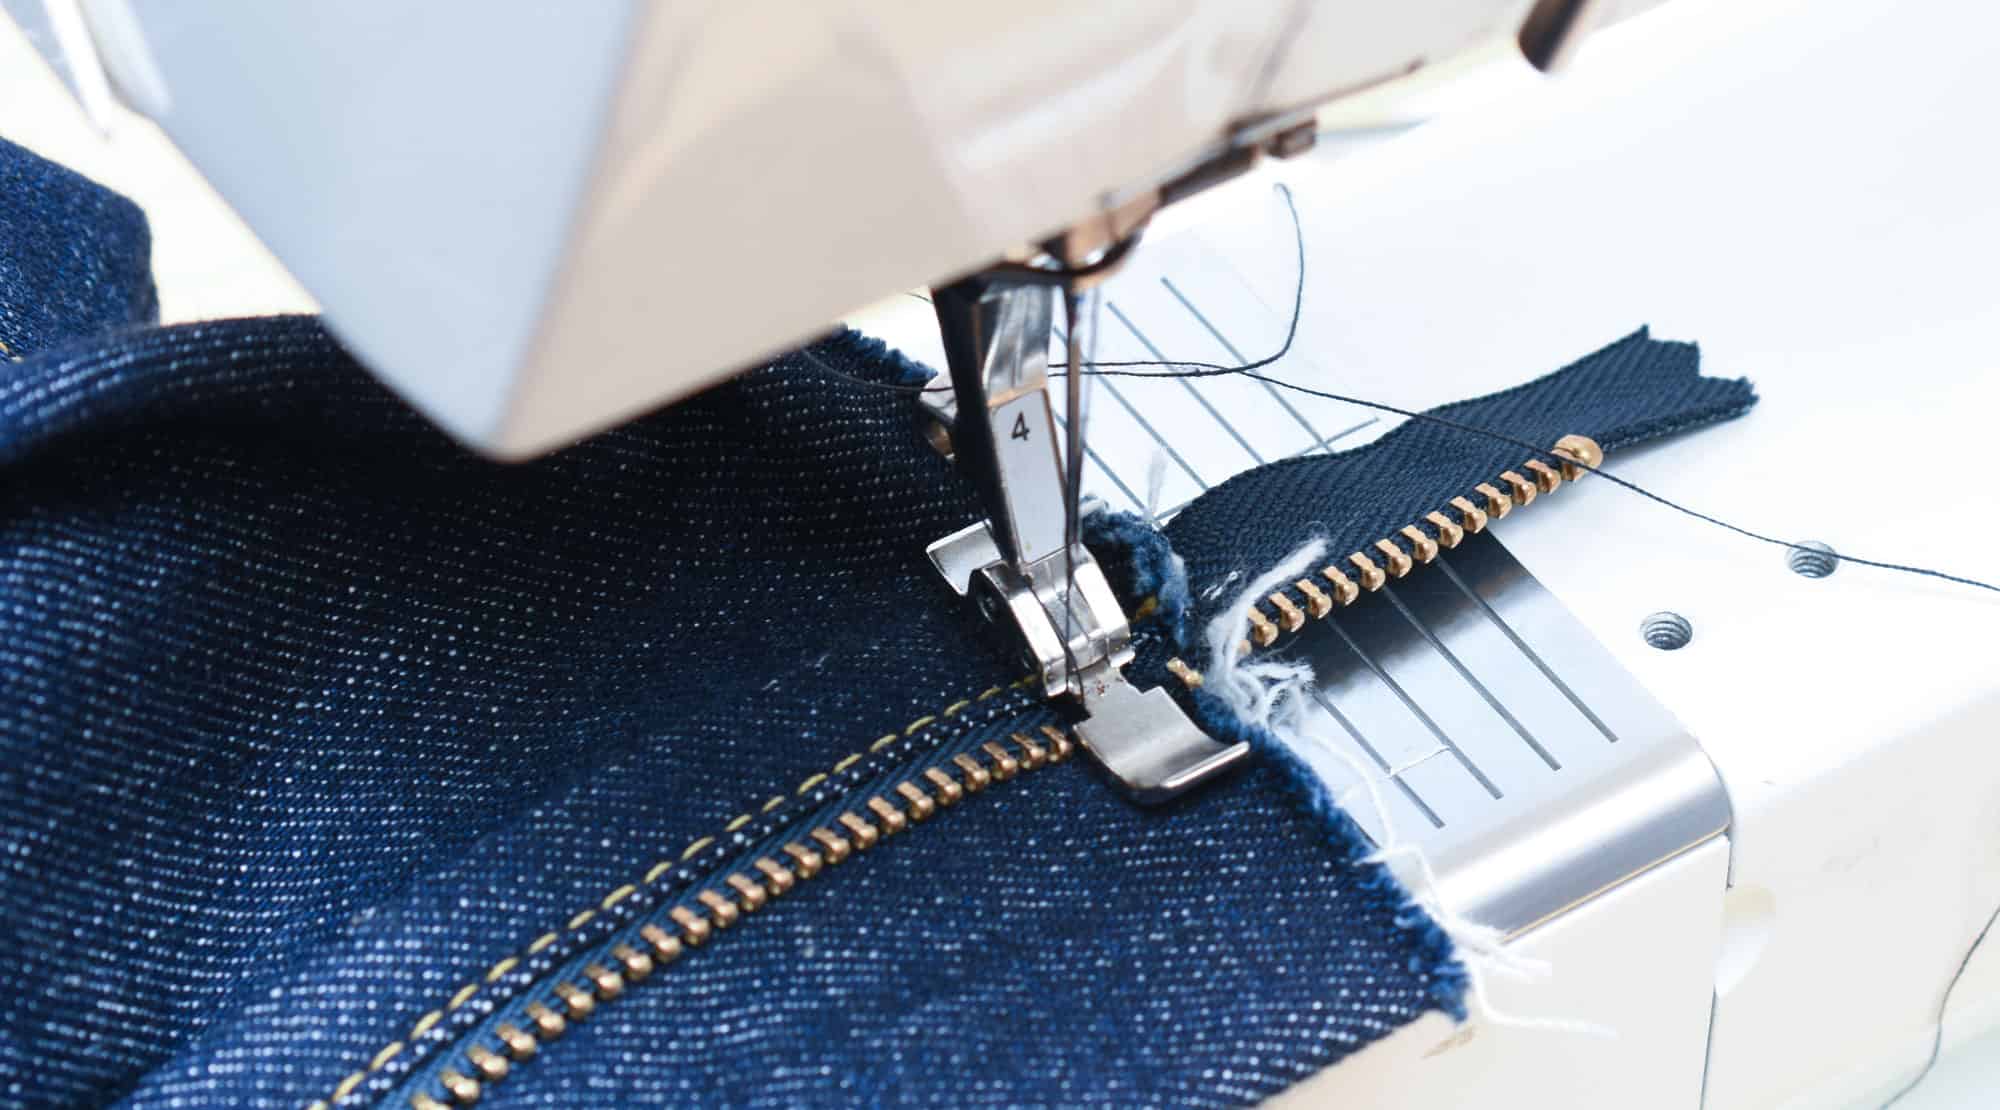
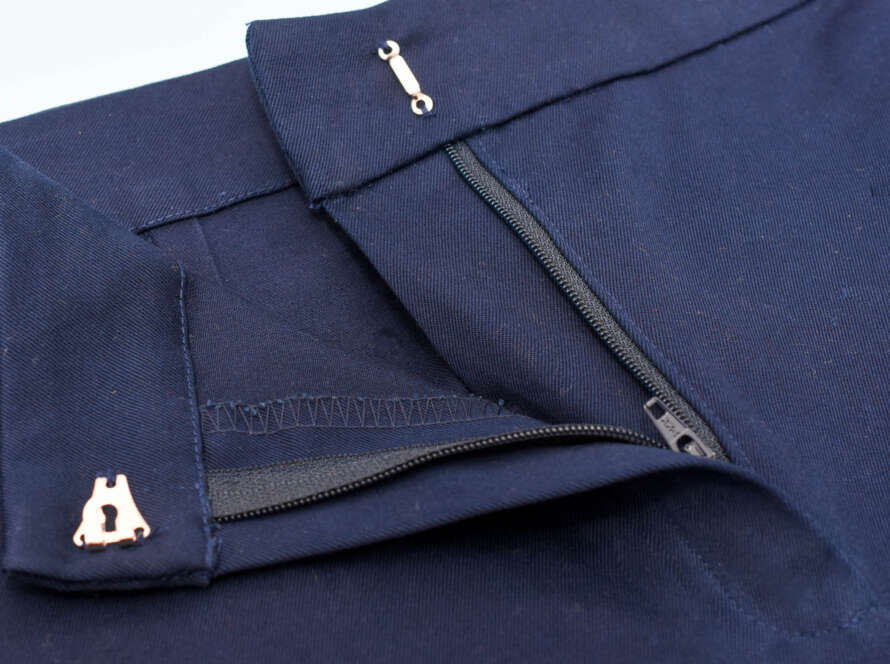
9. Stitch over the zipper to create a stop
Stitch back and forth a few times above the last teeth to keep the zipper pull from slipping away
10. Fold in the seam allowance of the upper corner of the waistband
Method 1: The professional technique. Fold the seam allowances of the outer edges of the waistband so that wraps around and encloses the zipper. The waistband needs to be facing down to make this possible.
Method 2: Fold in the seam allowance and press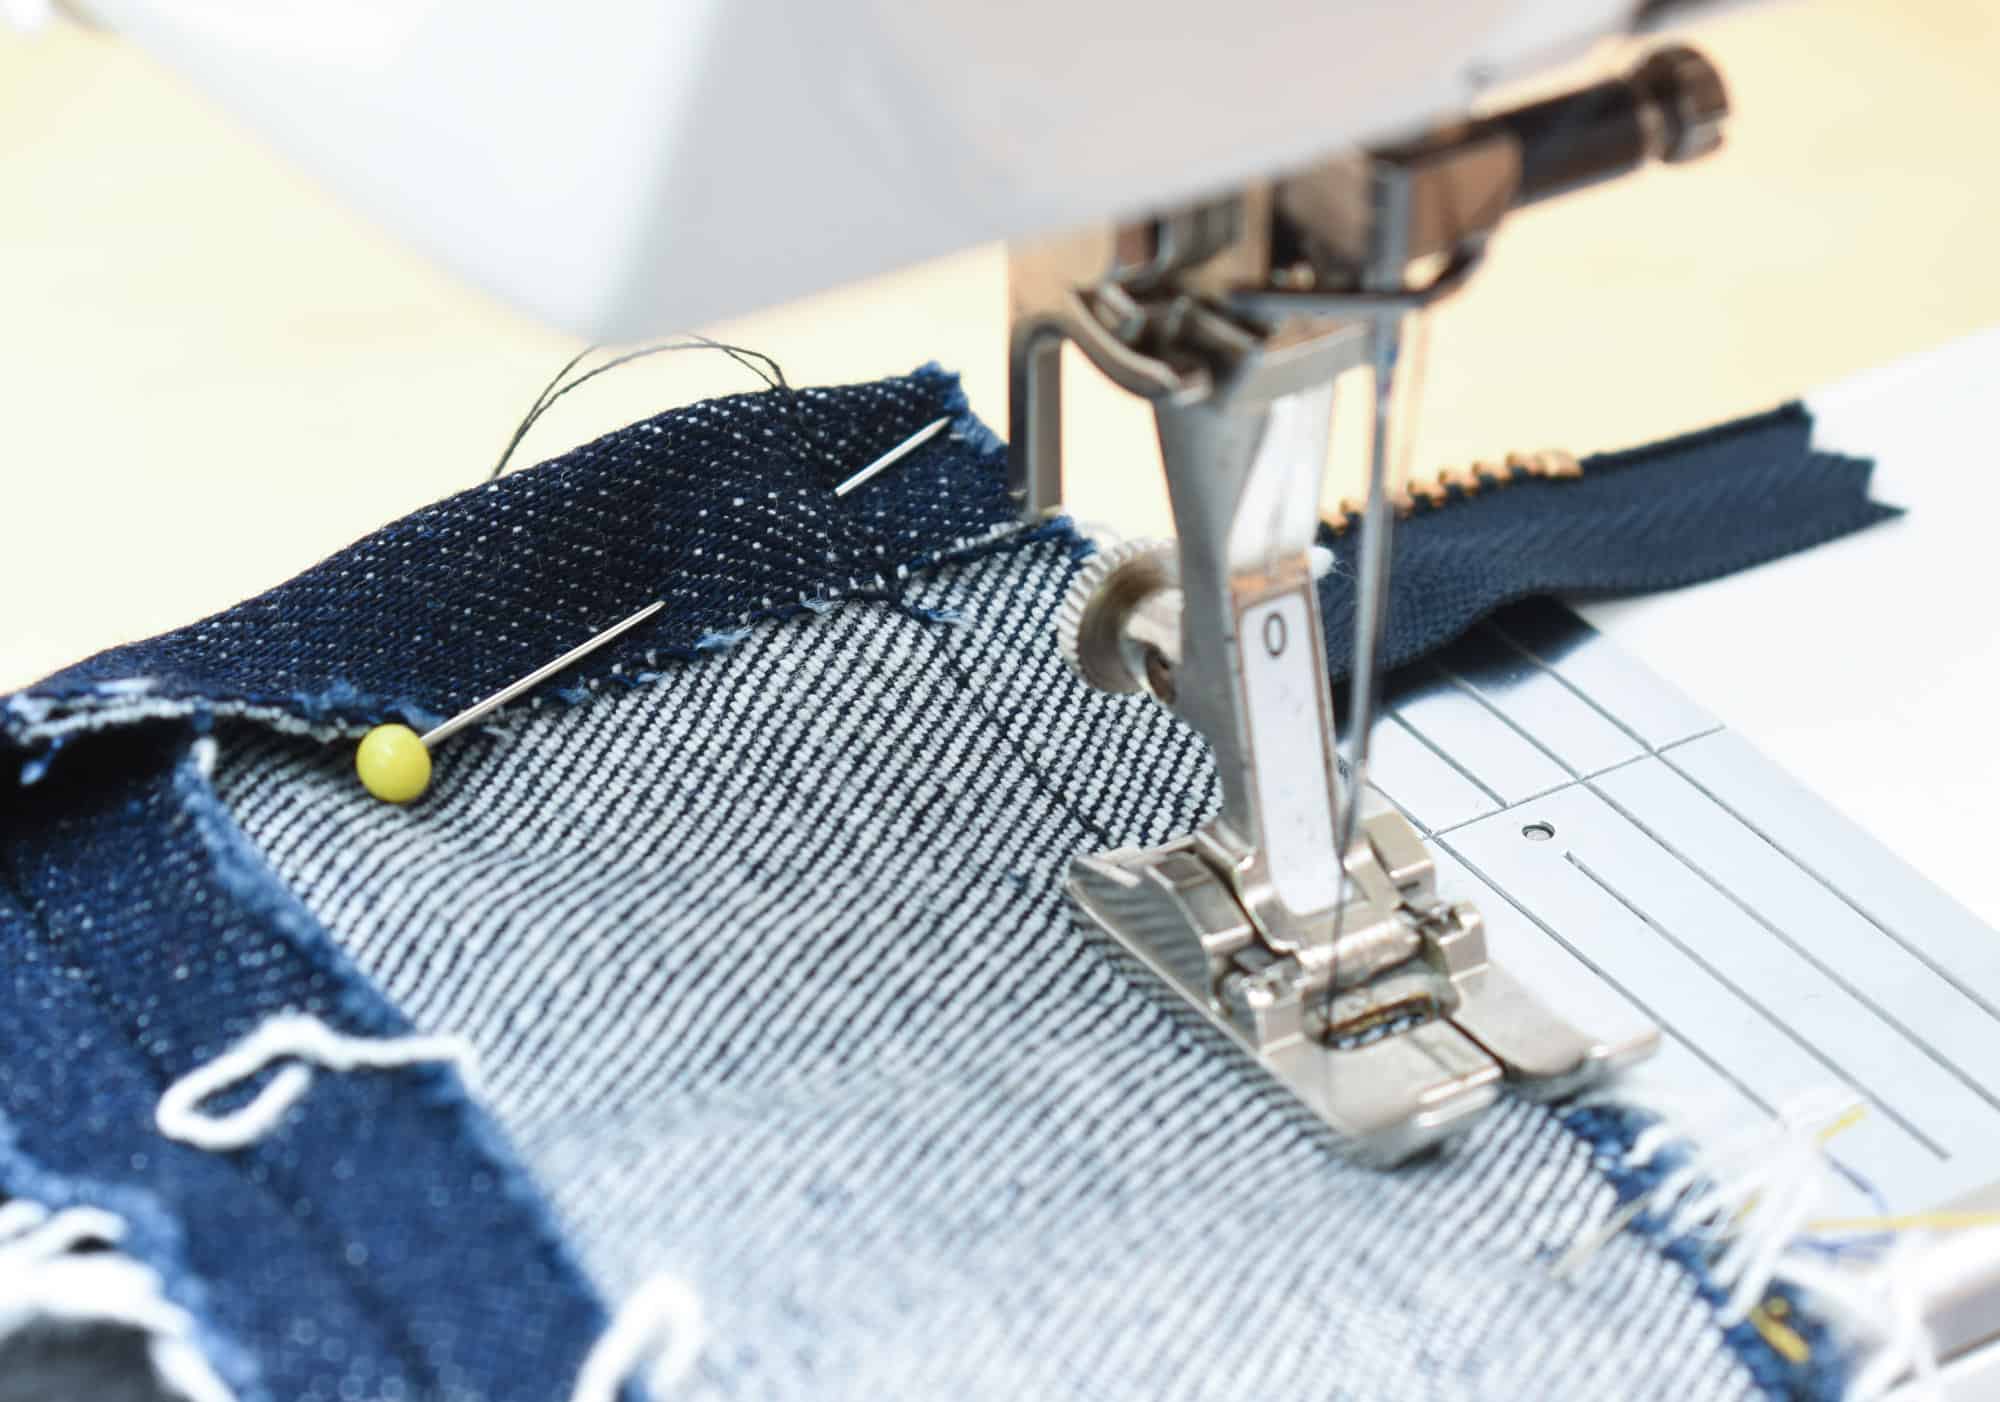
11. Attach the waistband to the jeans
Right sides facing, sew on the reverse side, start at one edge and sew over the folds. Again use a 1 cm (3/8 in) seam allowance.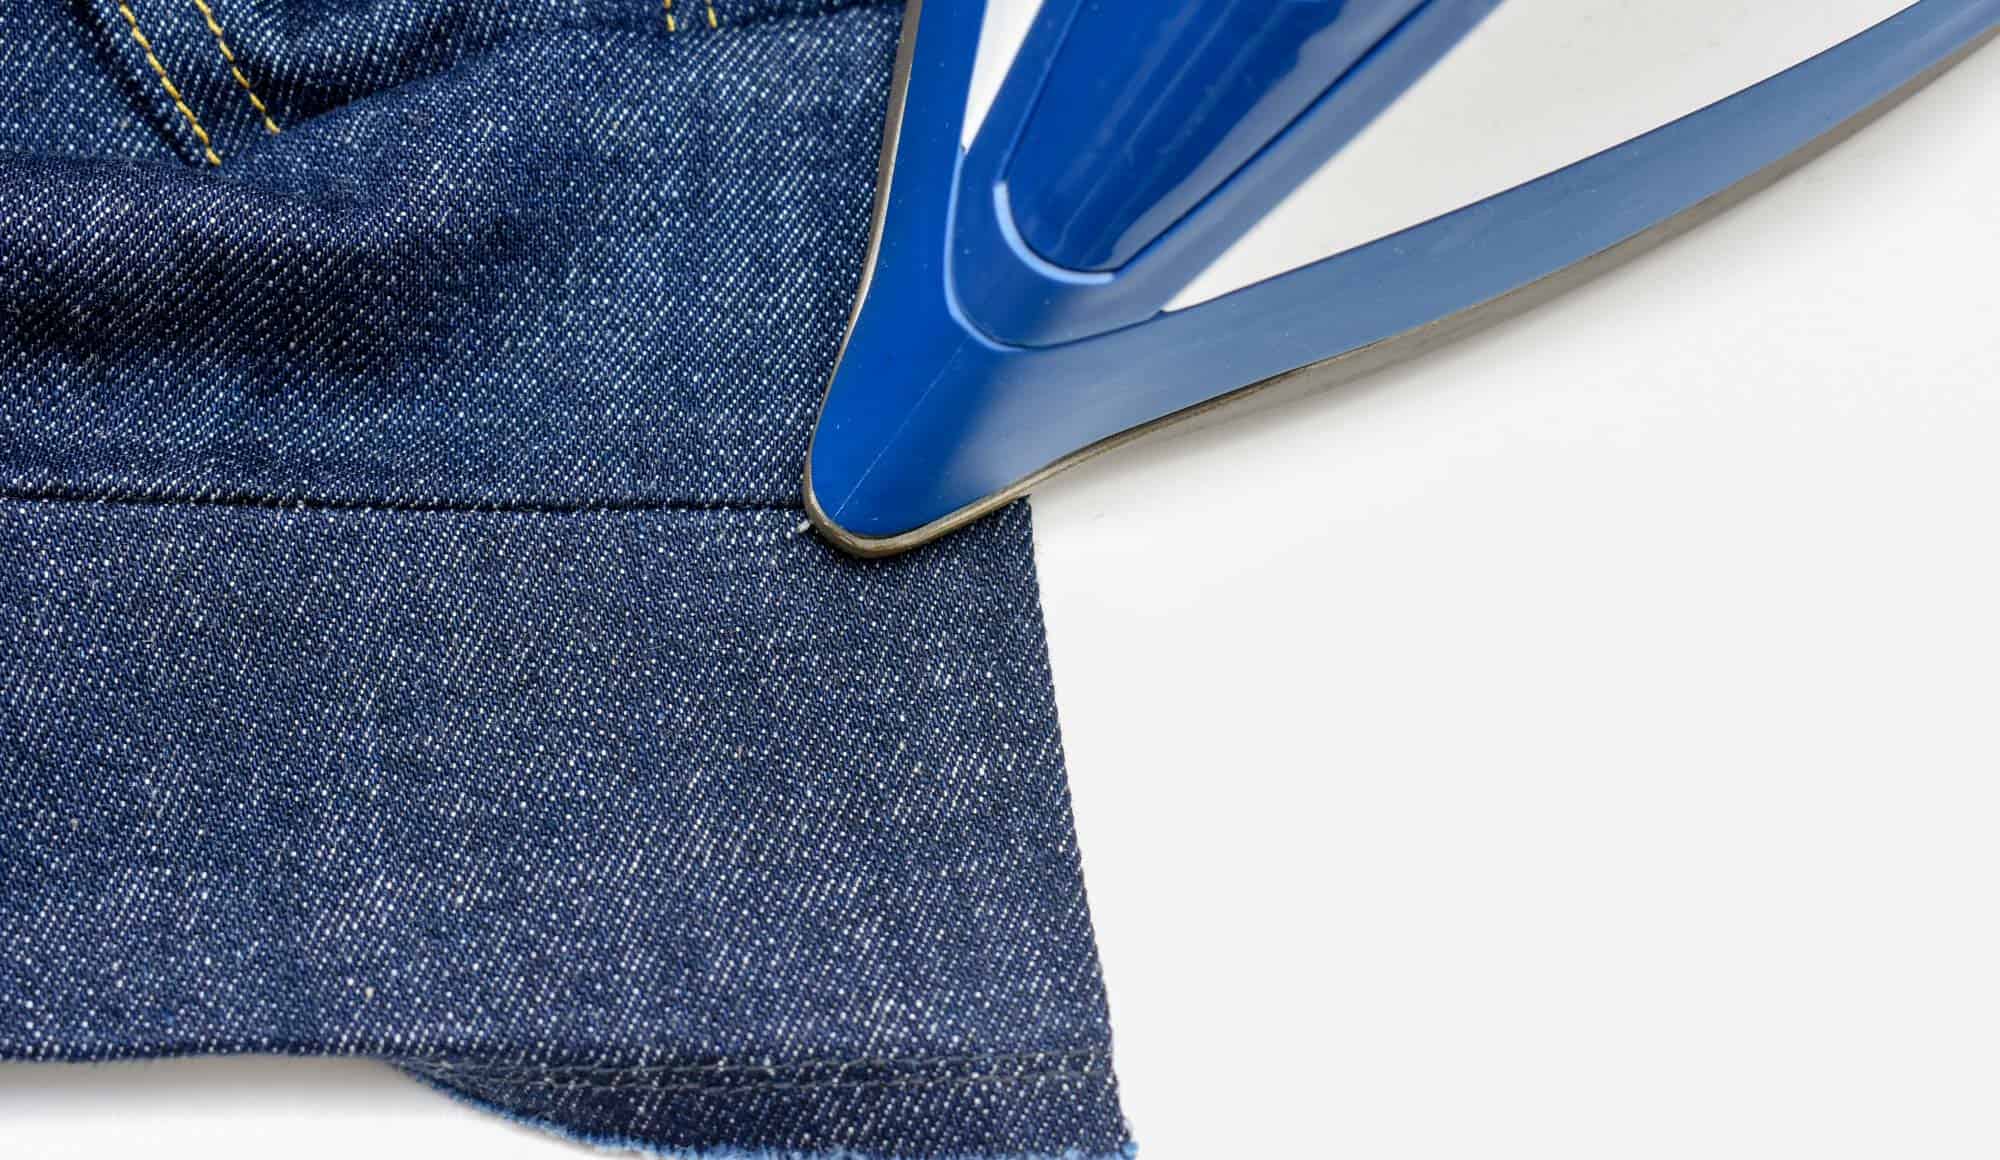
12. Fold and press the edges on the inner waistband
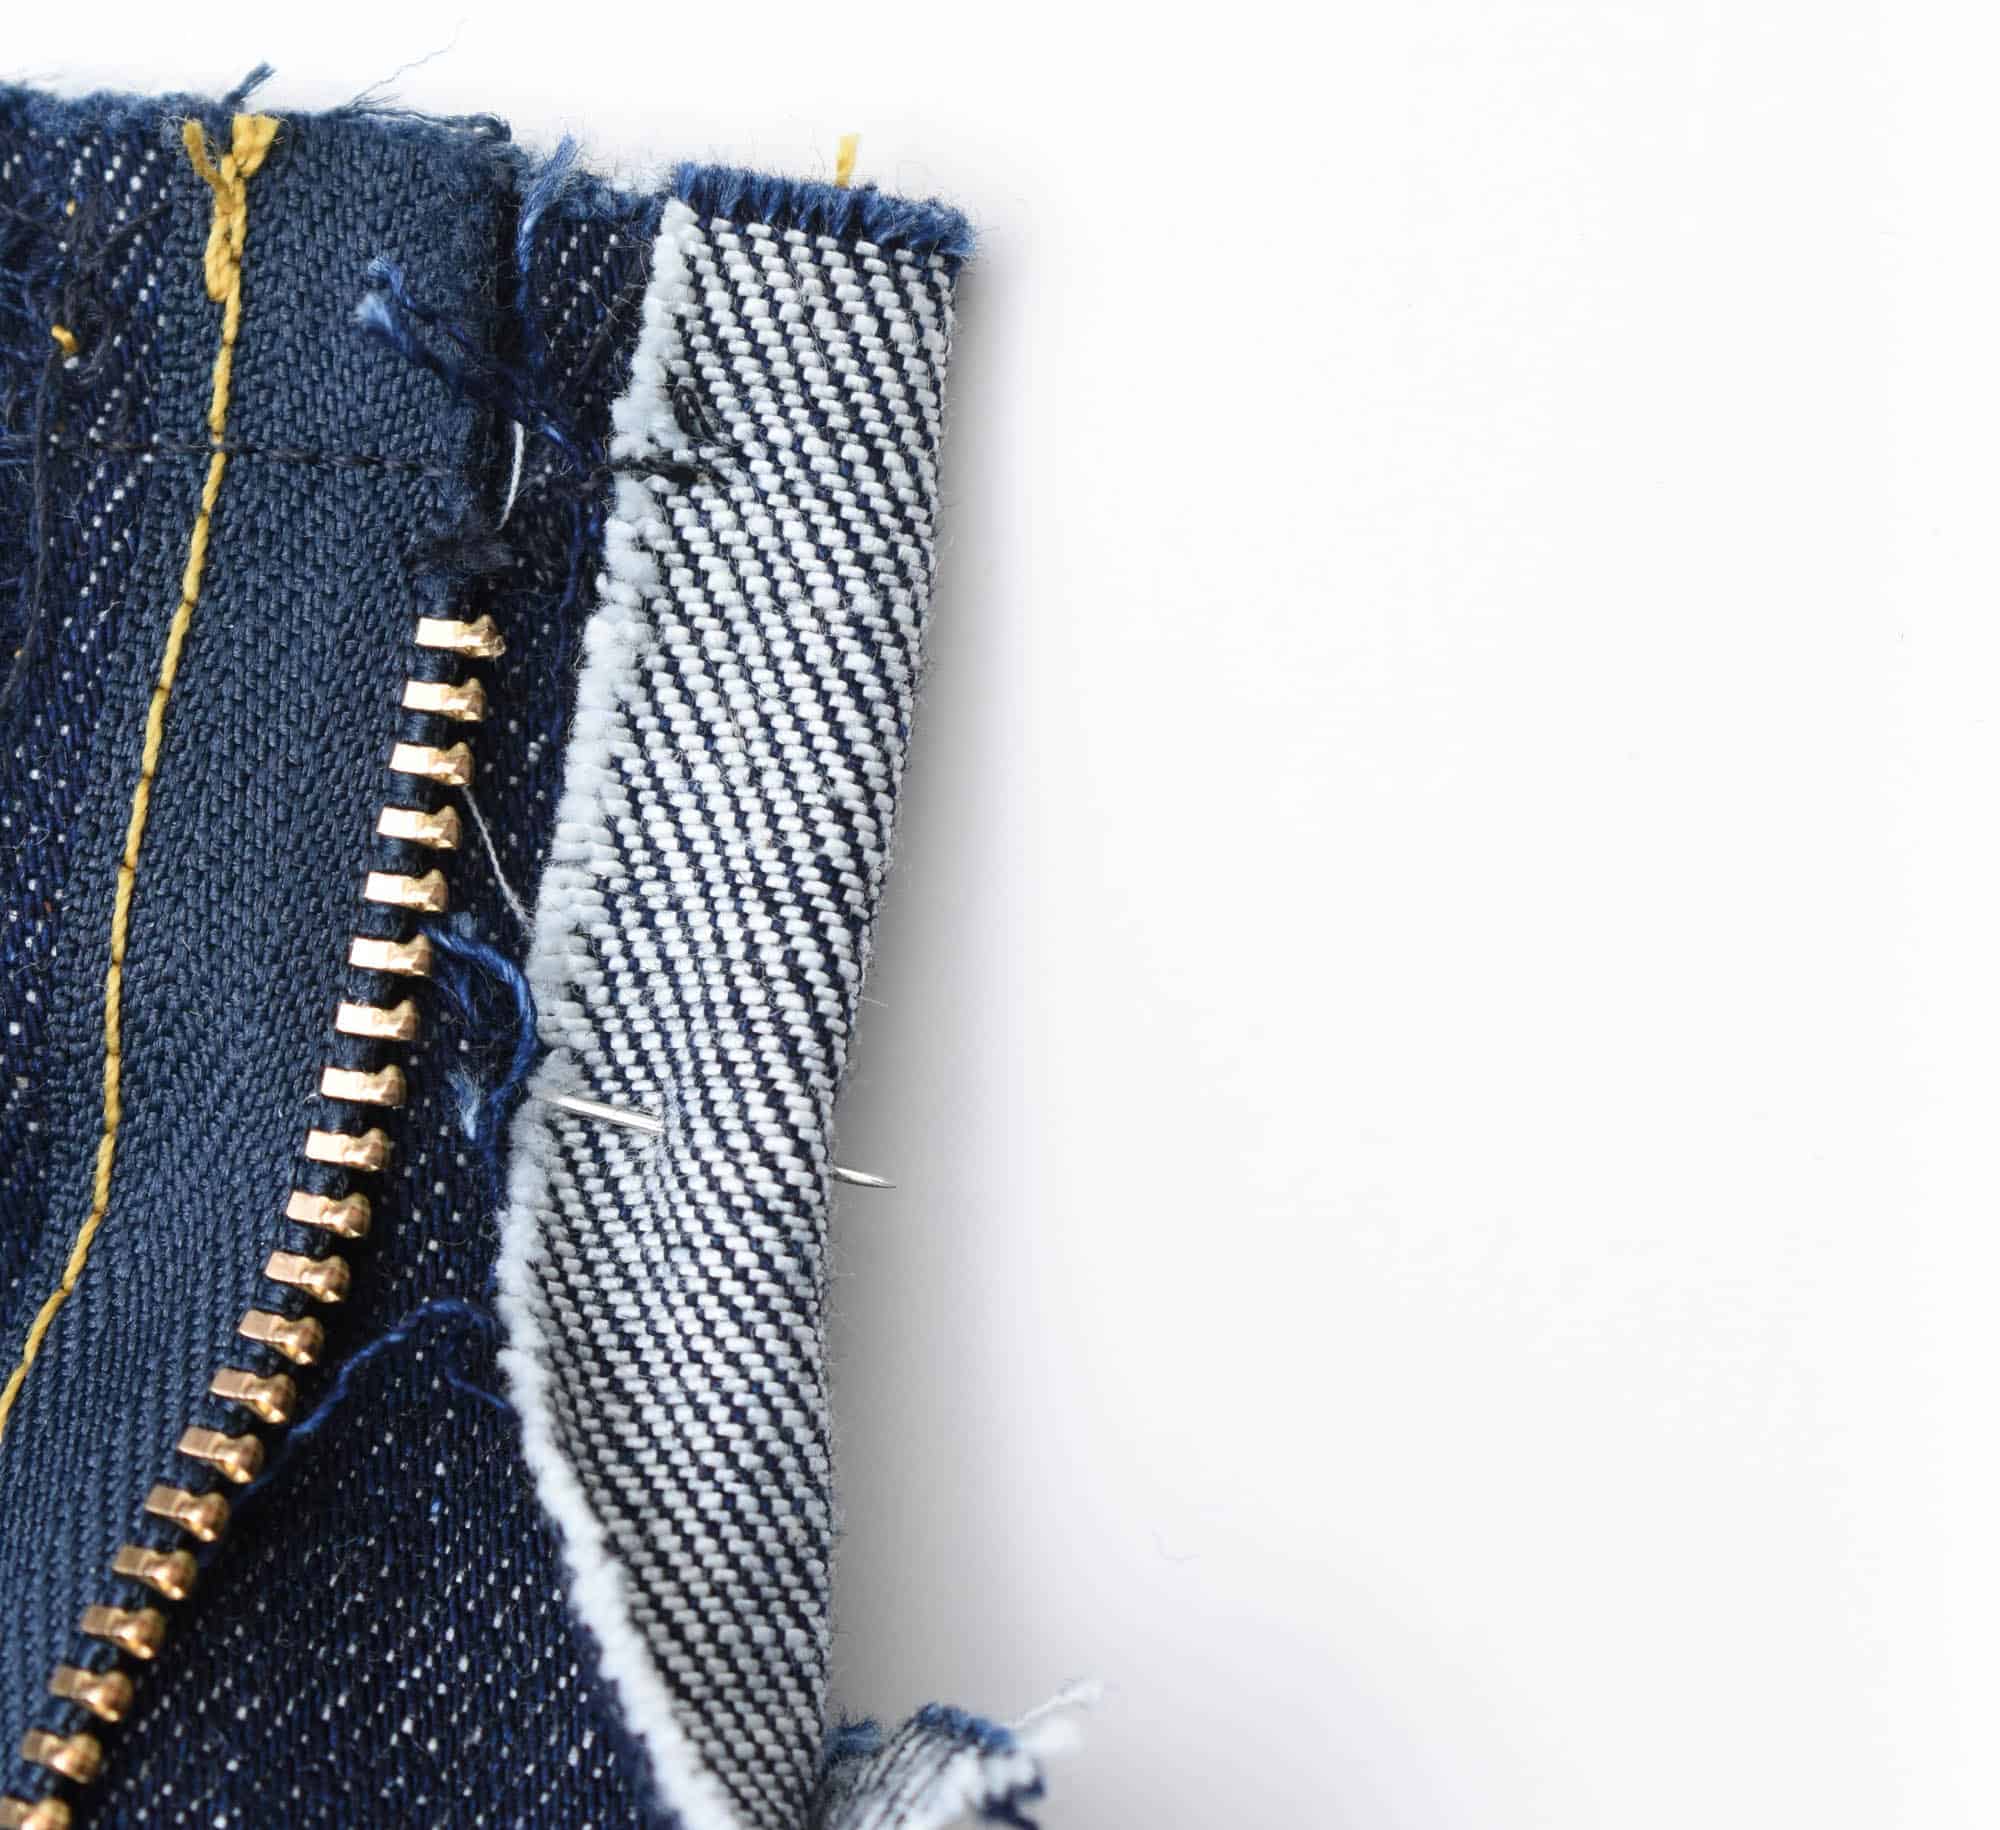
13. Attach wonder-tape to the seam allowance on the inner waistband
This will help the waistband to stay put when topstitching. You can of course also baste or use glue to secure the folded seam allowance, but the wonder-tape really does wonders for a crisp inner waistband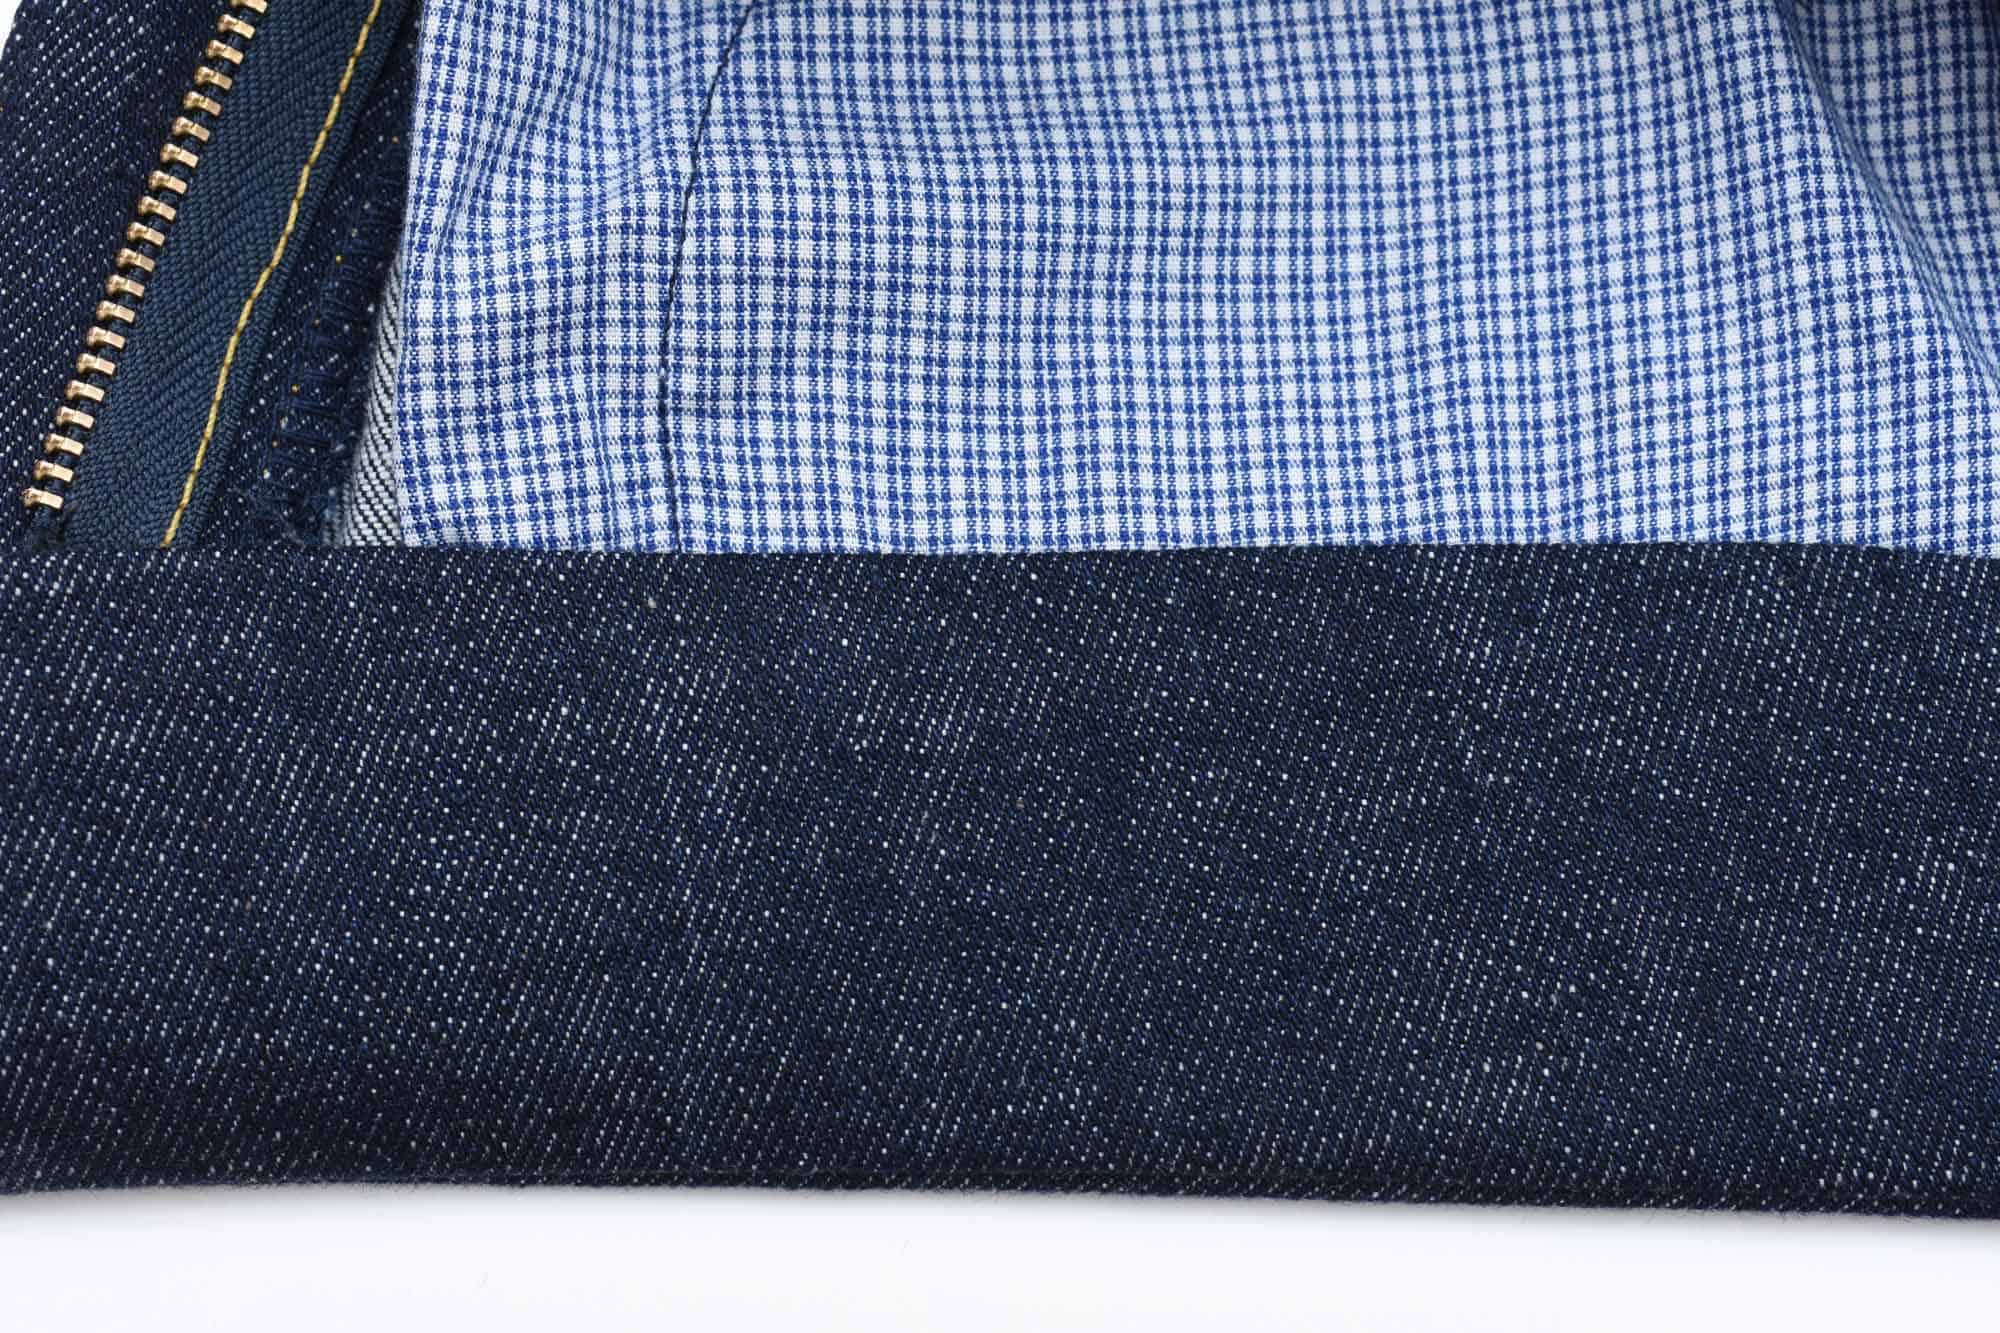
14. Fold in the seam allowance and press
Make sure the seam allowance really sticks to the inside of the waistband, so that it doesn’t slip during topstitching.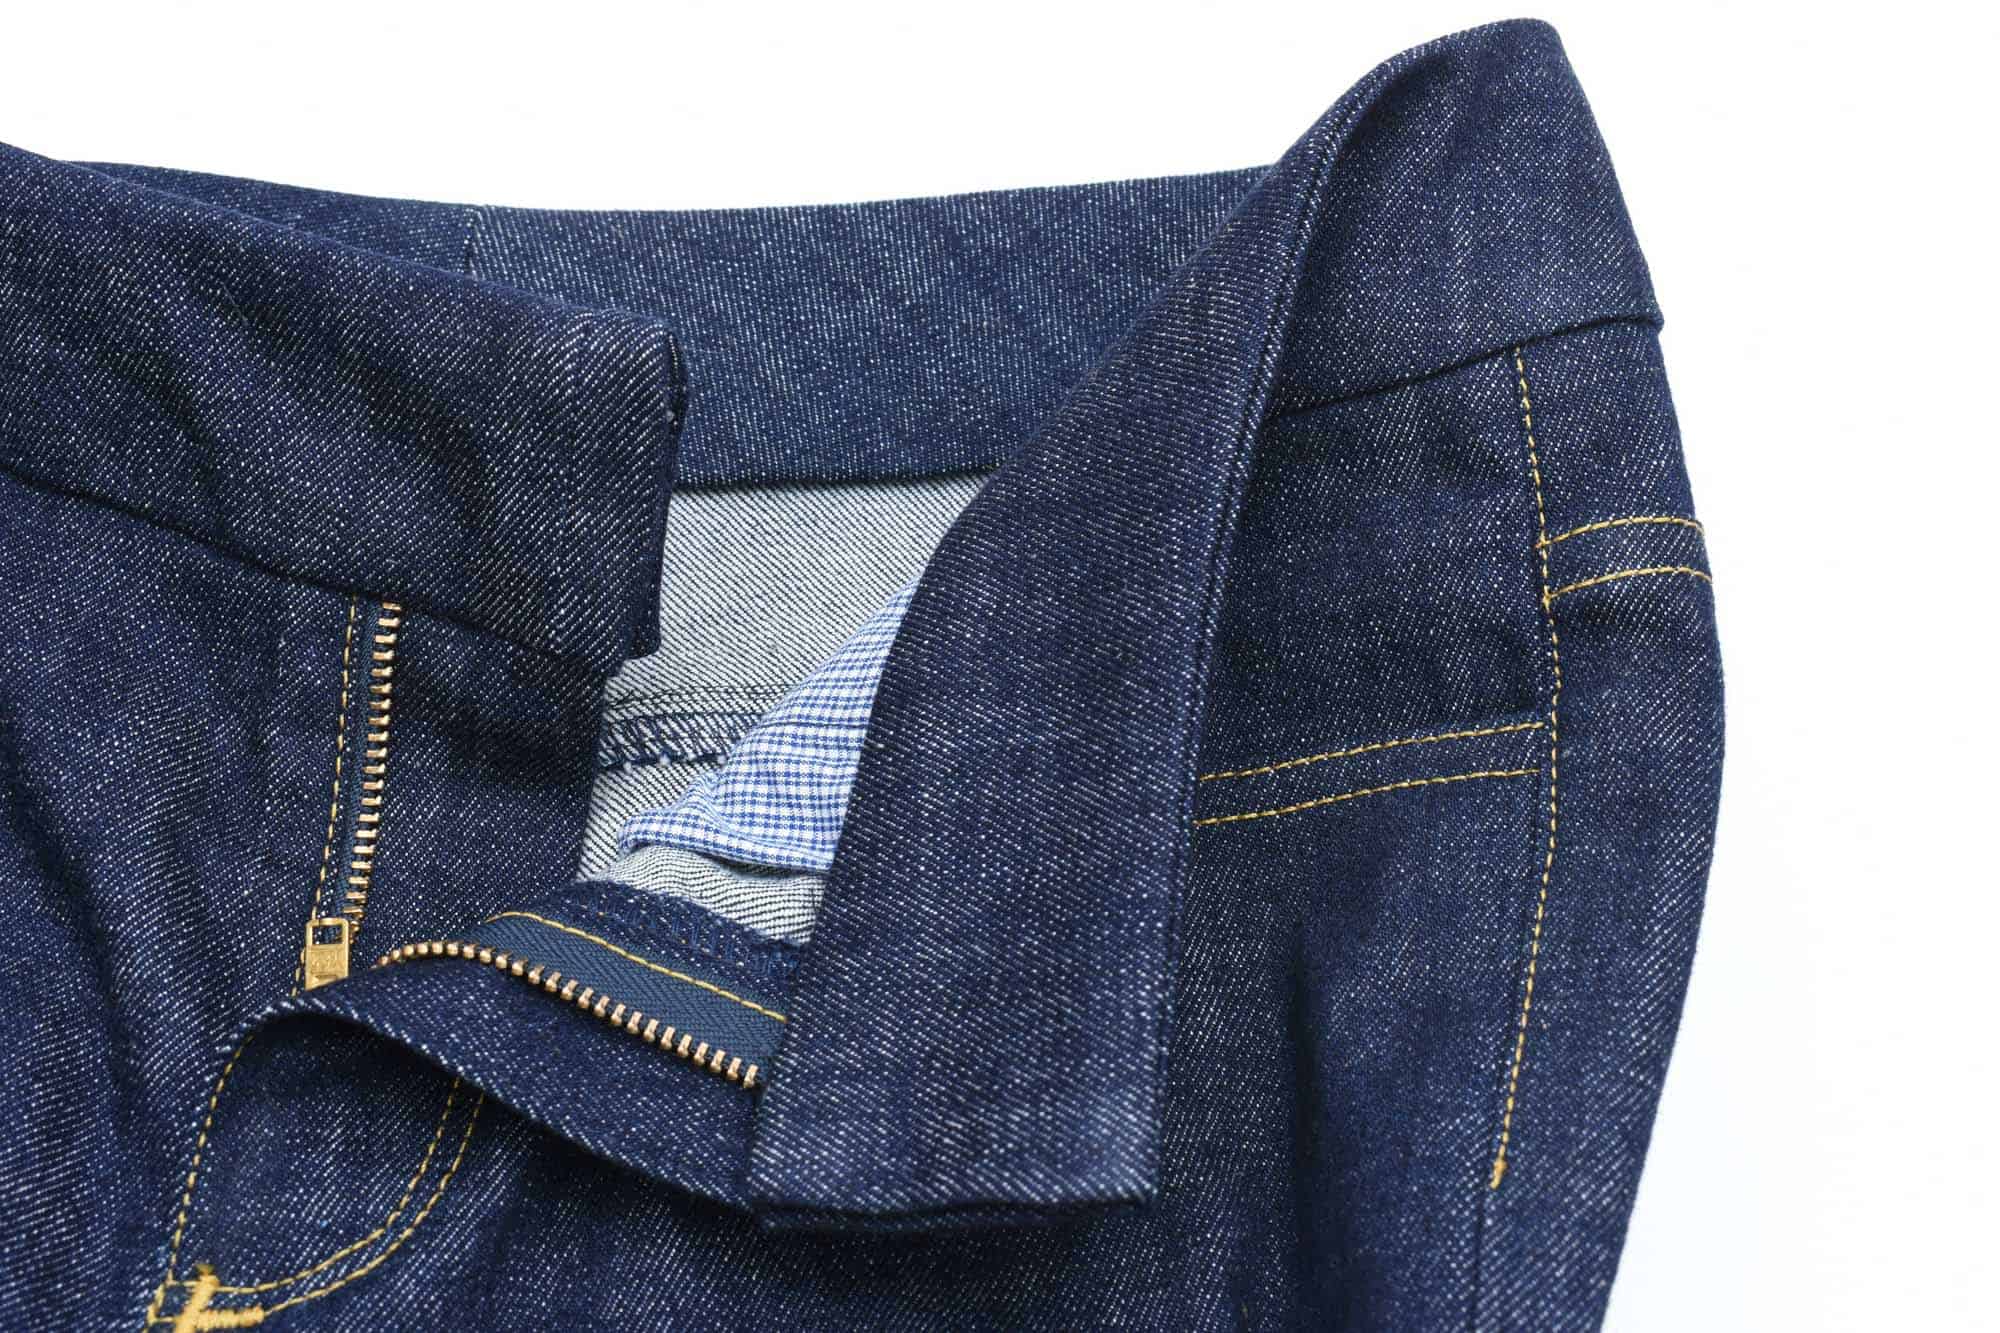
Pressed and ready to be topstitched
Topstitching the jeans waistband
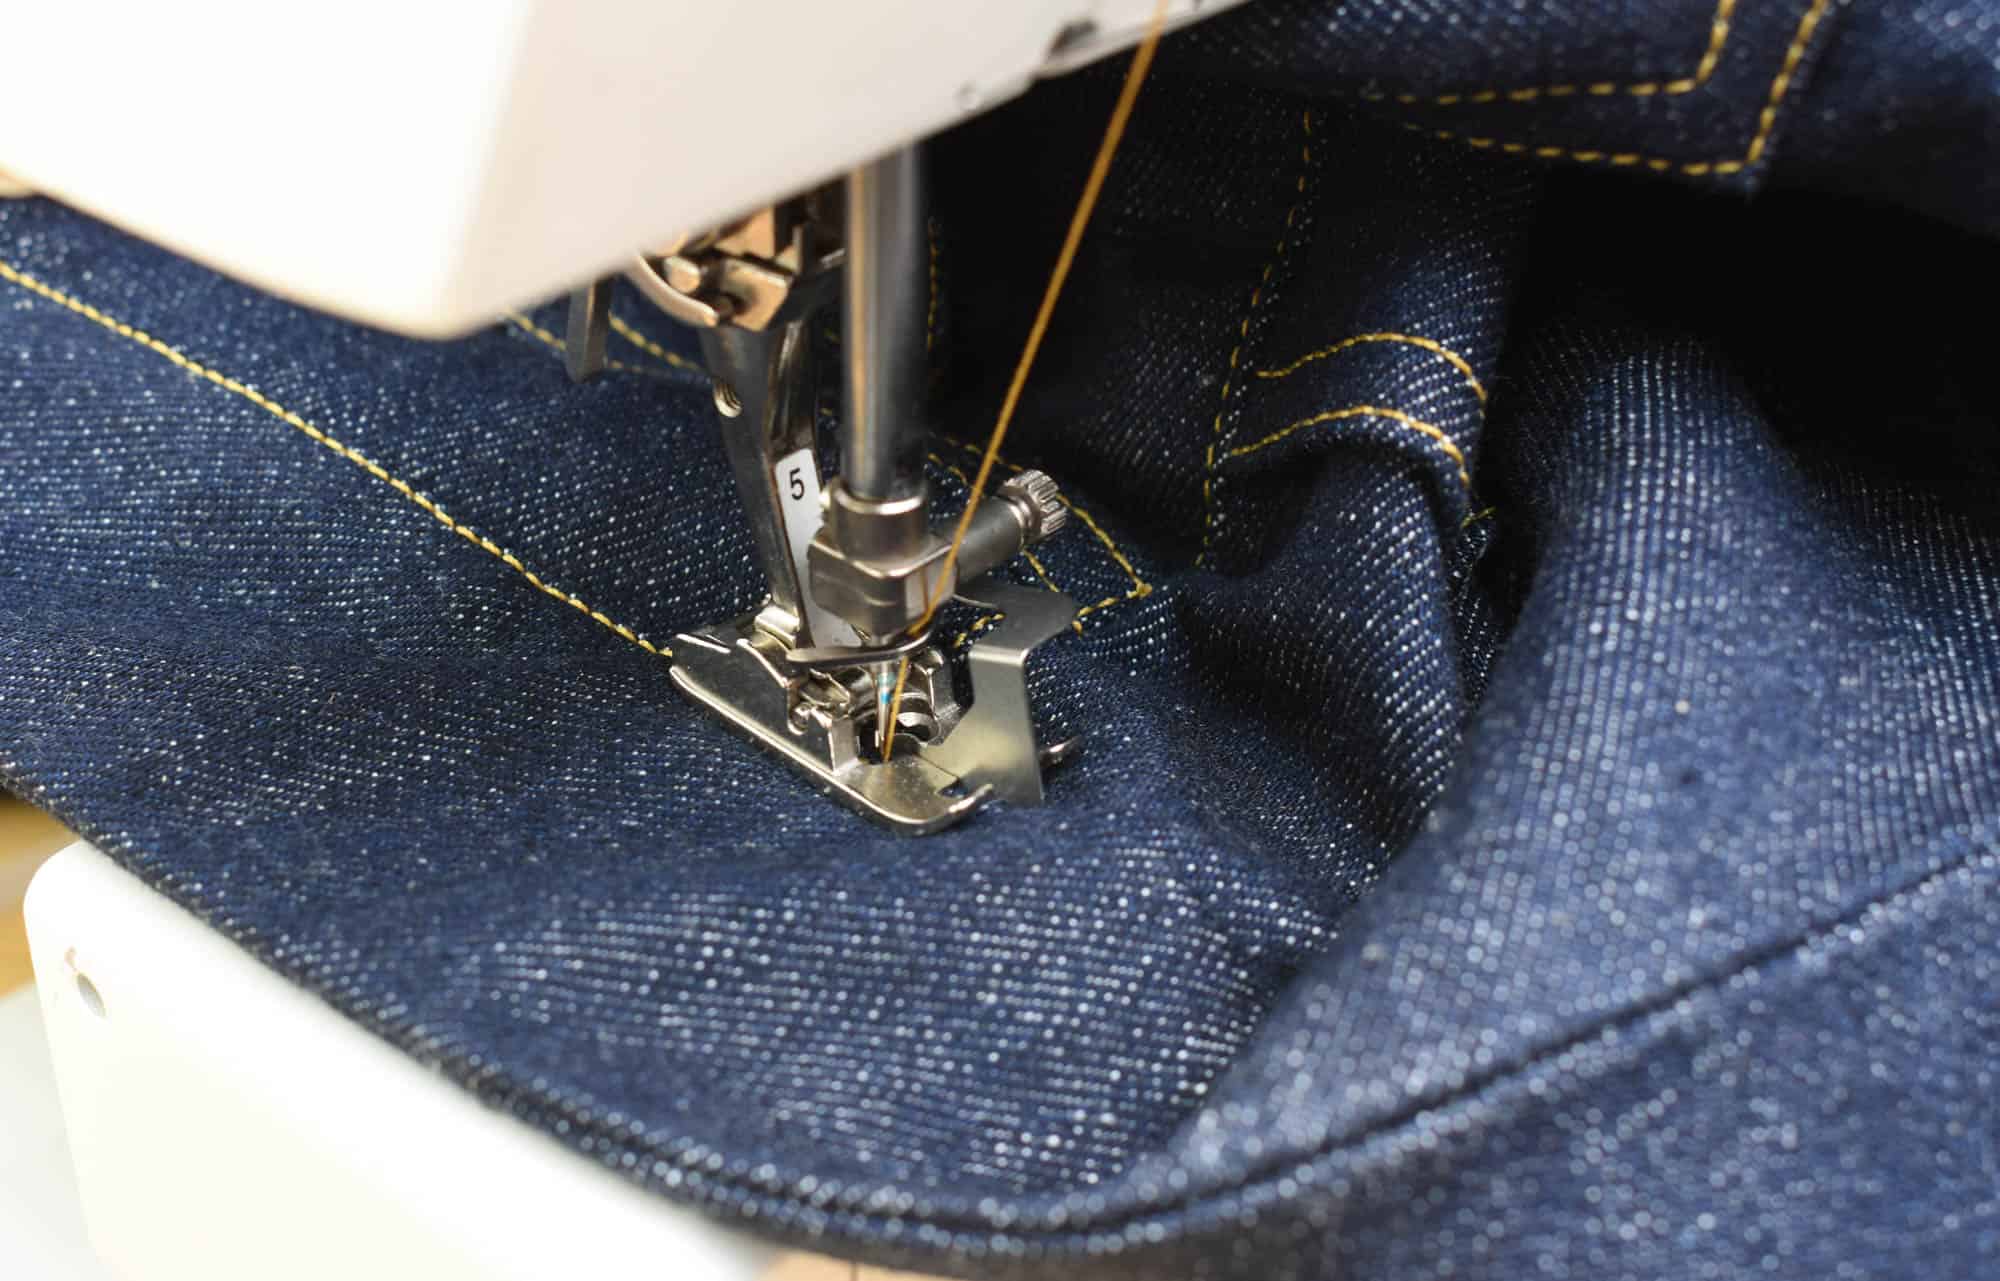
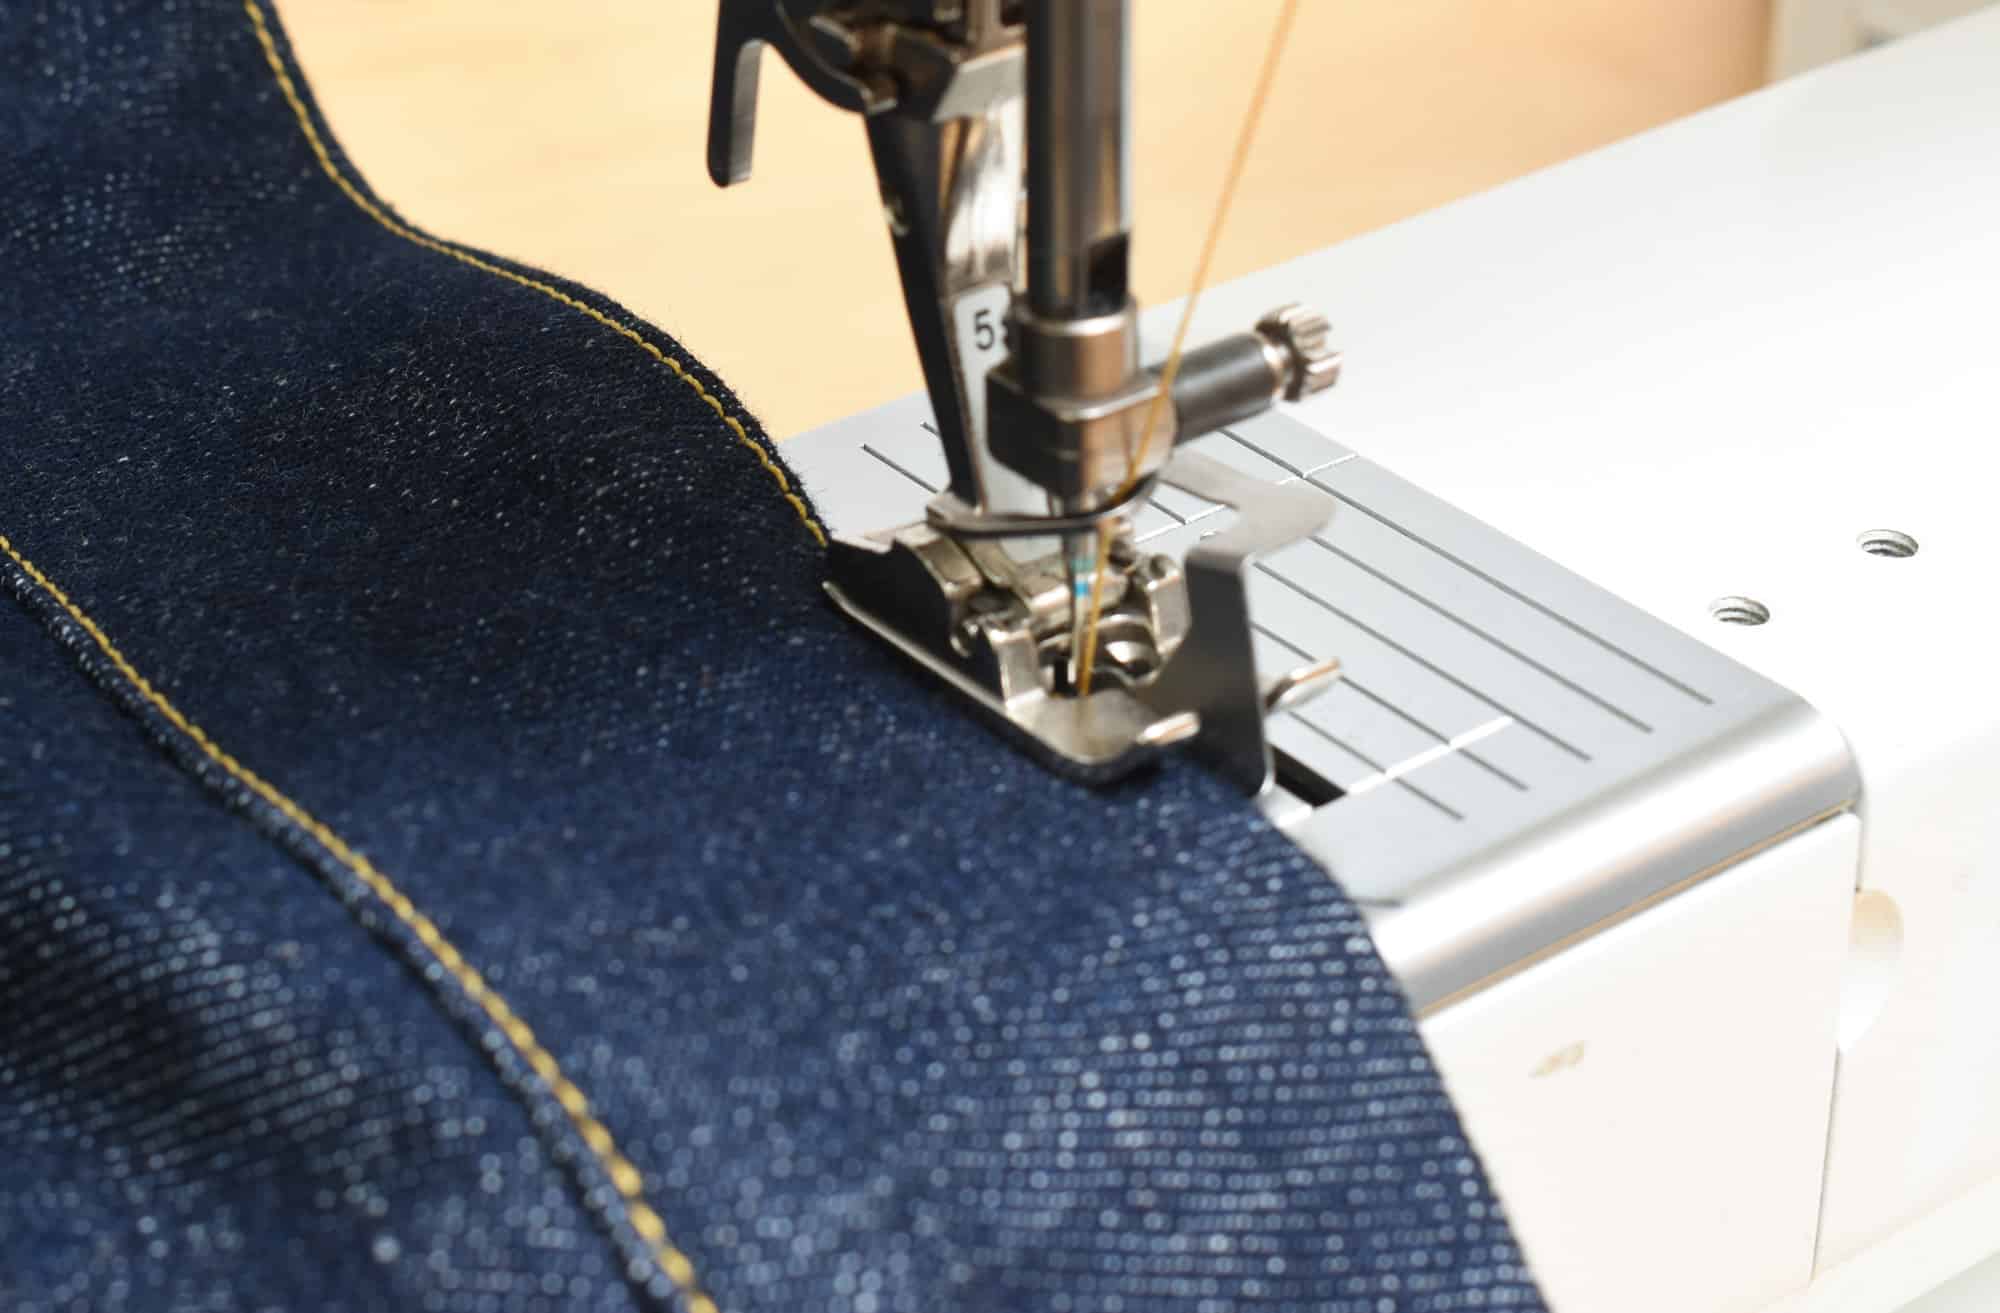
Start at the lower (button) waistband, sew along the waistband seam first and then move up to the upper edge. Secure properly. See my tutorial for successful topstitching for instructions on how to topstitch jeans.
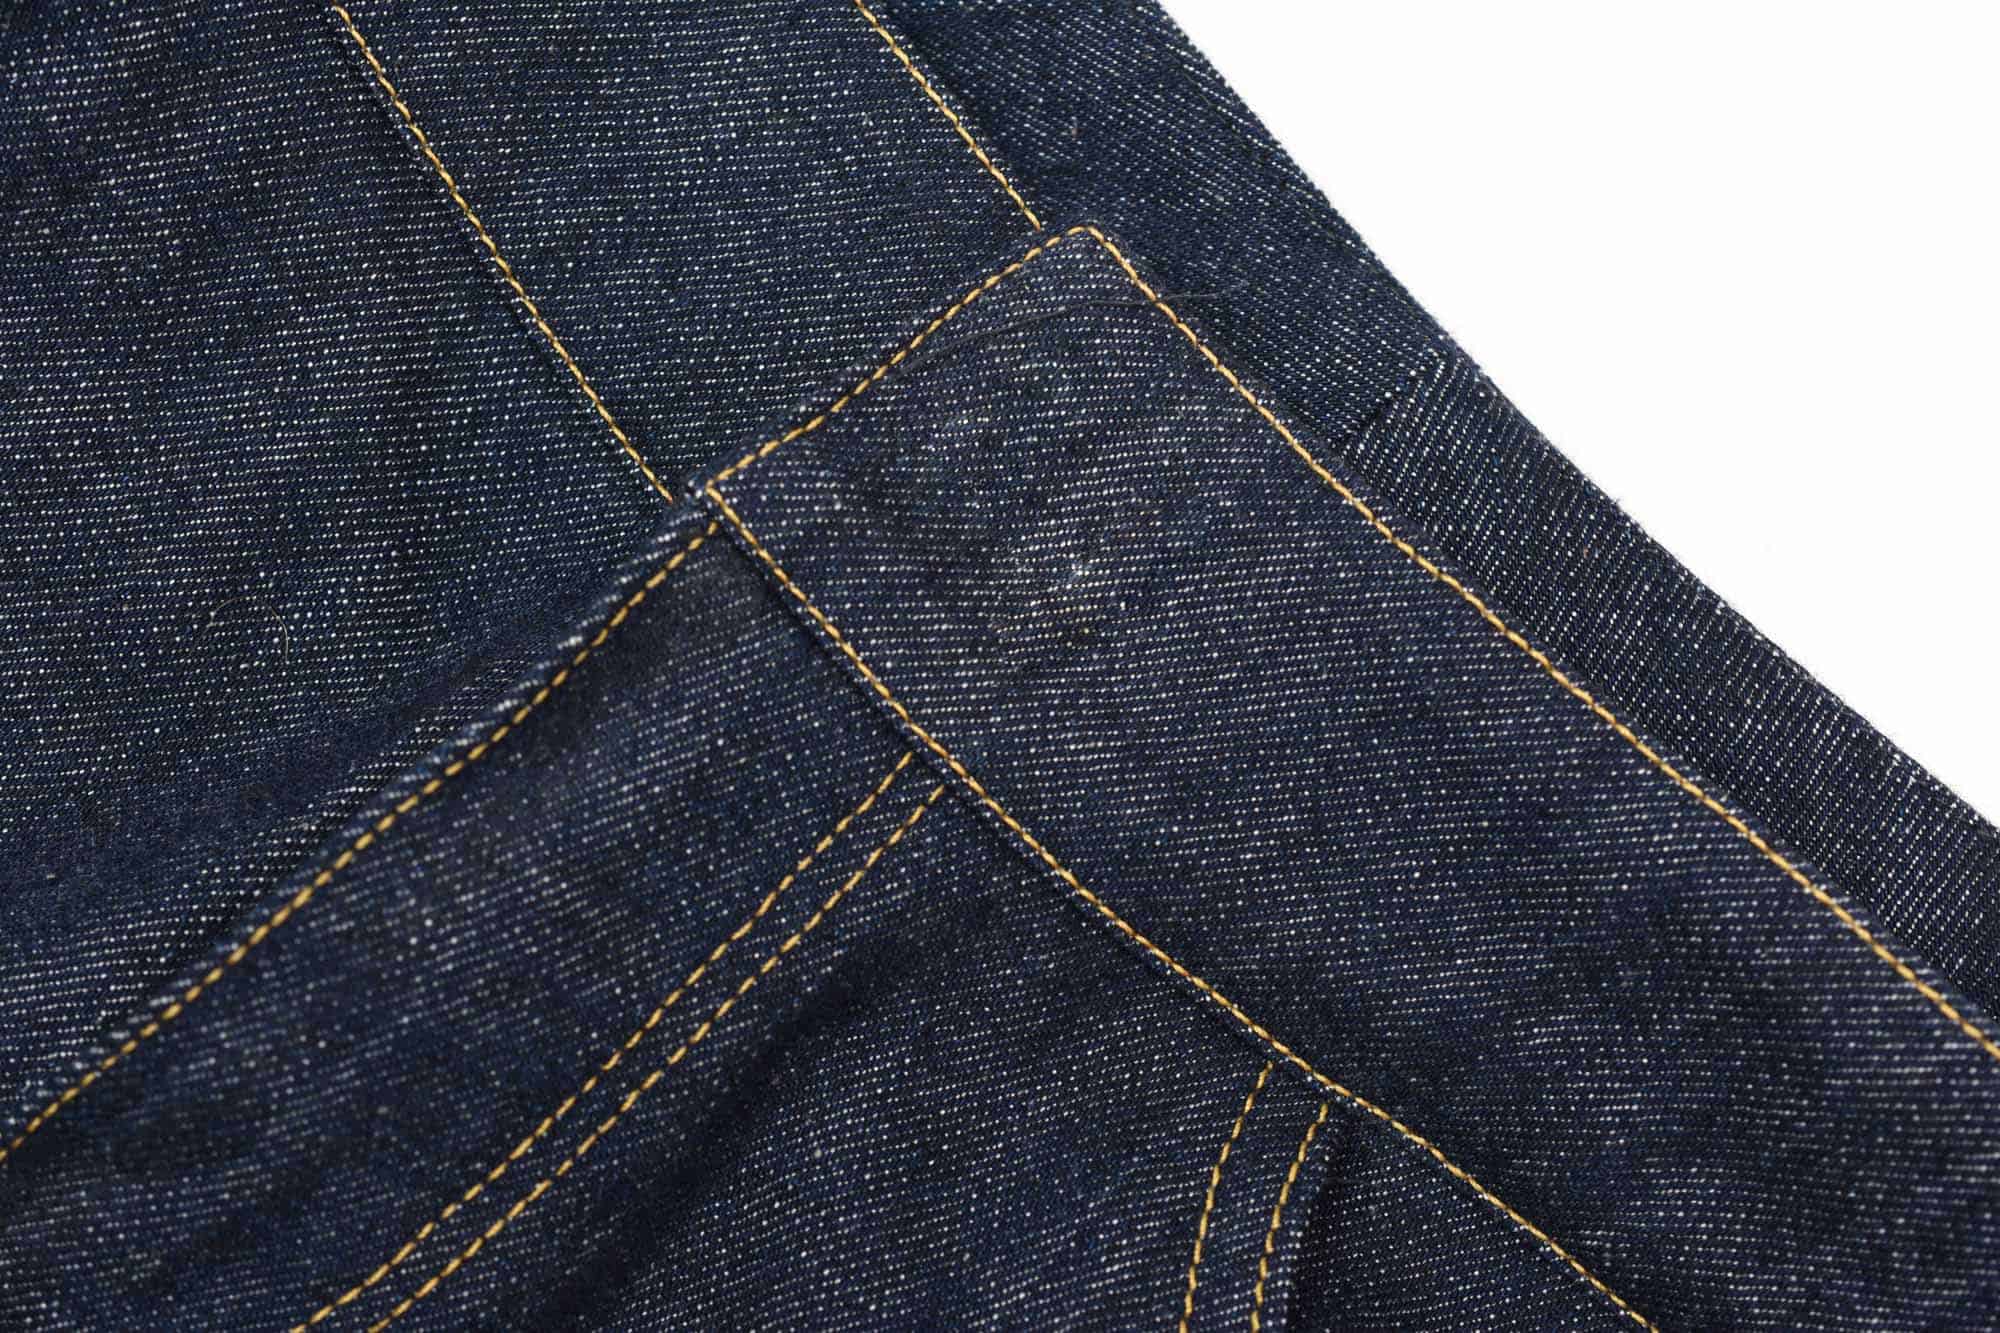
The finished waistband
This method really yields a really professional-looking waistband without you having to be a sewing pro, which is my favourite kind of sewing techniques to teach!
Other tutorials in my jeans making series
Sewing back pockets like a pro
How to sew front jeans pockets the professional way
Sewing a proper jeans zipper with a fly shield
Sewing side seams and the yoke

This post contains Amazon affiliate links, meaning that a commission is earned from qualifying purchases.
17 Comments
COREY
Nice job, good tutorial!
Johanna
Thank you!
Erika Sjöberg
Hej! Är det alltså ingen söm i framkanten (kortsidan) på linningen utan bara sticknings-sömmen som håller ihop yttre och inre linningsdelarna?
Johanna
Precis så! Genom att bara vika blir hörnen knivskarpa och stickningen håller ihop sömmen. Jättelätt och mycket snyggare
Erika Sjöberg
Aha! Då ska jag testa det nästa gång. Tack för tips 🙂
Machelle Helms
I CAN’T WAIT for your new book!! Thank you for all of the great tutorials you give. I LOVE how you teach techniques to such a great depth!
Johanna Lundström
Thank you so much! That’s so encouraging to hear!
Hazel
I always have problems with my handmade jeans waistband rolling. I have a bit of a tummy, and unless I wear a belt, the waistband crumples and rolls, even if I use a stiffer interfacing. I’ve seen ban-rol or buckram suggested in place of interfacing, but I worry it would be too stiff (and the shops are currently closed & it isn’t easy to find online in Canada). Any tips or suggestions would be greatly appreciated!
DebbieR
Darrell Thomas Textiles in Ottawa Ontario, Canada has wonderful interfacing. He also sell denim, jean zippers, top-stitching thread, buttons for jeans….if you ask them they even have rivets. They ship 🙂 and often have sales…there is one on their fabric right now.
Sophie Bradshaw
Hi Johanna,
Recently bought your jeans book – its brilliant! I have drafted a curved waistband for a pair of jeans I am making instead of a straight one, however the denim I am using has quite a bit of stretch. It has come out of shape almost immediately with some movement and hasn’t recovered well!
I want to be able to retain the stretch properties of the waistband but ideally want to avoid it stretching completely out of shape so much. I’ve seen lots of tutorials for stabilising curved waistbands for non stretch wovens (twill tape for example) but is there anything similar for stretch wovens?
Megan Townsend
I’m finding your blogs and YouTube videos on Jeans making absolutely essential until my copy of your book arrives to me in Australia. Do you have any tips on finding an interfacing suitable for Denim, especially heavier weight ones?
Comments are closed.