
When I bought the Janome Coverpro binder attachment last year for my coverstitch machine, I had high hopes that I would be able to achieve professional looking binding on my knit garments. I even took a class at my dealer’s store to really learn the technique.
But I soon realised that only a particular pre-cut cotton interlock fabric works well with the binder attachment,
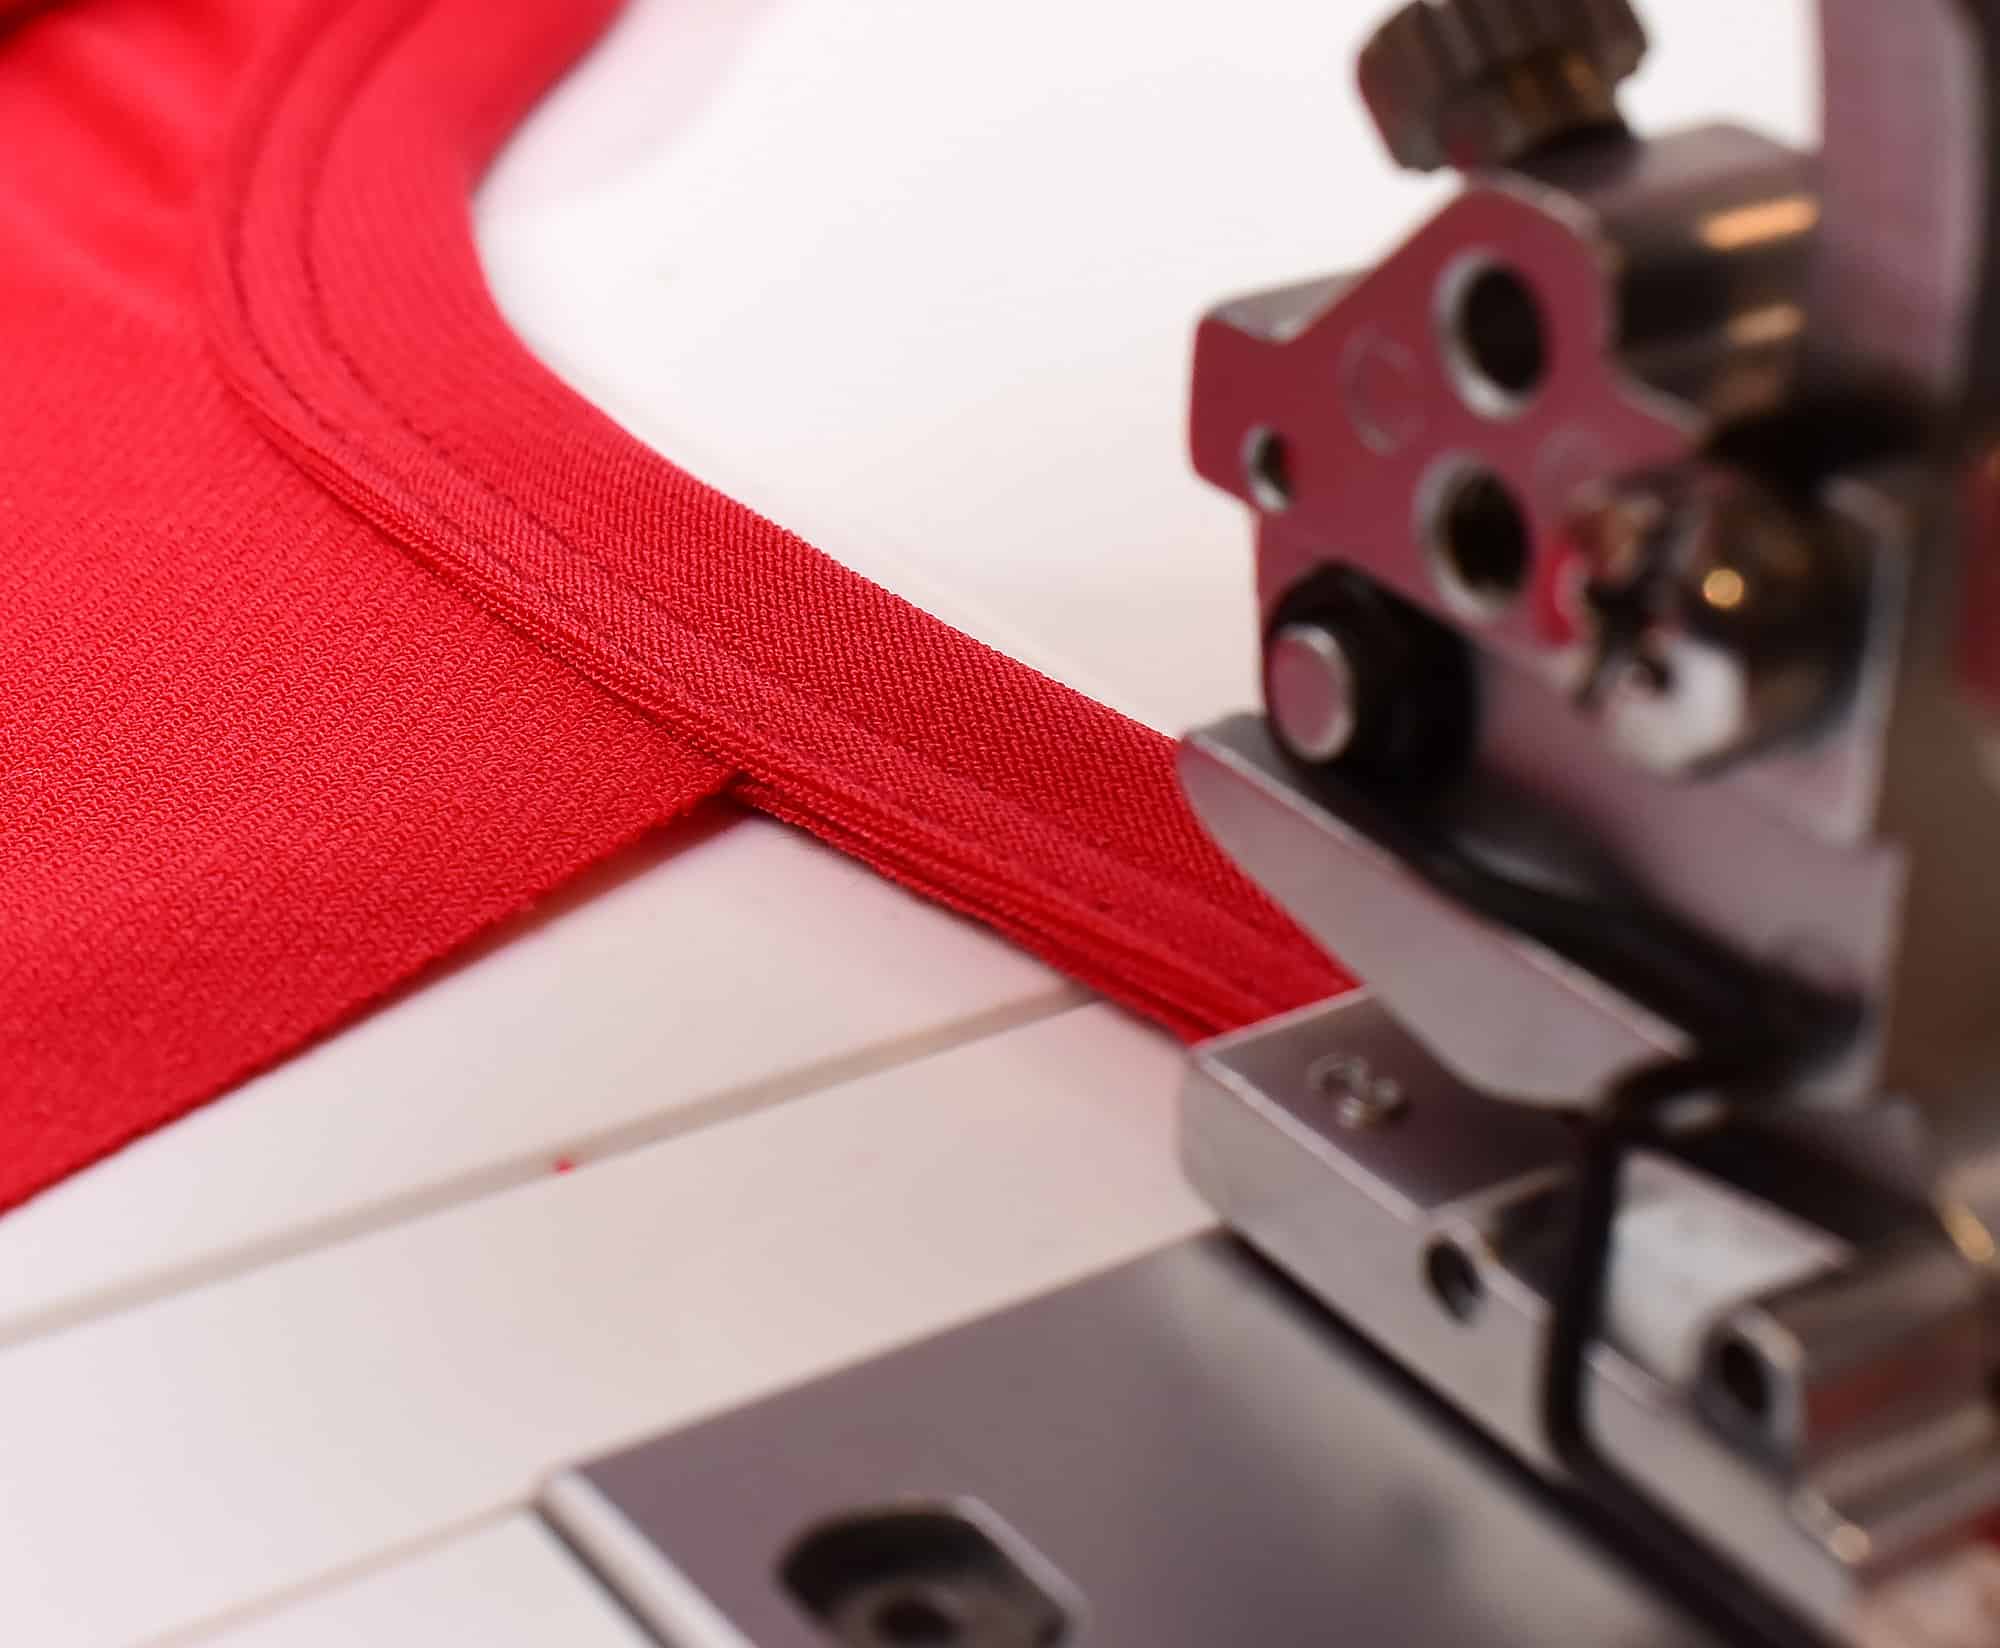
Whereas all those stretchy lycra fabrics that I love to work with was a nightmare to sew. Skipped stitches and uneven feeding was the norm, plus the binding tape kept slipping sideways when sewing, which resulted in very uneven seaming. Not fun at all!

So I decided to do some diligent research, reading blogs and Facebook groups and then just do some extensive testing and practising with the mindset that it is possible to achieve good results with the binder attachment.

It took me over eight hours, spread over three days before I was able to sew binding that I felt met my standards. Yes, it was a lot of time devoted to this task, but I did end up with something that looked pretty good, especially considering the fabric I used was a very slippery sports lycra fabric.

So let’s take a look at what worked for me
Coverstitch binder tutorial

1. Use a piece of lego
This is a tip I got from several Swedish sewists. Placing the lego pieces on the right side of the presser foot prevents the binding from slipping. A longer piece is better than the regular size ones. Attach it with blue-tack. Fellow sewist Laura also directed me to something that is called a magnetic seam guide which could work the same way.

2. Use a clear presser foot
A clear presser foot makes it easier to sew straight as you can see how the binding lines up and also when the tape starts to slip. I like the clear presser foot from Janome (Amazon affiliate link)
3. Max stitch length
Another tip I picked up from fellow Swedish sewists. That means 4 on the Janome Coverpro. This setting will help with feeding the tape binding through, plus it won’t look large like it would on regular hemming.
4. Experiment with the foot pressure
I found sewing over bulky binding much was easier when the presser foot pressure was reduced. On the Janome Coverpro, I found 13mm was a great setting. Normally this is counterintuitive as you are supposed to increase the presser foot pressure on thicker layers. Experiment and see what works for you.

5. Lower the differential feed
This might sound odd, but to get to get a balanced seam without wrinkles I had to lower the differential substantially. I had mine down to 0.5, but I think 0,75 would have been optimal on the Janome. Normal setting is around 1.3.
6. Use 90 needles
Skipped stitches is another problem when it comes to coverstitching binding. I found that a 90 size coverstitch needle worked better than the 80, as you will sew over many layers. I only use Schmetz ELX 705 overlock needles (Amazon affiliate link); they are the best for coverstitching.

7. Roll the tape on a toilet roll
Another tip I picked up from a fellow sewist. Roll the tape on an empty toilet roll and put it on a paper towel stand, This will help to feed the tape evenly and keep it from collapsing before it is fed into the binder attachment.

8. Secure the plates
On the Janome coverstitch binding attachment, the plates don’t keep very still, so I ended up taping them in place.
9. Gently guide the tape when sewing
Use a narrow tool such as an awl or tweezers to guide the tape back if it starts to slip. Don’t tug and pull the tape with your hands while sewing, this is a recipe for messed up stitches. This is something I learned in my class and found it to be very true.

10. Practise. A lot.
This could be the number one key factor to success I think. I noticed the same thing when I took the class. After a lot of practising it just went smoother, even though the machine at the store was already set up correctly. So even if your setup is spot on you might still need to spend a lot of time sewing scraps before moving on to the real thing.
Video Tutorial: Coverstitch Binder Success
The Janome Coverpro Binder Attachment (Amazon affiliate link)

This post contains Amazon affiliate links, meaning that a commission is earned from qualifying purchases.
43 Comments
Anthonia
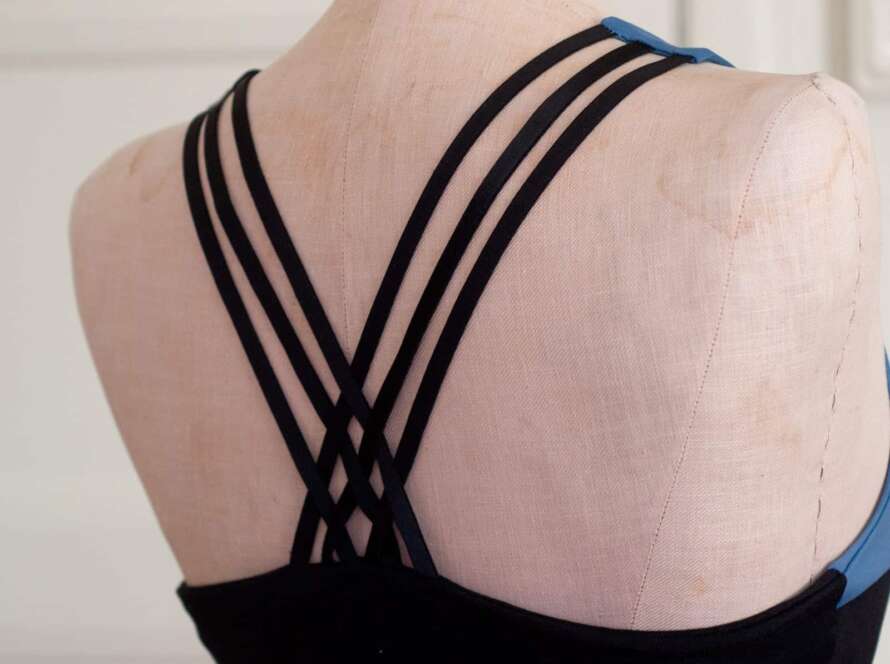
Wow! The blue top looks more than professional.
I don’t have a coverstitch machine as I hardly sew with stretch fabrics but I loved reading this post.
Are they of any use for woven fabrics?
Johanna
Yes the binder attachments works for wovens too, but I have not tried it myself but I imagine the finish would look beautiful
PsychicSewerKathleen
Thank you Joanna! I noted all your points on paper to have it at the ready when I want to use my binder attachments with knit banding. I don’t know if I have your patience! I’ll give it a whirl but if it’s too frustrating I have a STRONG feeling I’ll end up resorting back to my old way on the serger and sewing machine 🙂
Johanna
Hehe, yes it does require some patience and just like you I already felt confident in my old ways of making a knit binding. But I will say the finish looks so nice once I got it right I felt it was worth it!
Mary
Thank you for putting the hours in to come up with these tips. I have just asked my children for a lego block (out of the thousand pieces of lego they own)! I’m thinking about getting an extension table and attaching a binder to that. In theory the table supports the weight of the fabric and there is less drag causing skipped stitches. Planning to buy a generic binder off ebay and using blue tack to attach it. This is a cheaper solution than spending Australian$199 for a Janome binder/plus plate. I’m terrifed of spending heaps of money and then it just not working to a standard that I can live with.
Your binding looks great and the tips you have provided are wonderful. I find it interesting that you still had to tape down the plate even when it was screwed to the attachment points.
Johanna
I think getting a good generic binder will be a better investment than shelling out $$$ for the brand one. I got my cheaper as part of my coverstitch packet, but I’ve tried a generic that only cost 1/3 of the Janome and it was just as good or better. If I had known this beforehand I would have bought that one instead of the Janome.
Those screws just don’t sit tight enough to stabilize the plates. I’ve changed screws and everything but I just can’t get them to keep the plate still. Maybe I’m doing something wrong, but when I took the class the plate wasn’t stable either on that machine.
KAREN FAULDS
I’ve just bought a generic binder and base plate. I couldn’t get the binder to attach securely to the base plate with the provided screws either. My husband had a look at it and he says it is because the edgings around the holes for the screws are very slightly raised above the plate. Easiest fix is to use one or two washers between the screw and the hole, which has worked for me, but failing that, he said to remove the plate and give a few passes of a metal file over the top of the hole to bring it level or even slightly below the plate. I haven’t needed to do this because the washers worked for me Now I just need to get the settings right.
Adrianne
Wow, thanks for all the tips! That lego trick could work on lots of things; my mind is working on the possibilities.
Your garments are fabulous and you inspire me to keep trying, so THANK YOU!
Johanna
Yes, the Lego was a game changer! I can also see many uses for it now, weird that it isn’t a better-known hack since many of us have access to those plastic pieces 🙂
Celeste
This is awesome. I have the same machine, same problems. Thank you!,
Johanna
Happy to hear you found it useful, it was so tricky to learn so I’m happy to share my findings!
Valerie
In reading your post, I am confused as to whether you used the clear view foot or the foot that came with the binder. I have the binder and foot AND the center guide clear foot which is not working for me because the fabric wants to come between the space where the rudder would go. Thinking of investing in yet another expensive attachment, the clear view foot which does not have that gap. You give me hope.
Johanna
I tried both the included and the regular clear presser foot. The clear one was superior, it is a bit longer but I didn’t find it to be an issue. And no scrunched fabric, but yes another $$$ accessory
Sade Williams
I can’t imagine if we didn’t have people like you, I’d give up! Thank you for the information!
I have noticed some tape binder attachments with an elastic feed on the top but I can’t seem to find it or any info on this at all, how else can you add elastic in between the binding without having to serge it on.
Auschick
I have a pencil holder next to mine and roll my strips into empty thread spools. I then put a thin rod into my pencil holder, and put the spool on that :). And because I keep them rolled up, I don’t need to worry about them curling up.
April Christensen
Does this work on very narrow light Modal/Tencel knit? I’m even having issues with tunneling with this fabric unless there’s 4 layers.
Femke verschueren
My brother makes very beautiful standards for the tape and it works perfectly!! I wanted to post a picture but i don’t know how…
Femke verschueren
https://www.etsy.com/shop/mrRubenWoodcraft
This is his website
Gail
Recently bought a binder and was not getting good results. Just followed your instructions and used your settings and I got a perfect binding. Thank you, thank you so much. You have saved me hours of trial and error. I really appreciate you taking the time to blog this.
Johanna
Yay, that makes me so happy to hear! As someone who struggled a ton too before I figured all the stuff out, I totally know the frustrations!
bethany
OH MY GOSH!!! i have been struggling for months and almost gave up. i plugged in all your settings and it went from hopeless to perfection. i am almost crying right now. i am new to your blog and need to explore your backlog of cpx2000 posts bc i have so many questions. thank you thank you.
Irene Sweeney
Hi Johanna, I’ve been practicing with my new binder and have found placing little rubber washers under the screws attaching the binder to the base plate helps to stop the plates from moving, have ordered your book & can’t wait to get it I’ve got lots to learn!
Judit Zombo
Hi Irene, I am new to the binding foot can you put up picture of washer and bolt you are using?
Not sure what to purchase exactly. Thank you JuditZ
Caroline
Thanks Johanna 🙂 I’ve just bought the Brother CV3550 coverstitch with the binder attachment… looking forward to trying it out. I am hoping your tips will save me a lot of time and frustration!
Nicola
You are a life saver. I have been struggling with the tape moving sideways all afternoon and you’ve given me a simple fix with the Lego trick. I used a sticky seam guage but it’s the same results.
Thank you so much
Robin E.
I’m researching cover stitch machines and am thinking of Janome CPX 2000 or Brother CV3440 but undecided. I like certainn accessory feet Janome offers that Brother does not but am wondering if Brother CV3440 is a better machine. Brother CV3440 is easy to thread and I like the features (seam guide on machine, number values on presser foot presser guide and included clear presser foot). I’m not sure if the Janome has a higher presser foot lift capability and/or removing fabric might be easier on the Janome than on the Brother coverstitch? Top stitching hems and cuffs seems like it would be more accurate using the Janome cover hem guide. I also could use the Janome center foot guide but not sure if I could find something similar that would fit the Brother. I don’t see much reviews or video out there for the Brother CV3440. It should be the same as the CV3550 minus the extra stitch feature. Walmart.com was selling the Brother CV3440 for $504.99. I emailed Brother and Walmart.com who confirmed by email that the machines sold at Walmart.com are the same machines internally and externally as sold at authorized dealers so that seems like a great value.
Robin E.
PS, I recently read that using a magnetic seam guide is harmful to computerized machines. I believe I read this while looking at a magnetic seam guide product description on Joann.com. I’m not sure if a magnetic seam guide would harm a cover stitch machine or if it applies more to computerized sewing machines. Just food for thought.
Andrea McHugh
Hi! My binding is getting better and better. However I still find that my fabric looks gathered on my neck bindings. Any suggestions?
Victoria
I found that putting little black rubber washers under the screw heads helped keep the binder from slipping without taping.
Eve Theriault
What about the position of the serpentine? Does that have an effect on the results?
Samantha
I could stare at this blog forever…it’s that beautiful!!!
Julie
Thanks a lot I’m sat here reading your blog I’ve got a Singer coverstitch and not had it out yet going to get some kneedles from Amazon I’ve got my material and cottons now so I’m going to try it out thanks for the link and your time
sherry yusuf
Hello. Which size binding attachment would you suggest? 8 to 32 or 15 to 55 (mm). Just sewing clothing.
Claire
Great blog, you’re nudging me closer and closer to getting a coverstitcher!
I’ve found when sewing a racer back that if I don’t put a tiny bit of tension (ie slightly stretch) on the binding as it goes on, the back sags. Have you found this to be true and if so how to you make sure you add this tension with the binding attachment? Your racer back looks great.
Thank!
Jan Willis
Claire, I think that the binder inherently adds a little tension while passing through the folders.
Karin
Wow, net een namiddagje oefenen erop zitten en er niets van terecht gebracht.
Dit ga ik uitproberen. Net wat ik zocht, dank u wel voor je advies!
Jolene
Thanks for sharing all your valuable tips and information. I bought a new Janome CoverPro 1000CPX machine, which is wonderful. Then a generic tape binder….which took a lot of patience and practice to get a decent result. Yes, I did use your tip about taping the tape attachment to the plate. It made all the difference when lining up left side of bias tape to the needles.
Mrs Susan Smith
Hi can anyone tell me what settings the needles and looper setting needed for the binding attachment keep getting thread breaking and messy on the back tried all the tips in the manual but still no joy thank you sue from Scrooby
Leila
Hello Johanna,
Thank you for the excellent book Master the Coverstich Mashine. It’s very good. I just have one question,
It doesn’t cover how to sew a binding into a neckline when the side seams are sewn together. I have a Janome 2000 with a free arm so that’s possible. I am just wondering what is the best way to connect the binding together after sewn the whole round?
Karolina Slowicka
Hi! Great blog! Thanks for all the effort! I love sewing binding on my coverstitch but I have one problem…if there is a seam connecting two strips of binding, it doesn’t pass easily through my binder attachment. It gives me really messed up stitching and I hate it. I’ve tried a few solutions but it’s just getting worse and worse…how can i solve this?
One more question, when sewing with a binder attachment I saw that most of the tutorials first attach the binding and then overlock the side seams. But then the overlock side seam is quite visible and the binding is too bulky in that spot to my liking…any suggestions?
Comments are closed.