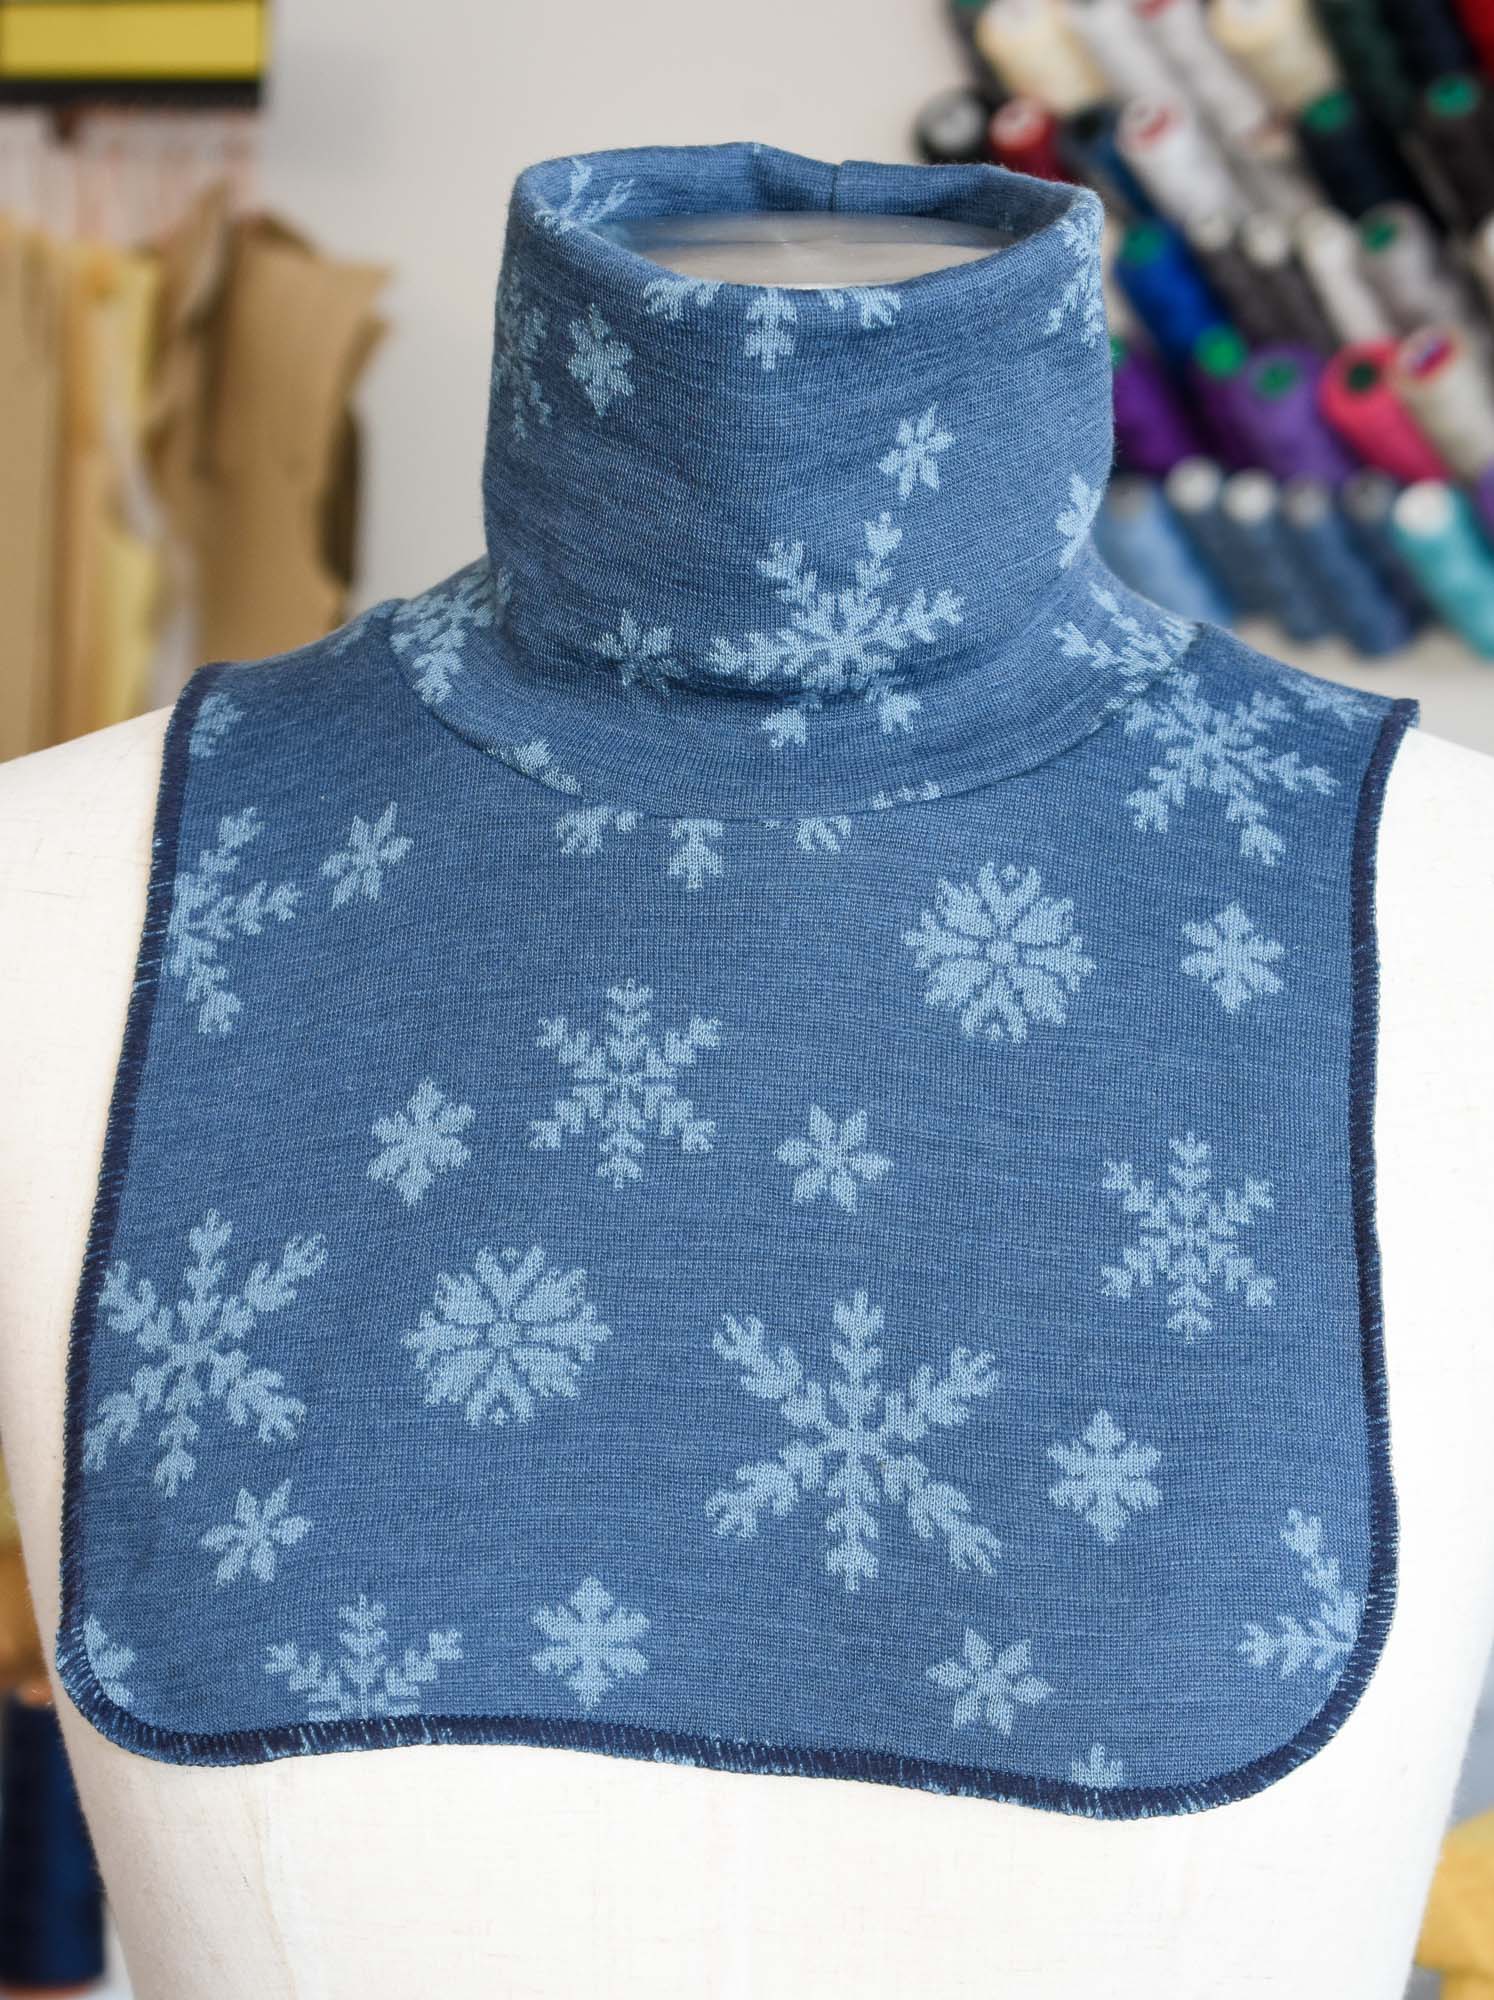
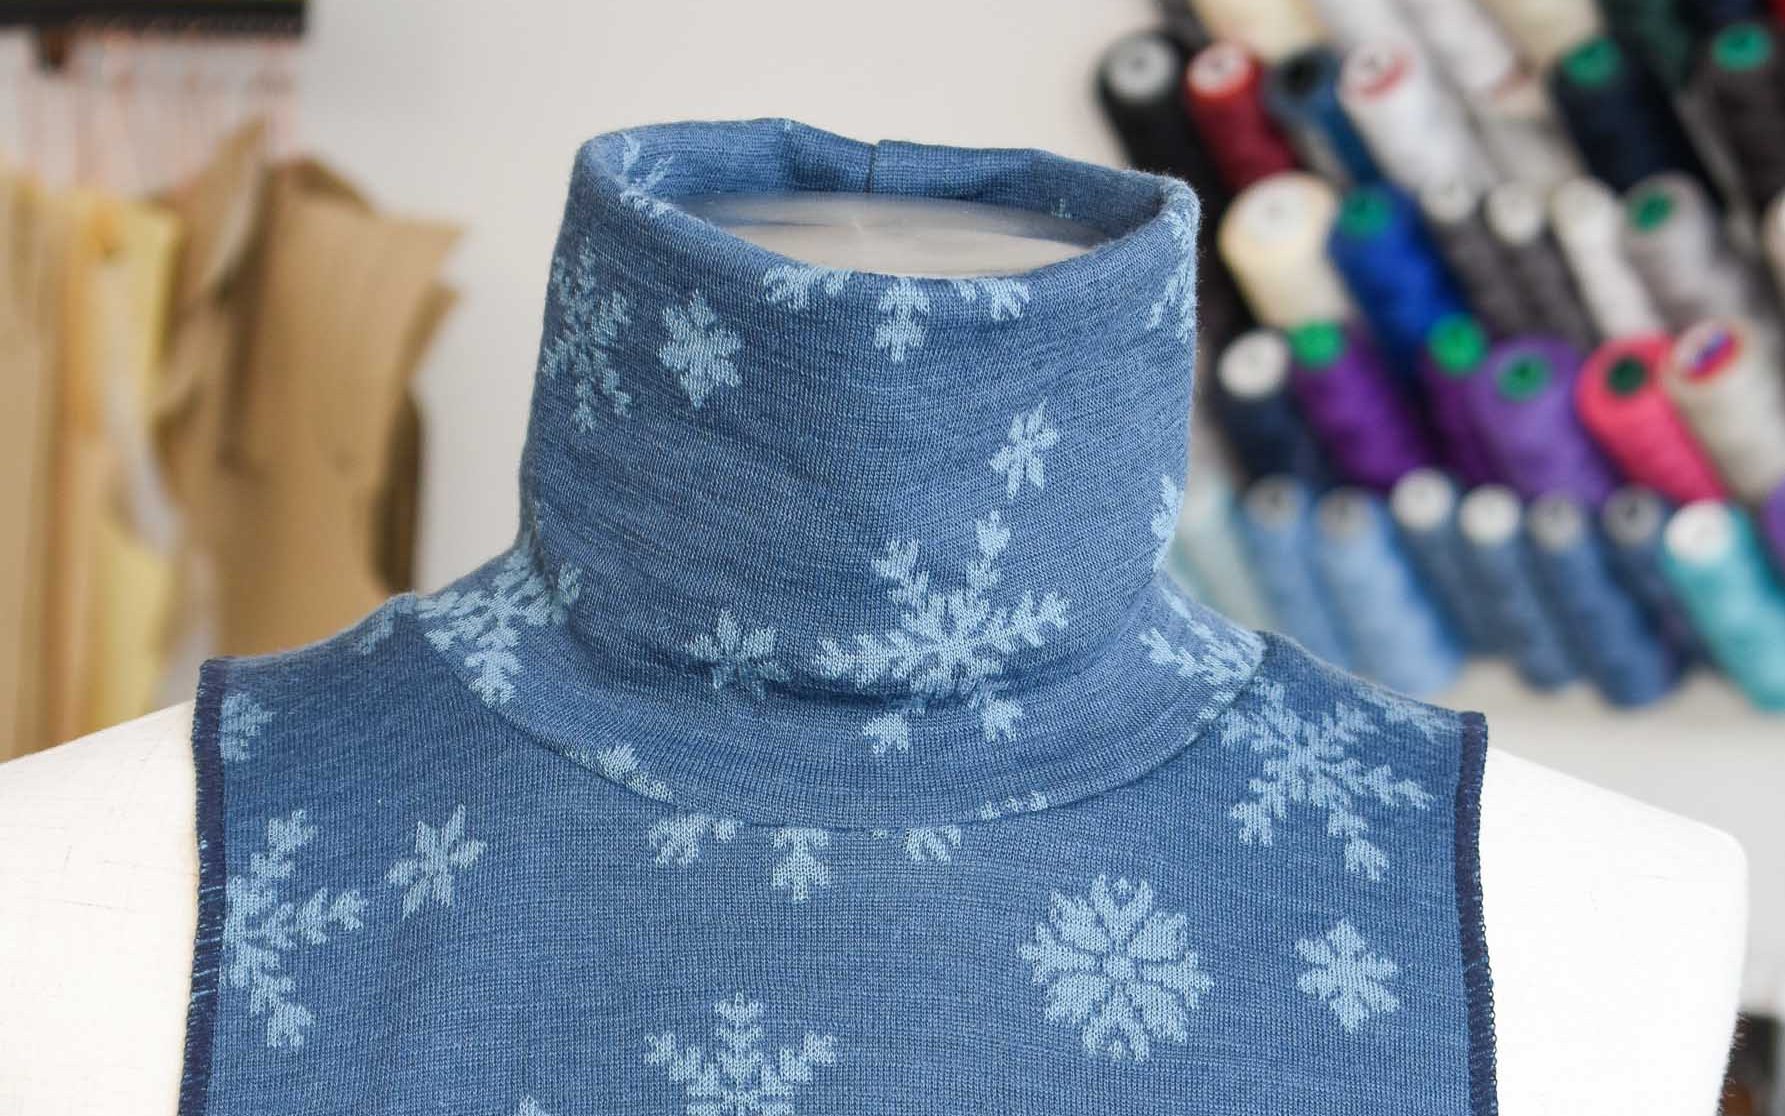
Turtleneck bib, or dickies as they are also known, has made a big comeback lately. Here in Sweden, they are in every shop right now, so I thought, why not try to make one myself?
Since I’m not a knitter, this tutorial is for sewing your own bib, which is actually very easy and a quick project too. Having a serger will help immensely. But you can use a regular sewing machine, too if you have the right fabric.
Fabric and notions
- Sweater knits, stretchy fleece or similar fabrics. The knit should not be flimsy but have plenty of stretch.
- Sewing pattern with a turtle neck collar, or you can draft one yourself (see instructions below).
- Serger or a regular sewing machine
- Woolly nylon, i.e. a flossy serger thread (optional)
Drafting the bib pattern
You have two options for making the bib pattern, drafting the pattern from scratch or using a sewing pattern for a knit top with a turtle neck.
Using a turtle neck sewing pattern

I used my Gurli Knit Top sewing pattern to draft the bib pattern, but any sewing pattern for a knit top or sweater with a turtle neck will work.
1, Align the front and back inner shoulders
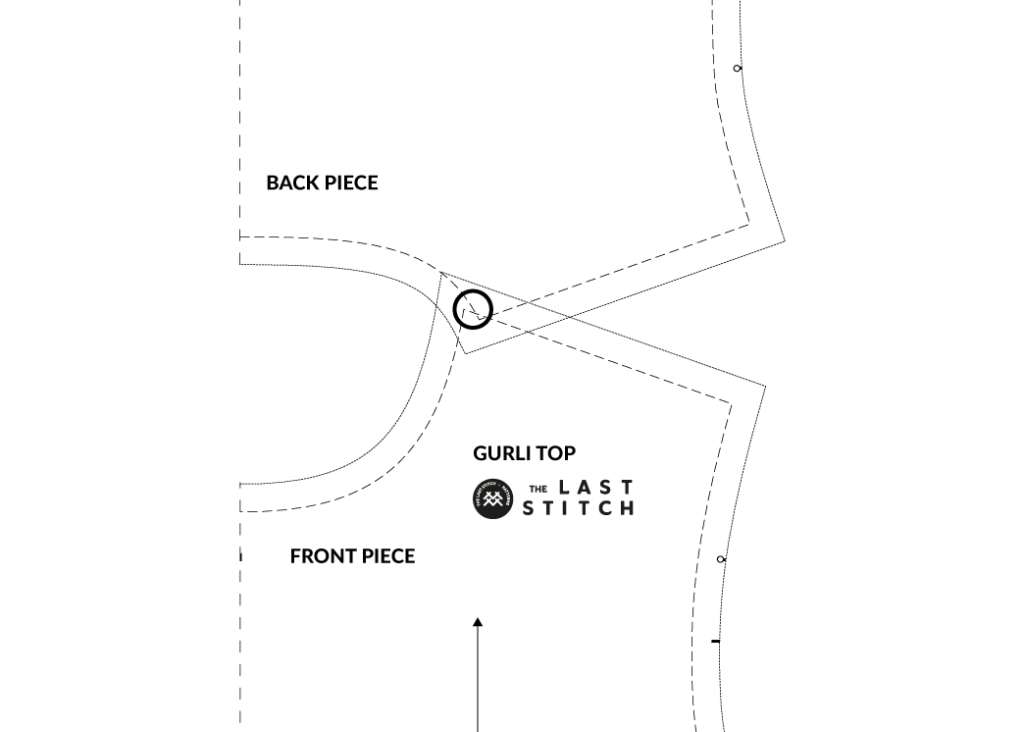
Put the front and back pieces together so that the inner shoulder seamlines align. Do not align along the seam allowance (outer edge) since that will make the neckline too big. If one piece is wider, you will have to shift the pieces slightly to get the centre-back and centre-front lines to align up (see the circle).
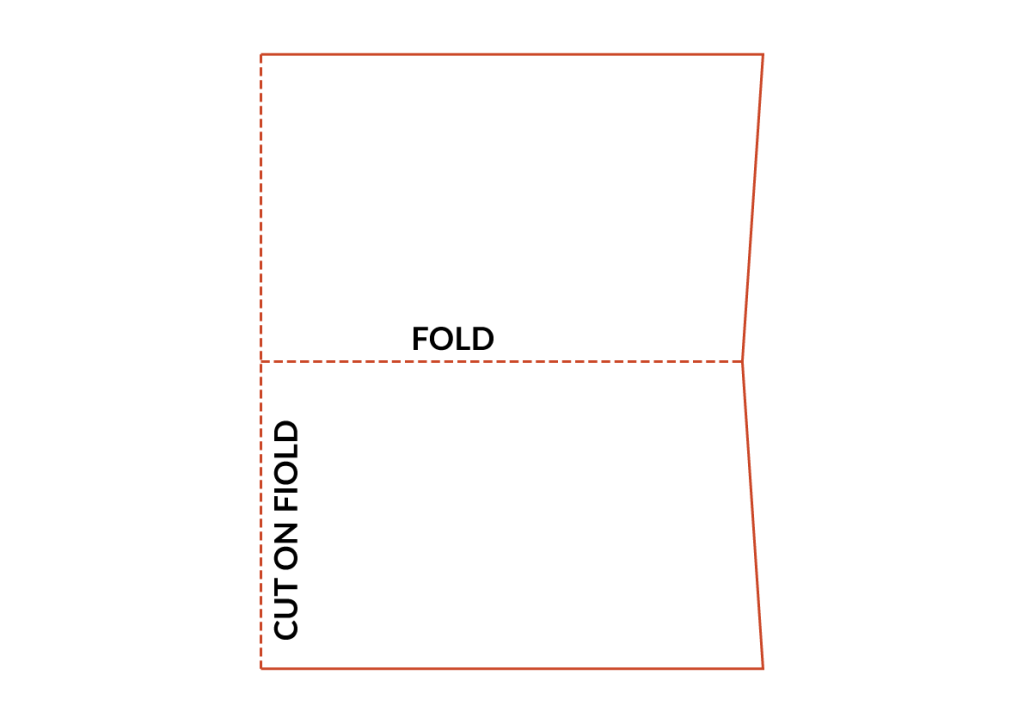
2. Draft the bib
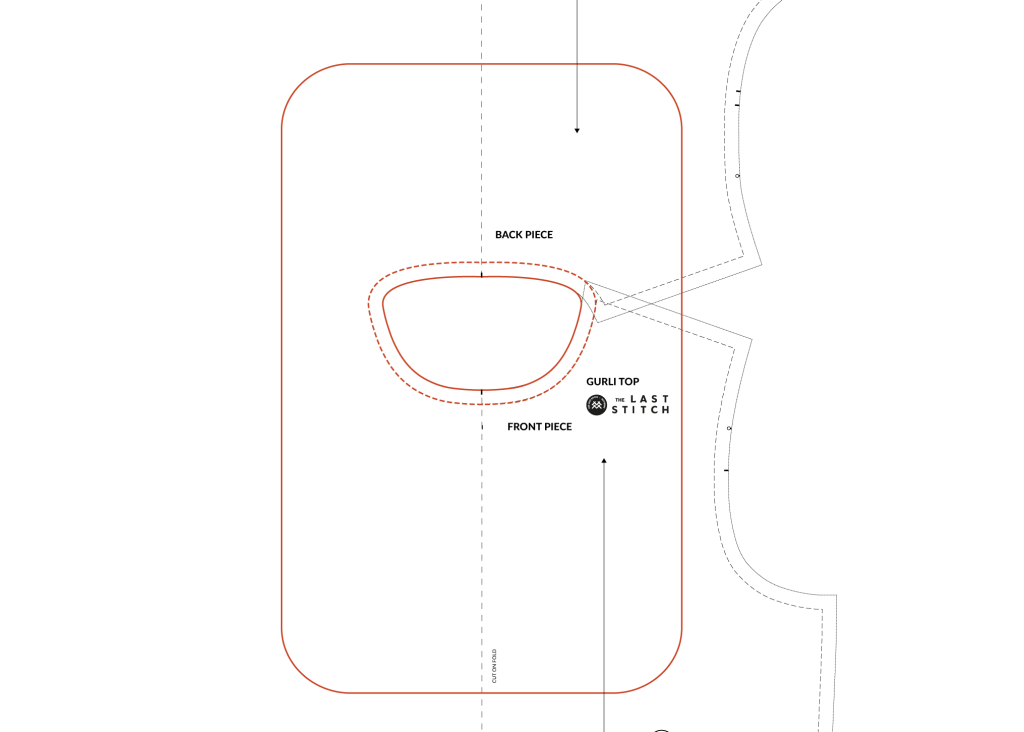
Draw a new neckline following the original shape. Make sure it’s smooth with no sharp corners.
Then draft the outer edges of the bib. I used round corners to make sewing edge finishing easier, but sharp corners can work too. Mark the centre-back and centre-front notches, as this will ensure that the turtle neck is attached evenly.
The length and width of the bib
A bib is often longer in the front than the back. Ensure it’s long enough to cover your undergarment when wearing your jacket or coat. As for width, make it shorter than your actual shoulders since you don’t want it to bunch up under your jacket.
A note on the shoulder seams
For simplicity and comfort, I am omitting the shoulder seams. The drawback with this approach is that the bib will not lie 100 per cent flat since the shoulders aren’t slanted. If that’s an issue, make the bib into a front and back piece and join them together at the shoulder seam.
Notice how the ends of the bib are a bit lifted from the shoulder line. That is due to the lack of shaping shoulder seam. The longer you make the shoulders on the bib, the bigger the cap will be.
The turtleneck pattern
The Gurli Knit Top pattern I’m using comes with a turtleneck piece, so I don’t have to draft one. You can make the back seam straight instead of slanted if you prefer.
Drafting a pattern from scratch
The principle is the same, but here are a few pointers when drafting your bib:
- The back neckline should be more shallow than the front neckline
- The circumference of the turtleneck should be shorter than the neckline. Depending on the fabric, I suggest making it around 85-90% of the neckline length. And then it’s stretched out when sewn.
- When drafting the neckline and collar, use the seamline. Then add seam allowance; I recommend a seam allowance that is either 6 mm or 1 cm (1/4–3/8″)
Sewing the bib
1. Cut out the pieces
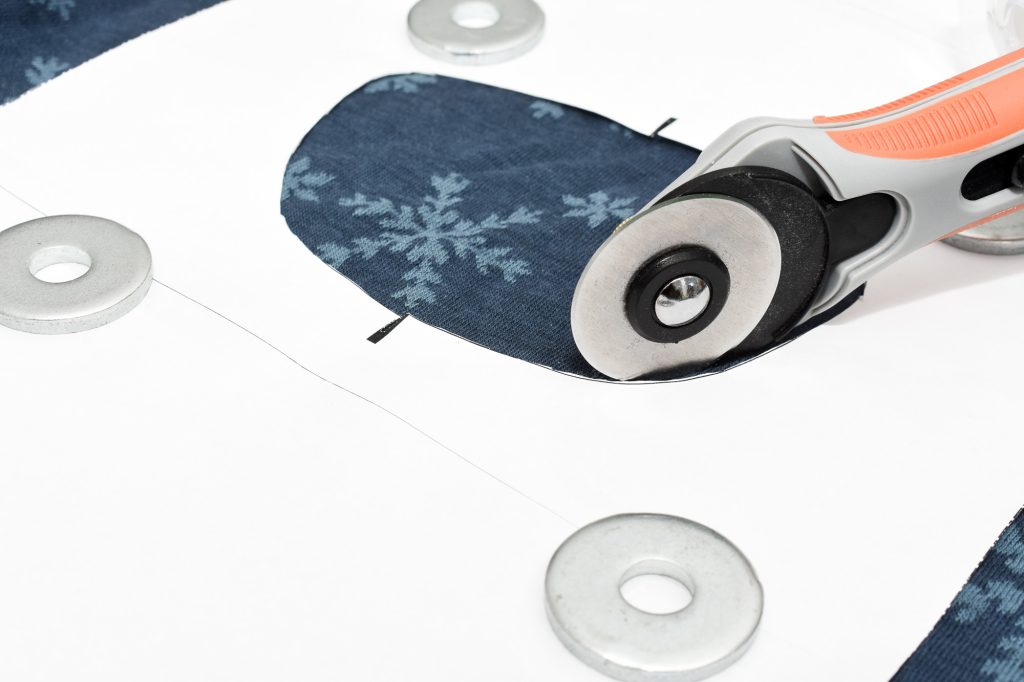
Having a rotary cutter is helpful for ensuring that edges are evenly cut.
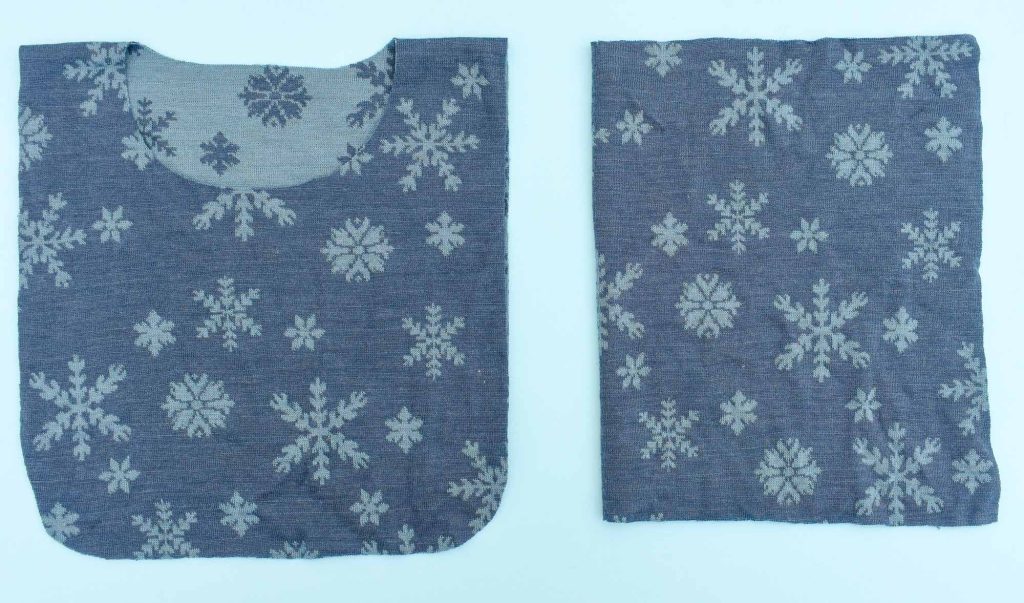
2. Overlock the edges
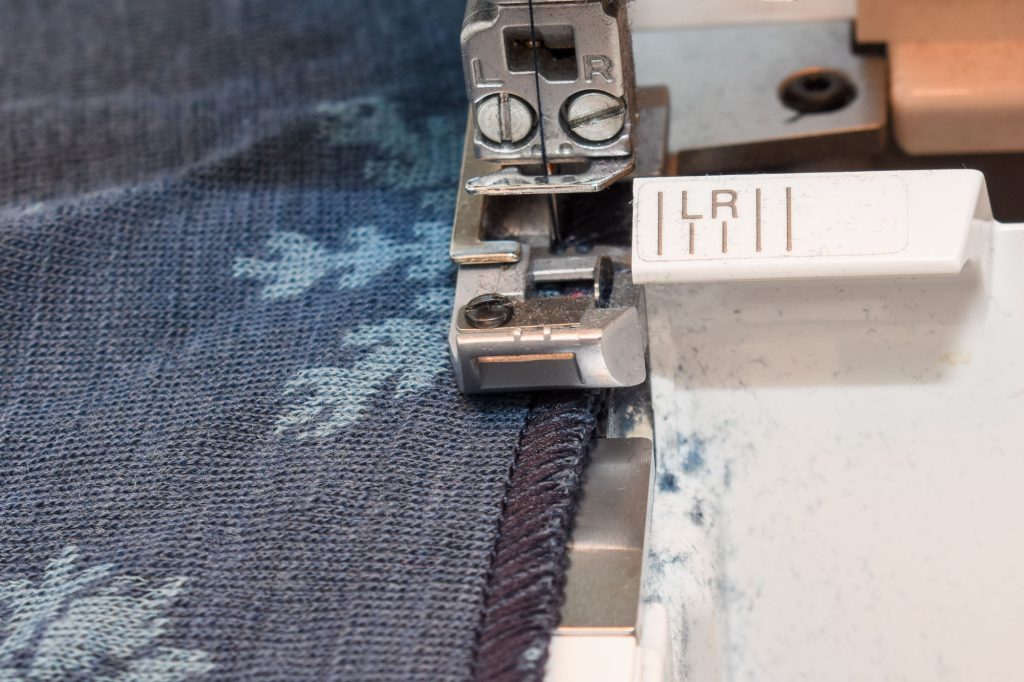
If the knit is prone to unravelling or curling, you’ll need to overcast the edges.
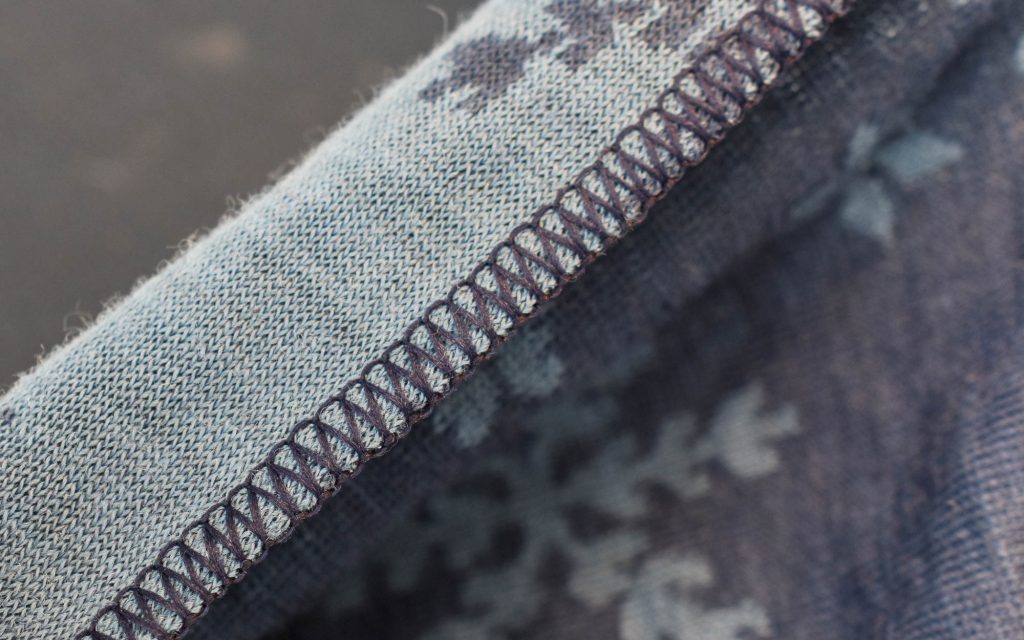
If you have a serger, I recommend using the wide 3-thread overlock or the 3-thread flatlock. For a beautiful finish, use flossy woolly nylon (Amazon affiliate link) or another thicker thread in the looper.

For this bib I used a 3-thread wide overlock with woolly nylon in both the upper and lower looper.
3. Stitch the turtleneck collar
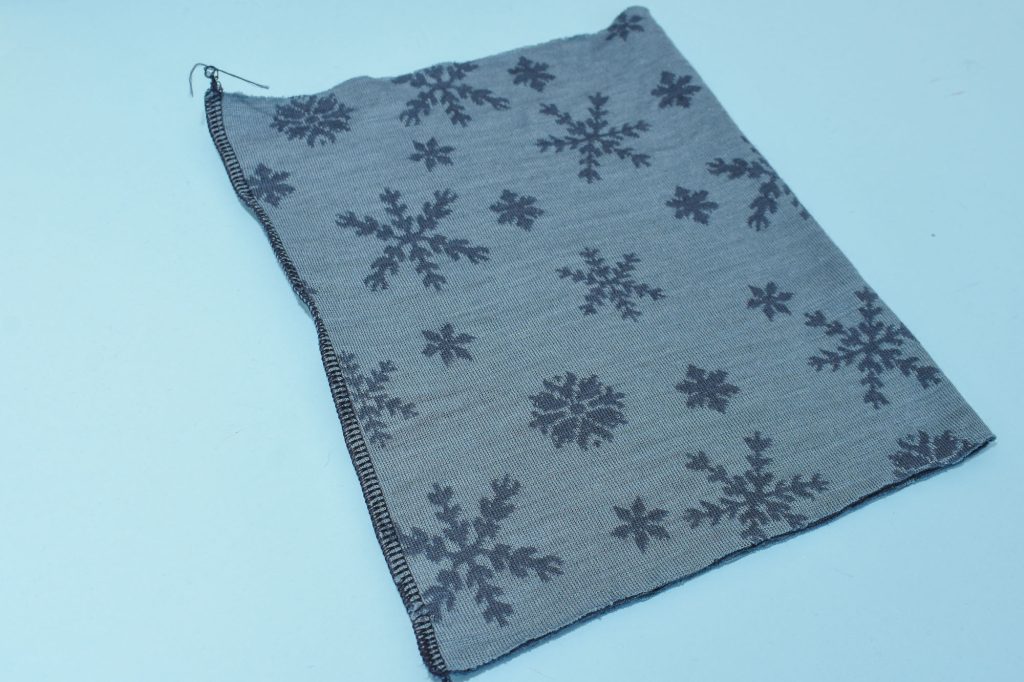
Sew along the edges, right sides facing
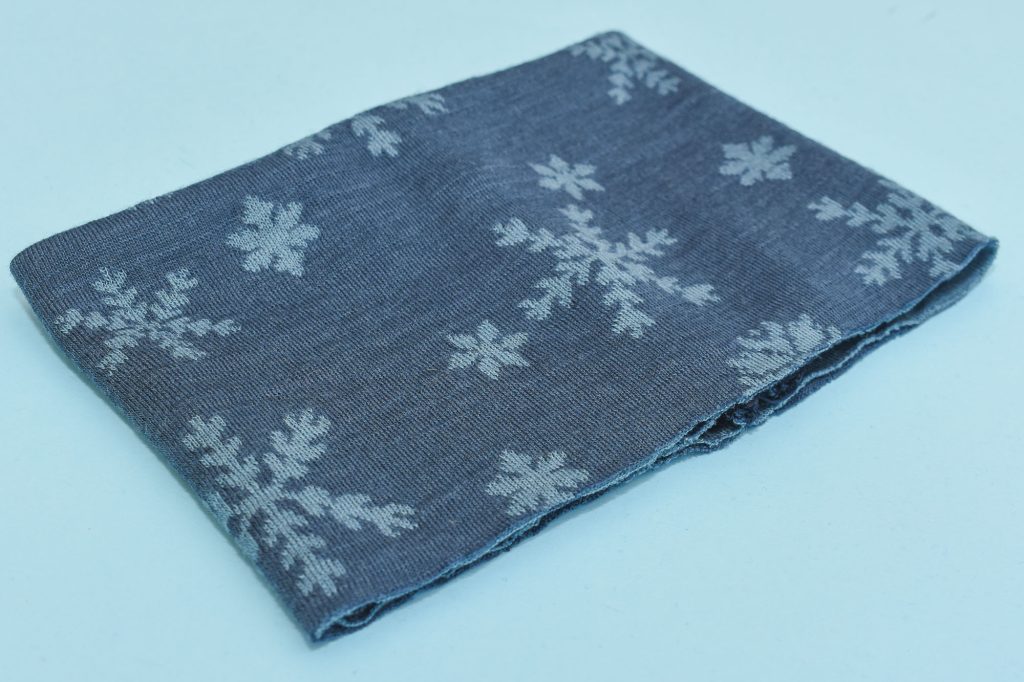
4. Turn the collar out and fold
5. Attach the collar to the neckline
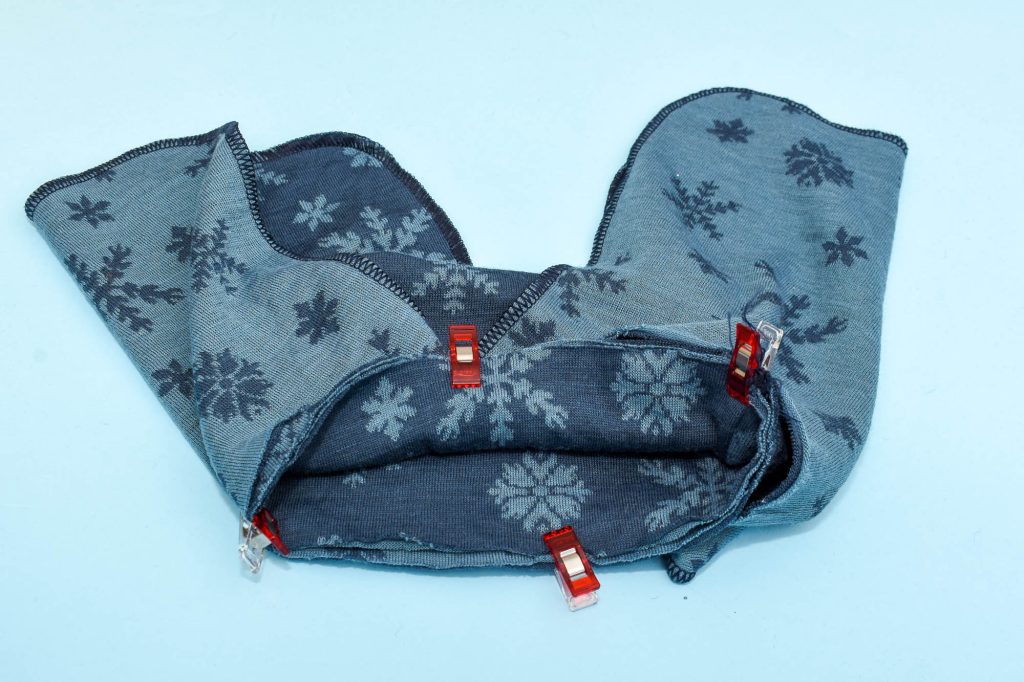
Pin or use wonder clips (Amazon affiliate link) to attach the collar, right sides facing. Place the collar seam mid-back (centre-back). Match the notches.
6. Stitch the turtleneck
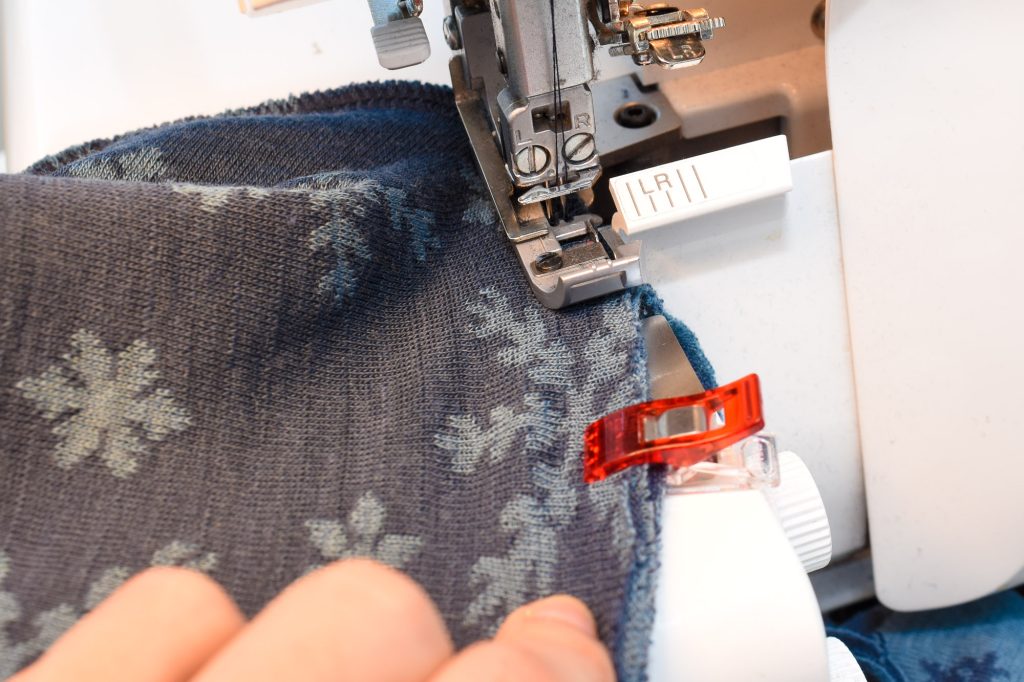
Have the collar facing up, towards you when sewing. Stretch out the collar to match the notches. Use an overlock stitch or a narrow zigzag stitch.
The finished bib

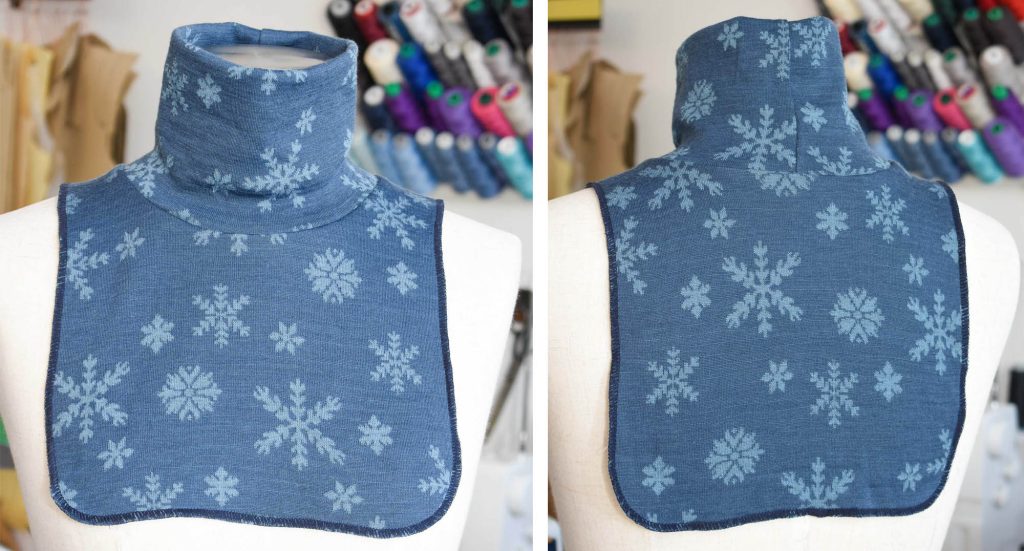
This is how it looks on the reverse side. You can iron on low heat to press down the seam allowance if you like.

This is how it looks from the front.
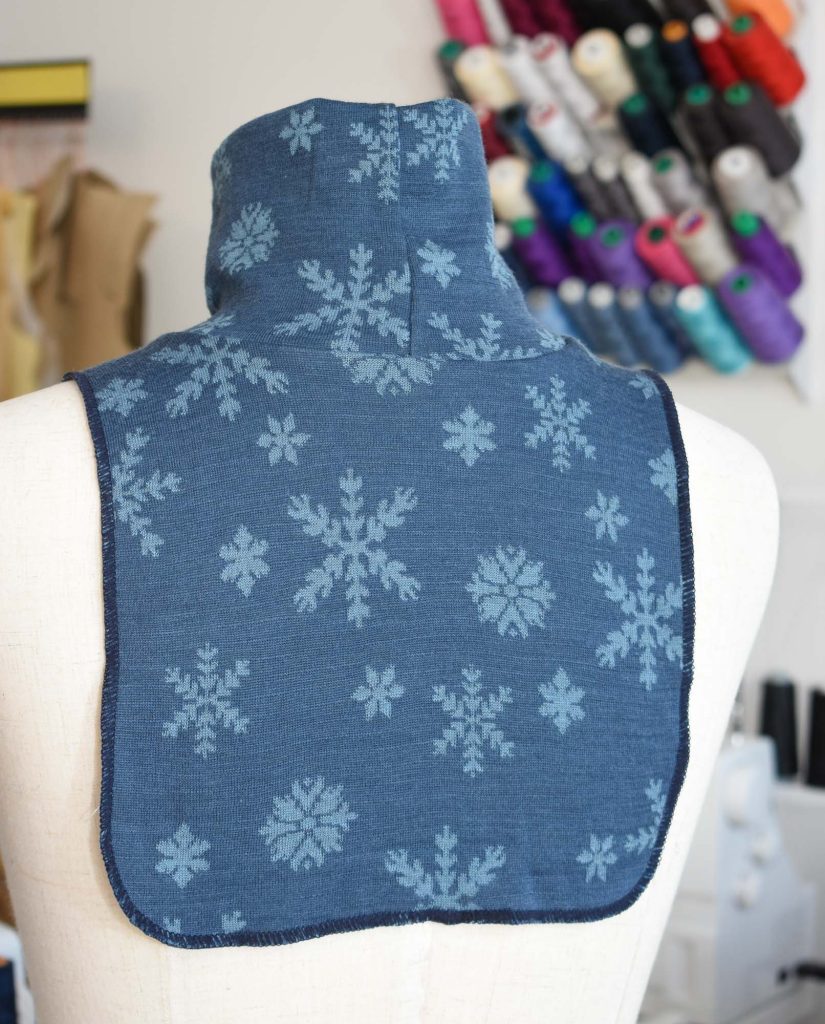
Back view. I ended up extending it slightly in the back, but it’s still shorter than in the front.
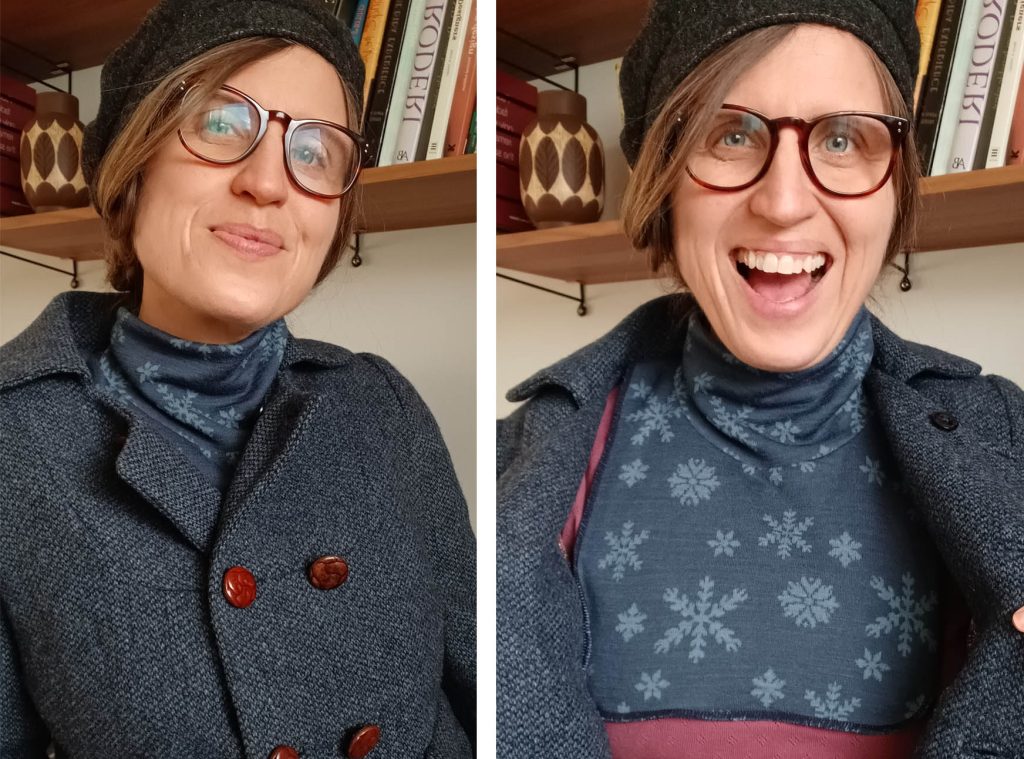
Ready to face the winder chills with my new bib wearing my Burdastyle Tweed Jacket and Iselin Beret.

1 Comment
Comments are closed.