
The Eivy Cardigan sewing pattern is semi-fitted, with about 8 cm (3”) ease around the bust and hips (ease means the extra garment width added to the body measurements for a given size).
This means that the pattern is best suited for knit fabrics with at least 20% stretch (see How to Pick the Right Fabrics for the Eivy Cardigan to learn more).
However, when I released the pattern I got a bunch of questions from fellow sewists who wanted to use fabrics with less stretch to sew the Eivy Cardigan and wondered if it was possible?
So the short answer is yes, but you need to modify the pattern. The easiest way is to simply size up and perhaps also deepen the arm opening slightly.
But if that is not an option (Eivy goes up to size EU56/US24), or if you already have made your personal alterations on the original pattern, you can also do a simple ease alteration that could take as little as 30 minutes from start to finish. No cutting, taping or spreading is required so this method is quick and easy.

To add more ease to the Eivy pattern you need:
- Tissue paper
- A pencil
- A ruler
- The side front piece, mid-back piece, side-back piece and sleeve pattern, in your original size.
Adding ease to the bodice
In this case, we are adding a total of 4 cm (1 ½”) extra ease to the garment, meaning that there will be 1 cm (⅜”) added on each piece (that will be cut twice).
You can go up to 1.5 cm (⅝”) on each piece and get a satisfactory result, but more than that is not recommended since it could alter the draft and might throw things off.
1. Draw vertical lines on both bodice pattern pieces
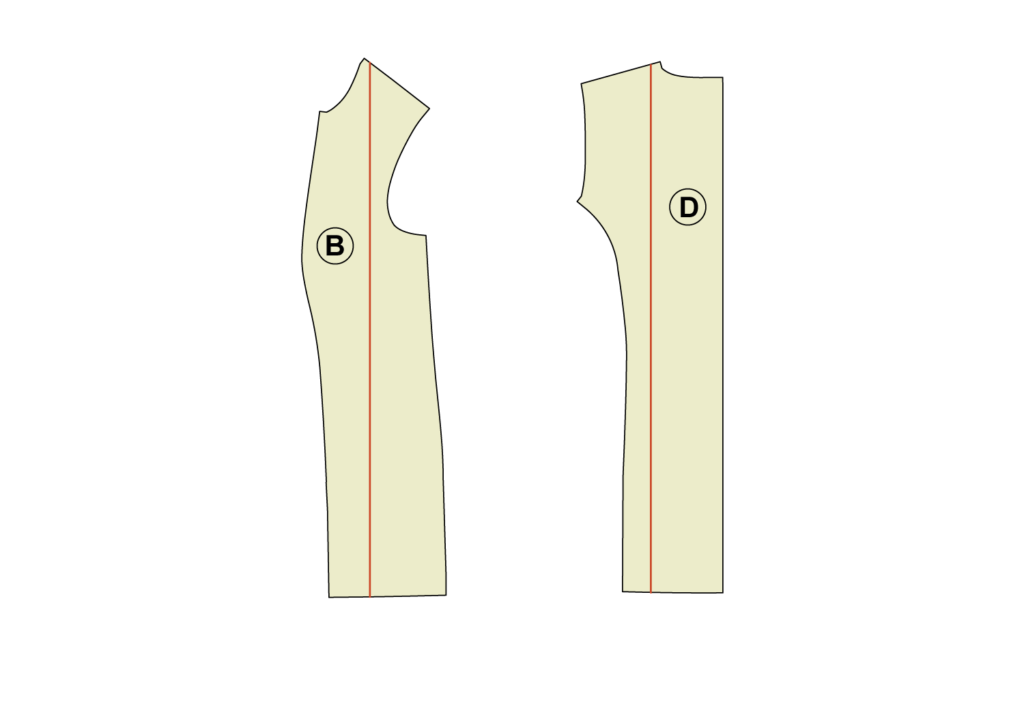
The lines should be 2.5 cm (1”) away from the inner shoulder point. Use the grainline arrow as a guide to make sure the lines are truly perpendicular.
2. Trace the inner area using tissue paper

Place tissue paper over a bodice piece. Trace along the edges and the vertical line.
3. Draw second vertical lines on the tissue paper
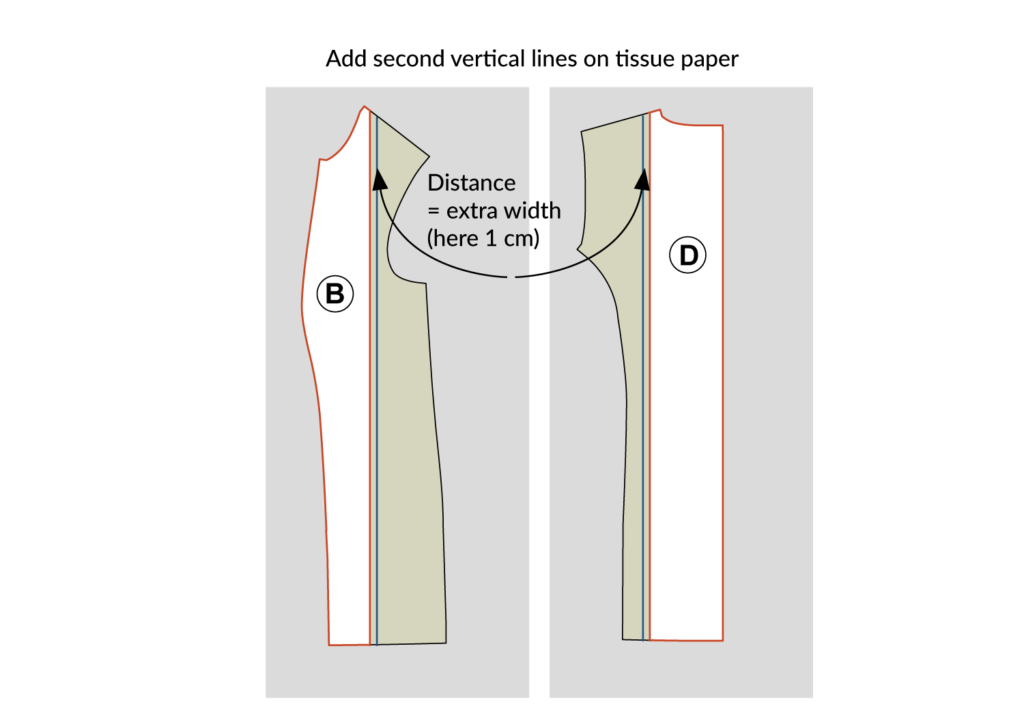
In this case, the second (blue) line should be 1 cm (⅜”) away from the first line to add extra ease.
4. Move the tissue paper to align the lines
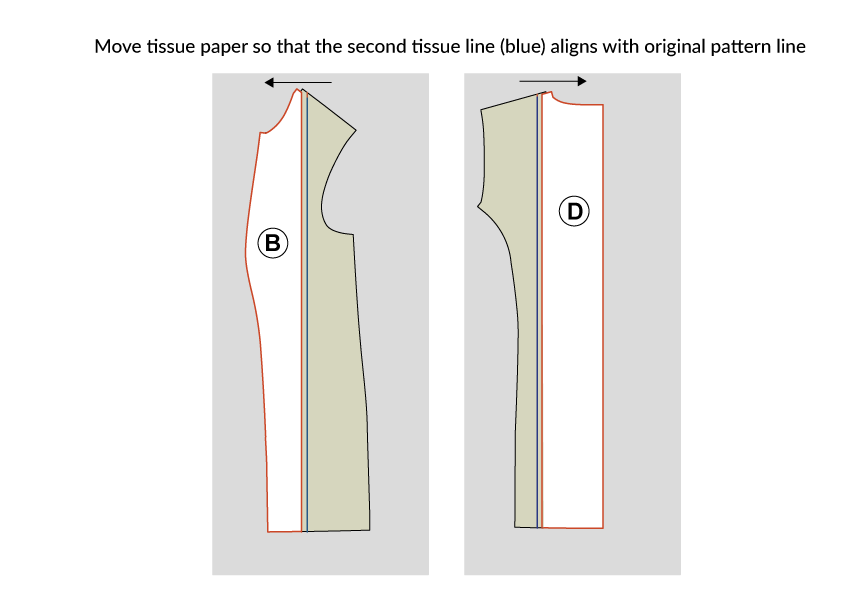
Move the tissue paper so that the second vertical (blue) line aligns with the line on the original pattern piece that we drafted in step 1.
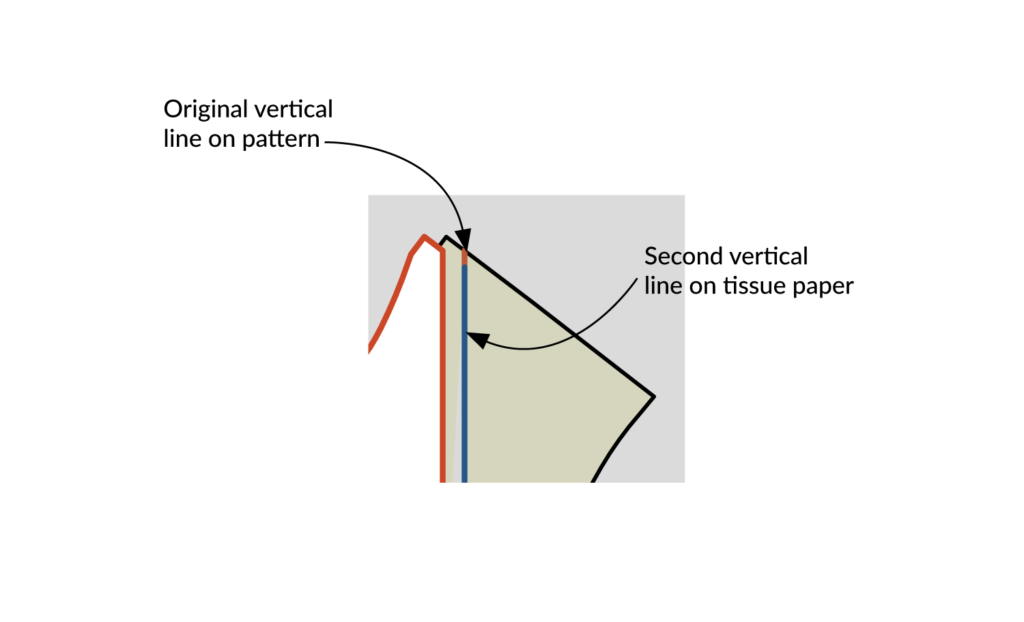
This is how we will widen the pattern since this 1 cm shift will add the extra ease.
5. Trace the remaining pattern

Use the lines of the original pattern pieces underneath the tissue paper. Also, true the shoulder line so that the start and end points keep their original height position.
Do not cut out the pieces just yet, since we will do a few more (optional) alterations.
Comparison of the original and retraced pattern
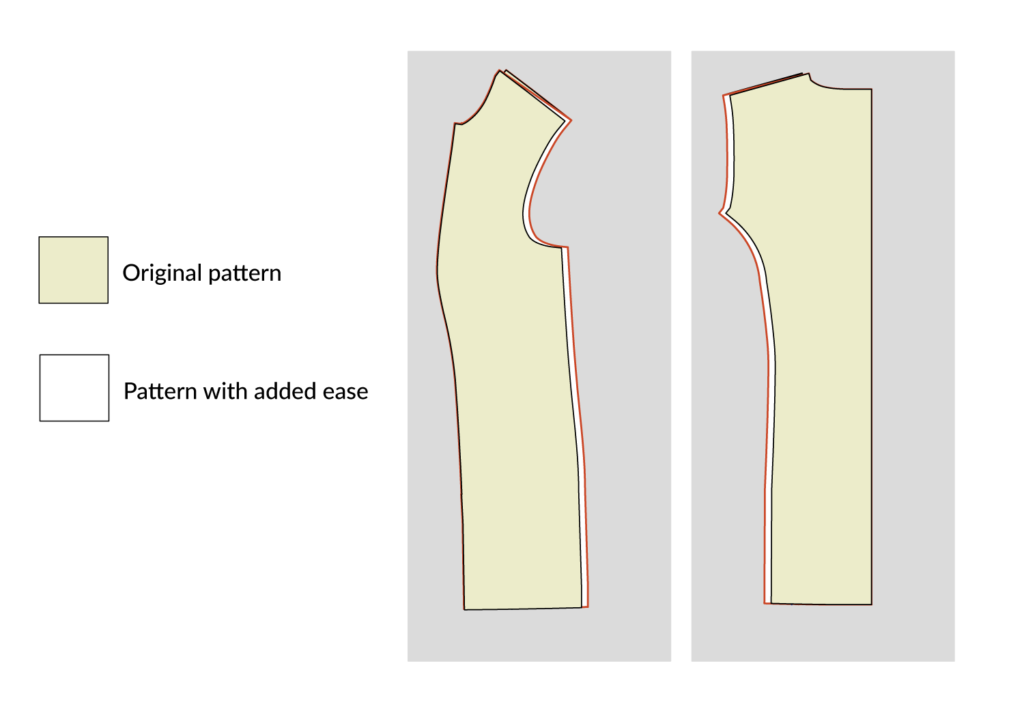
Since we are just adding a small amount of ease to each piece, it might be difficult to see the difference. But here is a comparison so you can see how they differ in width.
Are you using pockets? Remember to add the corresponding extra width to them too, using the same method.
Lowering the armholes
This is often necessary if using a thicker fabric or if you want to have extra room inside for thicker sweaters.
1. Lower armhole on the bodice pieces

Add a mark 1 cm (⅜”) below the original armhole on the tissue versions the side-front piece and the side-back piece. Draw a smooth curve on both pieces to reshape the new lower armhole, ideally using a French curved ruler (Amazon affiliate link)
2. Retrace the sleeve and lower the armhole
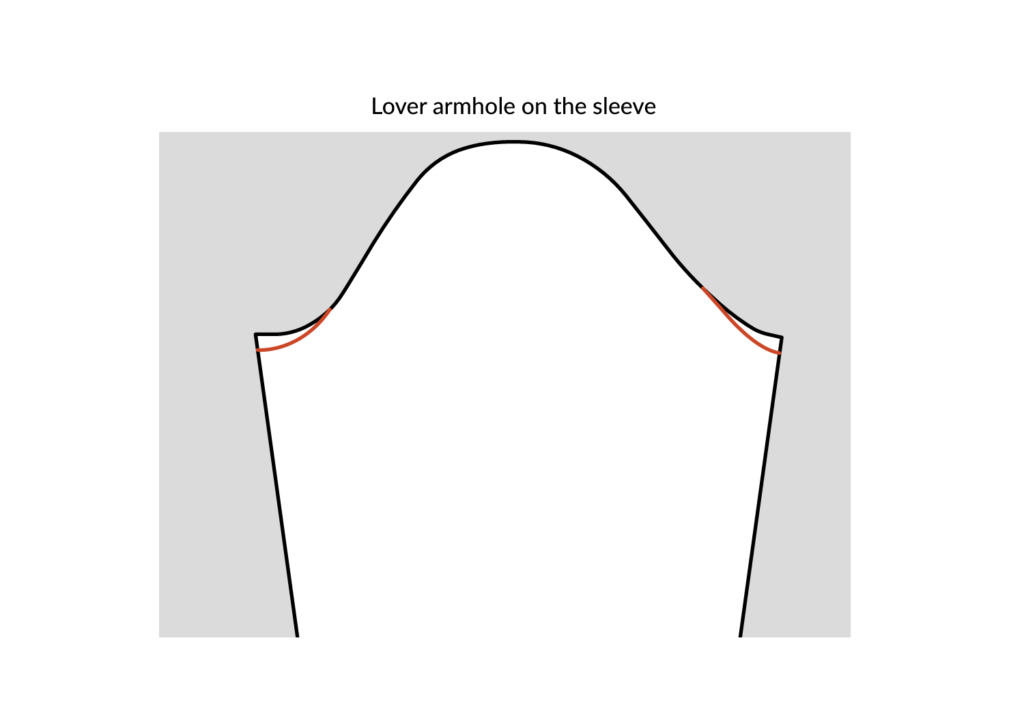
Place tissue paper on the sleeve pattern and retrace the lines. Lower the armhole 1 cm (⅜”) on both sides of the sleeve. Draw a curve that is identical in shape and has the same length as the re-drafted curves on the bodice pieces.
Do not cut the pattern pieces from the tissue paper yet. There is one final (optional) alteration to do.
Widening the sleeves
Since the Eivy cardigan is meant to be worn fairly fitted, the sleeves are more on the narrow side for an elegant look (but they are not small, there is still ease). So for bulky fabrics and cardigans meant to be worn more like a jacket over a long-sleeve sweater, you will need to add a little extra width to the sleeves too.
1. Add width to the bodice pieces
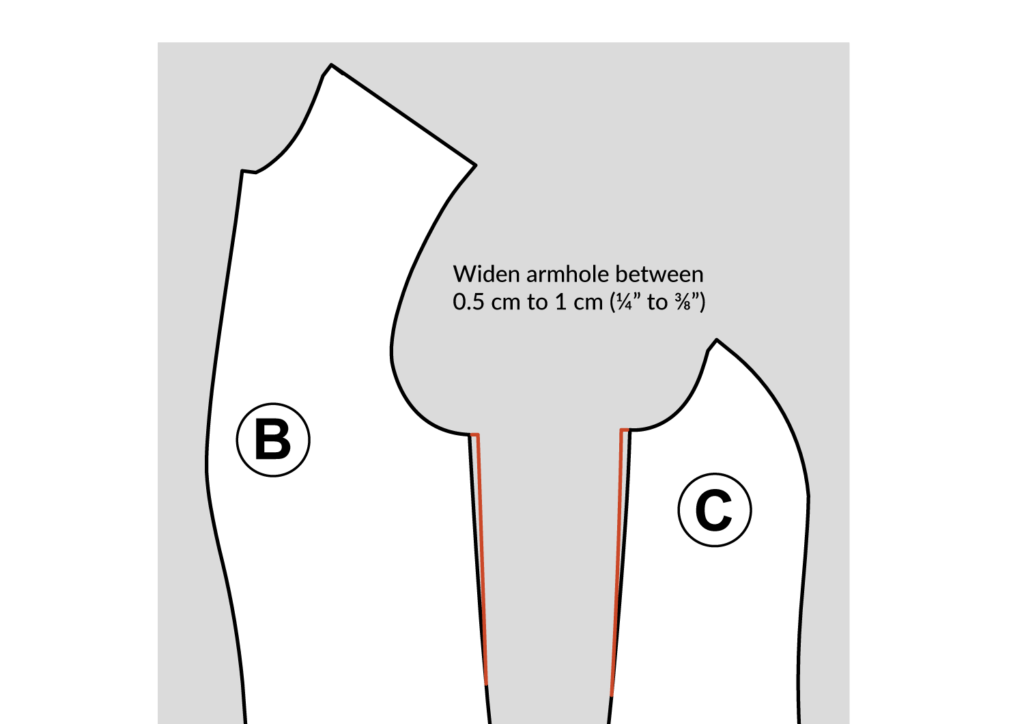
Add 0.5 to 1 cm (¼” to ⅜”) width to the armhole openings on the bodice pieces. Draw a smooth, tapered line towards the waist.
2. Add width to the sleeves
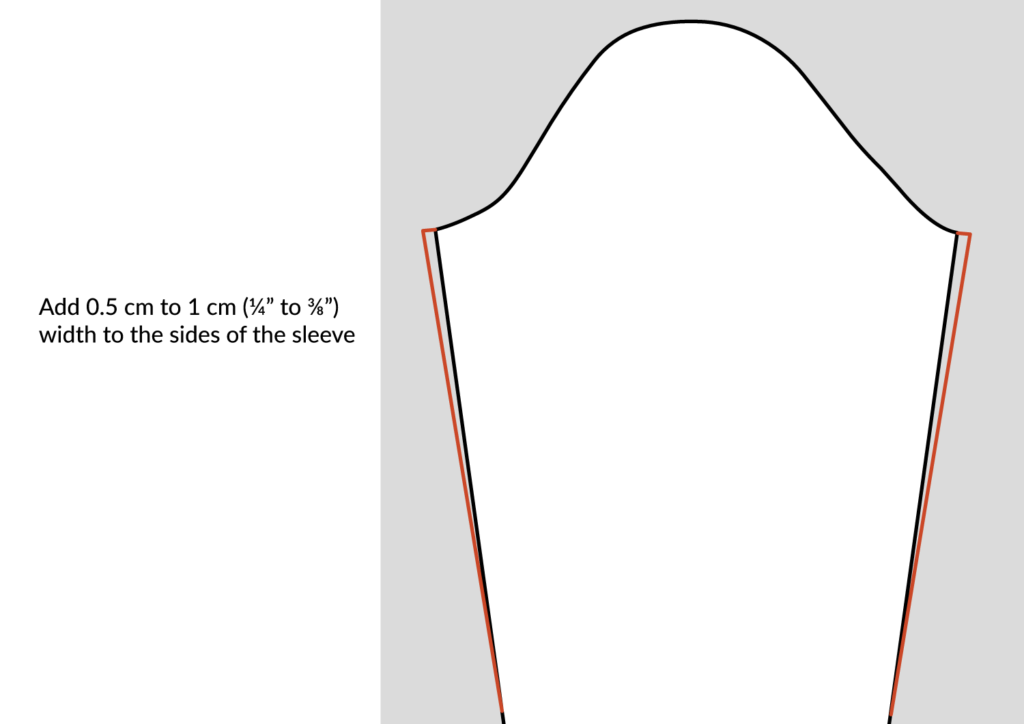
Add 0.5 to 1 cm (¼” to ⅜”) width to the sides of the sleeve. You can taper them down gradually, to retain the original hem width (see image above).
Or if you want a wider overall sleeve, you can draw the lines to the hem (see image below).

Now you can cut out all the traced pattern pieces from the tissue paper.
And remember to alter the pockets too so that they also get the new width.

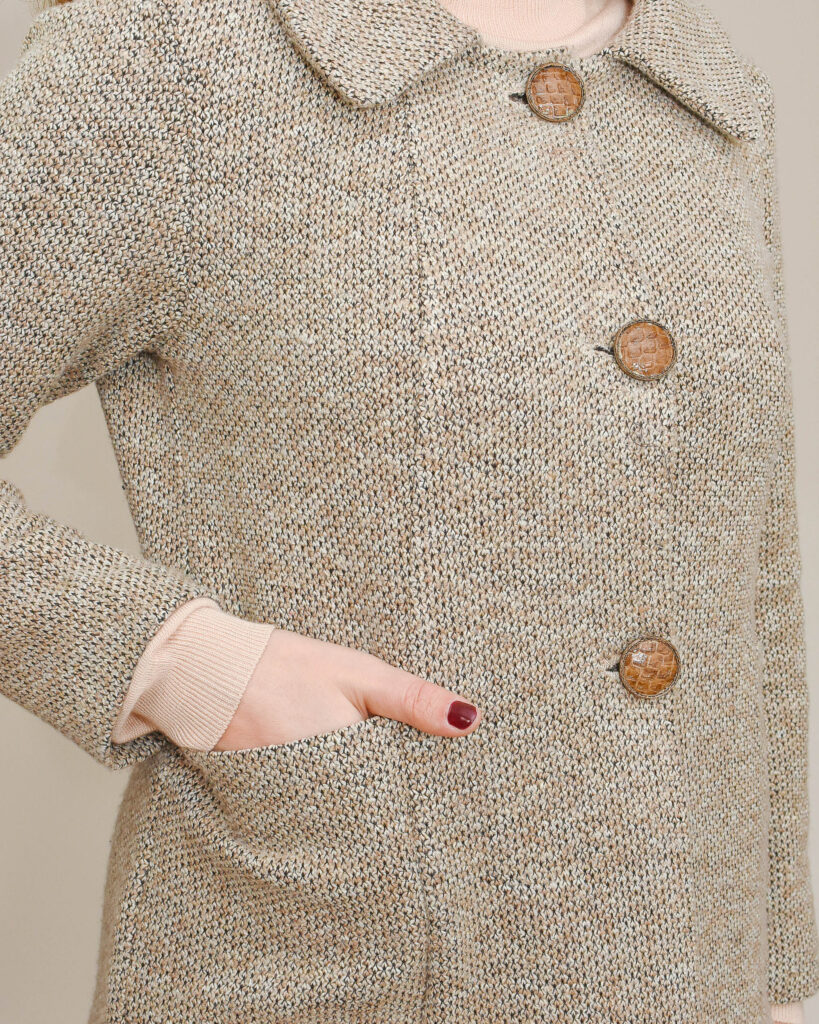
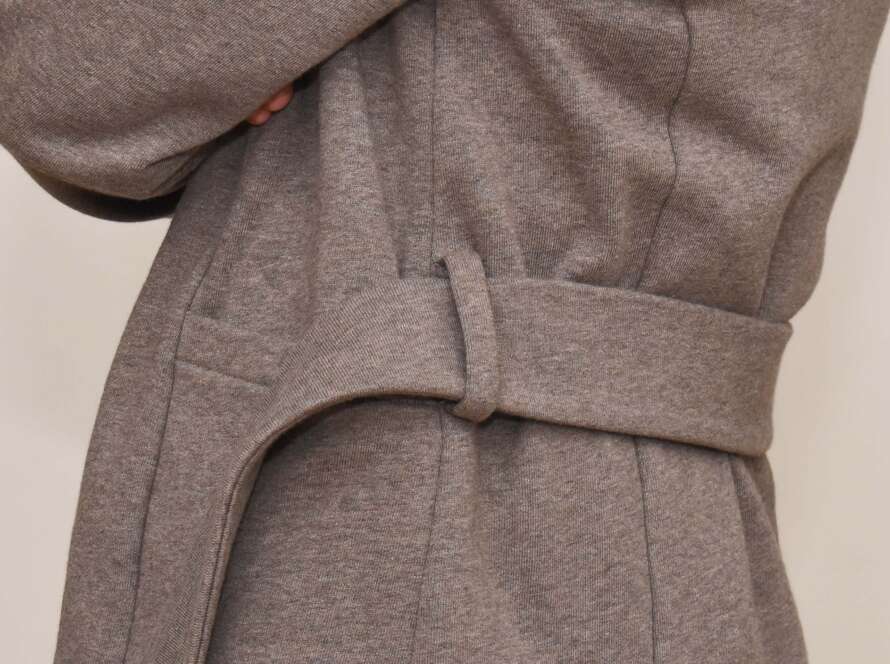
Here is how this alteration worked on a sherpa fleece version of the Eivy cardigan. I added a total of 4 cm of ease, the same amount that is shown in this tutorial. I also deepened the armholes and added more width to the sleeves (but kept the original hem width intact).

Worth noting, however, is that the finished cardigan is a bit bigger than that because the fabric I used expanded somewhat during sewing. I did wash the cardigan afterwards, but the fleece did not completely bounce back. But the fabric expansion is pretty subtle and works great with this style.
I hope that this tutorial showed you how easy it is to alter the Eivy cardigan to give it a roomier fit, but still preserve the distinct shaping. This is something I personally want in my clothes, a subtle shaping but without sacrificing comfort.
And don’t forget to check out the other posts in the Eivy Cardigan Sew-Along series.

2 Comments
Comments are closed.