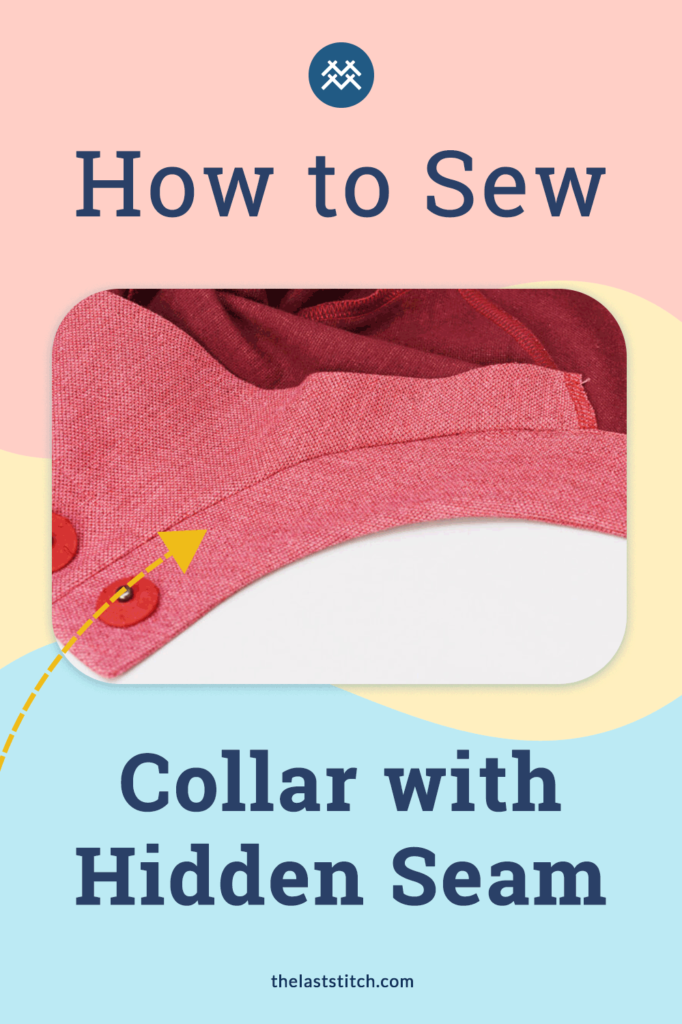
Have you looked into more high-end RTW knits with collars and have been intrigued by how they manage to hide the entire back neck seam allowance, without using a back facing or a band to cover the back neckline seam?
In this step-by-step tutorial, I will show you exactly how it is done so that you too can sew a knit collar with a hidden, enclosed seam.
This tutorial is part of the Sew-Along for the Eivy Cardigan sewing pattern but you can of course it for any type of knit collar.
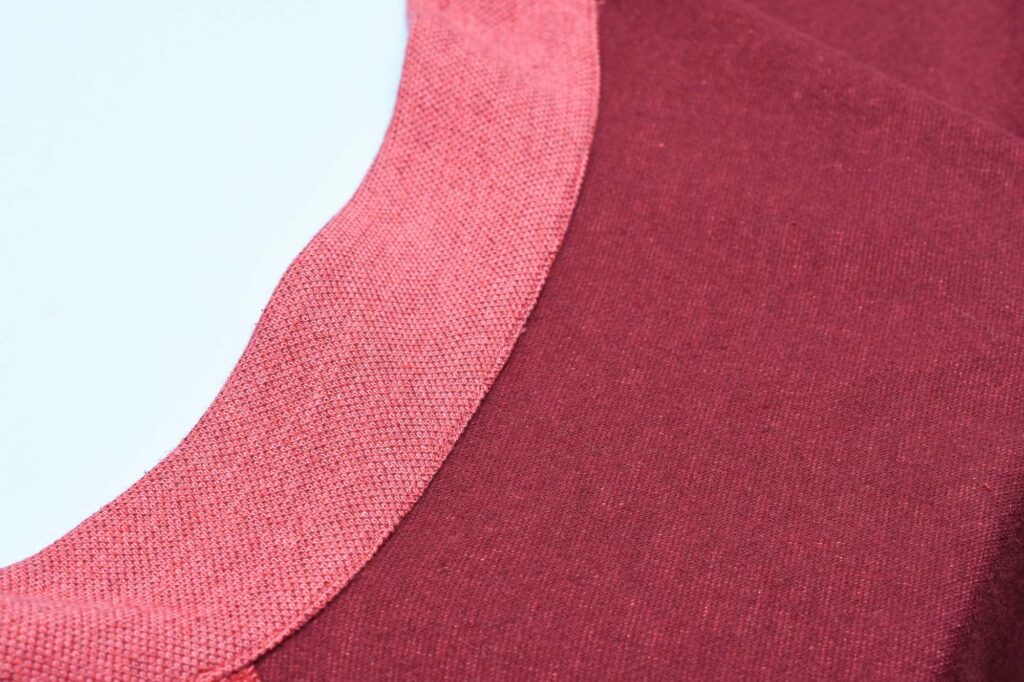
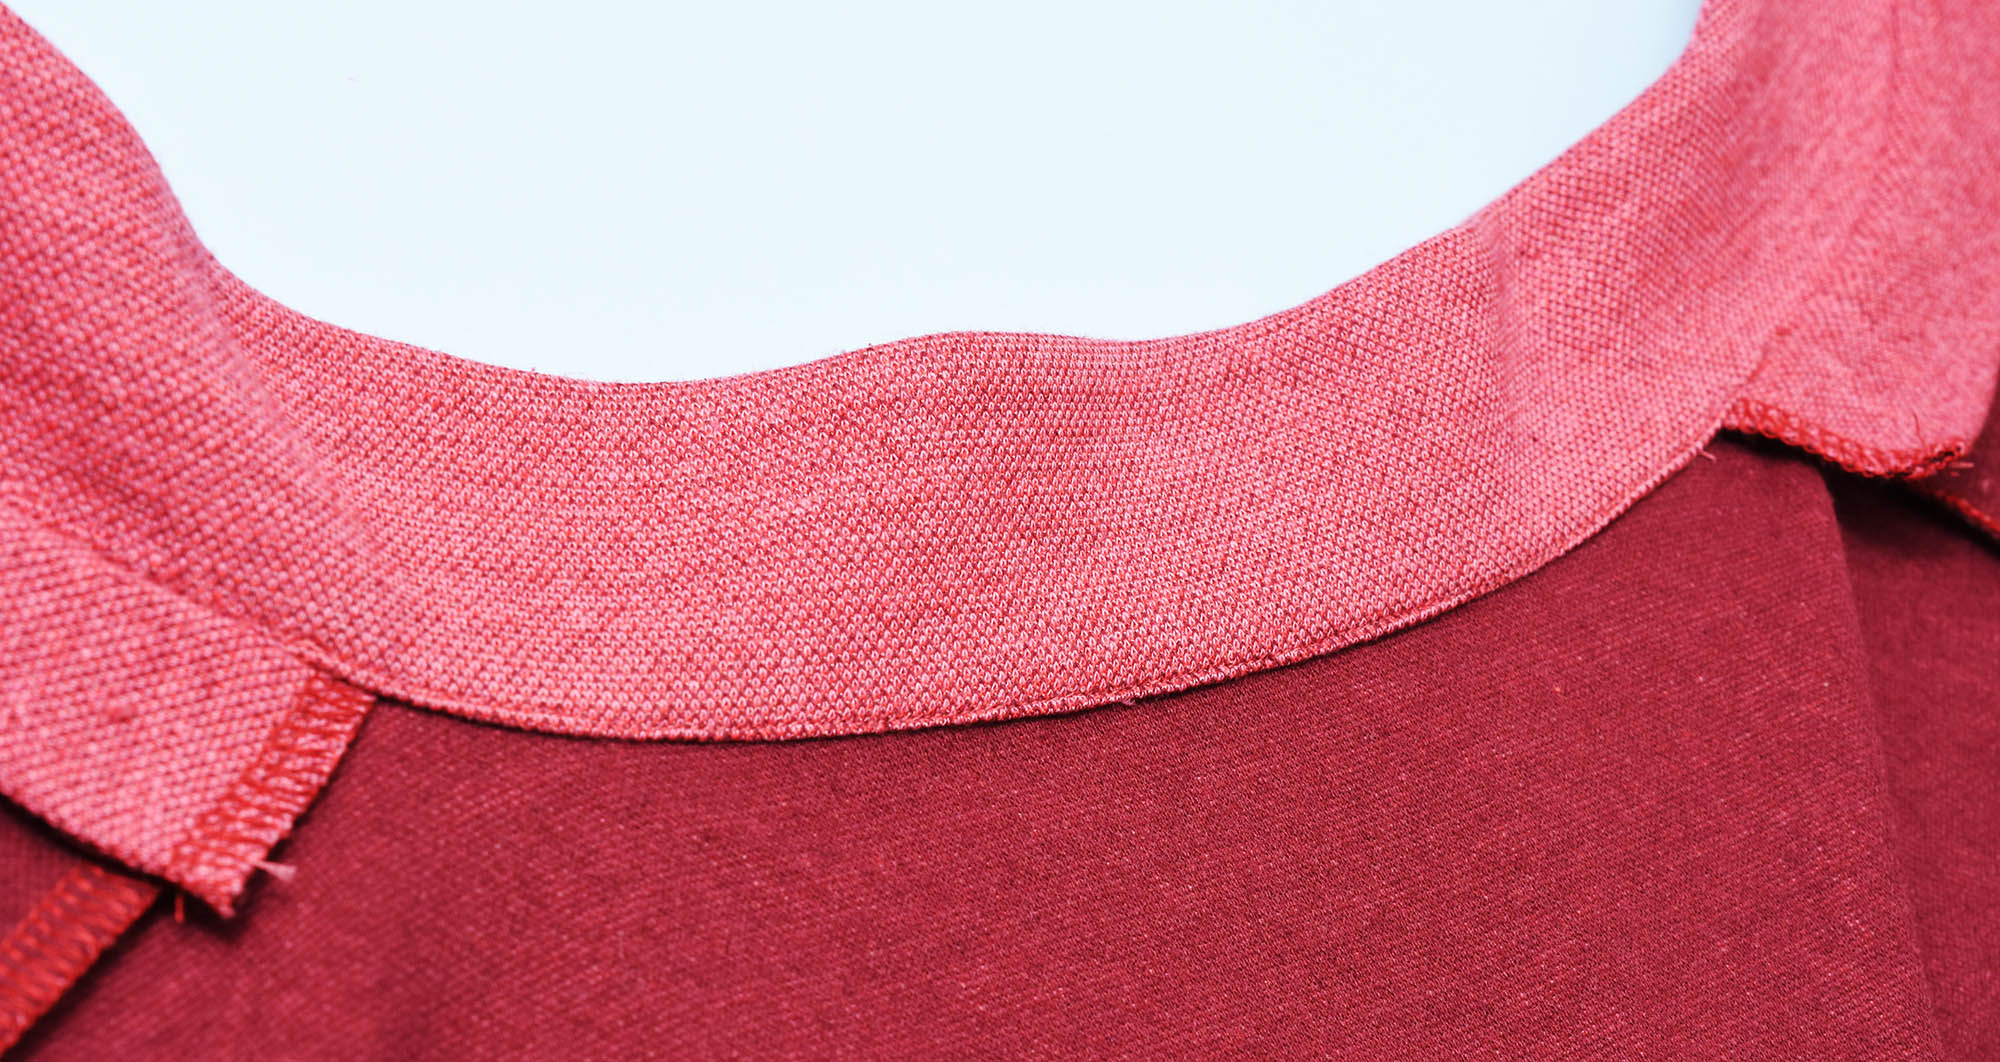
As you can see on the collar here, on the back collar area there is no visible seam allowance, it´s all enclosed inside.
Now this method is not necessarily difficult, but it is a bit more complicated to sew compared to the basic collar assembly version where the seam allowance is visible, so having some prior experience with sewing collars is recommended.
So now let’s start with the tutorial for this high-end knit collar finish!
Sew the knit collar
I strongly recommend interfacing both collar pieces with knit fusible interfacing to give the collar enough stability to make the assembly process relatively easy (check out my guide to stretch interfacing for knits to learn more about this notion).
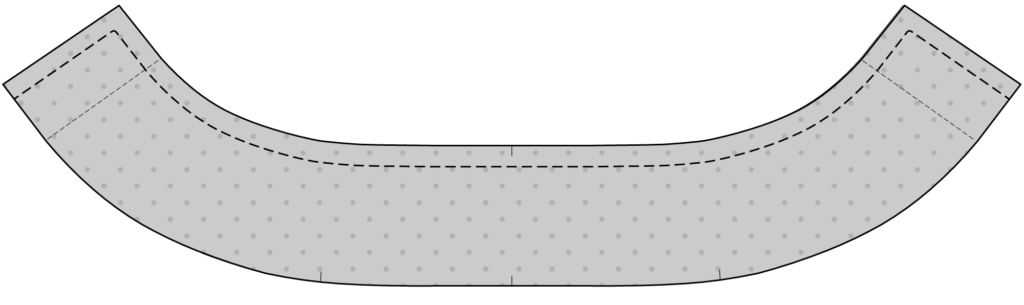
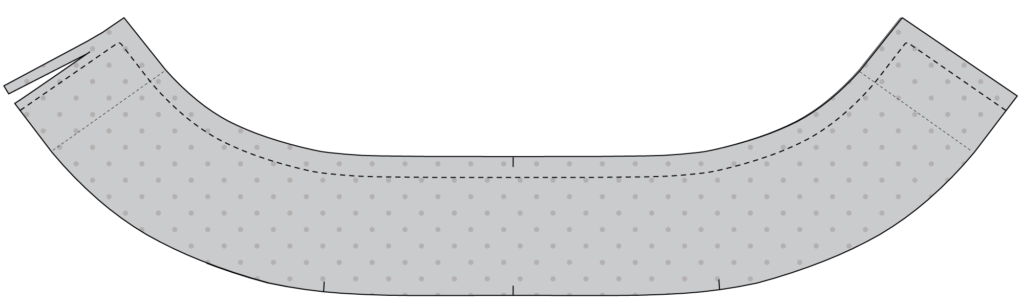
1. Place the collar pieces together
Right sides facing, matching notches. Pin or baste the layers together.

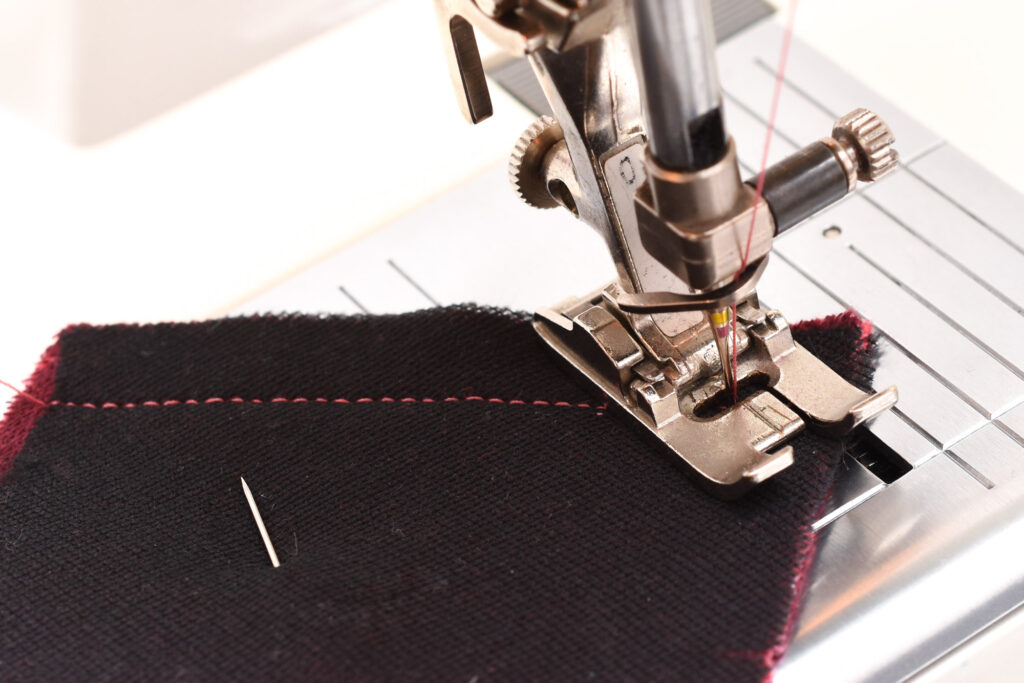
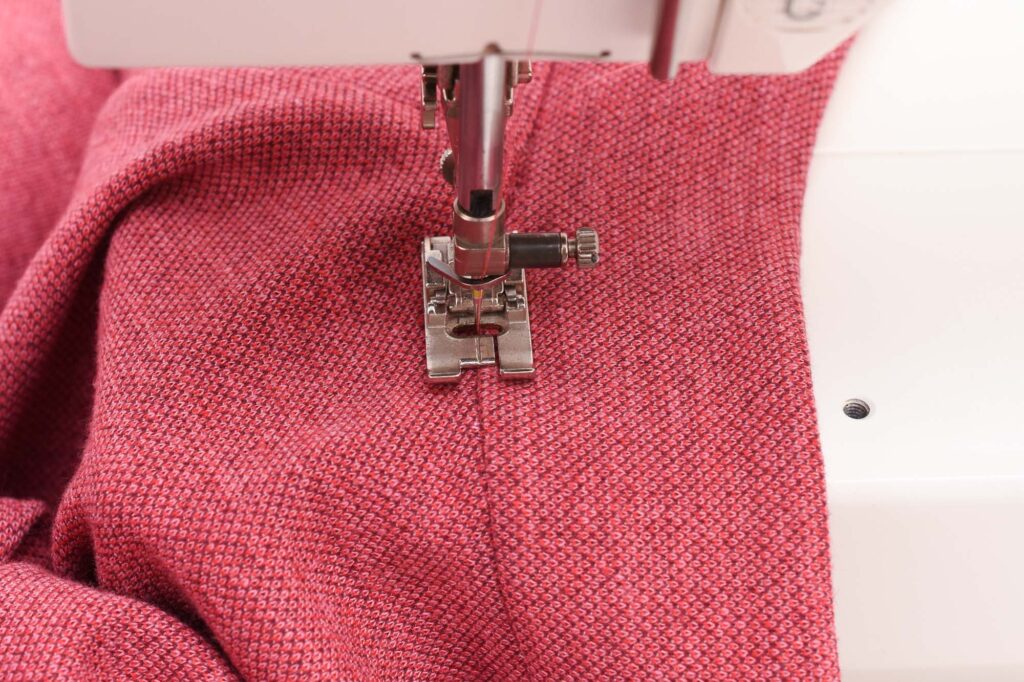
2. Stitch the collar
Sew the collar and be careful to not don’t stretch it out during sewing (using interfacing will prevent this too).
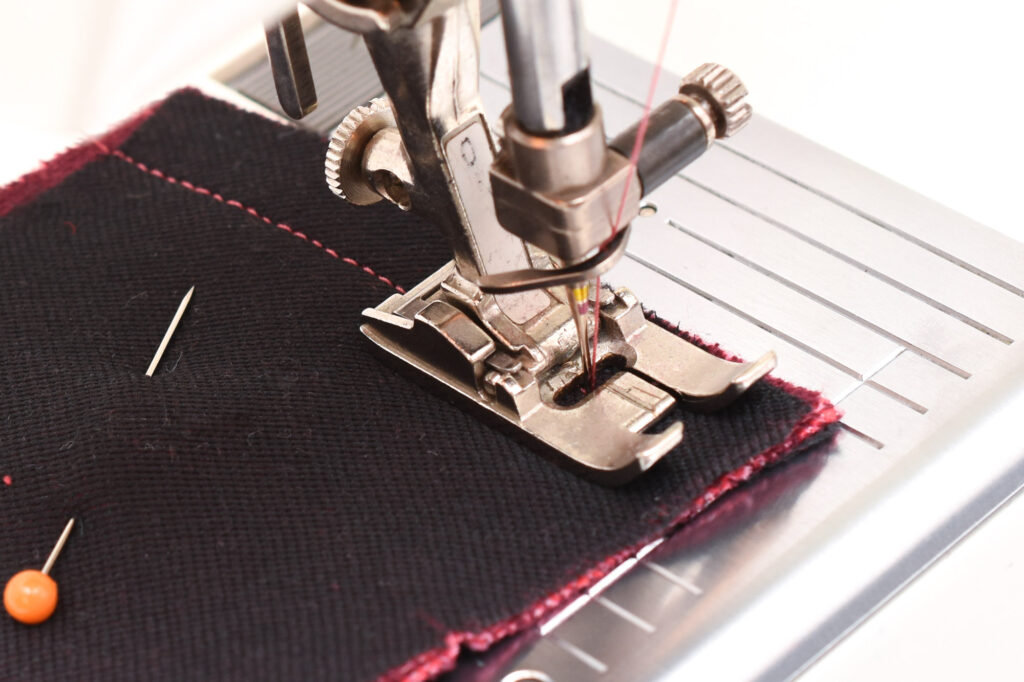
Tip: If the upper collar layer is stretched out, despite being interfaced, use your fingers or an awl to gently push the upper fabric layer towards the presser foot in a rhythmic motion.
Another option is to use a walking foot for an even feeding of the upper and lower layer.
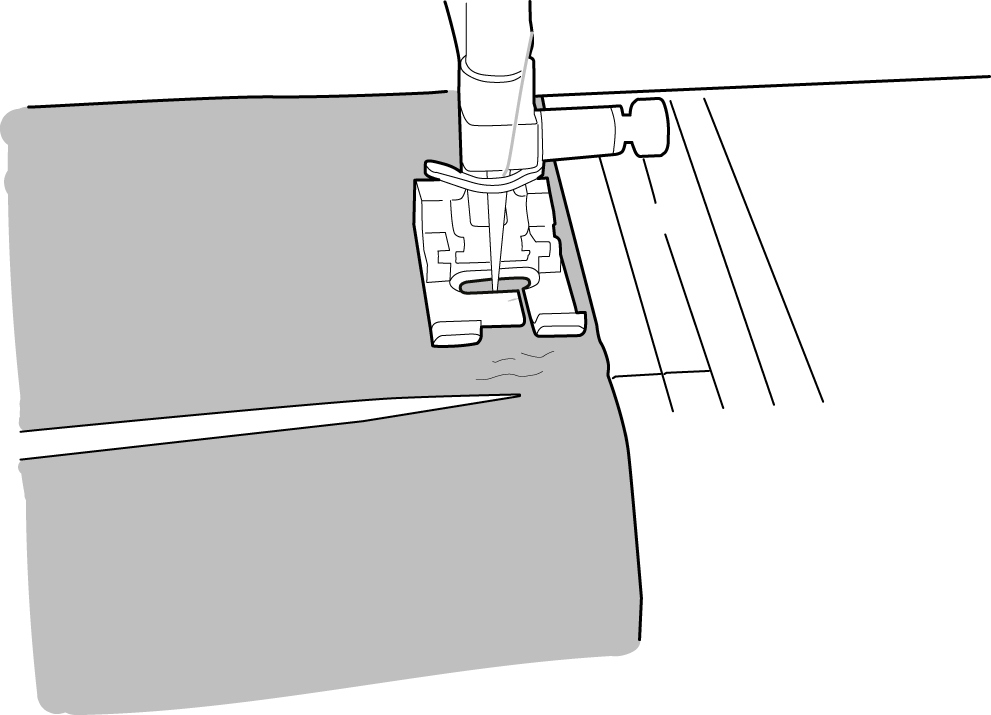
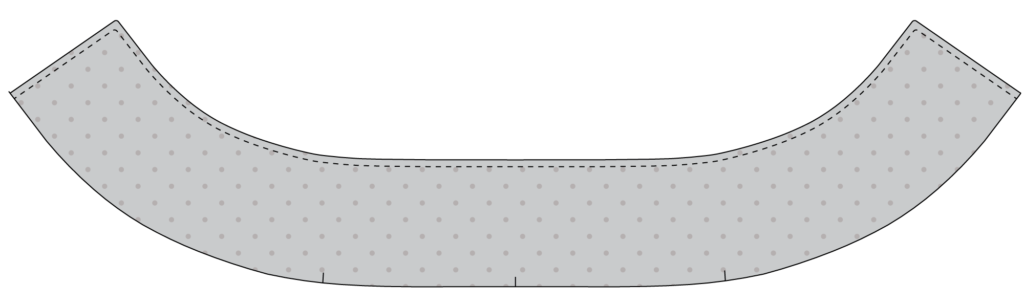
3. Shape the collar points
For better shaping, stitch a subtle rounded corner at the collar point by making small pivots (with the needle down in the fabric) for 3-4 stitches.
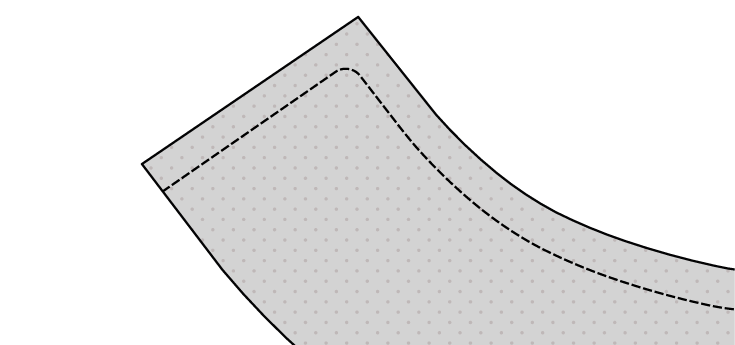

4. Reduce the seam allowance
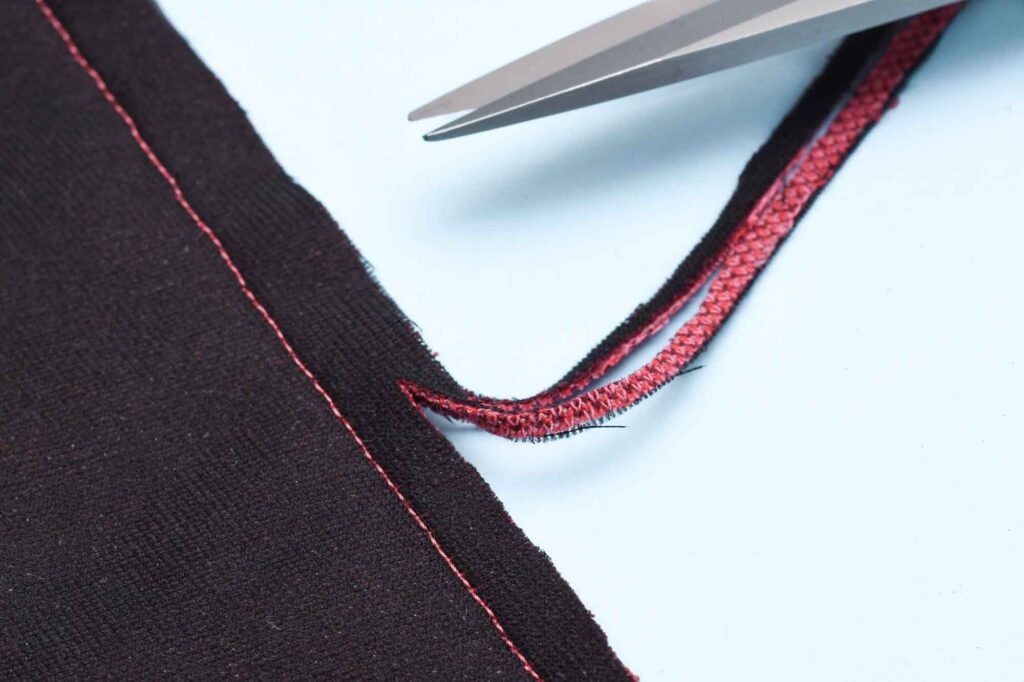
Trim down the seam allowance to around 3-5 mm (⅛ to ¼”) to remove bulk and to give the collar a rounder shape. This is optional but will give the collar an overall better appearance. By cutting close to the point and rounding the curve slightly you will often minimise the need for additional shaping of the collar point.
Note: If you are using a serger, just use a more narrow overlock stitch, no need to trim afterwards.
Sew the knit collar with an enclosed seam allowance
Now let’s get to the meaty stuff, this is where I will show how to hide the seam of the neck, omitting the need for back facing or band to cover the collar seam.
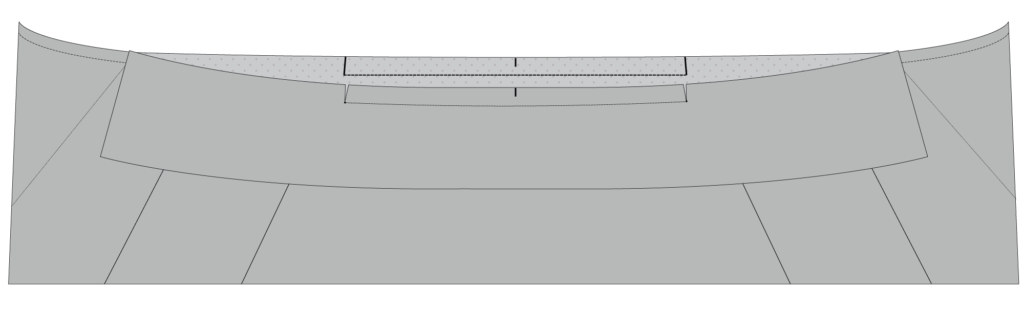
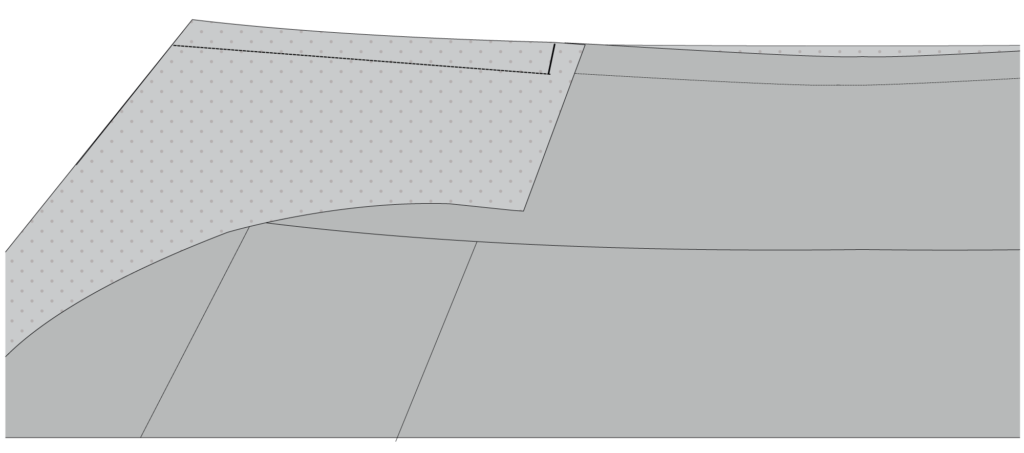
1. Stitch a folding guideline on the inner/upper collar
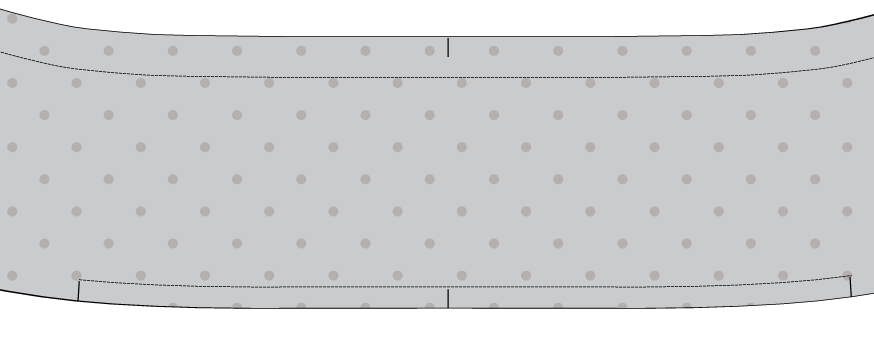
Stitch a straight stitch line along the seam line between the shoulder notches on the inner (or upper) collar piece , i.e the one that will face the back of the neck. This stitch will be used as a guide for folding later on.
2. Attach the outer (under) collar to the neckline
Place the outer (under) collar along the neckline, i.e the side that doesn’t have the fold stitch.
Pin or baste the collar to the neck edge, making sure the notches align.
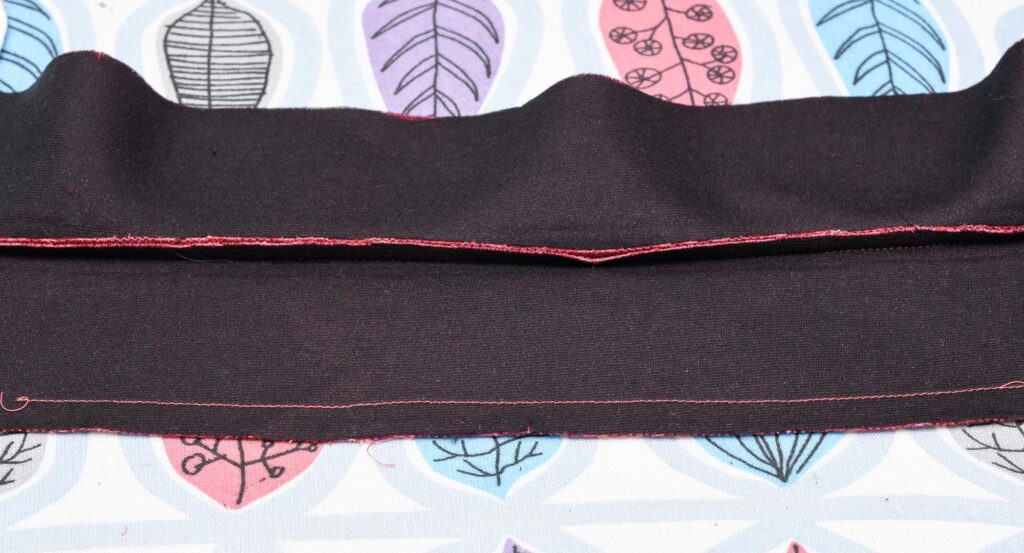
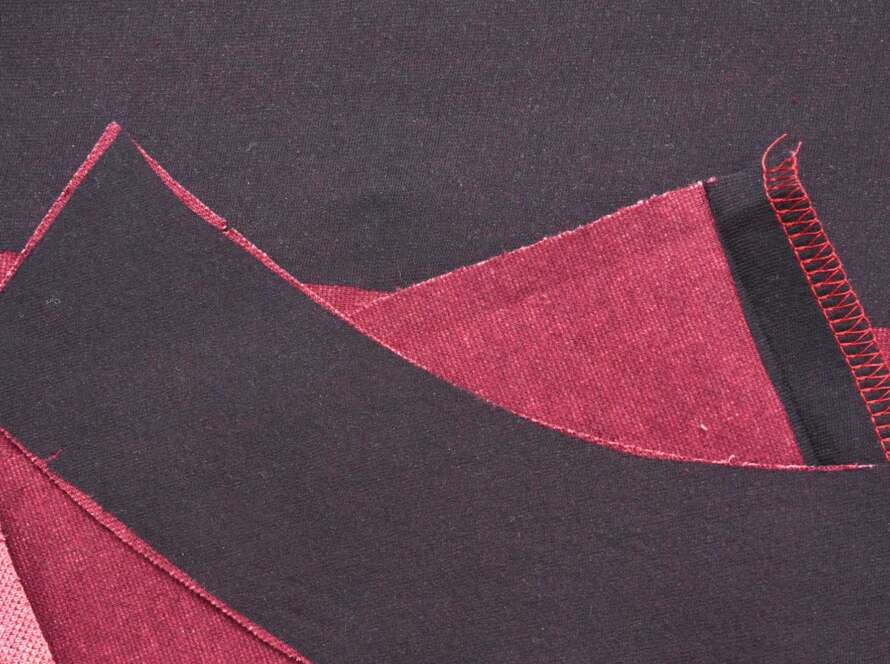
3. Stitch the back neck area of the outer collar

Stitch only between the shoulder notches to attach the collar. You will attach the rest of the collar to the remaining neckline in a later step.

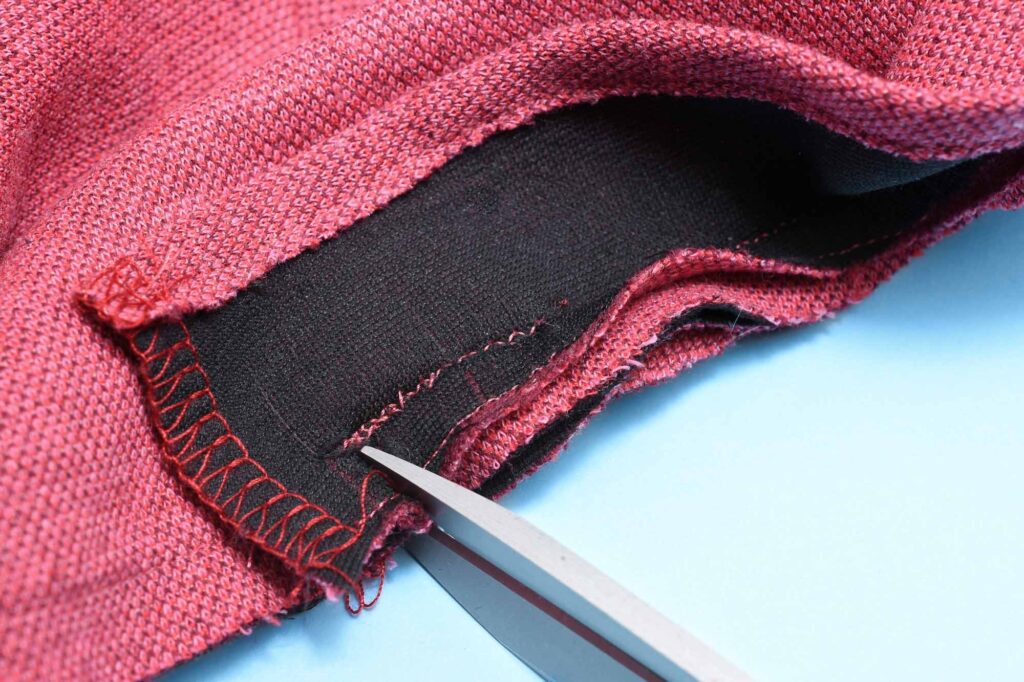
3. Clip the notches on the inner/upper collar
On the collar piece that isn’t attached to the neckline, clip notches at the marked shoulder notches. The notches should be as long as the width of the seam allowance, in this case 1 cm (⅜”)
4. Fold over the front facing
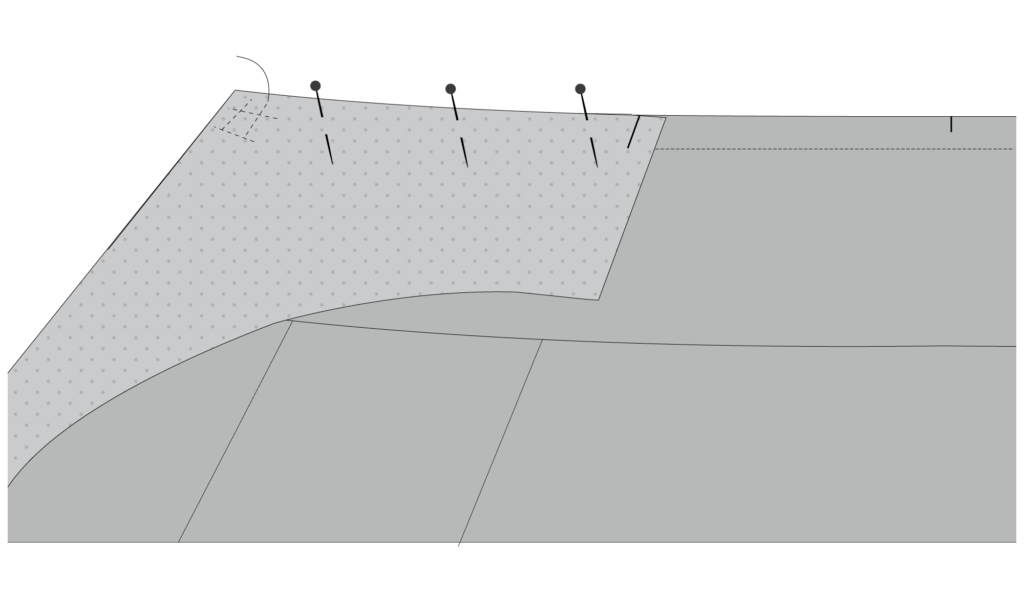
With the collar folded down, enclose the collar by folding the facing over the collar, covering the entire front neckline area.
Tip: Sewing all the layers in one go can be tricky if you are new to sewing with knits. So baste or pin the collar in place before you cover it with the facing. Then baste the facing so that it snugly wraps around the collar edge. This will prevent the layers from sliding.
5. Stitch over the facing
Starting from the folded edge, stitch over the facing and collar and stop at the shoulder notch. Repeat on the other side.
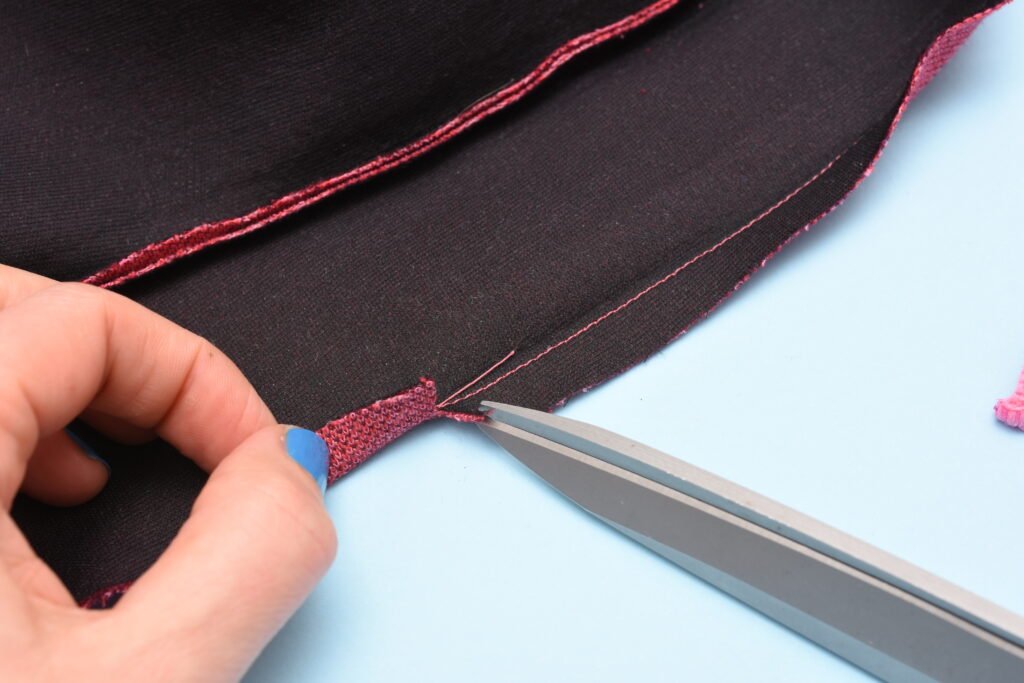
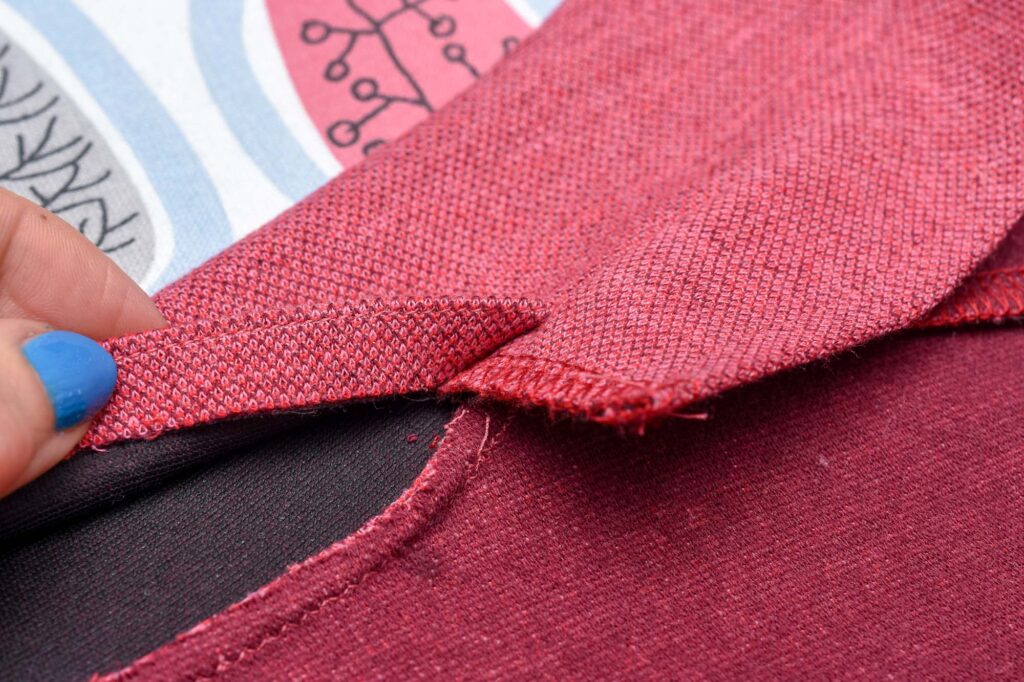
6. Clip notches at the shoulder notch markings

Cut a notch through all the fabric layers at both shoulder points, just where the front facing stitch ends. The notches should be as long as the width of the seam allowance, in this case, 1 cm (⅜”).
7. Fold away the seam allowances

First, fold away the un-stitched edge of the facing. Then fold down the seam allowance of the inner (upper) collar, i.e the one facing the neck.
8. Fold over the collar to enclose the seam
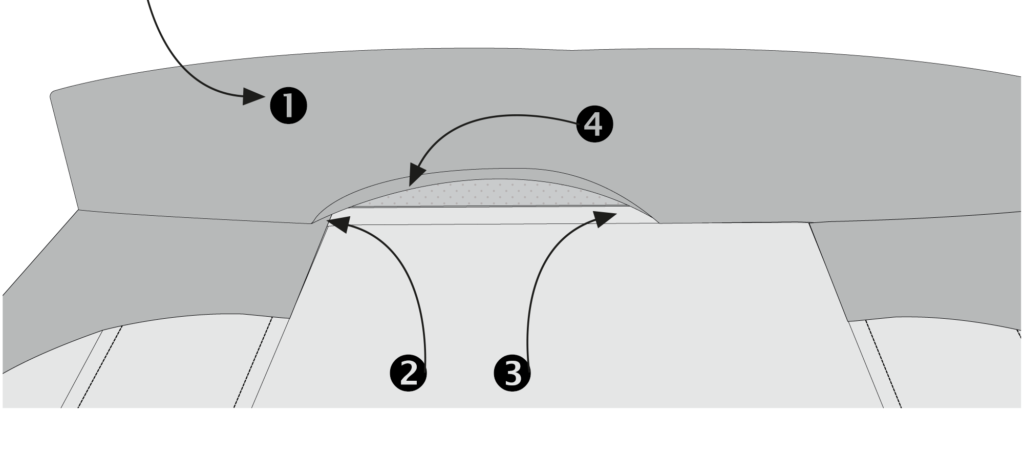
- Fold back the collar towards the inside.
- Fold up the edge of the facing so that it will be enclosed inside the collar.
- Fold the back piece seam allowance upwards, as it will also be enclosed inside the collar.
- Fold in the seam allowance along the stitch line on the inner/upper collar.
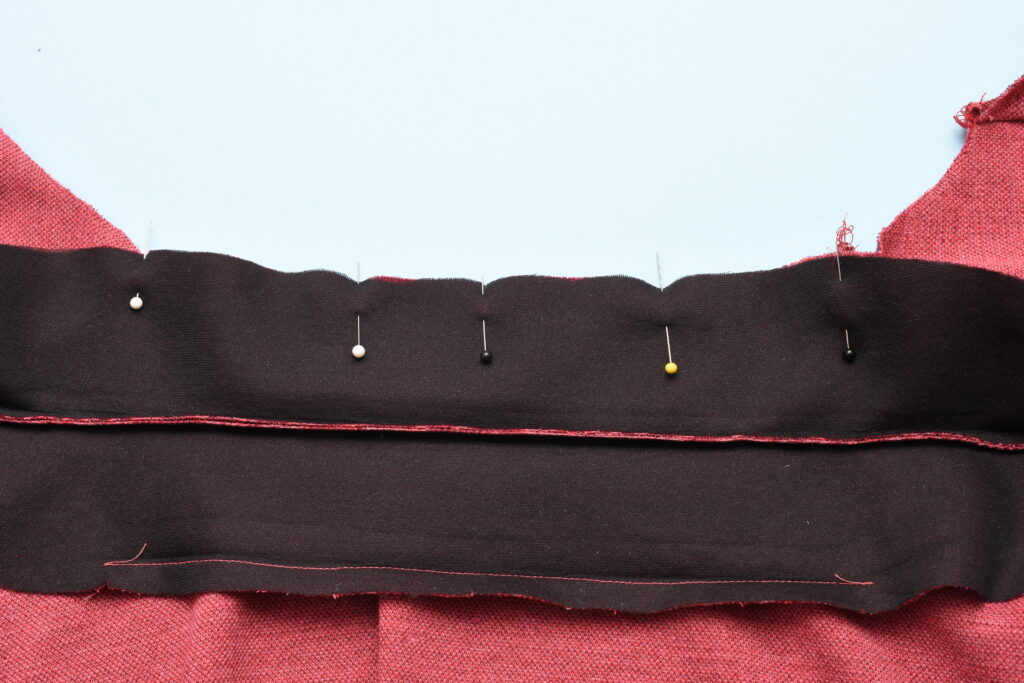
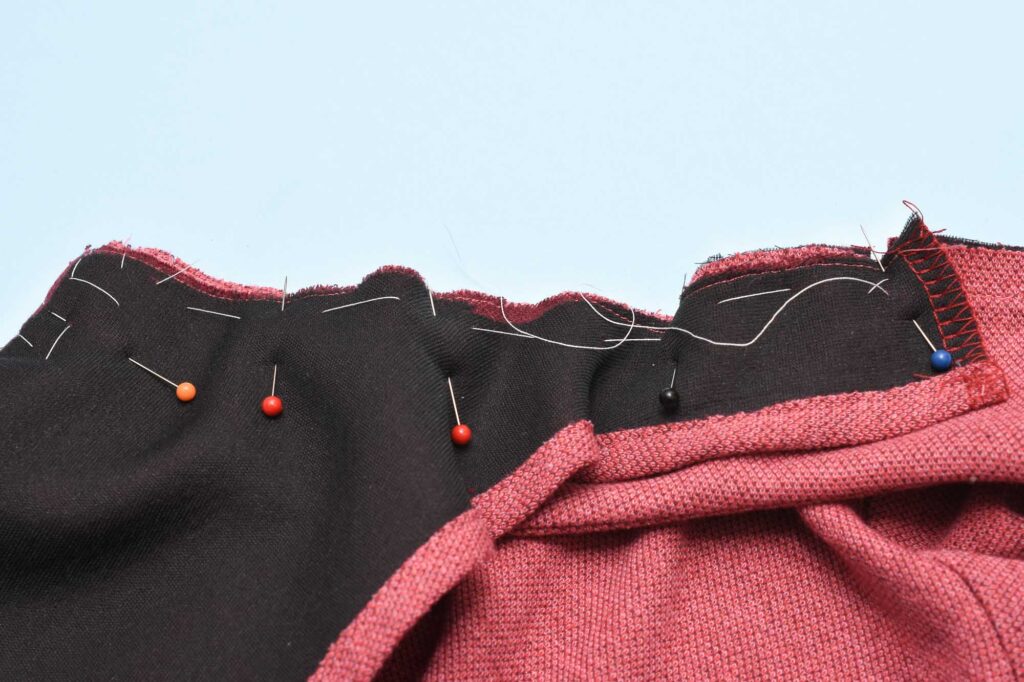
8. Pin the collar in place so that it covers the seam allowance

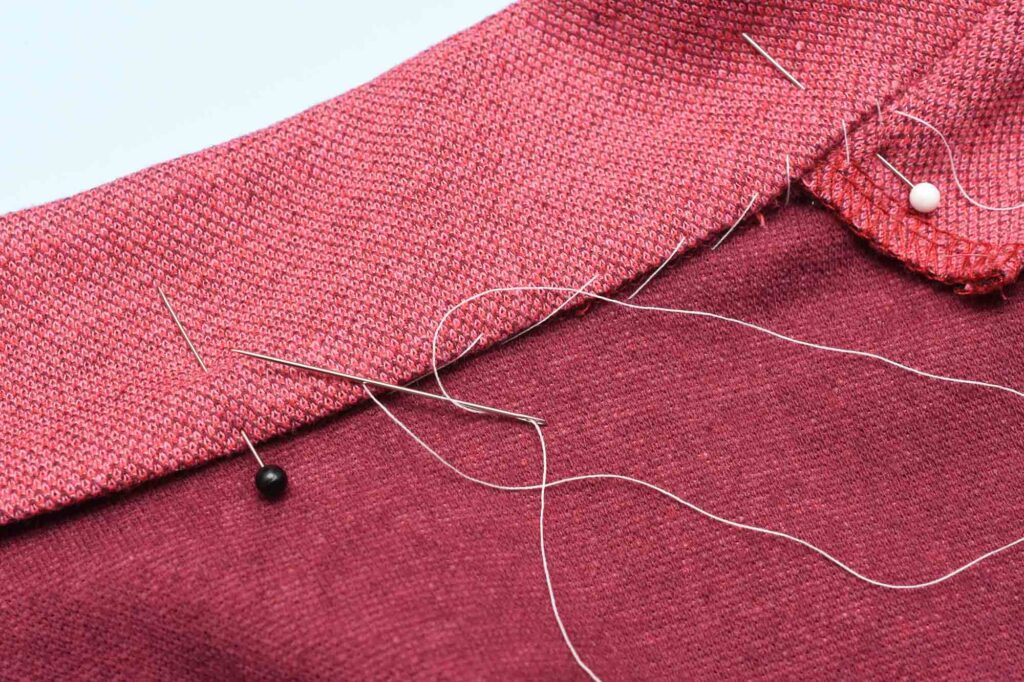
You can also hand baste or use water-soluble tape Wonder-Tape (Amazon affiliate link) to keep the folded edge in place. Making sure the fabric stays still is very important for the final step of this procedure.
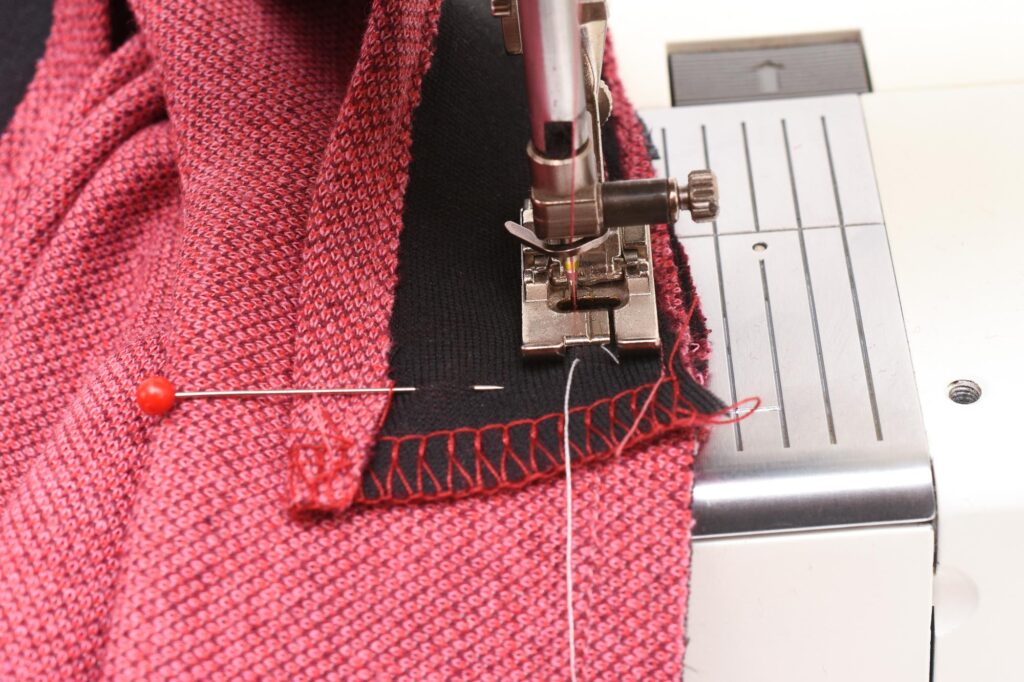
9. Stitch the collar close to the folded edge to hide the seam (final step!)
From the outside, stitch in the collar seam ridge (ditch) to attach the folded collar. Sew from one shoulder seam to the other.
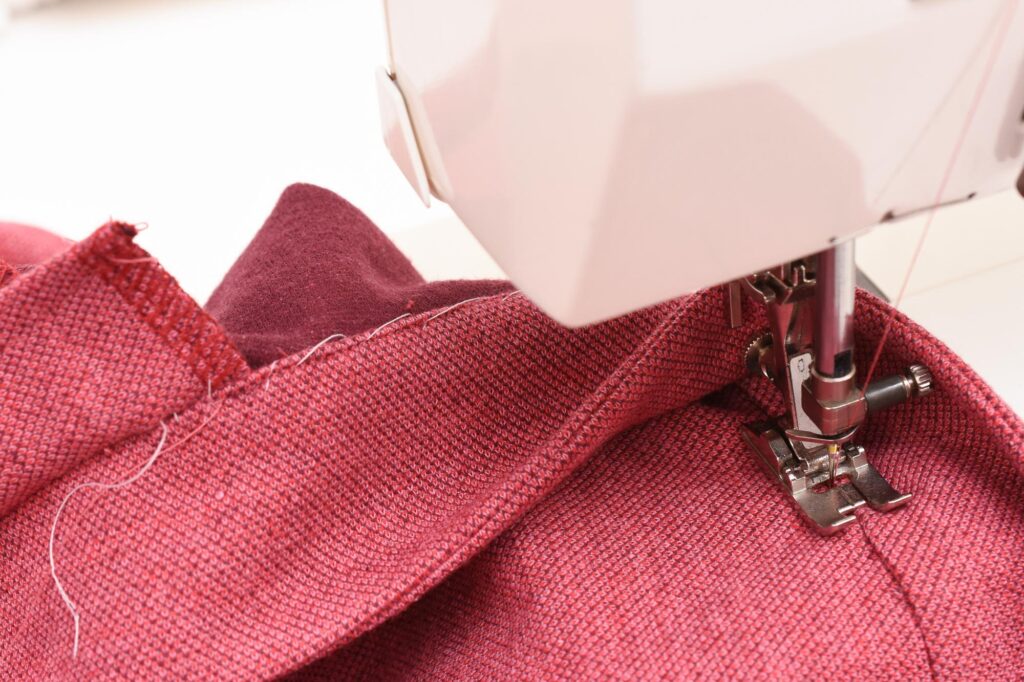
This can be tricky if you are new to this method, so here are a few tips to sew straight and evenly.
Tip 1: Place your index and long finger on the inside and control the fabric fold with your fingers to ensure it doesn’t move and that the stitch is even along the edge.
Tip 2: If you find it too hard to stitch evenly from the right side and the fabric has some texture that will hide the stitch, you can also sew the collar from the inside, along the folded edge.
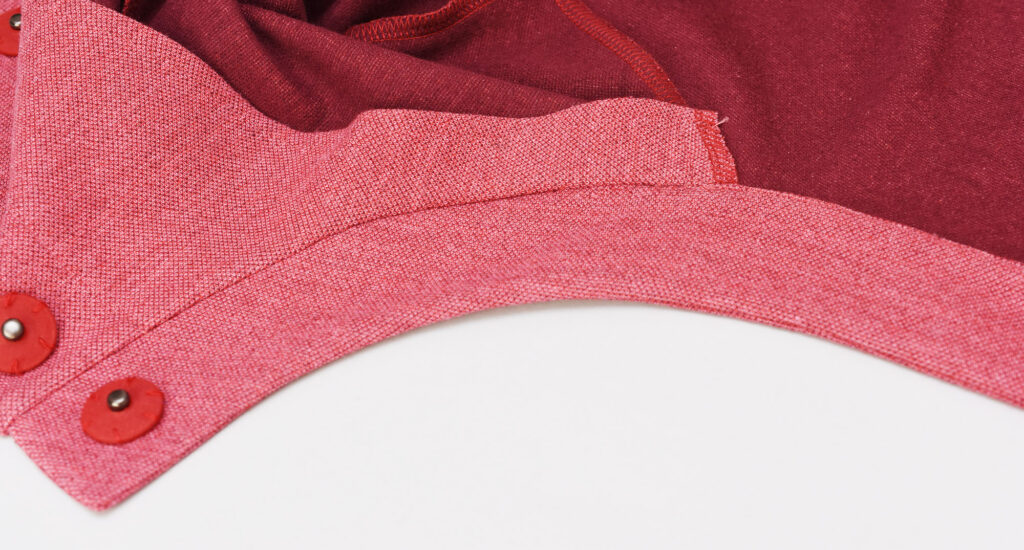
The finished collar

I hope that all the steps didn’t overwhelm you! In fact, once you start you’ll realise that it’s actually pretty straightforward and logical, which can be hard to communicate in just images.

And if you feel that this collar method is too much for you, rest assured that I show a much easier and quicker method in the sewing instructions for the Eivy Cardigan.
And don’t forget to check out the other posts in the Eivy Cardigan Sew-Along series.

2 Comments
Carlene Fleshman
Thank you on showing precise collar stitching, great help for a beginner.
Comments are closed.