As promised here comes the tutorial on how I sewed the twill tape on to my skirt. This is a really quick way to attach any type of ribbon to a skirt. The hem should preferably be straight. You can do this on a curved hem too, but it will be a bit harder. The trick is to add the ribbon before you sew the side seams. And if you are careful with the markings the ribbons will line up perfectly.
You’ll need: A ruler (the wider the better), a crayon or dress maker pen and a glue stick.
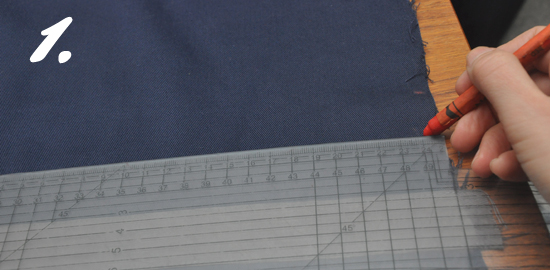
1. Place the ruler were you want to the ribbon to begin and make sure it’s 100% parallel to the hem. Add one dot for the lower edge of the ribbon and one for the upper edge.
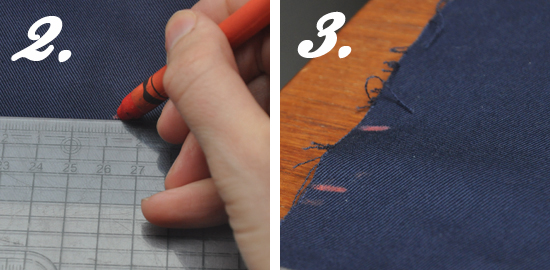
2. In the middle of the skirt piece add two more dots. 3. And again on the other side. That is all the markings you’ll need, unless the skirt is super wide.
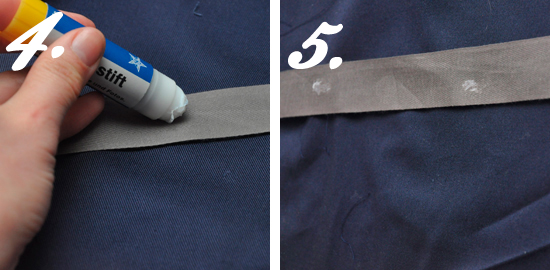
4,5. Take the ribbon and add some tiny dots of glue. But don’t glue the entire ribbon as it can get too stiff and messy. Stick glue is water soluble and great for trimmings.
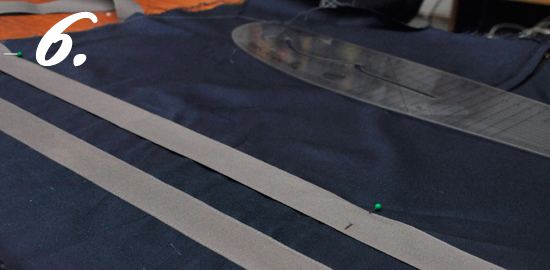
6. Place the ribbon so that it follows the dots. Secure with a couple of needles as well to keep it in place.
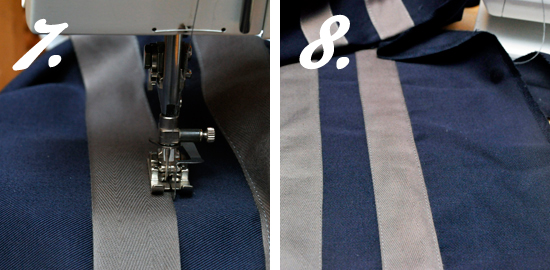
7. When top stitching use the blind hem presser foot as it makes sewing straight seams really easy. To avoid stretching out the fabric or the ribbon while sewing make sure you don’t pull to hard, just gently guide the fabric and ribbon. Also make sure the ribbon doesn’t start to slip
8. Voilà. It really is this easy. Works best on non stretchy fabrics that isn’t cut on the bias. Also do a test patch first to see that the ribbon doesn’t stiffen the fabric too much, unless that’s the look you’re after.