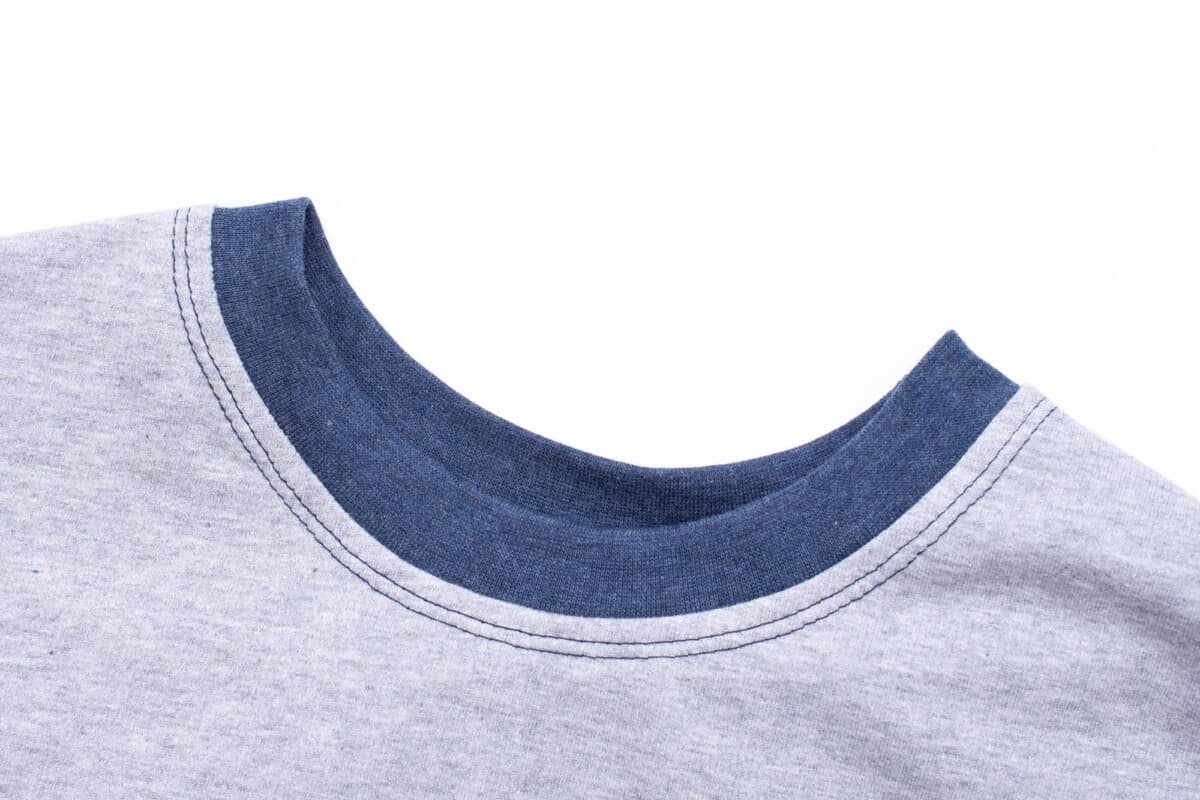

Are you struggling to sew a knit neckband on your t-shirt and tops? Perhaps it’s gaping, won’t lie flat or it pulls the fabric of the neckline and creating those annoying draglines and gathers.
I can assure you that you are not alone in this struggle, because sewing neckbands on knit tops is deceptively simple, so don’t feel bad if you nail this sewing technique straight away.
The good news is that there are easy fixes for this issue, you just need to understand and follow some important principles and then use the right techniques. So in this sewing tutorial, I will share all the tips and techniques I’ve found super helpful in my own sewing, and hopefully, these can help you too!
6 important things to know before sewing a neckband
- The more stretch the rib knit has, the shorter the neckband piece should be. A good rule of thumb for a regular crew neck t-shirt opening is to make the neckband piece around 70-75% of the neckline circumference.
- For a super stretchy rib knit you might have to go below 70%, but remember that if the rib knit is stretched out too much it will create gathers around the neckline when attached, so it’s always a balancing act to figure out the sweet spot.
- A wider neckband is less likely to lie flat compared to a narrow. If you want to use wide neckband, cut a strip and fold it in the desired width and stretch it around the neckline to get an idea if it will work.
- A good folded width for a classic t-shirt neckband is around 2.5 cm (1″) + seam allowances. Remember though that the finished width will likely be a little narrower since the fabric is being stretched out when attached. The more you stretch the fabric, the narrower it gets.
- For a neckband on a deep neckline, make it narrow, since it won’t lie flat otherwise.
- If using self-fabric (jersey) instead of rib knit, the neckband piece should both be longer and more narrow than a pattern piece for rib knit, as jersey has less stretch and won’t lie as flat when stretched out. Opt for around 80% length and around 2 cm (3/4″) folded width or even slightly less
What all this means is that even if your pattern has a neckband pattern piece included, you might still need to modify it depending on the type of fabric you are planning to use for the neckband.
Before you attach the neckband
- The neckband needs to be stretched out evenly, otherwise, you might end up with different widths and/or gathers along the neckline.
- To avoid a bulky intersection of seams at the shoulder, move the neckband seam a couple of centimetres (less than an inch) towards the back.
How to notch a neckband
So let’s put all this information into practice. To make sure the neckband is evenly distributed I recommend that you use notches. So in this example, the distance between the shoulder seam and the mid-back on the neckline is 10 cm.
This means that the corresponding distance on the neckband should be 7.5 cm if we are using a neckband that is 75% of the neckline circumference.
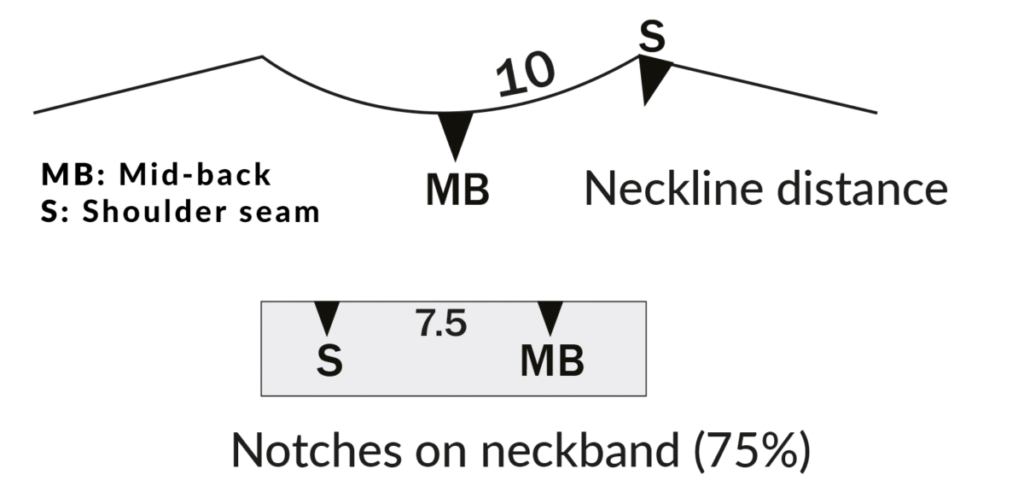
And then we have the issue of moving the neckband away from the shoulder to minimise bulk. If you want to account for this, you need to move the shoulder notch away from the seam line on the neckband, like this:

Moving the shoulder notch away from the seamline makes it a little trickier, but you don’t have to be super precise with the measurements, the most important thing is that you follow the principles somewhat and the rest will sort itself out.
Is all this info giving you a headache?
I know, it is a lot! But the good news is that if you just follow the guidelines somewhat loosely it will still make a big difference. And after you have sewn several neckbands, you’ll eventually develop a sixth sense on how to gauge all this, so with time, it will become more intuitive and less mathematical.
But if you are struggling currently, I highly suggest that you start with this methodical approach before going rogue.
Step-by-step tutorial for sewing a neckband to a t-shirt
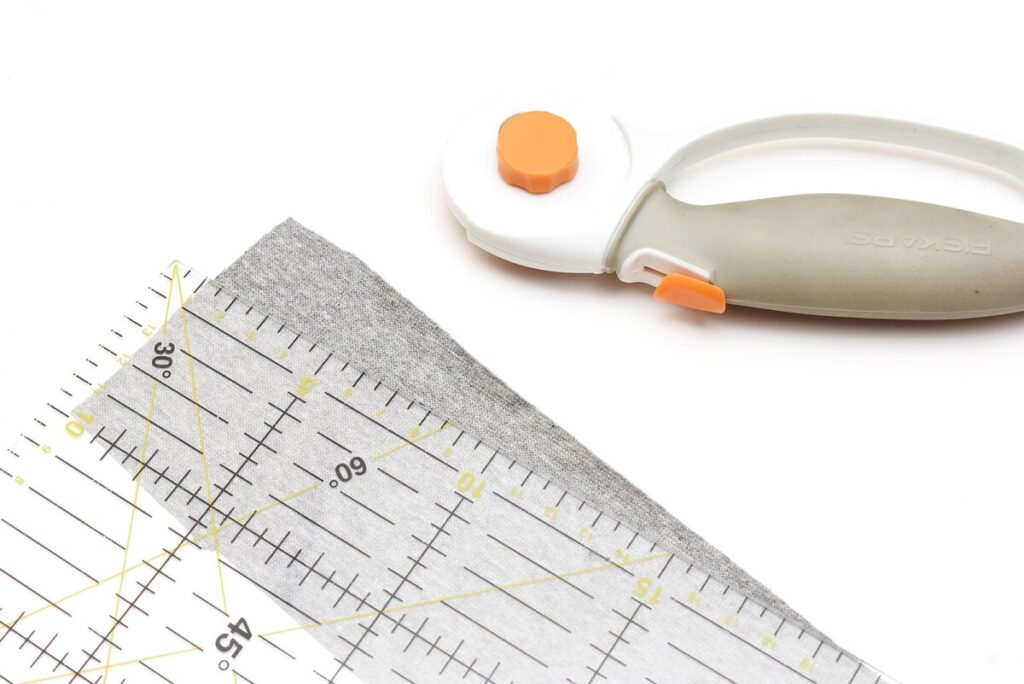
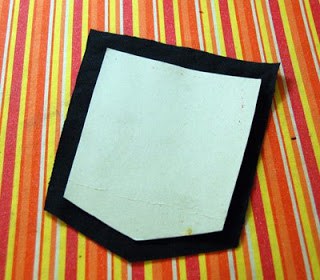
1. Cut the ribbing
Preferably use a ruler and a rotary cutter to cut the ribbing because it creates the most even ribbing piece. But of course, a paper pattern piece and a pair of scissors will work too,
just make sure the scissors are sharp!
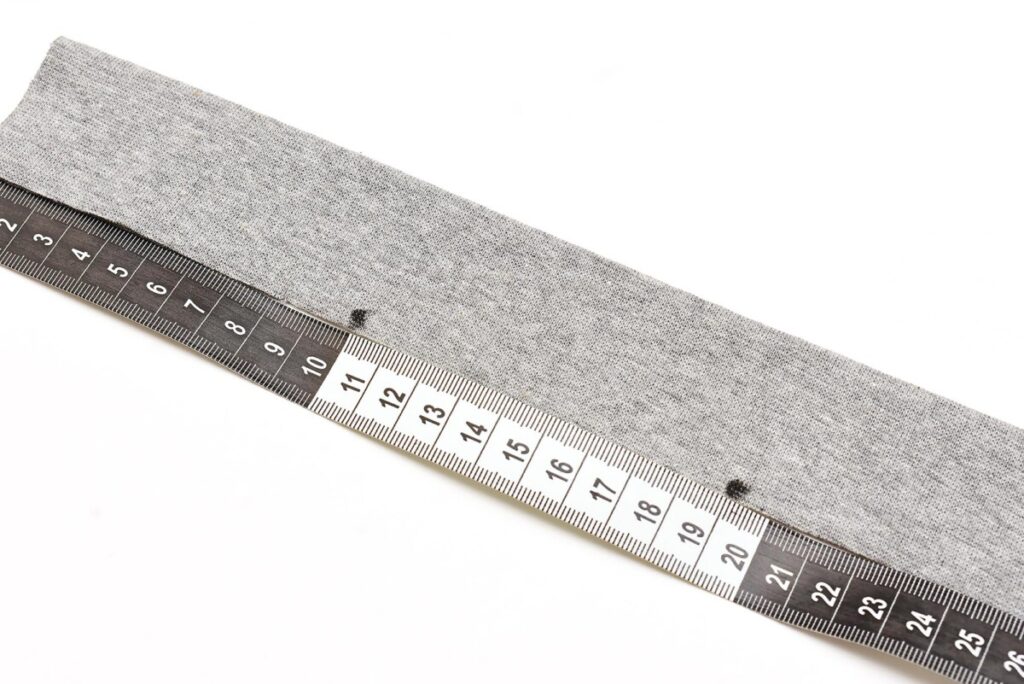
2. Mark notches on the neckband
First, fold the ribbing. You can carefully press the fold with an iron on low heat to make the fold crisp. Then, mark notches that correspond to mid-back, shoulder seams, and mid-front using the suggestions above. Either clip the fabric or use a pen for the notches.
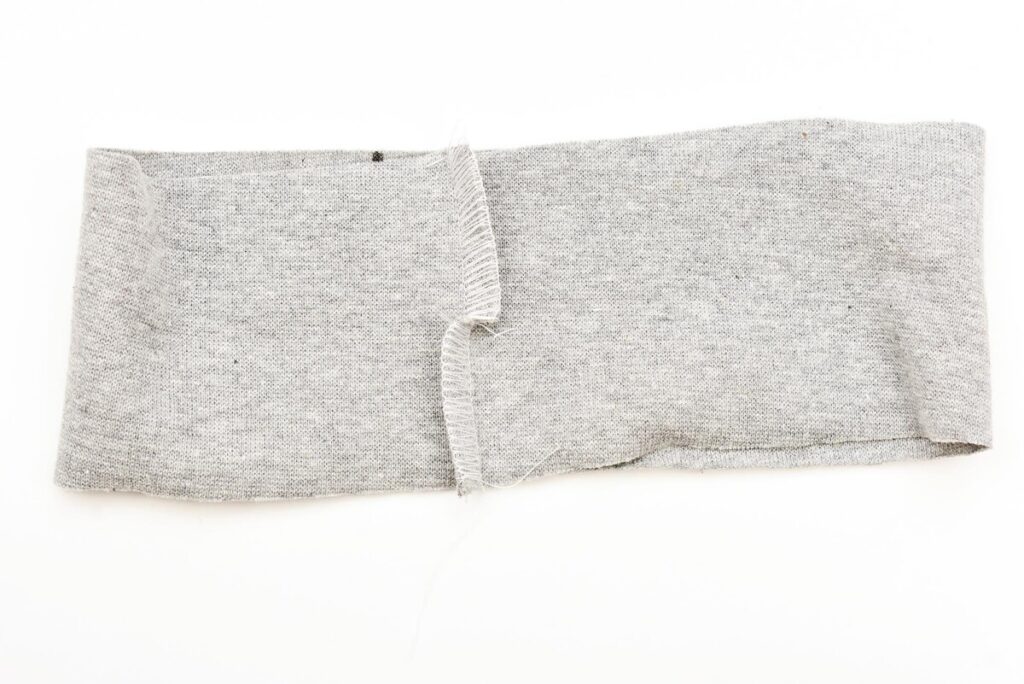
3. Close the neckband
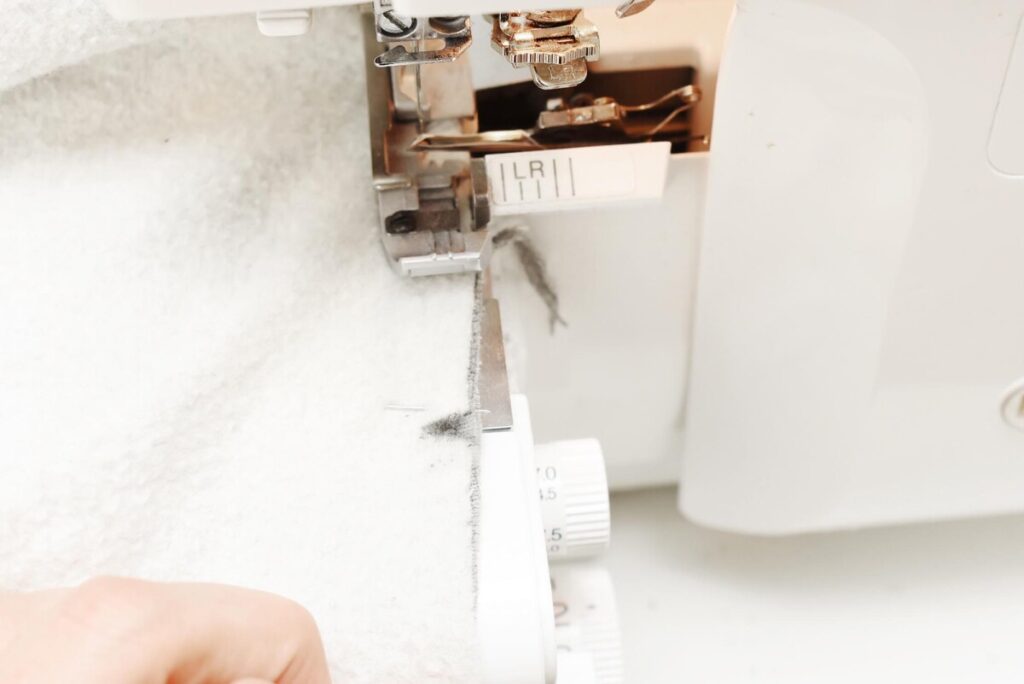
Use either a 3-thread serger stitch, a narrow zigzag stitch or a sewing machine stretch seam. If you are using a narrow zigzag, press the seam apart to make it flat. To create a flat fold when using an overlock seam, clip the seam allowance carefully (just a tiny notch) at the fold and press in opposite directions.

4. Match the notches
Mark the corresponding notches on the neckline of your garment and align them with the notches on your neckband. Tip: You can use needles or very loose hand basting to keep the neckband in place when sewing.
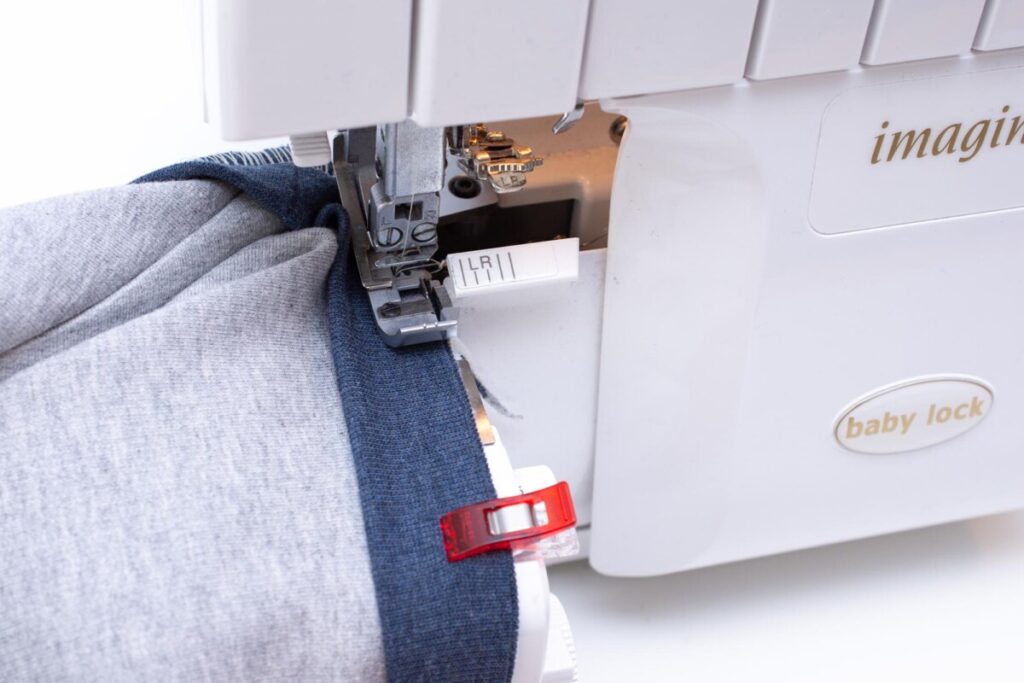
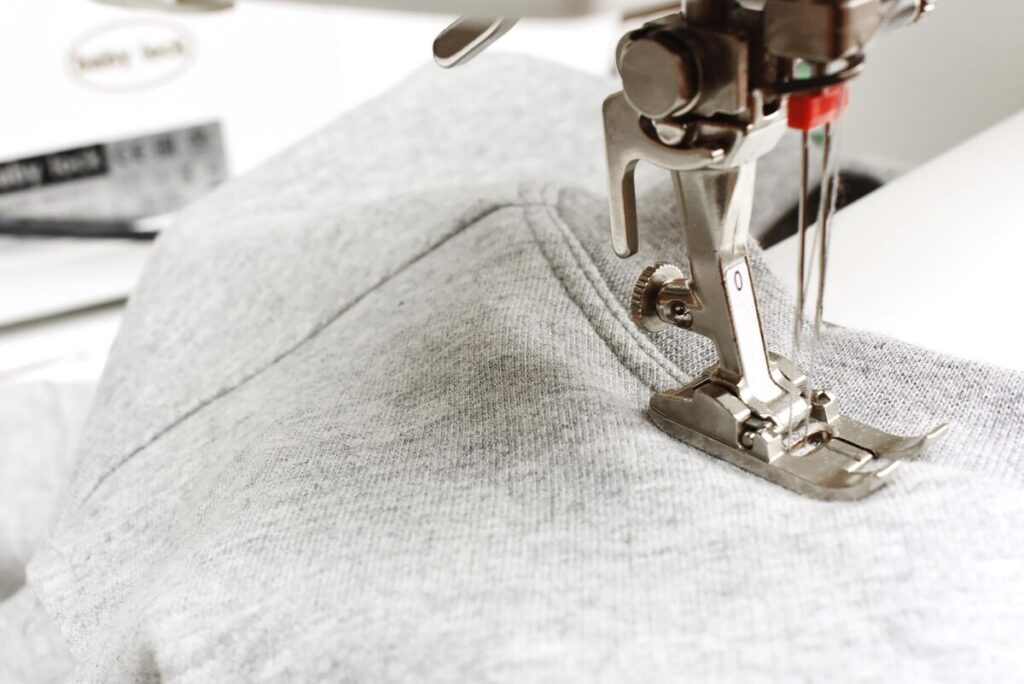
5. Attach the neckband
Use either a serger or a sewing machine stretch seam to attach the ribbing. Stretch the neckband while sewing, making sure the notches align. Don’t stretch the neckline, just the neckband.
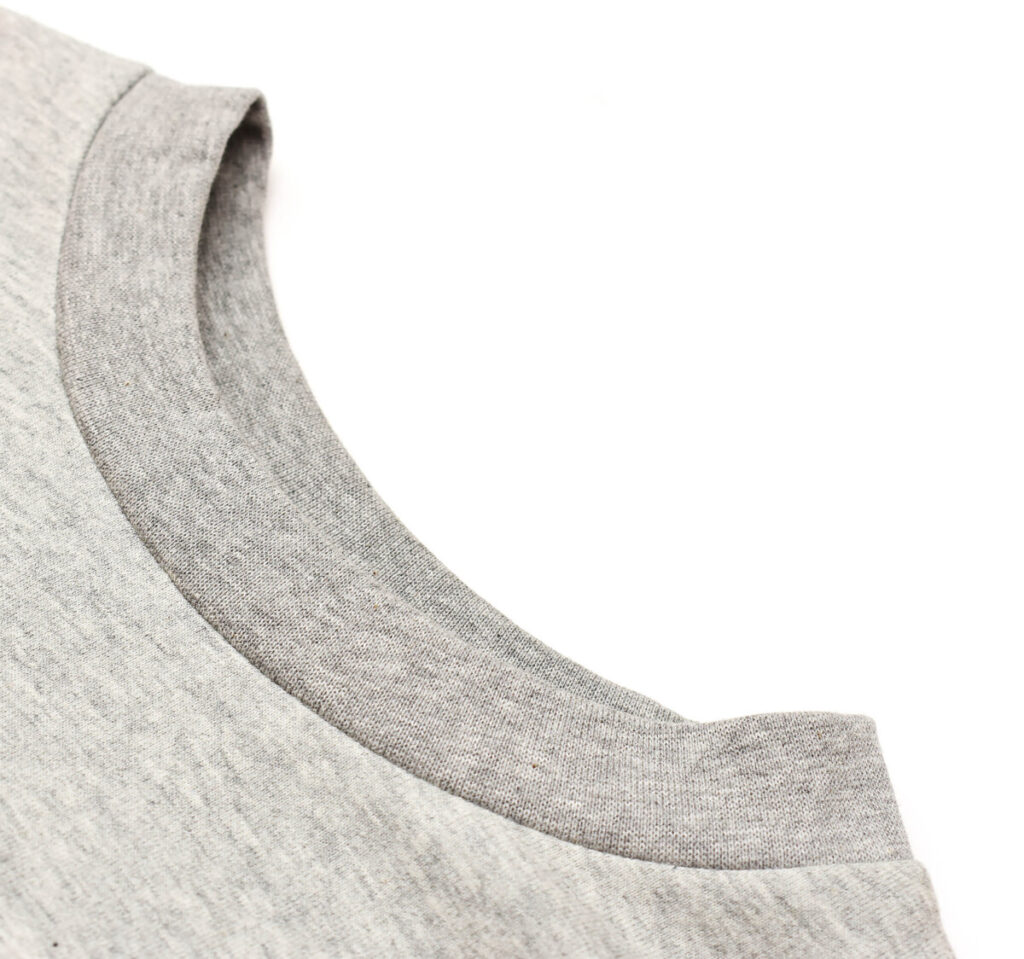
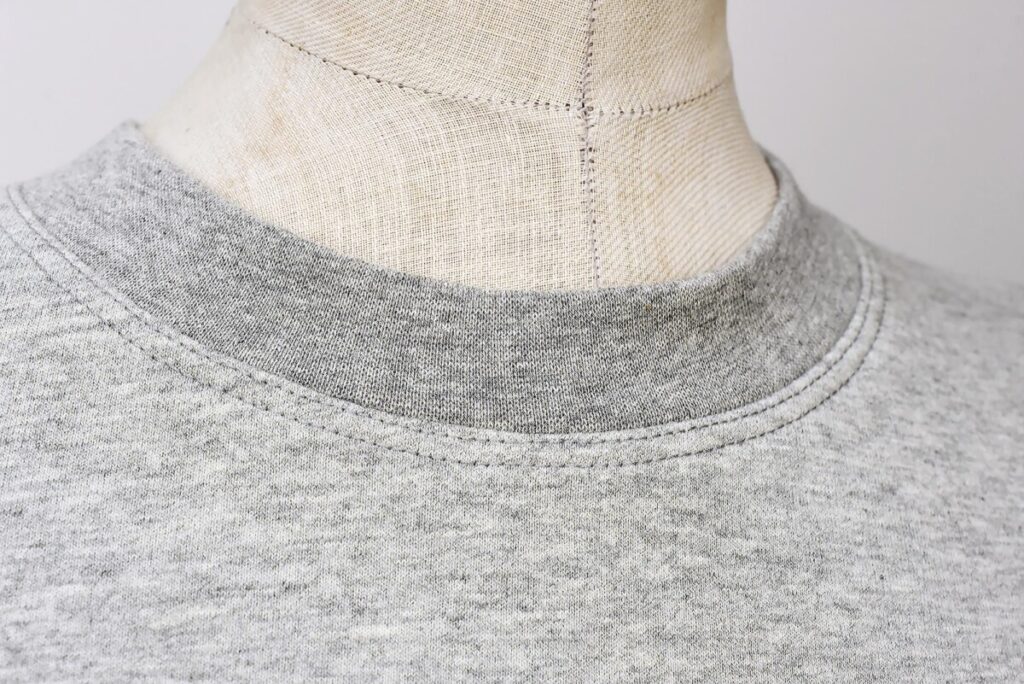
6. Press the band flat
After sewing, it’s a good idea to press the neckband on a low setting to make sure the ribbing lies flat and to remove any creases. Just test the fabric first to see that it can tolerate an iron.
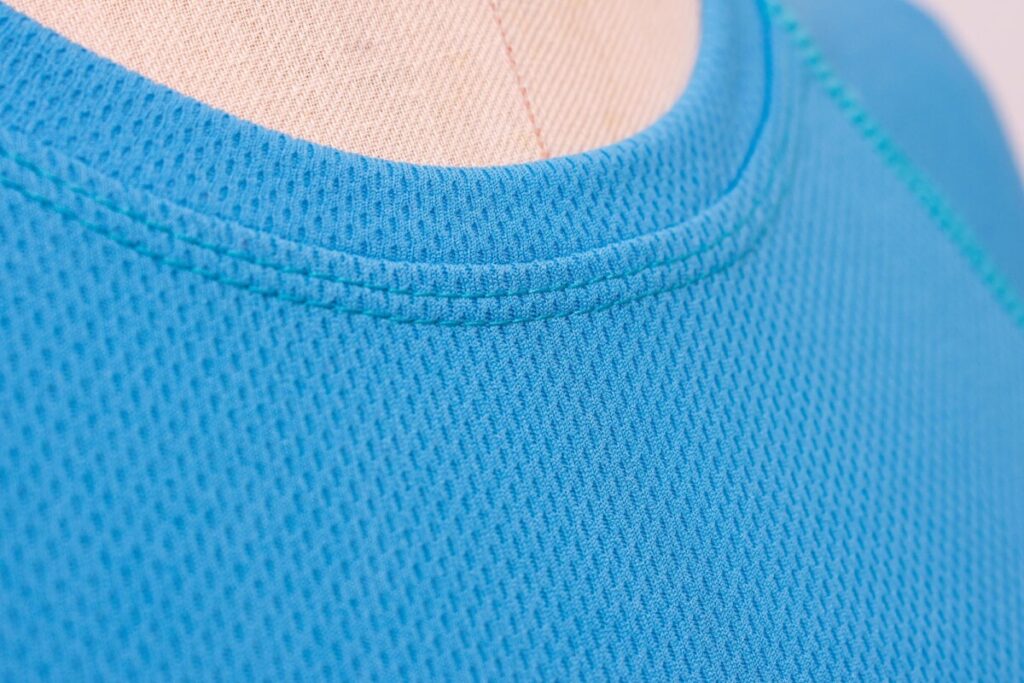
7. Stitch down the seam allowance
To create a flatter and more professional-looking finish, you can topstitch the seam allowance. Use a twin-needle, zigzag stitch, or a coverstitch machine for this. I recommend starting on the back piece, a few centimetres from the shoulder seam.
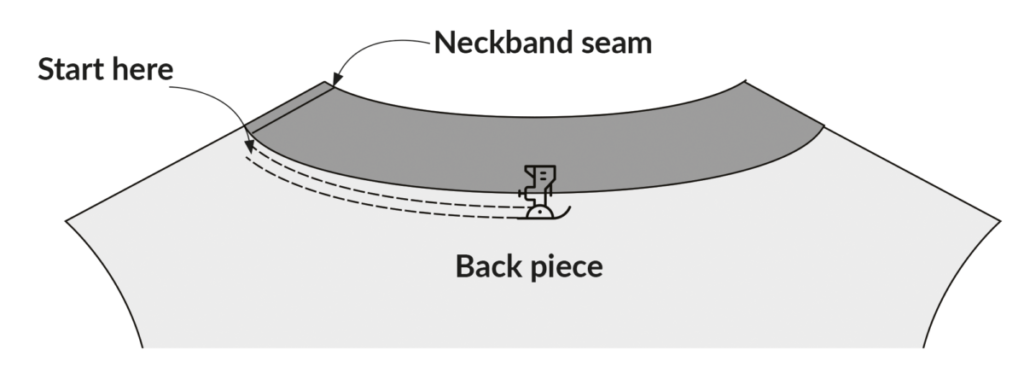
This will make the finishing of the seam less conspicuous and it also makes sewing easier since you don’t’ have to start over the bulky shoulder seam area.
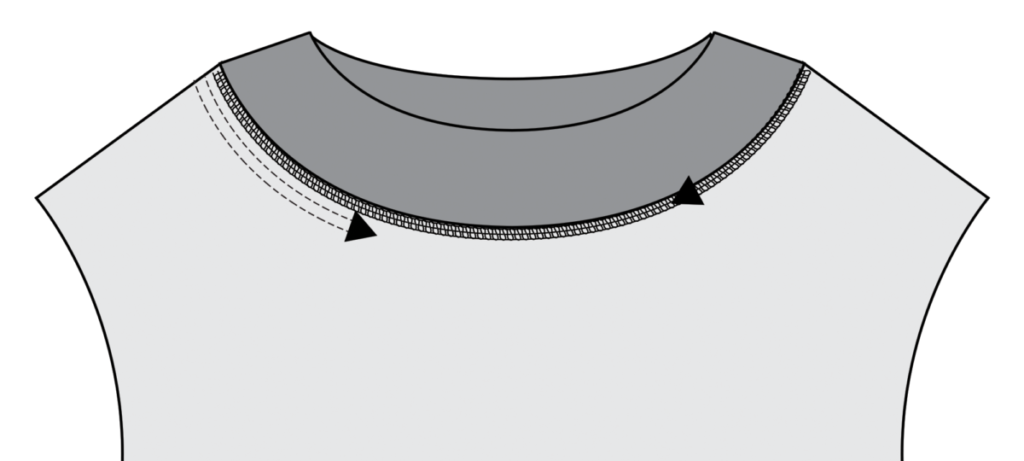
A great tip that I got from my friend and professional pattern maker Pattern by Malena is to topstitch the neckband in the opposite direction from how you attached the neckband. So if you sewed the neckband in a counter-clockwise direction, do the topstitching in a clockwise direction, as this will prevent draglines.
BTW, check out Pattern by Malena’s Hazelhen Tee pattern (English version is coming). She understands this stuff from a professional perspective, so her patterns include two neckband options, one for rib knit (shorter and slightly wider) and one for jersey (longer and slightly narrower).
To sum it up
I hope I didn’t overwhelm you with all this info, but I think it’s important to understand the principles behind how sewing works. So if you are struggling with sewing neckbands on knit tops, now you hopefully understand what causes those issues and how to fix them!
And rest assured that with practice this becomes easier and easier, and all the info in this post will become intuitive and you’ll be able to gauge and go by feel rather than bother yourself with too many numbers.
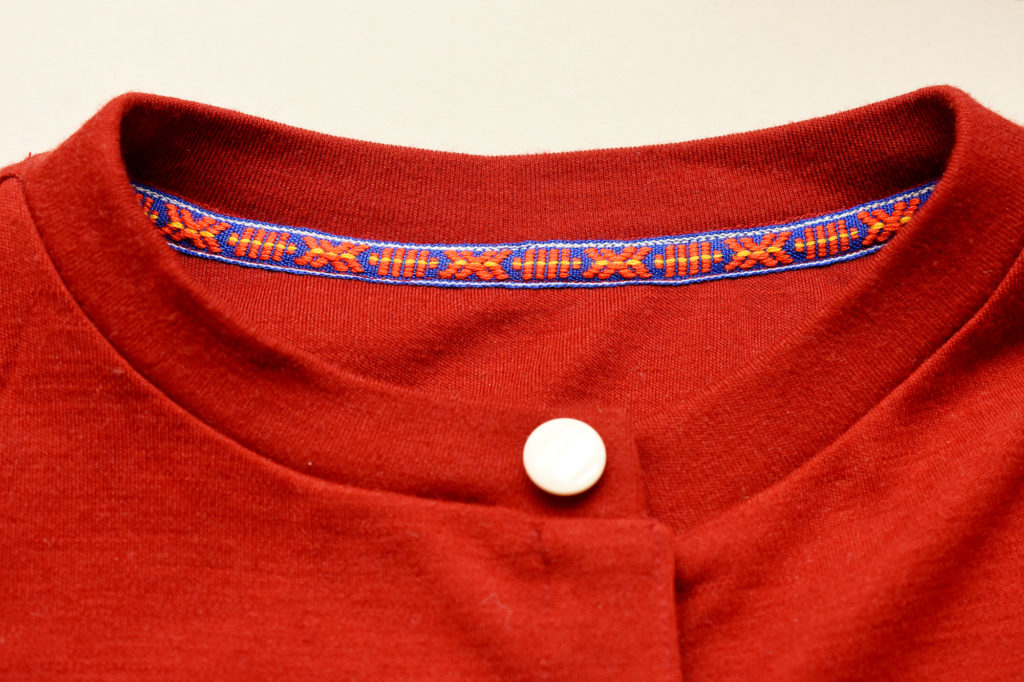
If you want the inside of your neckband to look neat and professional, you can also check out my tutorial for covering the seam with a decorative band, just like many higher-end RTW brand does.
25 Comments
Kyle Winden
This is an excellent tutorial. I’ve been sewing for over 60 years and have stayed away from knits because they never came out quite right. This has solutions to those things that drove nuts. Thank you!
Johanna Lundström
I’m so happy to hear you find this tutorial helpful, and I agree even if we have sewn for a long time, knits really are a very different way of sewing and we have to do and think quite differently about things compared to wovens.
Anne
I agree that this is fantastic. I am working on my first project with knit fabric and have just gotten to the point of having to attach the neckline. Your article has more information, clearly explained than anything else I have come across I now feel confident of how to try it and what to look for if doesn’t lie correctly. Thank you so much
Johanna Lundström
Thank you! It’s always tricky to explain these things when I can’t be next to someone and show how I do it, so it makes me very happy to hear that you’ve found this tutorial helpful when it comes to filling in those gaps!
Vivien Lee
Excellent detailed instructions. I’m literally just sewing on a stretch neck piece and a couple of your tips have helped it to look more neatly finished. Thank you again.
Johanna Lundström
Yay, that’s so great to hear! Usually, it’s just those small tweaks that can make a big difference, but we don’t know it until we know, so I’m happy to share the things I’ve learned the way!
Donna B.
Glad to “hear” from you, Johanna! Thanks for the tutorial. I always learn something from your posts!
Johanna Lundström
Thank you Donna! That makes me so happy to hear!
GIll
Great to have you back, excellent written tutorial rather than audio. Hope you are fighting fit soon.
Johanna Lundström
Thank you, yes I’m slowly getting my mojo back and doing this really extensive tutorial was really fun and rewarding, even if it took quite a bit of work. So it’s very validating to hear that you’ve found it useful!
Tracey Sabolevski
Thank you for the great tutorial! I just got some twin needles, but worry about using them on stretch fabric. Will the stitching stretch enough, especially around a neck hole?
Haydee
Hi, yes the twin needles work brilliantly. I have, ( I believe) ballpoint twin needles. The upper tension needs to be fairly high. (Eg: 6-9). It will create a kind of zigzag on the back. I like to use the needles that are close together (say 2.5mm), as it is easier working on an overlocked 6mm seam, it doesn’t have the same tendency to ‘fall off’ the edge.
Linda Dinnocenzo
I made some t-shirts out of up cycled t-shirts that my family no longer was wearing. Most of them were sleeveless due to lack of material and also work well for me at work. I am fond of v-necklines so most of them have an attempt at that. T-shirts are supposed to be easy but the details are important to get right as that is where the eye goes. I used self fabric for the neckline and armholes as that is what I had . I usually cut the band longer and stretch it ( sometimes too much) Thank you for your tips as I would like to refine my process. I am assuming the 3/4” is the entire width of the band not folded in half and not including seam allowances? Thank you for all of your wonderful media.
Eva Johansson
As always a really good instruction.
Is there a special reason for putting the seam of the neckline band close to the shoulder and not in the middle of the back?
Melody L Griego
This is exactly what I have been searching for! Clearly the best tutorial ever written on this process and now I am ready to make lots of knits tops.
Daniel Burgoyne
This tutorial includes techniques and advice that I never heard in my sewing classes.
Many thanks and a big hug for making these accessible!
Marie
I found the tutorial very informative. I’m about to try a tee for the first time so will come back to the article. Many thanjs
SOPHIA JESSOME MacDonald
Hi, how would I attach a neck band on a reversible Tshirt (only 1 layer of fabric)?
Jean D LaPalme
it is hard to do but take your time and divide your collar in 4 equal length and will need to stretch a little and everything will be fine. I tried it and for an OLD man i made. Thanks. for all the info.
Barkat
Very nice totural Sew T shirt. Good job work. Beautiful idea. I like
Nicole
Is there a trick to stretch just the neckband and not the shirt? It seems like I always end up stretching both and then have bunching on my shirts. Thanks!
Bobbie Jo
I am a beginner at sewing … Still and I blame it on my inability or more precisely my UNable~to get my lengths, stretching only neckband not the neck concept. Now the embarrassing part, I’ve been trying to be a dressmaker because I enjoy learning and sometimes I’ll get a nice piece of clothing made that is wearable. Mostly I have abuge scrap pile that I’ll try to add into more pieces of other projects. I am going to stop what I’m sewing now and sew a t-shirt and neckband with your awesome tips and I’ll surely share my end results !
Thank you ! You may have just changed my scrap stash back into a fabric stash. (My still new and uncut f(Abrics)
Jane
Hi, no matter how many times I sew a stretch neck band, I stuff it up!! I find the quartering I bit difficult as one or 2 of the fourths is too short for band. I do it the way all you professional people teach but just doesn’t work! Always droopy. Are there any other types of neck bands?
Martha R.
Thank you for the wonderful tutorial on attaching neckbands! I struggle with the neckbands wanting to turn outwards, so I’m thinking now that maybe they are a bit wide. I think I will take your advice and make them a bit narrower. Most of mine are Jersey knits. Wish I could have you in my sewing room for a few days!
Comments are closed.