

Want to make a belted jacket, coat or even a cardigan? But your sewing pattern lacks this feature? Then follow this easy to follow, step-by-step tutorial on how to add belt loops and sew a matching self-fabric belt.
This tutorial is part of the Sew-Along for the Eivy Cardigan Sewing Pattern and is especially useful for sewing belts on stretchy fabrics, but the same method can be used for woven fabrics too.
To sew a belt and belt loops you need:
- Fabric
- Interfacing
- Hand-sewing needle + thread
- A tube-turner tool (optional, thread and needle/safety pin will work too)
Drafting the belt pattern
First, you need to figure out the right measurements. If you already have a belted coat that you like the size of, use that belt as a starting point. If drafting from scratch, use these measurements as a starting point.
Belt length: = Desired circumference when tied + at least 100 cm (29 1/2”) for the ties
Belt width: = A good ballpark is a finished (folded) width between 5 to 7 cm (2” to 2 ¾”)
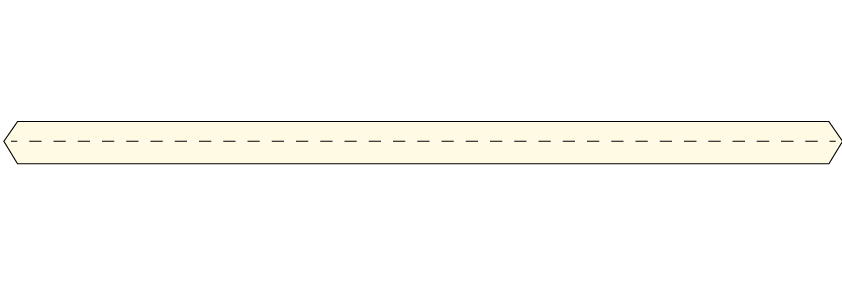
- Draw a pattern with the desired measurements + seam allowance.
- Remember to double the width since the belt will be folded.
- You can also add pointed tips as a nice design feature.
Belt loops pattern
There are many ways to sew belt loops, and in this tutorial, we are using a tube with no visible stitching.
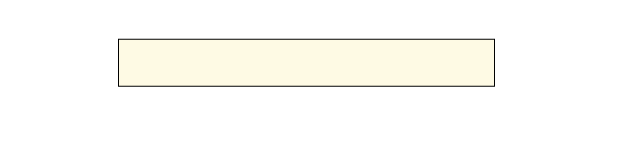
Belt loop length: Width of belt + 2 cm (¾”) for extra ease + 2 cm (¾”) seam allowance. Take the finished length measurement and double the length as we are sewing both loops as one single tube.
Belt loop width: In this tutorial, the belt loop pattern piece is 4.5 cm (1 ¾”) wide, which will yield a finished belt loop that is approximately 1.5 cm (⅝”) wide.
Cutting the belt and belt loops
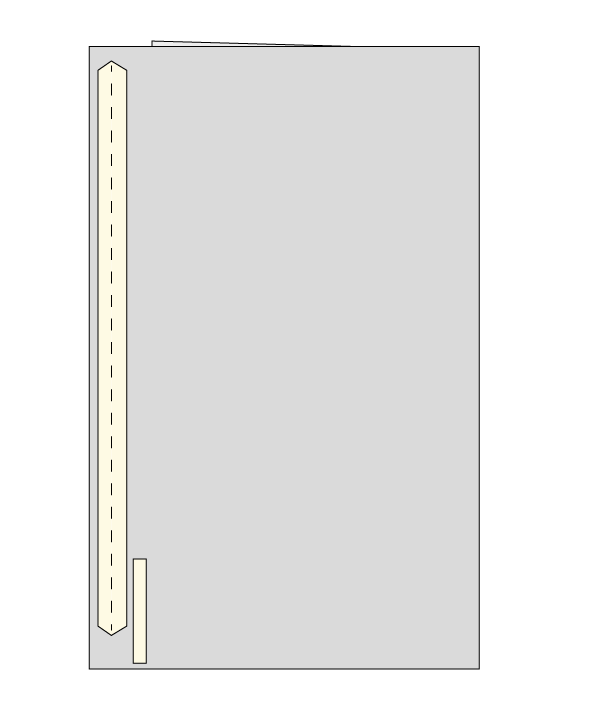
Ideally cut both pattern pieces lengthwise. Most fabrics won’t be wide enough for a belt and when working with knit fabrics it is definitely better to cut the fabric lengthwise since it has less stretch. A belt made with knit fabrics needs to be fairly stable so having a lot of stretch cross-wise is not ideal.
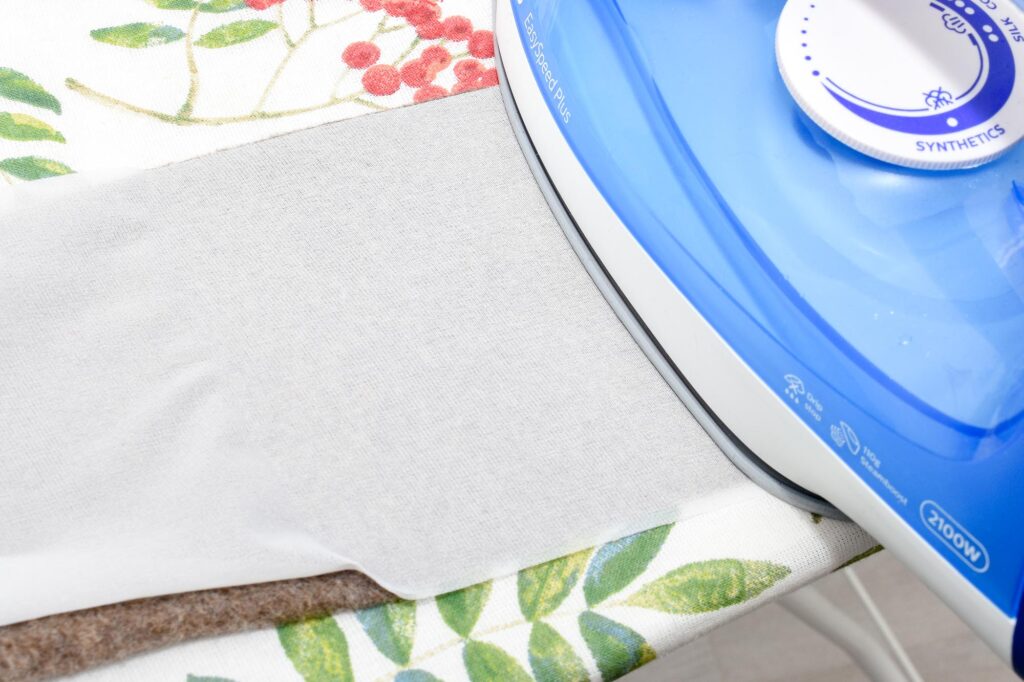
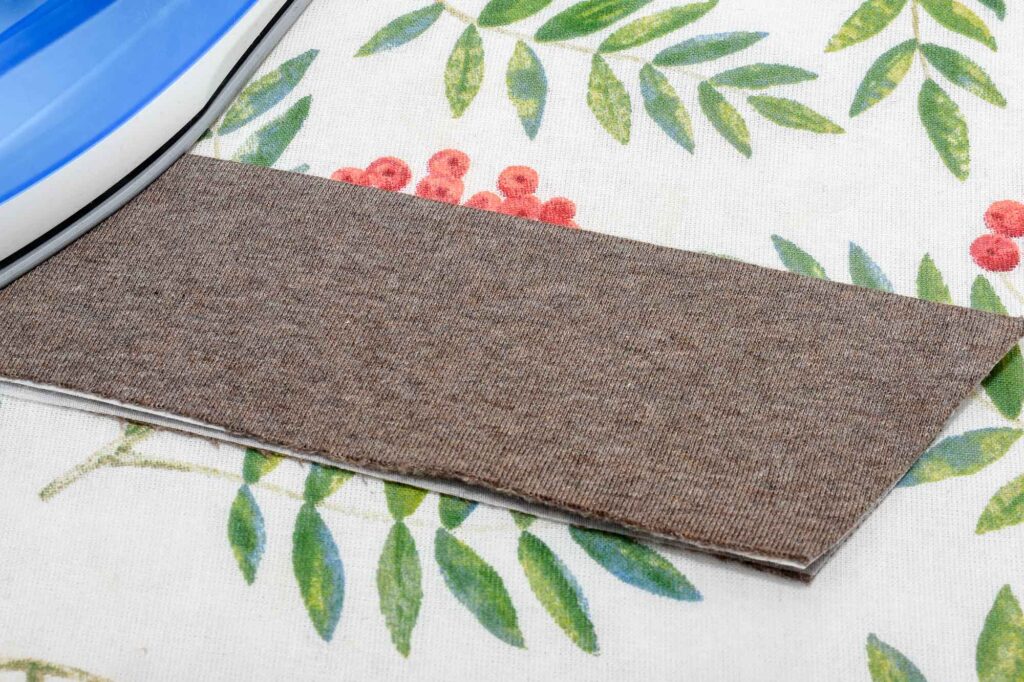
Interfacing the belt and loops

This is especially important when working with knits as it will provide stability and sharp corners. But interfacing is great for wovens too, especially the belt. To learn more about interfacing stretchy knit fabrics, see The Complete Guide to Using Fusible Interfacings for Knits.
Sewing and attaching the belt loops

Stitch the belt loop strip into a tube
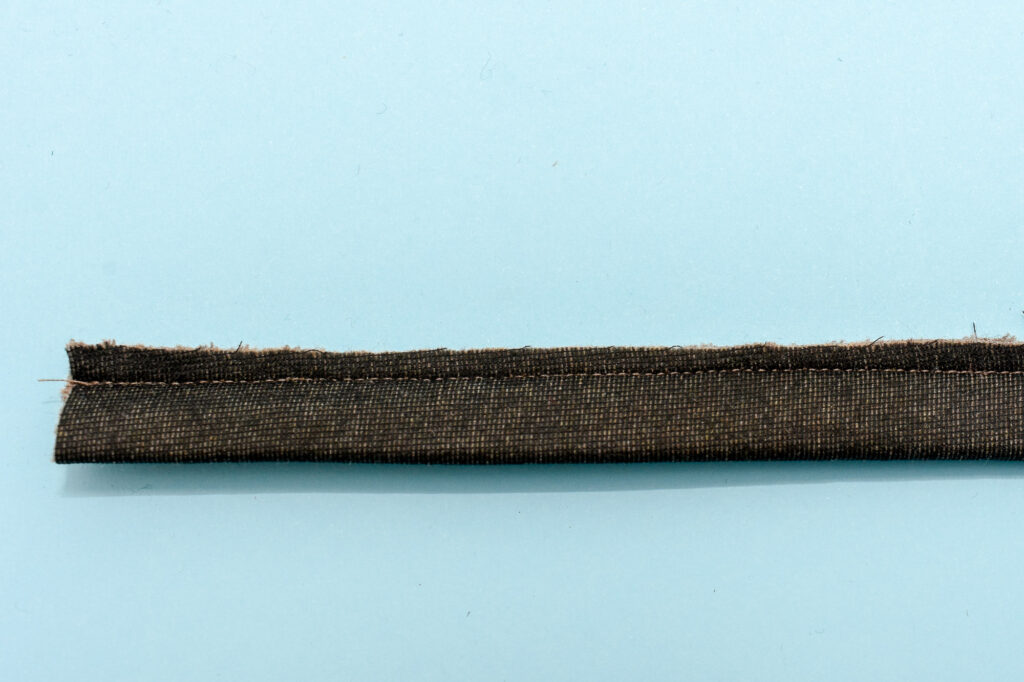
Stitch close to the edge, no more than 6 mm (¼”) away from the edge. Use the edge of the presser foot as a guide to stitch a narrow seam.
2. Press the seam allowance open on the belt loop
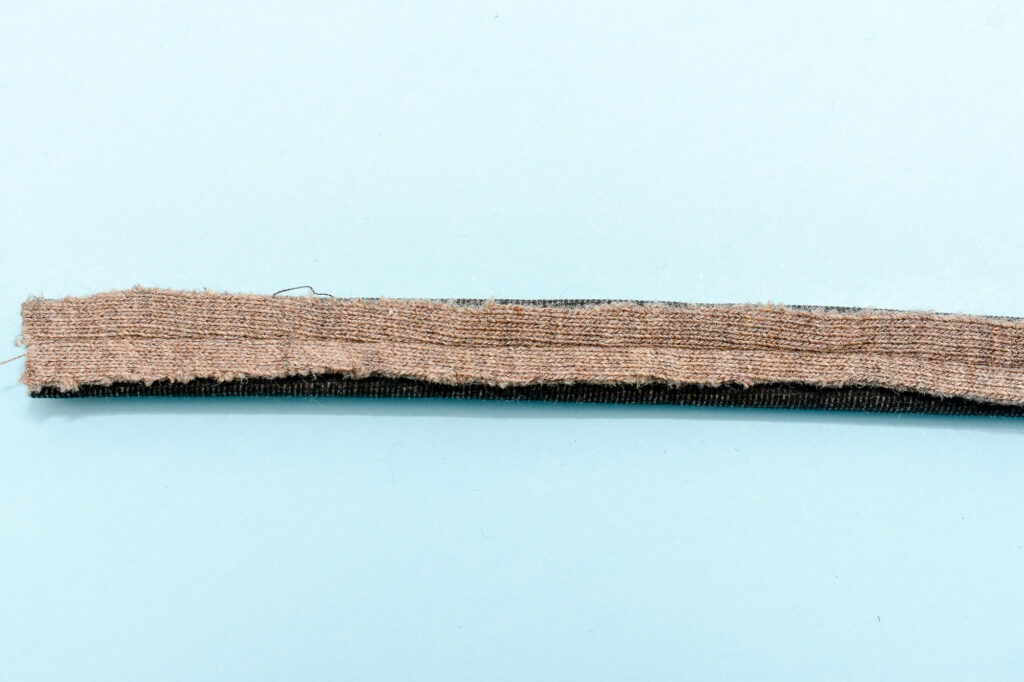
This will help stabilise and even out the belt loops once the tube is turned.
3. Turn the tube
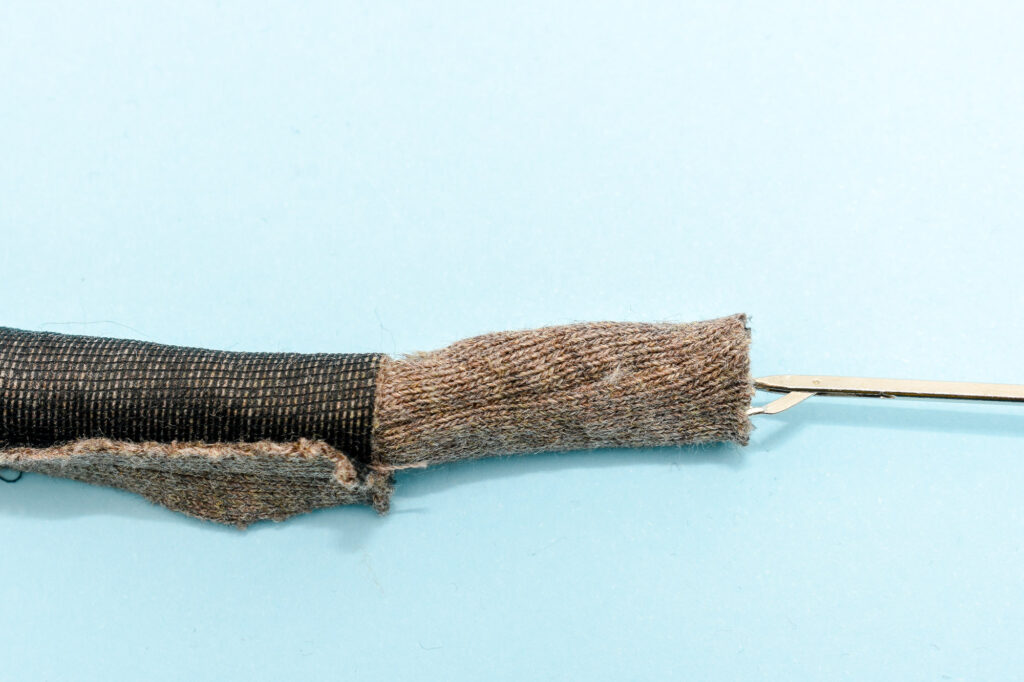
Here I am using a tube turner (Amazon affiliate link) but a needle and thread or a safety pin will work just as well. Just use your prefered method for turning loops.
4. Press the loop flat
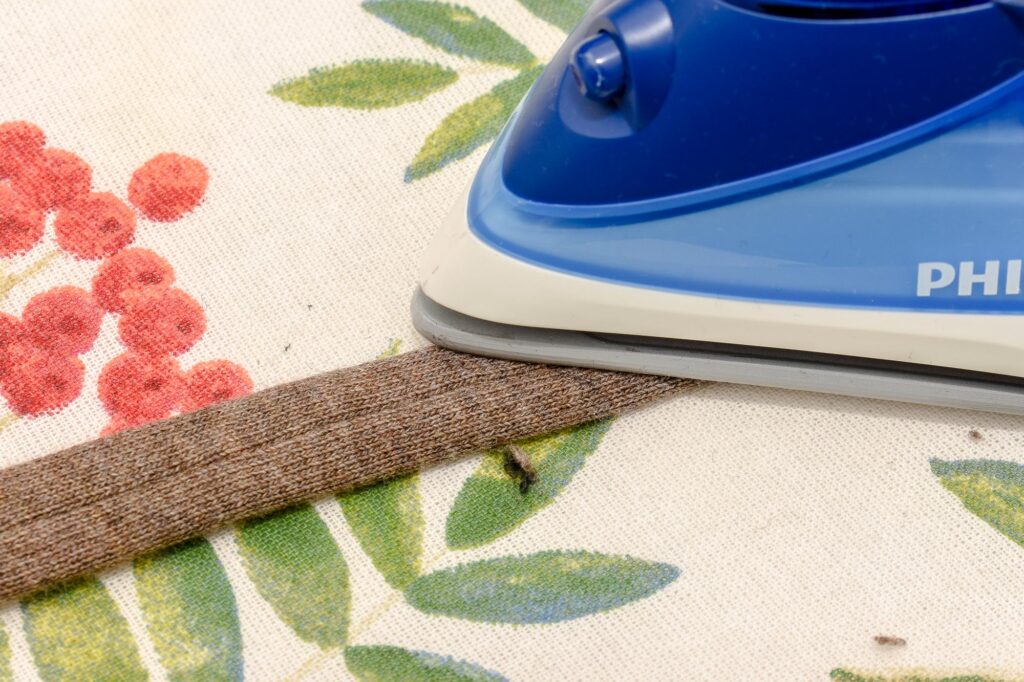
Make sure the seam is in the middle and that the folded edges are crisp.
5. Cut the loop strip into two equal length pieces

6. Close the edges of the loops
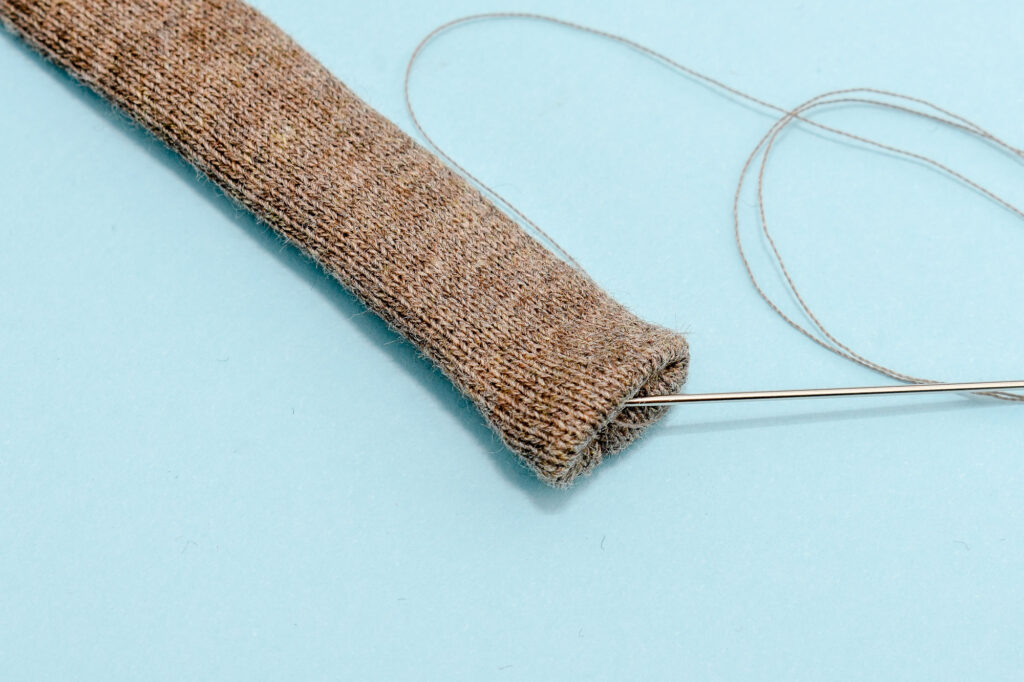
Turn in the raw edges and close the loops with hand-stitching (slip-stitches),
7. Pin the loop to the garment
Start with the lower end, and pin it so that it will be at the right spot when folded over.
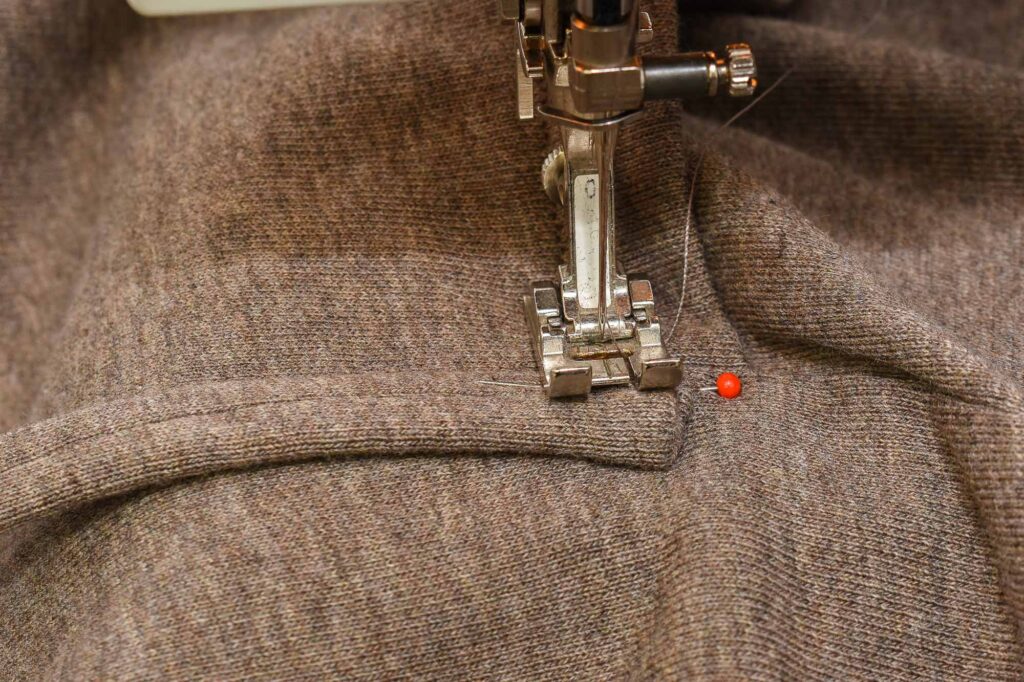
8. Stitch the loop in place
Sew close to the edge, around 6 mm in (¼”) in. Stitch back and forth several times and backstitch to secure the loop properly.
9. Fold the loop over and pin the upper part

Don’t let the belt loop lie completely flat, it is better if it is a little curved so that it doesn’t pull the fabric.
10. Stitch underneath the fold to secure the loop

Again sew close to the edge, around 6 mm in (¼”) in. Stitch back and forth several times and backstitch to secure the loop properly. Just push the loop away to get full access to the fold underneath.
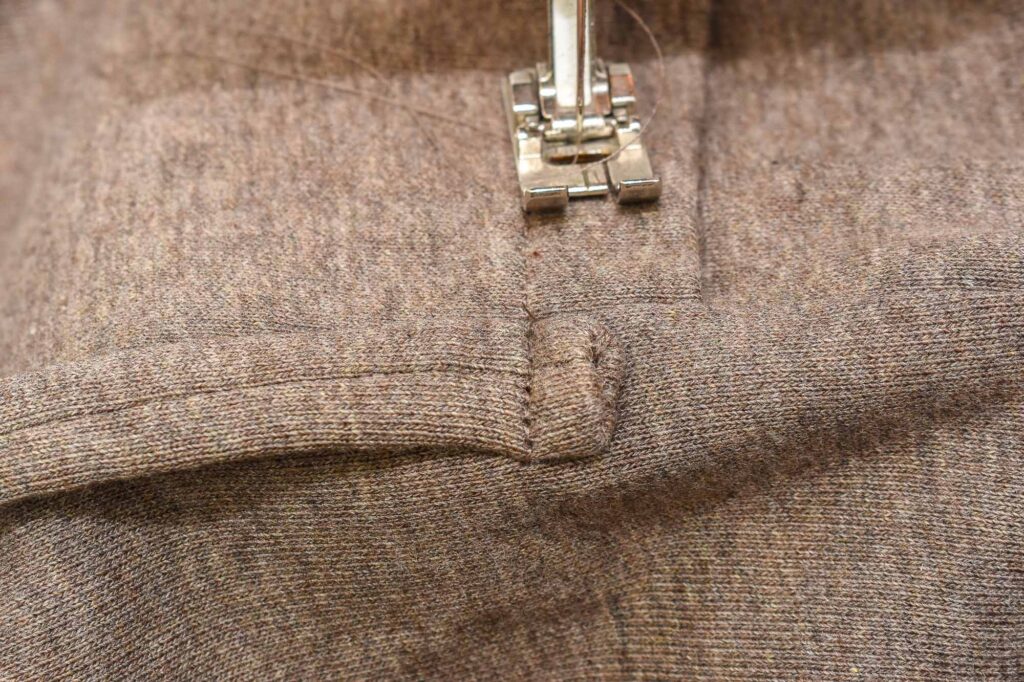
11. Press the belt loops to make the folded edges sharp
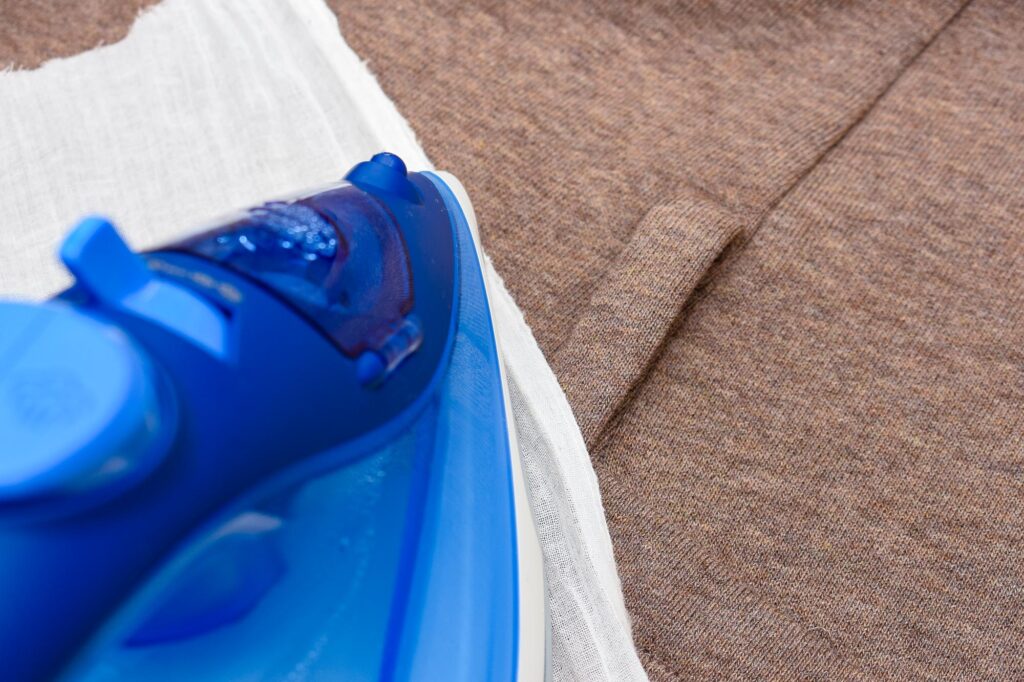
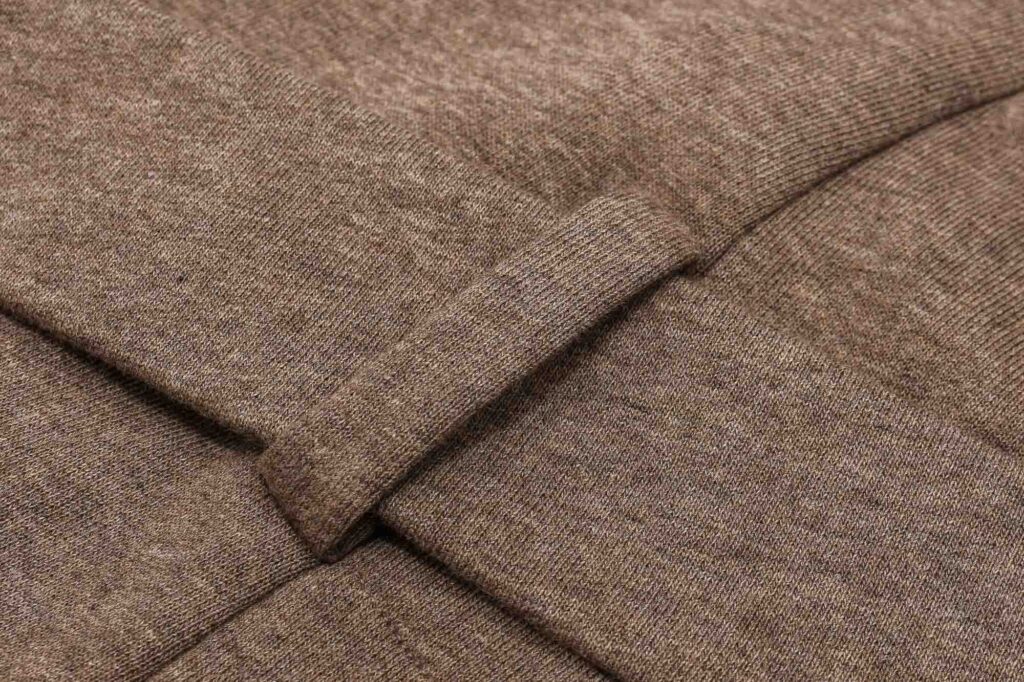
The finished belt loop
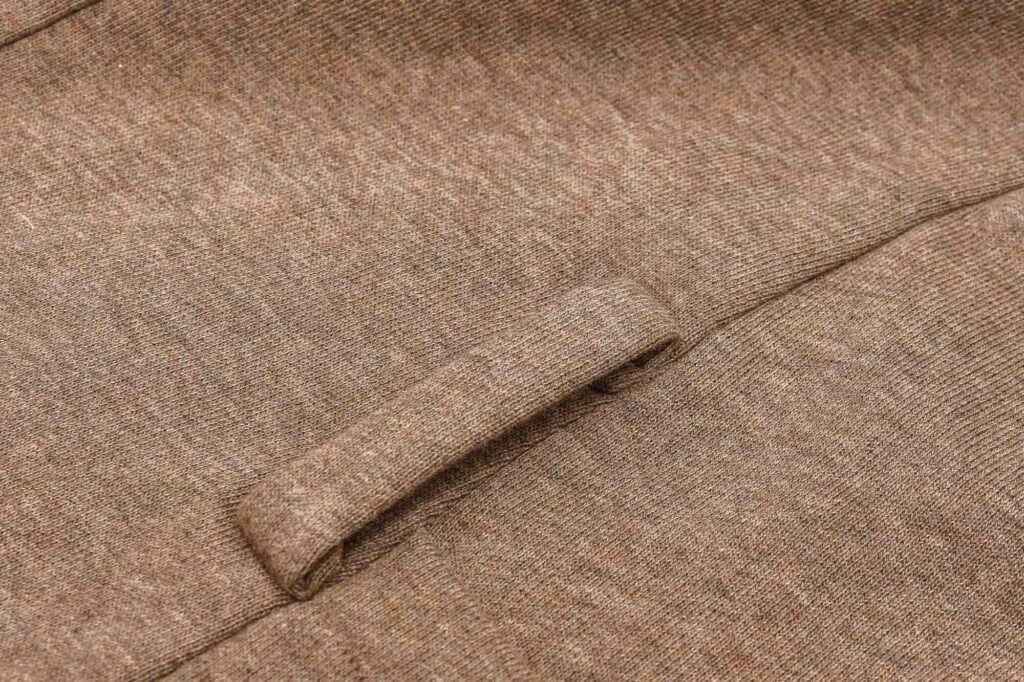
Using this method provides a very sleek looking loop with no visible stitching on the outside.
Sewing the belt
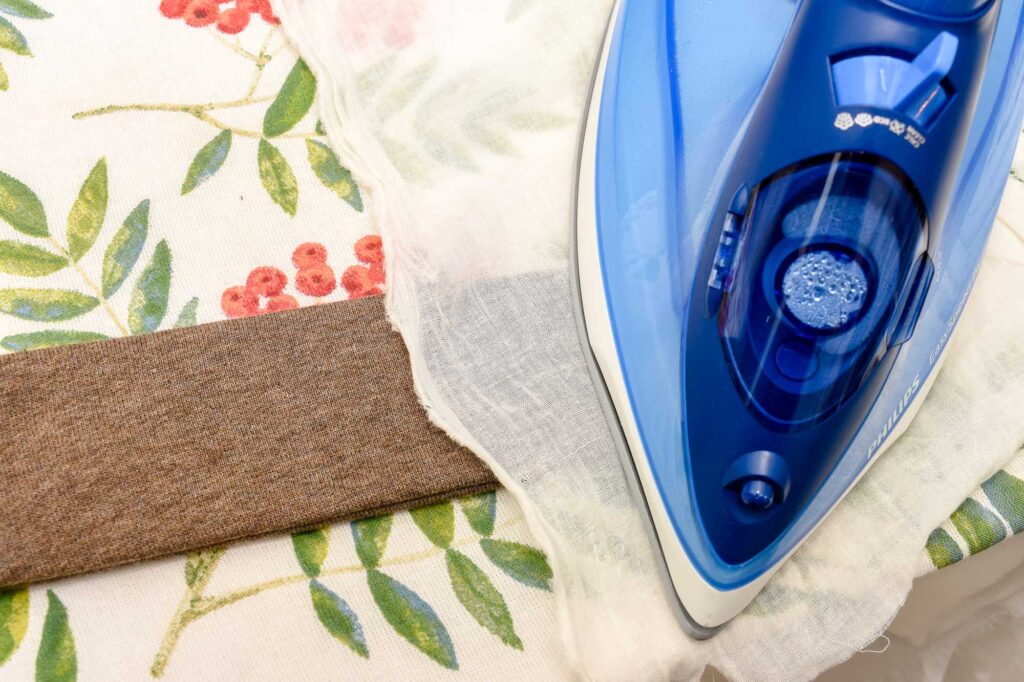
1. Fold the belt and press
Right sides out, press to make sure the fold looks crisp. If the fabric is delicate, use a pressing cloth to protect the fabric.
2. Fold in and shape the edges
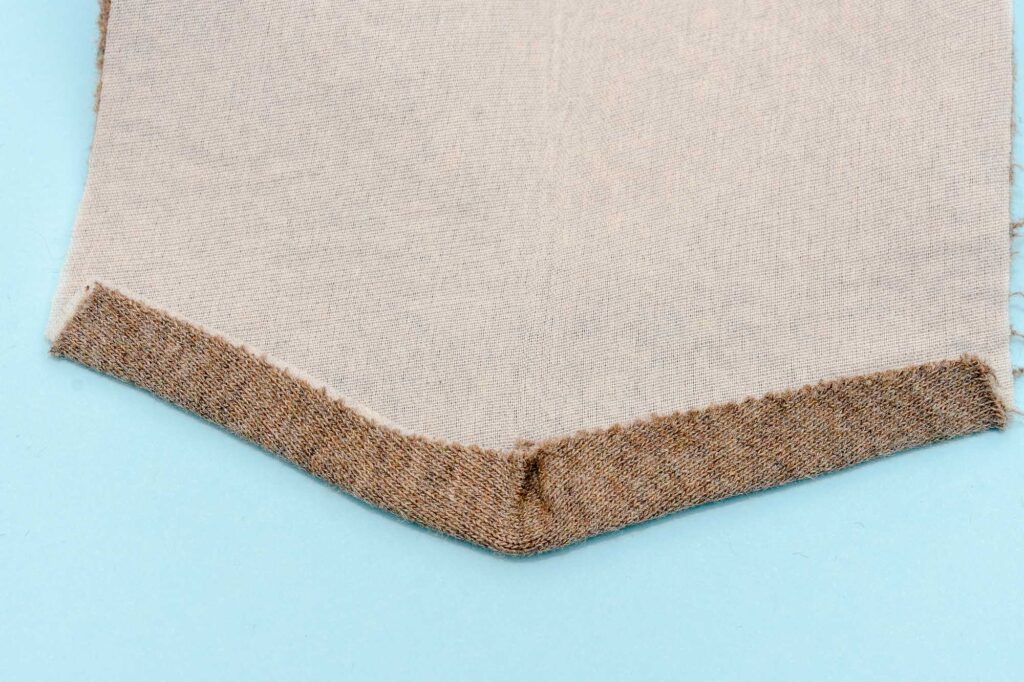
Fold and press in the seam allowance of the slanted tips on the belt. Using the fold method rather than stitching the tips together will ensure a much sharper tip, especially when sewing knits.
3. Sew together the belt loop
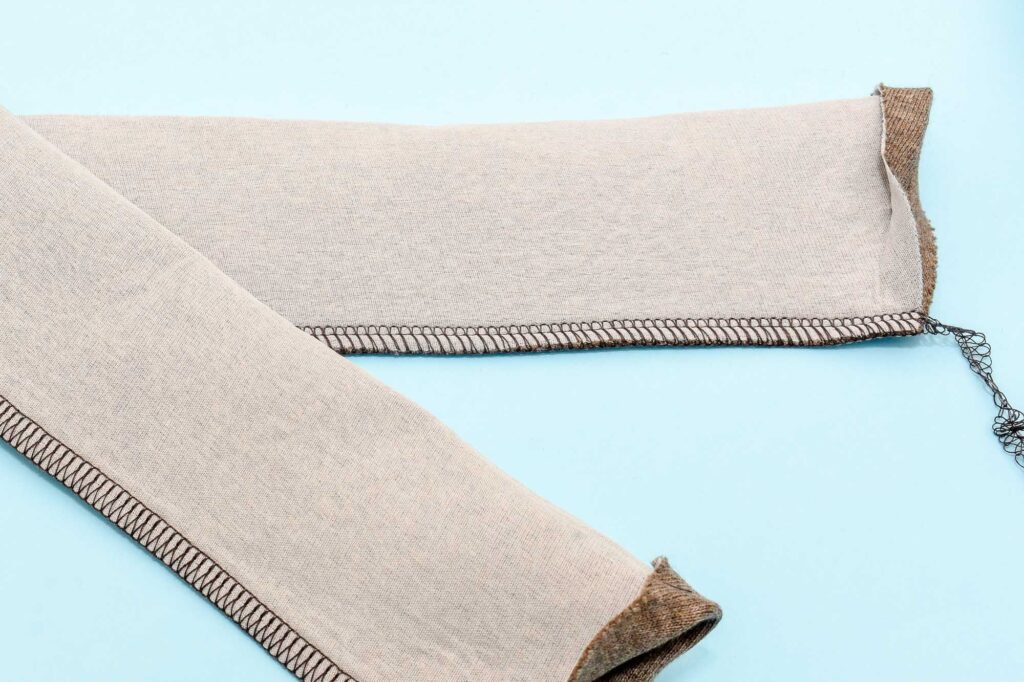
You can use a straight stitch, a narrow zigzag stitch or a serger overlock for this step. Sew with the tip folds open.
4. Turn the belt
Again use a tube turner or a similar tool to turn the belt so that the right side is facing out.
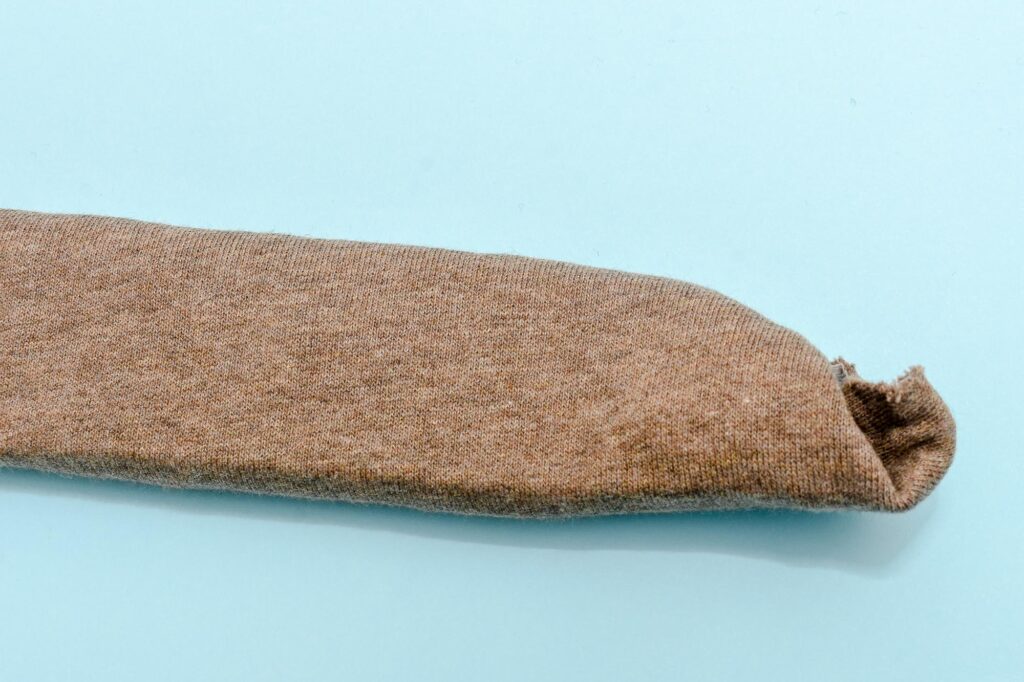
5. Press the belt
Make sure the seam is evenly pressed so that it isn’t visible on one side.

Also, give the folded tips another pressing.
6. Close the ends of the belt with hand-stitching

Ideally, use some slip-stitching to make the seam pretty much invisible.
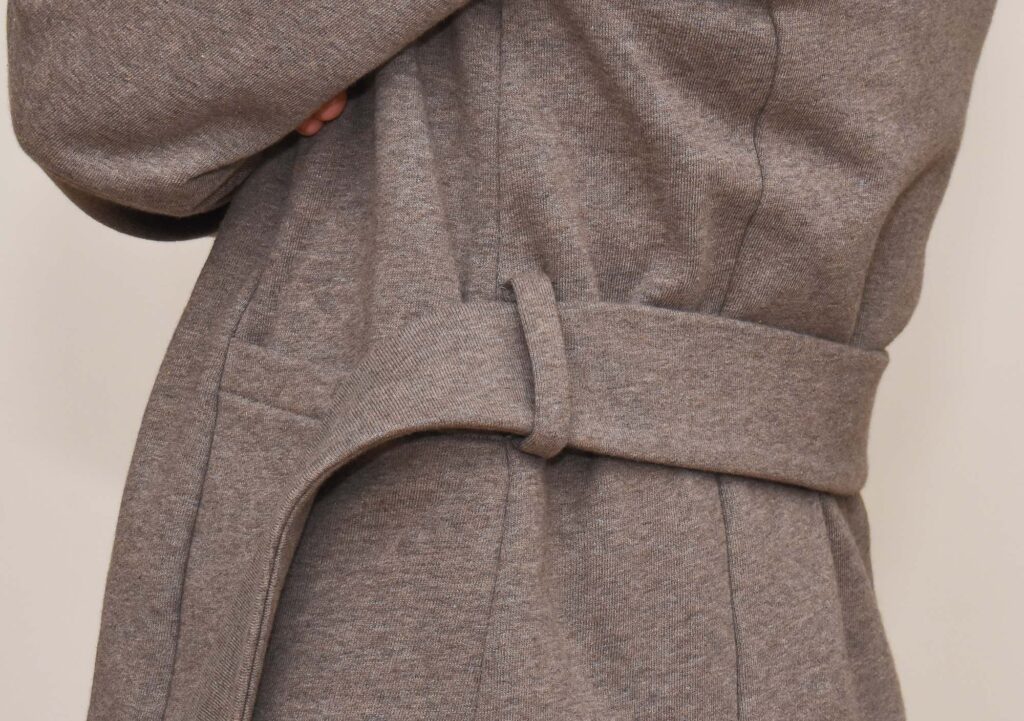
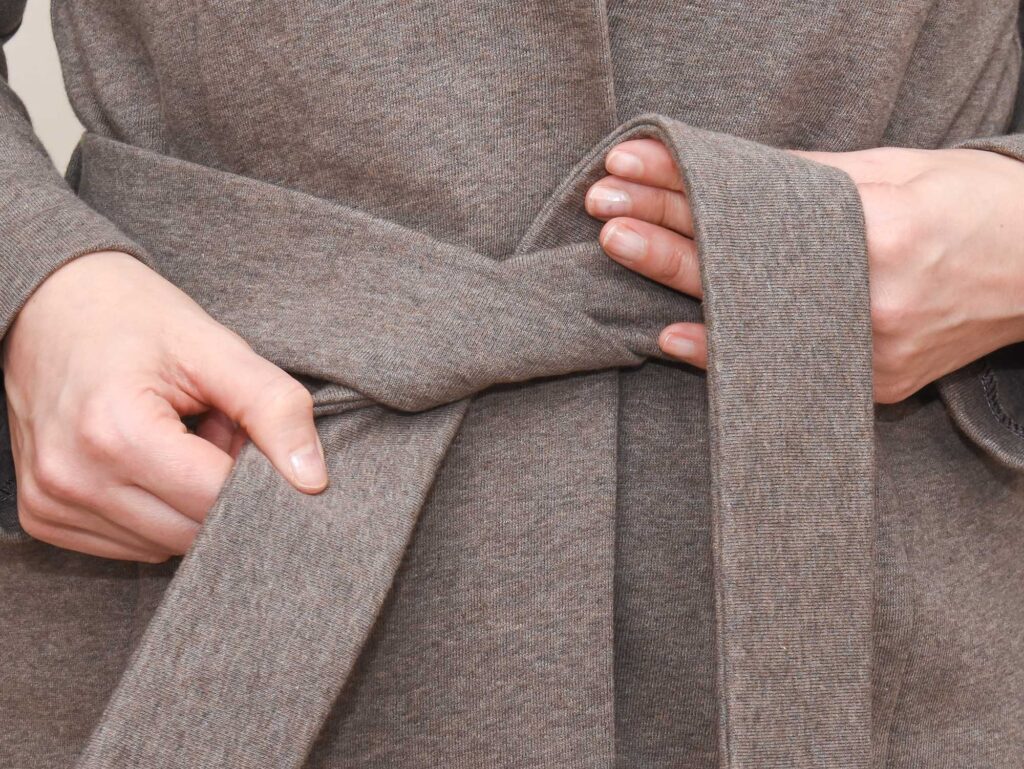
The finished belt

Notice how nice and crisp it looks despite being made with stretchy and soft sweatshirt fabric. This is primarily due to the interfacing and the fold and press technique used for the slanted ends of the belt.
Insert the belt into the loops and enjoy your belted version of the Eivy cardigan! And remember to check out all the other tutorials in the Eivy Cardigan Sew-Along Series.


1 Comment
BettieMPeter
I have a friend who is really into cardigans, and his birthday is coming up this week so I’m in a hurry to create one for him. This is an excellent resource for any fashion designers like me looking to expand their knowledge. I hope this will help me make a belted cardigan for him. Great pattern making for fashion design!
Comments are closed.