So in this instalment of the Eivy Cardigan Sew-Along Series, we will go through the best methods for sewing the seams on the Eivy Cardigan.
Picking the right stitch
You have several stitch options for sewing the Eivy, and the cardigan can be sewn either with a regular sewing machine or a serger.
Sewing machine stitches
The Eivy Cardigan can be sewn entirely on a sewing machine using one of these two stitches:
Narrow zigzag stitch

This is an excellent option if the fabric only has a small amount of length-wise stretch. A narrow zigzag stitch means that you reduce the width of the stitch to make it look a bit straighter, but the seam should still have some stretch.
Sewing machine overlock stretch seam
Most sewing machines have some sort of stretch seam, just check your manual for suggestions and settings. These seams are very durable and have good stretchability.
There are however two main drawbacks with this seam: It can cause some fabrics to stretch out and the stitch is also very hard to remove with a seam ripper. Test-sew a sample to check that the stitch will work for your chosen fabric.
Use stretch needles
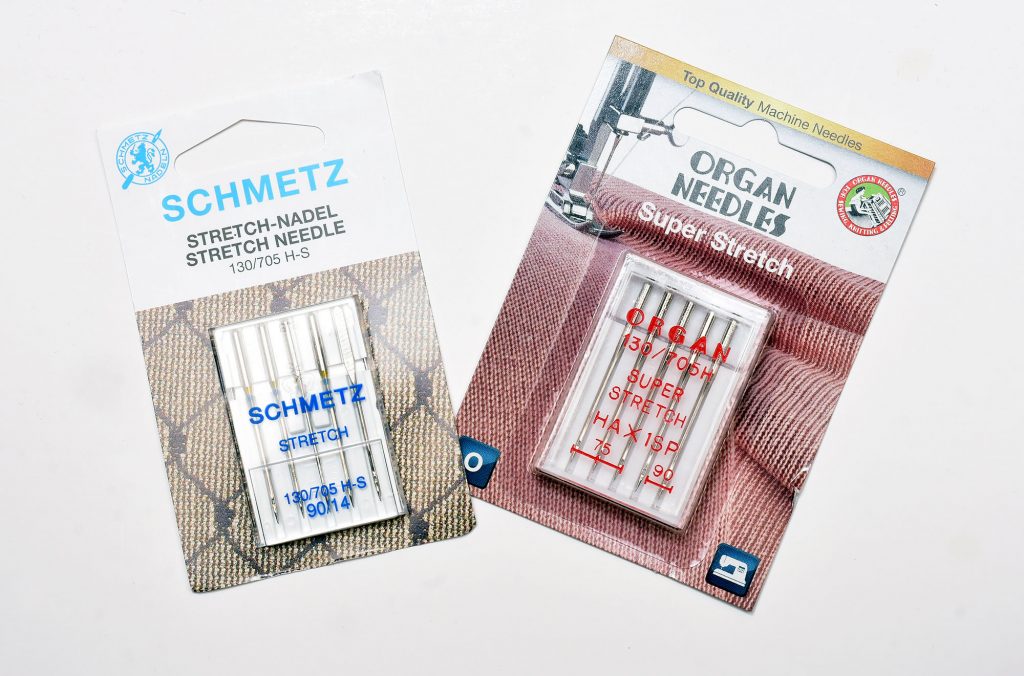
If using a sewing machine, ideally use a stretch needle to avoid skipped stitches and holes in the fabric, but a regular universal needle can work too. Check out our guide to sewing machine needles for knits to learn more about which needles to use and why when sewing with knit fabrics.
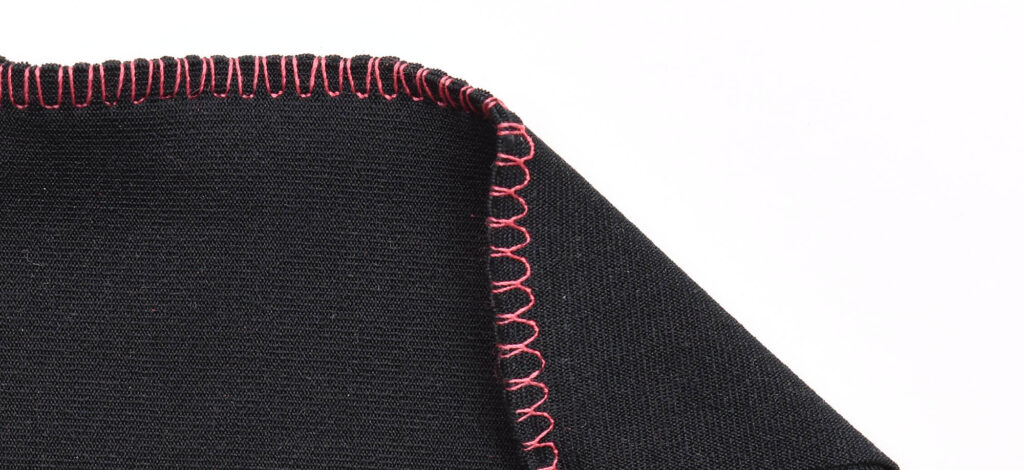
Serger overlock stitches
If you have a serger it’s a great choice for sewing the seams quickly and very neatly.
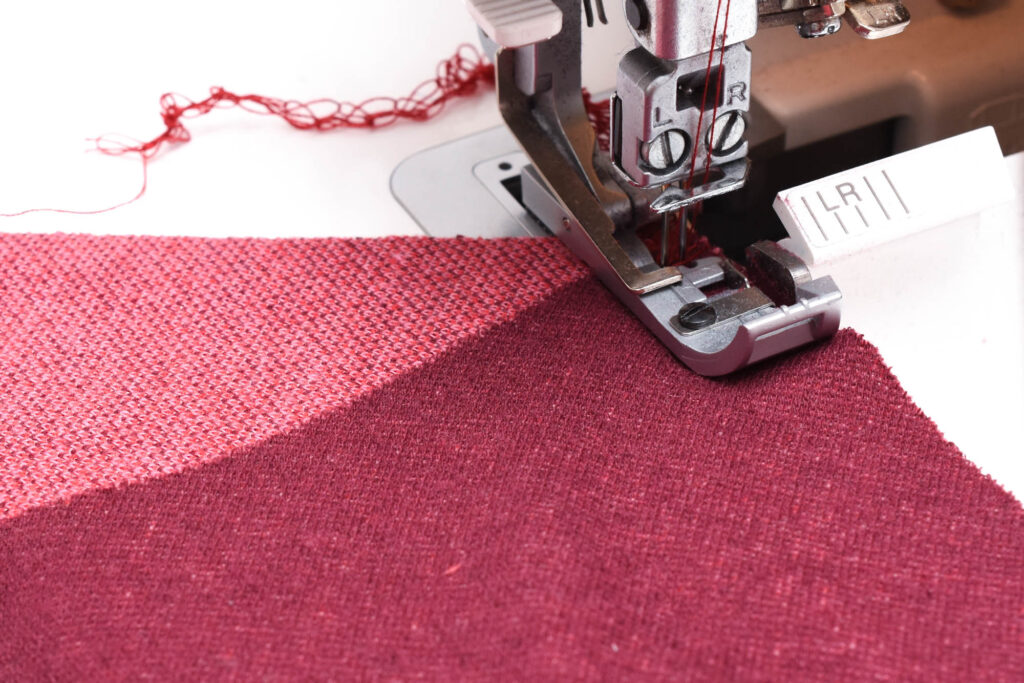
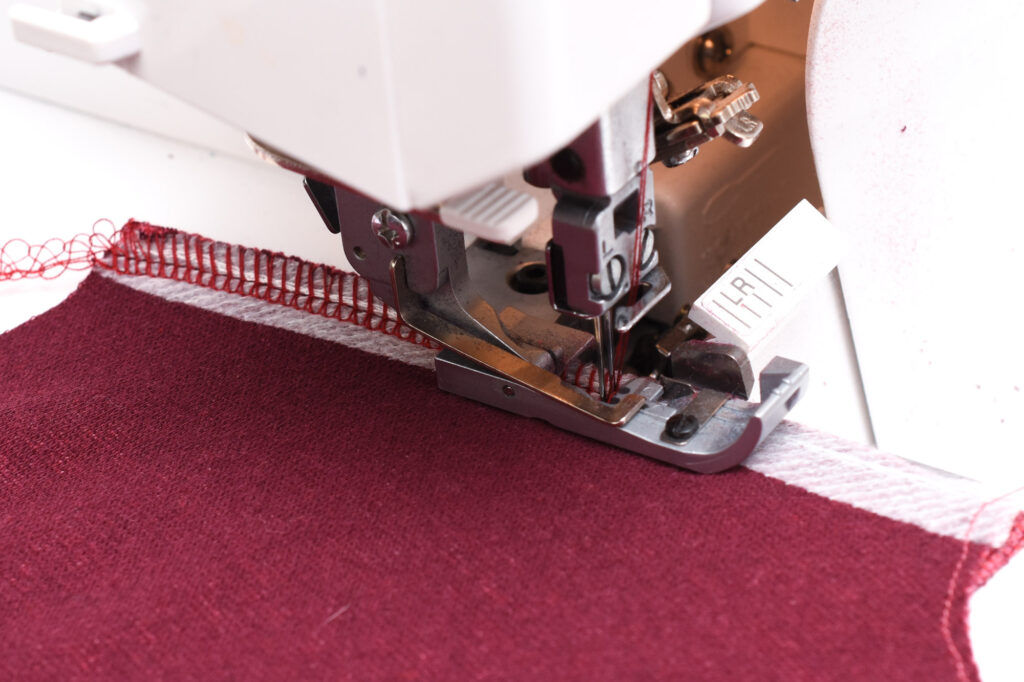
4-thread overlock
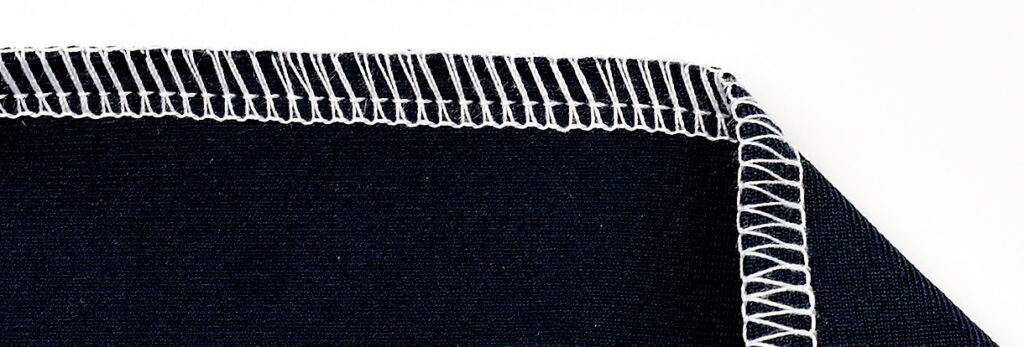
The 4-thread overlock is a very sturdy stitch that is really well suited for sewing more stable knit such as the ones used to make the Eivy Cardigan. It is the stitch used in this sew-along and a tip is to increase the stitch length slightly since the fabrics are on the thicker side, so a longer stitch length will make feeding easier, especially when joining several seams.
3-thread wide overlock
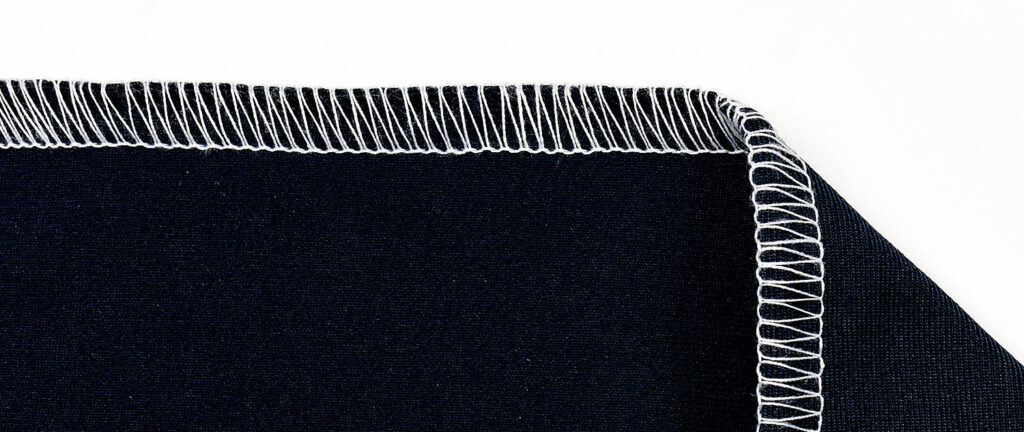
This is another option that can work too for sewing the Eivy Cardigan, it is somewhat less durable than the 4-thread version, but since the Eivy is not subjected to a lot of stress the 3-thread will usually work too.
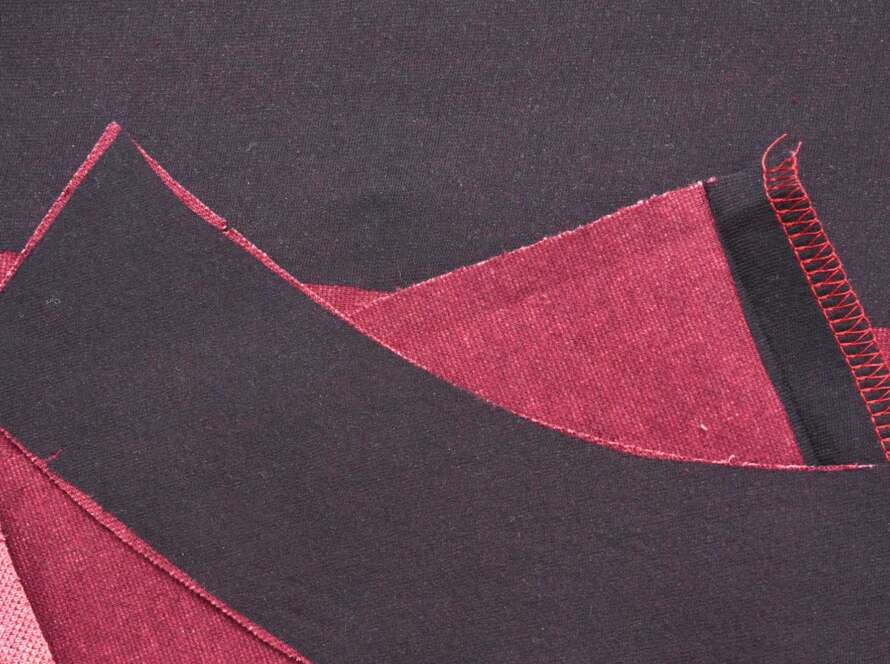
Sewing the princess seam panels
Note: If you are adding pockets, these should be attached before sewing the front and back panels for the side seams (see the Eivy Cardigan Pocket Adjustments Tutorial).
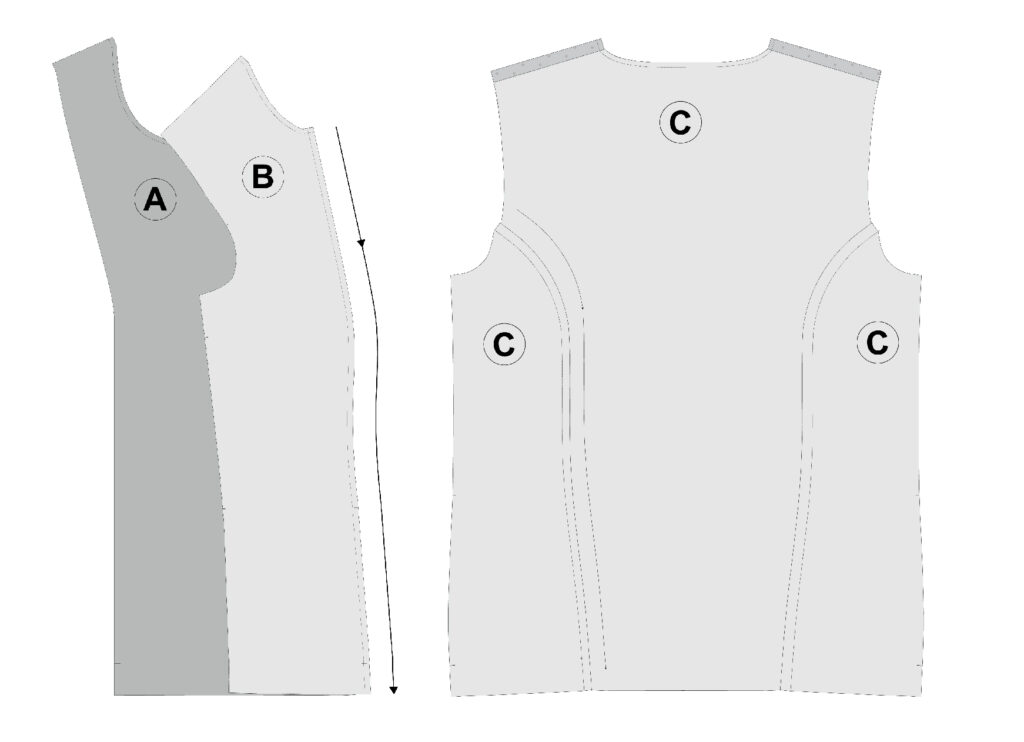
Sew the front panels
Pin or baste the side front (B) piece to mid-front piece (A), right sides facing, aligning the notches. Stitch together the seams, starting from the top and sew towards the hem. Repeat on both sides, using the same sewing direction (top to bottom).
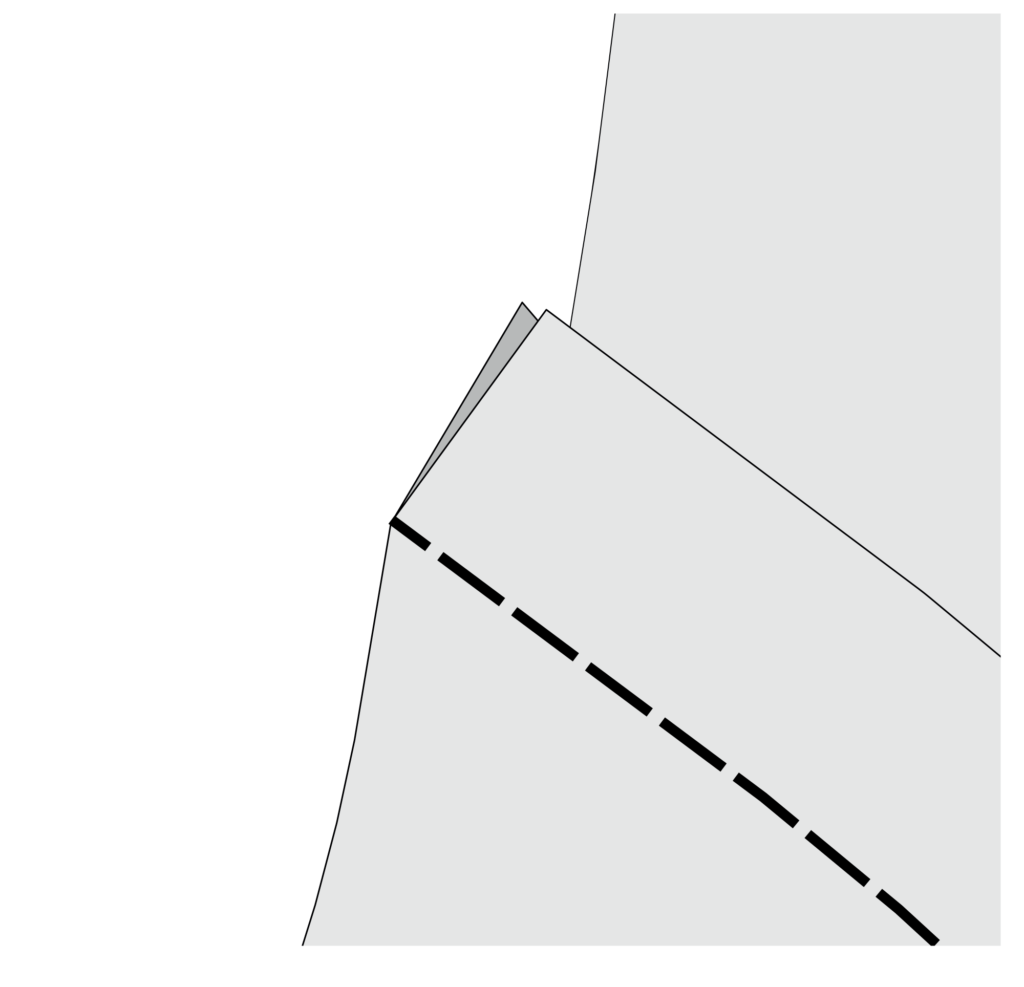
Power tip: The stitch lines on the back and front should align, so use the tilted corners of the seam allowance as your guide. This is the trick to getting the princess seams aligned so that one side doesn’t extend over the other one. And before sewing, make sure the corners are still aligned.
Sew the back panels panels
Pin or baste side back (C) pieces to mid-back piece (D), match the notches, with right sides facing. Stitch together the pieces, starting from the top and sew towards the hem. Repeat on both sides, using the same sewing direction (top to bottom).
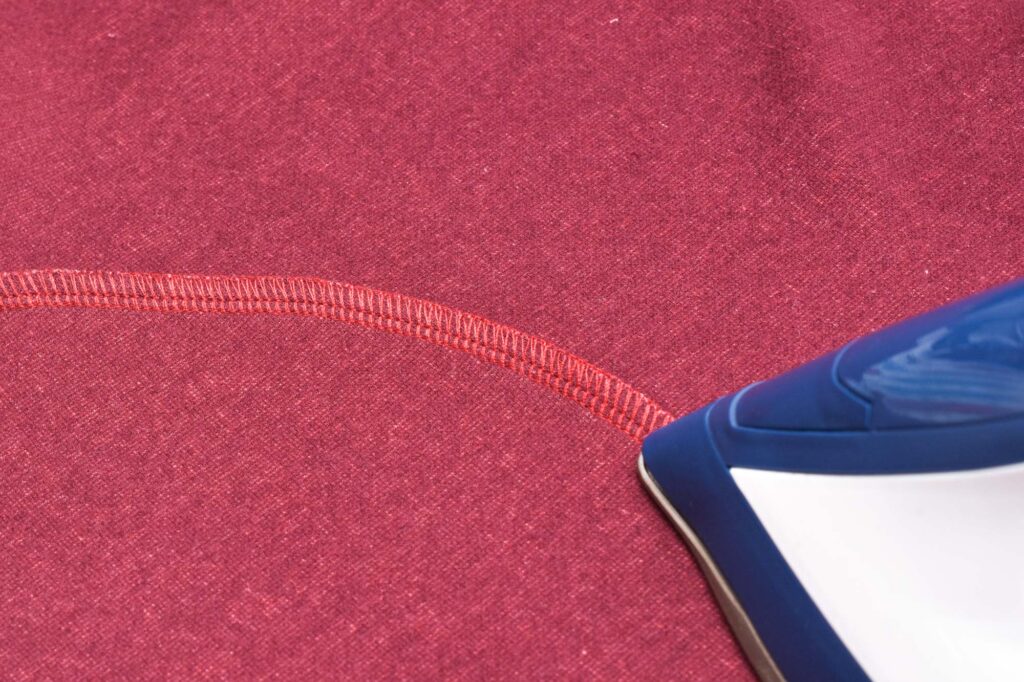
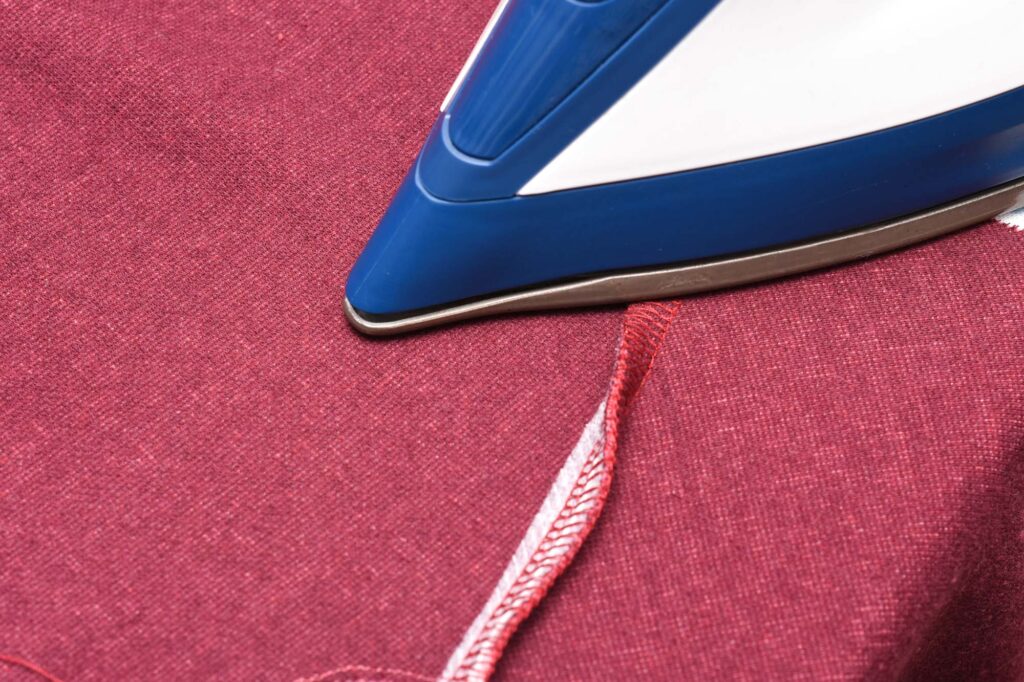
Pressing the seams
For a beautiful finish, pressing the seams as you go is key. Princess seams should always be pressed towards the centre. Always starting pressing from the reverse side. Important: Many knits don’t handle heat well, so start with a low setting that fits the fibre content and always press on a sample before pressing the cardigan.
Flip the garment over to check the outside. If there are ridges or bumps you might need to do a second pressing from the right side.
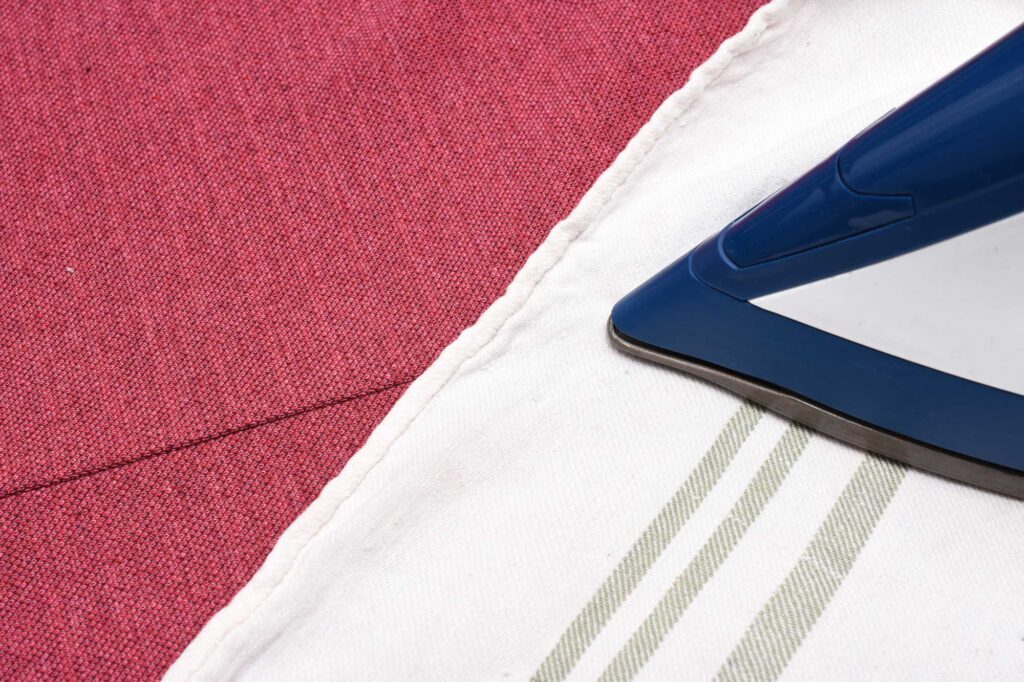
Always use a pressing cloth when pressing knits on the outside. This will prevent the fabric from getting that dreaded pressing shine and protect the surface from heat.

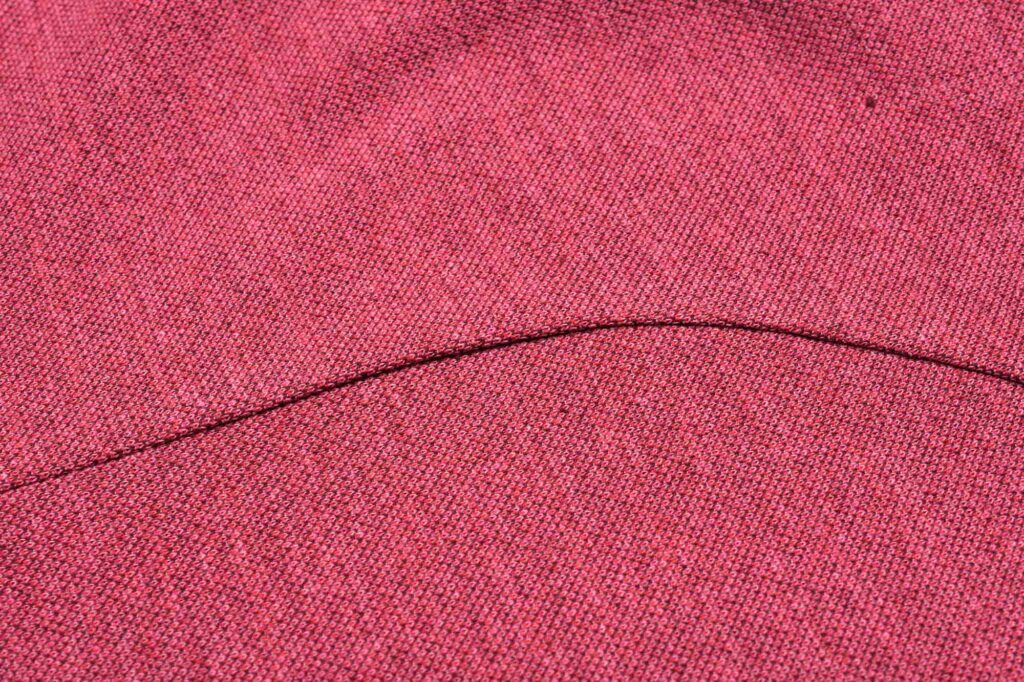
This is how nice and flat the front princess seams look after a little gentle pressing. This is why I strongly recommend pressing the seams when sewing the Eivy cardigan.
Sew the shoulder seams
Sew together the shoulder seams and always sew with the (reinforced) back shoulder piece facing up as this will prevent the under-layer (which isn’t reinforced) from stretching out. To learn more about the best methods to stabilise the shoulder seams, check out How to Stabilise Shoulder Seams on Knits tutorial.
After sewing fold and press the shoulder seam allowances towards the back piece. This will also hide the reinforcement strip.
Hope you found this tutorial useful for sewing your Eivy Cardigan and remember to check all the other instalments of the Eivy Cardigan Sew-Along Series.