
Let’s take a look at common fitting issues when sewing leggings and how to fix them. These fitting tips are also included in the pattern instructions for the Aila leggings, but I thought it could be useful to dive even deeper into this topic on the blog.

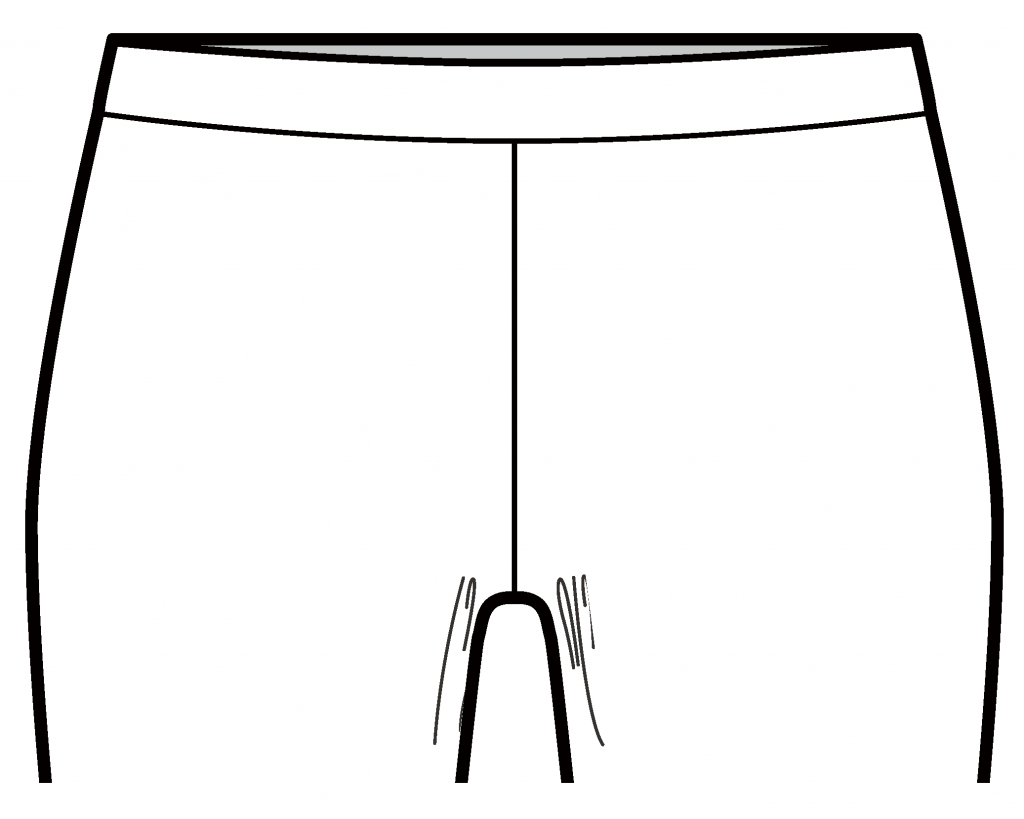
CROTCH FOLDS
The fabric forms vertical folds around the front crotch.
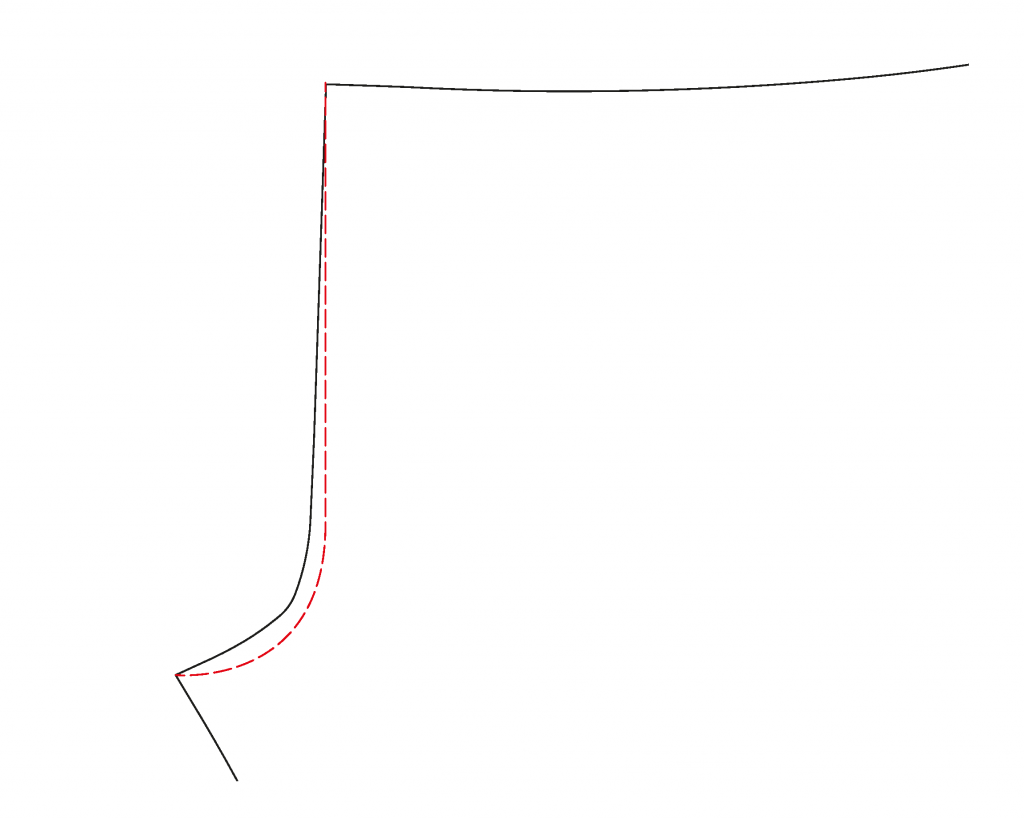
Solution: Deepen the front crotch seam by scooping it out to remove the excess fabric.
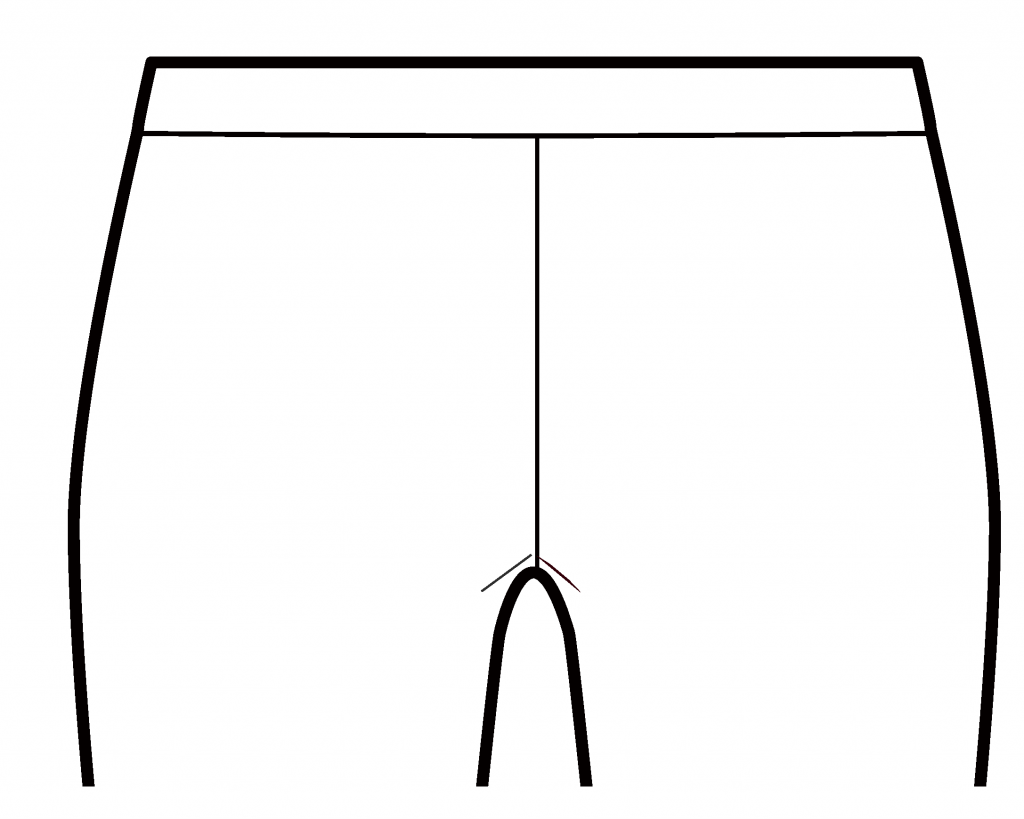
BUM FOLDS
The fabric forms horizontal folds beneath the hip.
Solution: Deepen the back crotch. If needed also remove some of the back crotch height and take in the inseam.
THIGH WRINKLES
Vertical wrinkles around the front or back thighs.
Solution: Take in the front or back seam to shorten the crotch length and remove excess fabric.
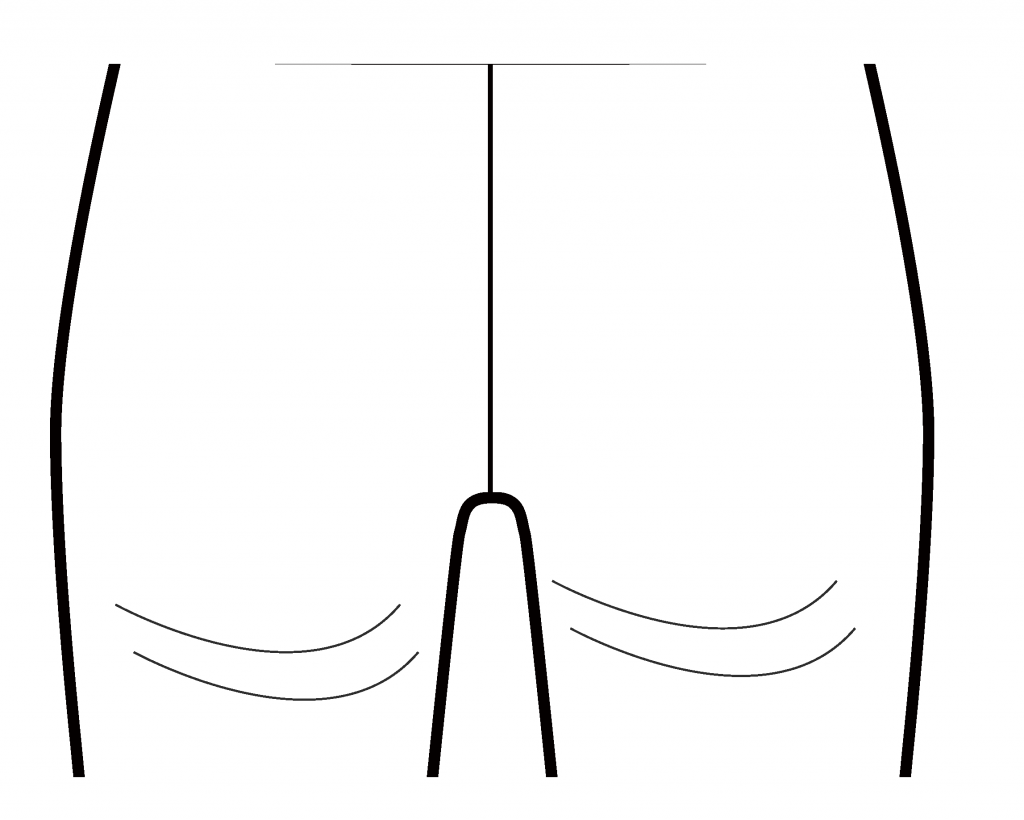
WEDGIE
The fabric pulls in the thigh and hip area.

Solution: Create more room by extending the inseam, making the crotch longer and adding some depth.
HIP FIT
If your lower hip measurement is one or two sizes bigger than the waist and tummy measurements, either choose a size based on your waist and upper hip measurements and use a fabric with up to 100% stretch or pick a larger size and grade down to a smaller waist. This is something you might have to experiment with to figure out the best method when sewing leggings.
Learn more: Sewing the Leggings Waistband: Aila Sew-Along
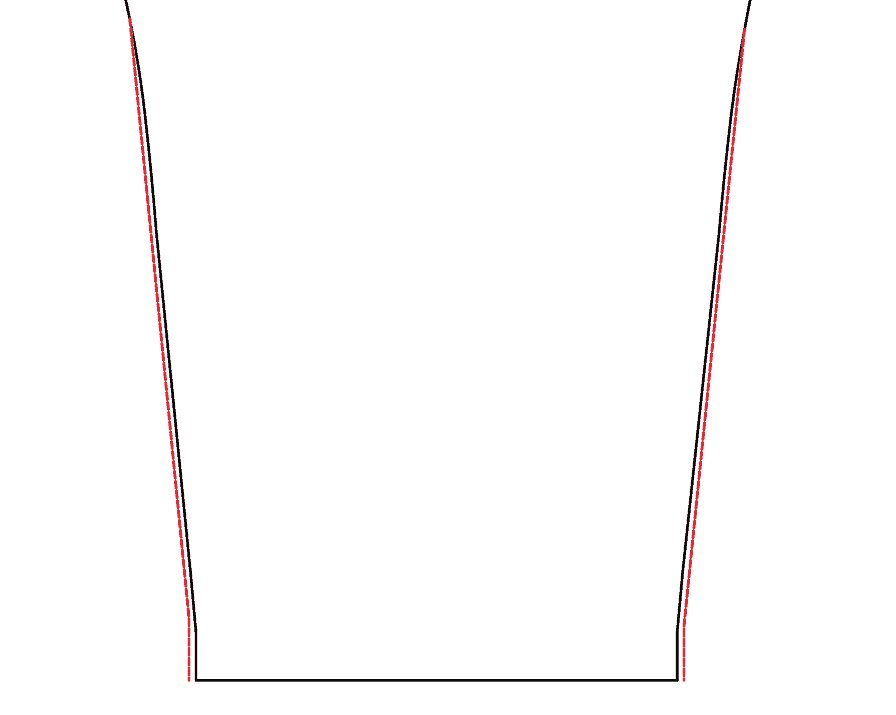
Too much width around the knees and ankle area
The simple fix is to taper those areas in. But be aware that these issues are often a result of not shortening or lengthening the pattern correctly.
Since leggings are supposed to fit snugly around the ankle, shortening the at the hem will result in a wide hem, since you will now have the wider calf area at the narrower ankle. The same issue can cause problems around the knee area since the thigh width will end up on the knees if you don’t shorten the leggings above the knee.
And if you lengthen at the hem, you’ll end up with leggings that are both too tight at the calf and the ankle. Plus the fit around the knees will most likely be off too.
So don’t shorten or lengthen the leggings at the hem.
How to shorten or lengthen leggings
The Aila leggings pattern has three lengthen/shorten lines that can be used to adjust the pattern. Note that you might be longer or shorter in just one area of the lower body, such as at the body (seat) rise.
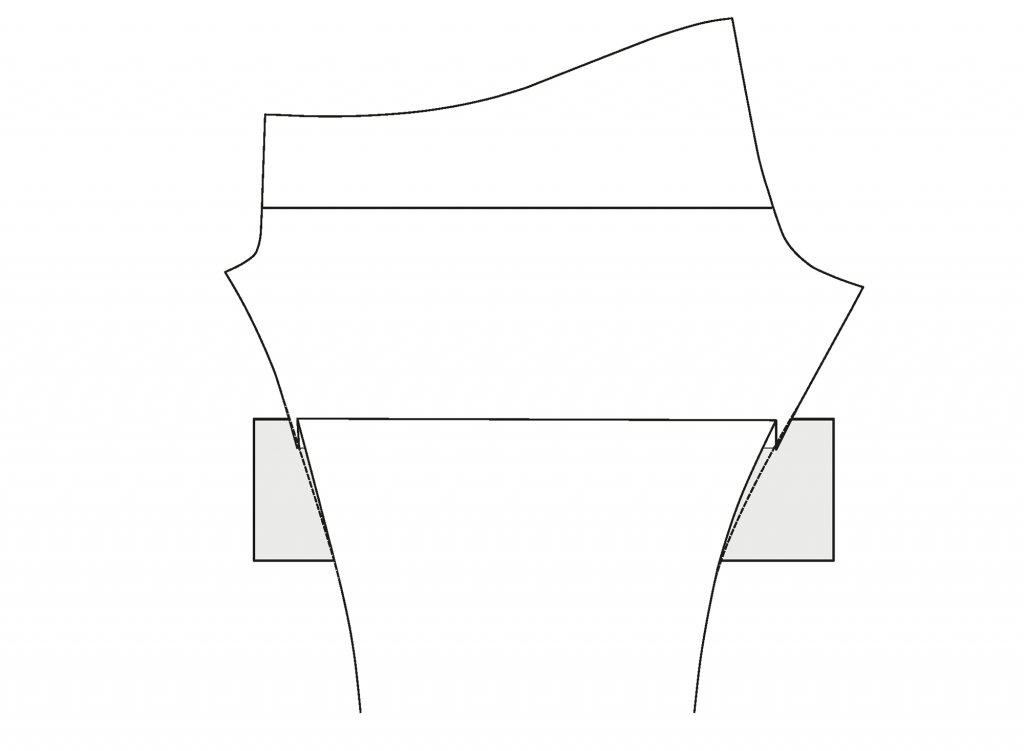
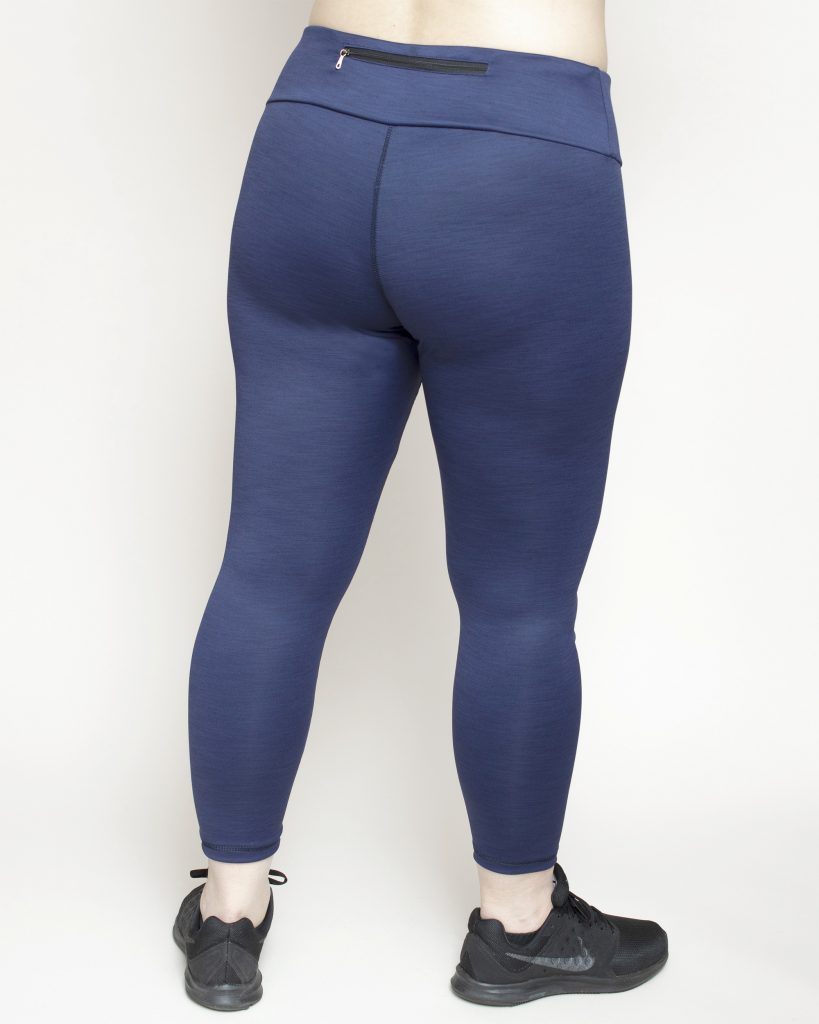
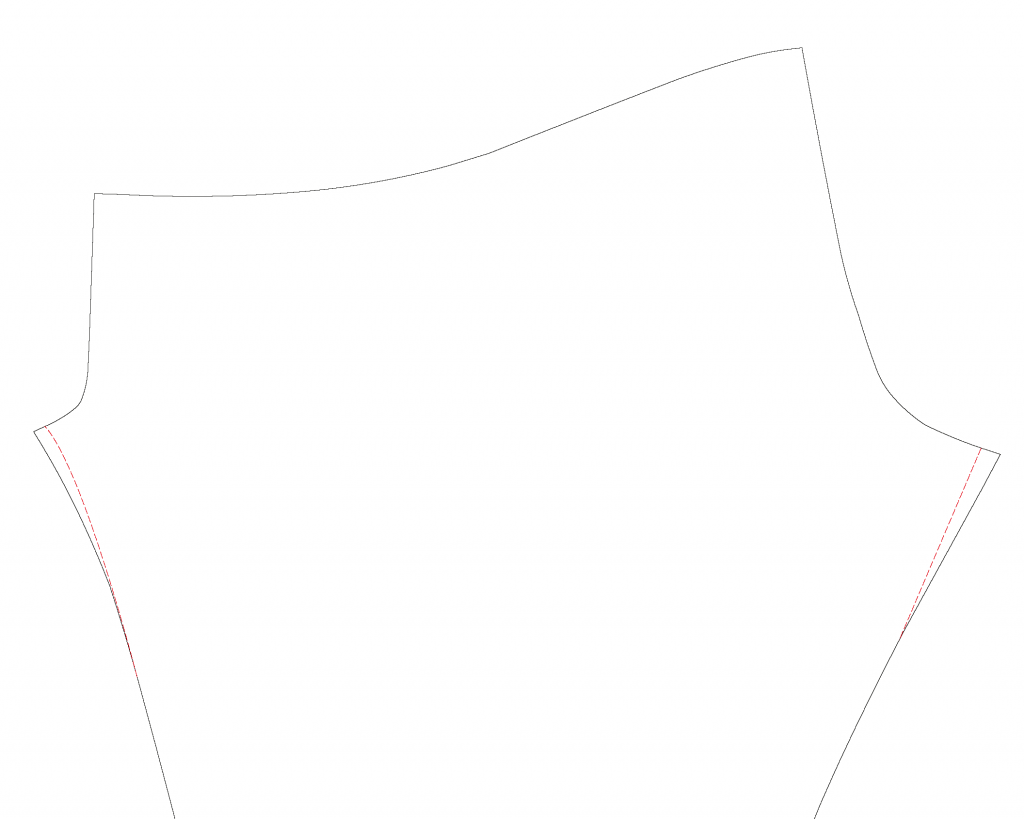
SHORTEN THE LEGGINGS PATTERN
- Fold and overlap the areas that need shortening
- Place paper beneath the fold
- True the pattern by drawing new lines where the fold is to even out the lines (the dotted lines in the illustration).
Learn more: How to Hem Leggings: Aila Sew-Along
Shorten for 4 way stretch fabrics
Fabrics with lots of lengthwise stretch might require additional shortening of the pattern. The reason for this is that the leggings will stretch out when you put them on, so even if the inseam length is correct on paper, the effect on your body will be legs that are too long. So use the same fold method described above to solve this issue.
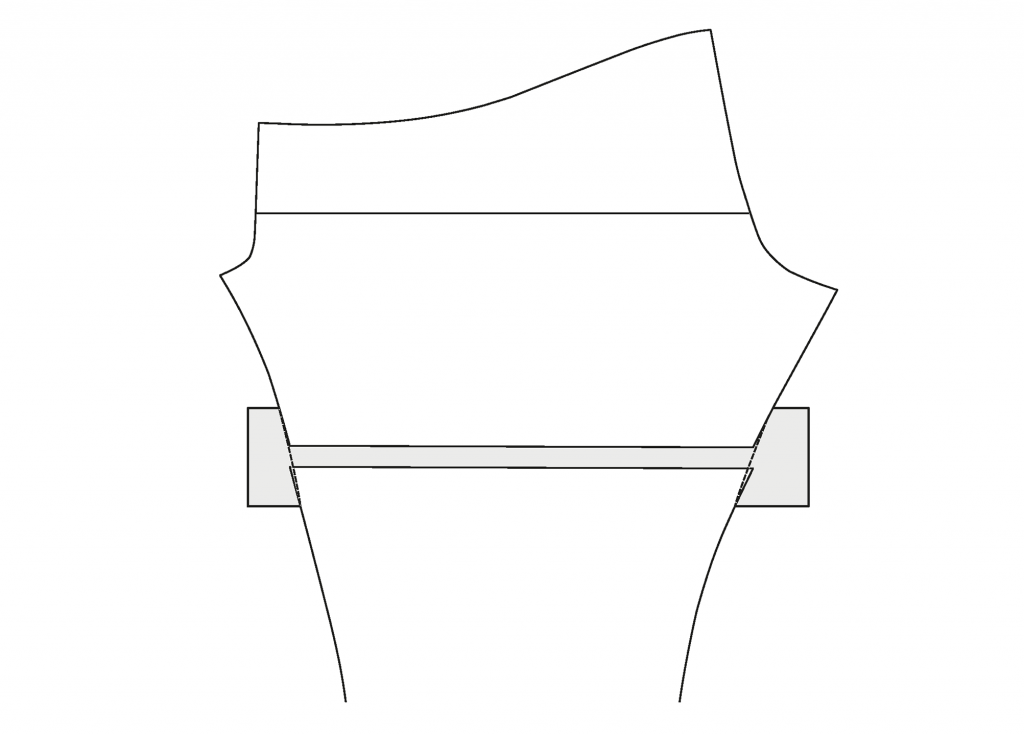
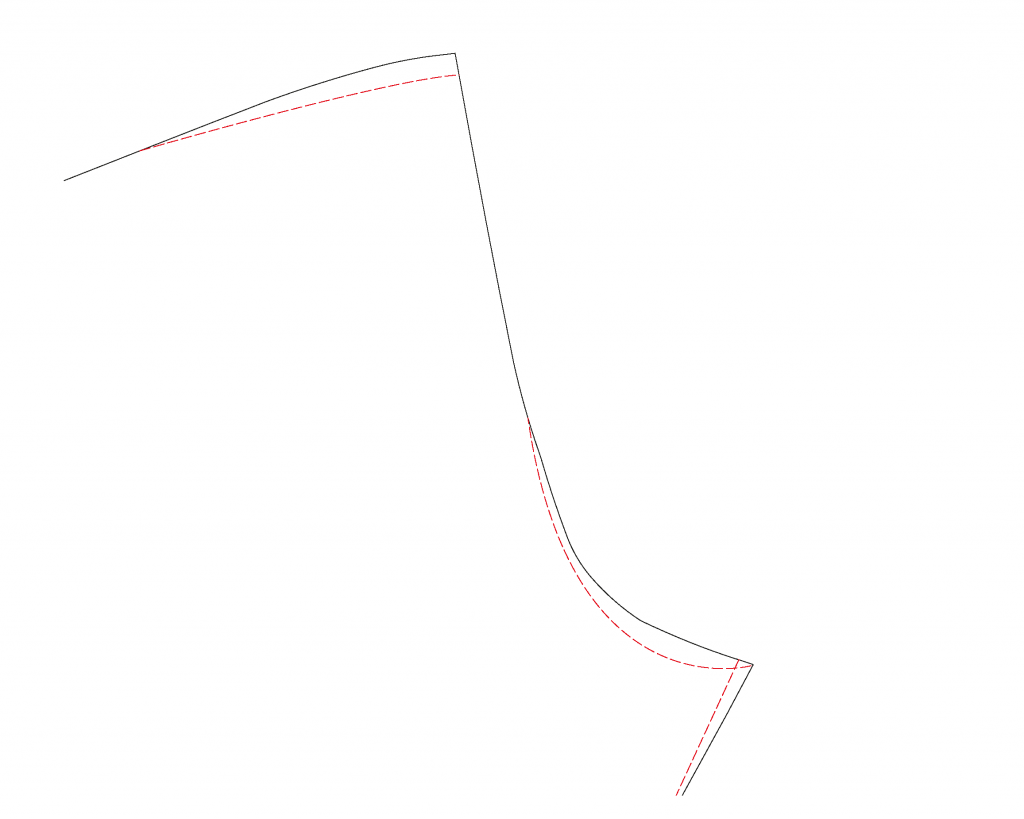
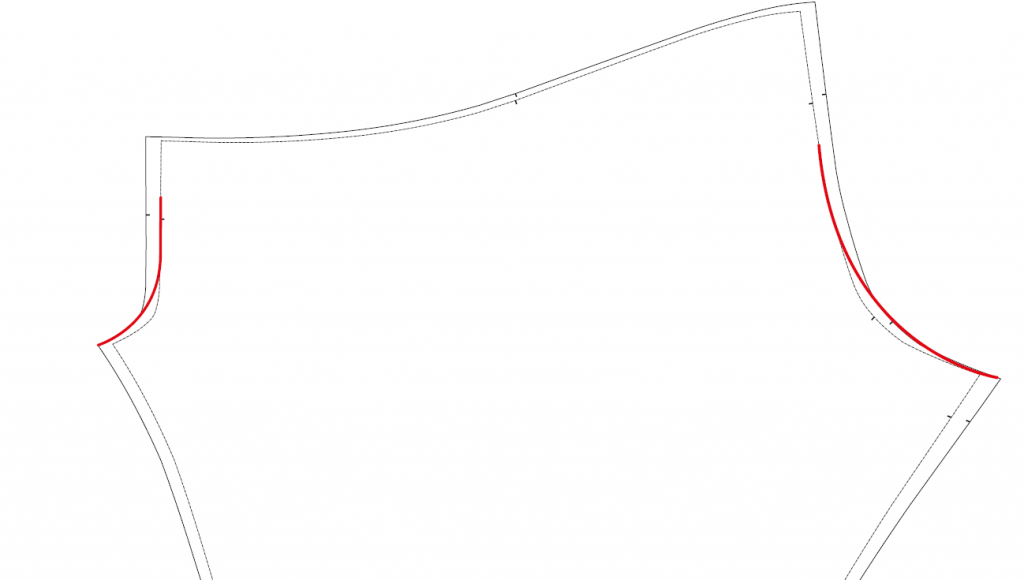
LENGTHEN THE LEGGINGS PATTERN
- Cut and spread out the areas that need lengthening
- Place paper beneath the opening
- True the pattern by drawing new lines where the opening is to smooth out the lines (the dotted lines in the illustration).
Add width around the calf or ankle
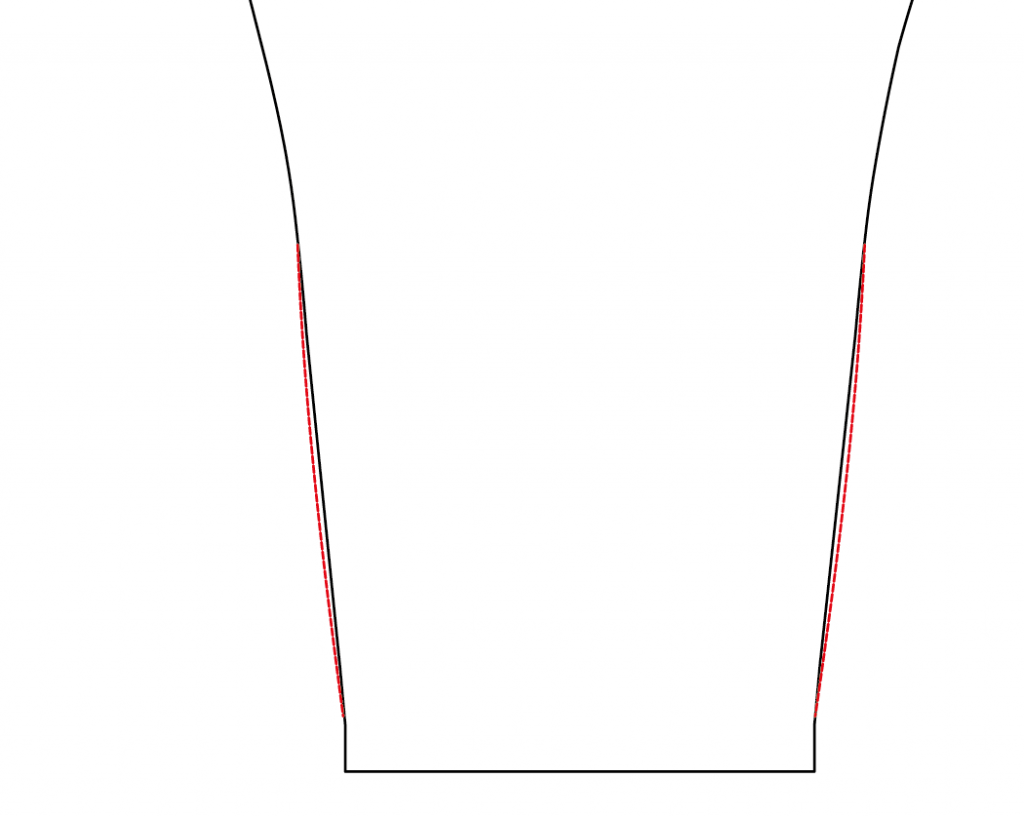
This is an easy fix, just add some extra width around the area that needs more room. Remember that you are working with very stretchy fabrics, so a little extra width goes a long way.
Using these methods will solve most fitting issues that one might encounter when sewing leggings. Also, the fact that you are working with very stretch 4-stretch fabrics will also make the fit process much easier compared to fitting a pair of pants made of woven fabrics for instance.
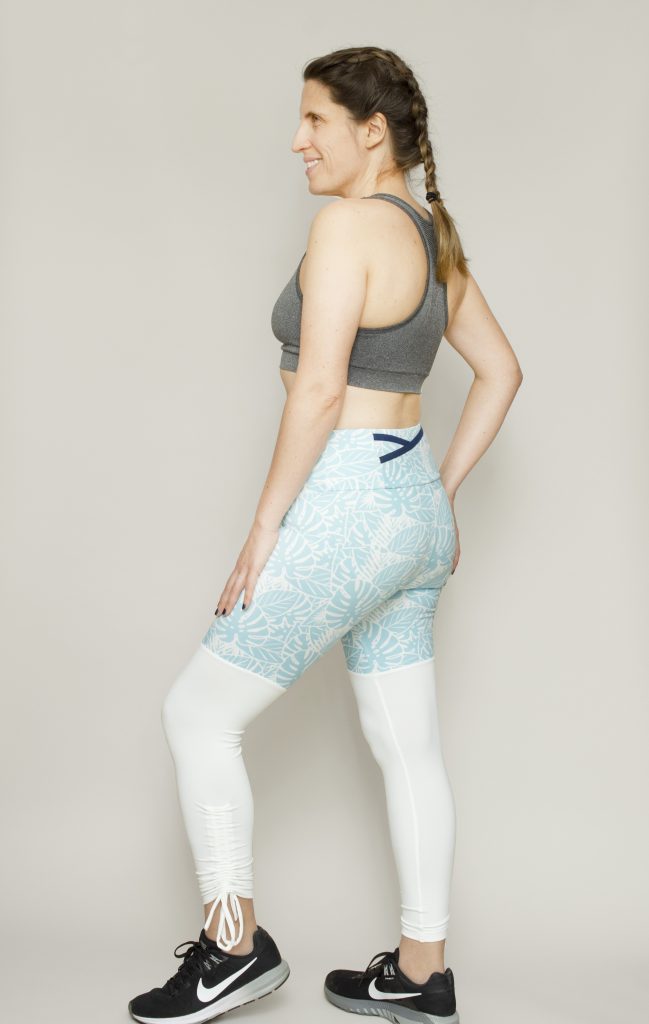
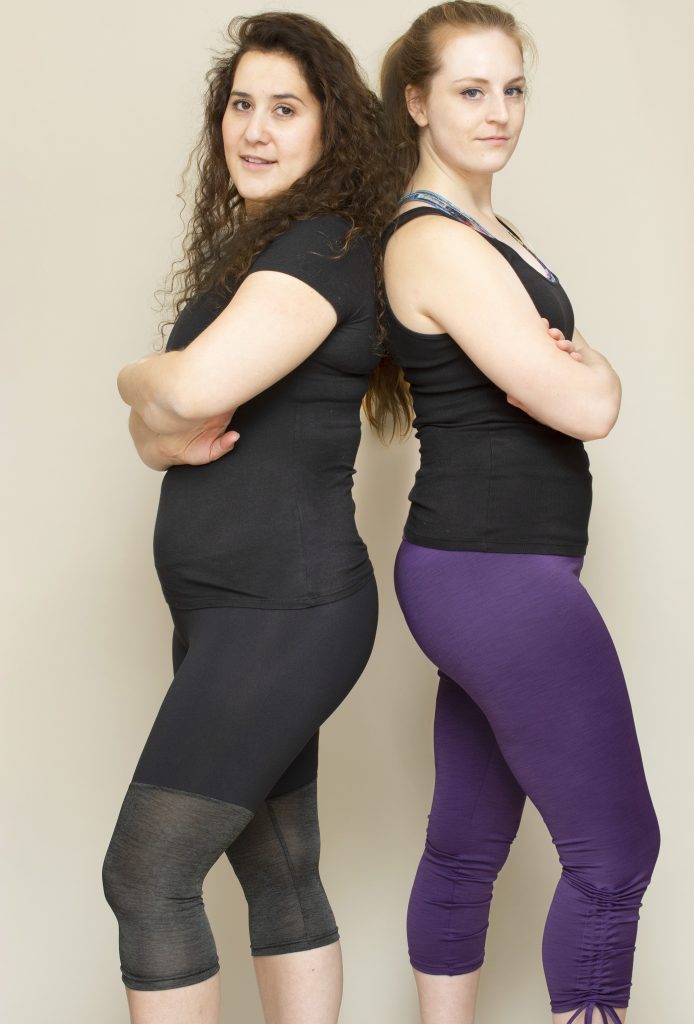
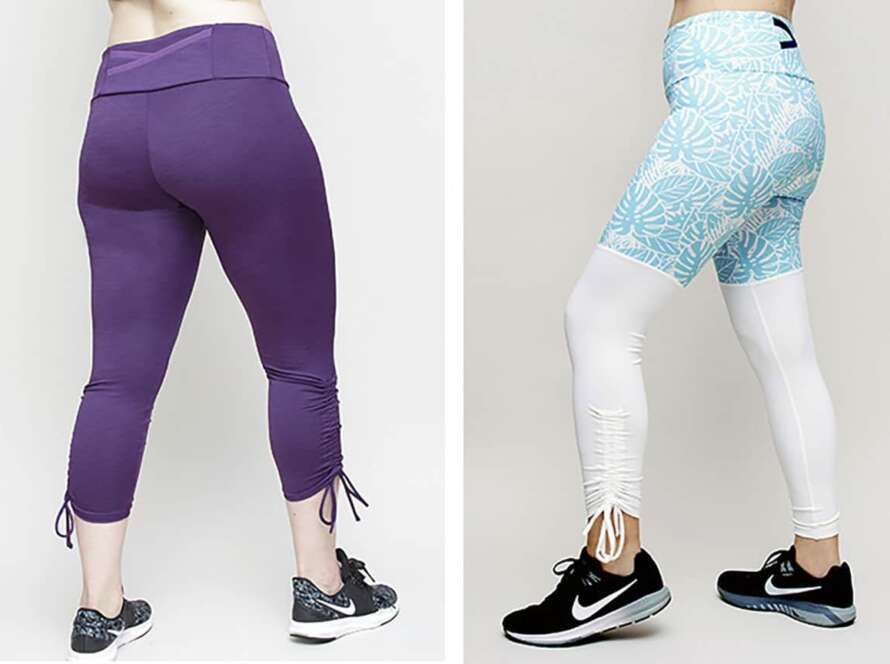
Here you can see the Aila leggings in action on different body types. Also, remember that the Aila leggings come with two waistband options, one regular and one for a rounder tummy. I use the round option myself, and it fits me so well, no unpleasant muffin top effect and it stays in place, instead of riding down or, which has been an issue for me with most leggings waistband.
Watch this video tutorial for even more sewing leggings tips!
4 Comments
Becky Rice Ware
I love that you copy ready to wear sewing techniques, that is what I like to do, especially now I have the BabyLock Evolve, and an industrial 5 thread safety stitch serger, in addition to a couple of other home sergers. I research like you do, you may enjoy one of my other favorite industrial sewing YouTube tutorials, which is video of industrial sewing techniques, pockets, plackets like golf shirts, special types of pockets, mostly expensive European sportswear. She is from Poland, SEWING is her YouTube identity, but
Here is a link to the how to sew a zipper pocket in leggings.
https://youtu.be/J3xZQVQmfoA
Another tutorial
https://youtu.be/GclLpR2JRdI
Another zippered pocket tutorial
https://youtu.be/t4dYXl061kE
paula
re leggings with inside and crotch seams????
Due a major genetic health condition these seams are a ongoing challenge for my granddaughter with a genetic and devastating skin condition. called EB (short form) I am looking for a pattern to deal with only side seams.
Sue
Paula, check out Greenstylecreations.com Cavallo &/or Novello tights. They don’t have an inseam, so they may give you a starting point to figure out how to alter the pattern to also eliminate the crotch seam.
Comments are closed.