Want to achieve perfect matching stripes when sewing knits? Then follow this step-by-step tutorial for how to cut and sew striped knits fabrics. This tutorial is also part of the Gurli Knit Top Sew-Along.
Learn more: Gurli Puff Sleeve Knit Top Sewing Pattern.
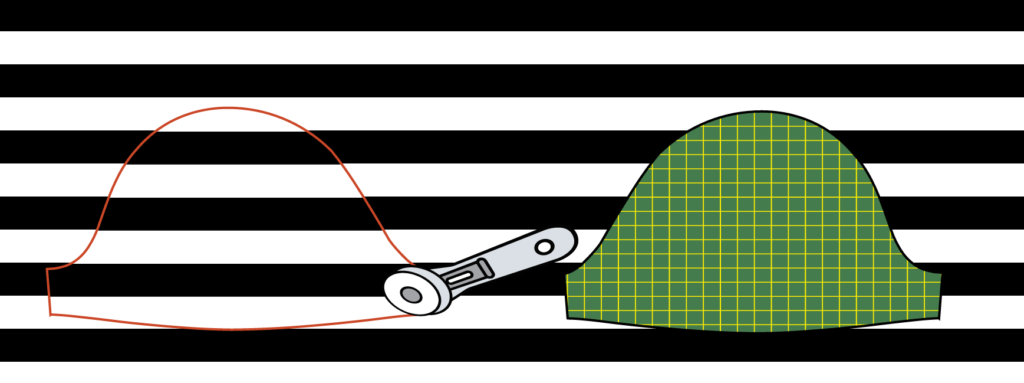
How to cut striped knit fabrics
The best single advice is to never cut striped knit fabrics on the fold, as it will be a huge hassle to get the stripes to align perfectly on both layers. Instead cut all pieces as single layers using the methods shown here:
Make the half-pieces full bodice pieces (Option 1)
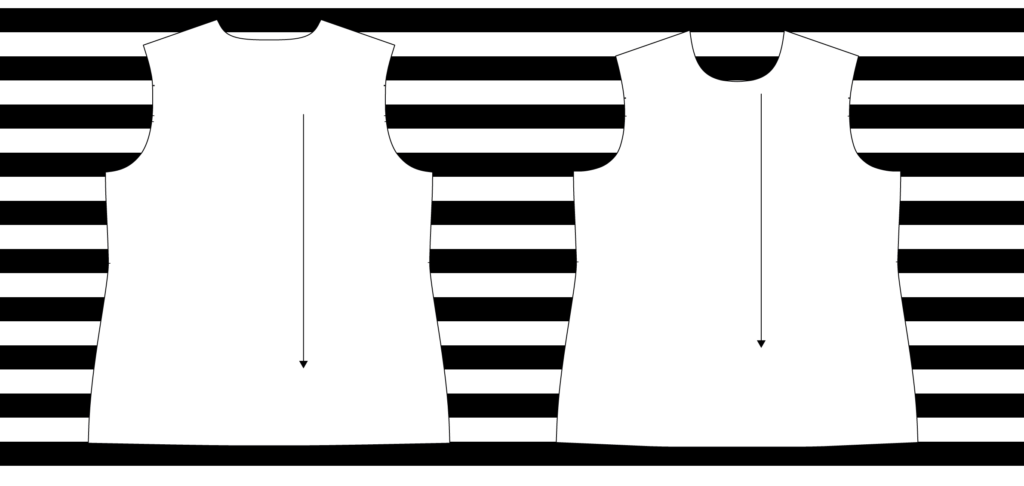
This is the common method in the garment industry, where knits are rarely cut on the fold. You can either print out two copies of the front and back bodice pieces (A & B), flip them over and tape the two pieces together. Or you can create a continuous piece using tracing paper.
Cut half of the bodice and flip the piece over (Option 2)
This method is faster than the mentioned above as there is no need to create whole pattern pieces. Instead, you use the cut half fabric piece as the guide for exact alignments.
Step 1
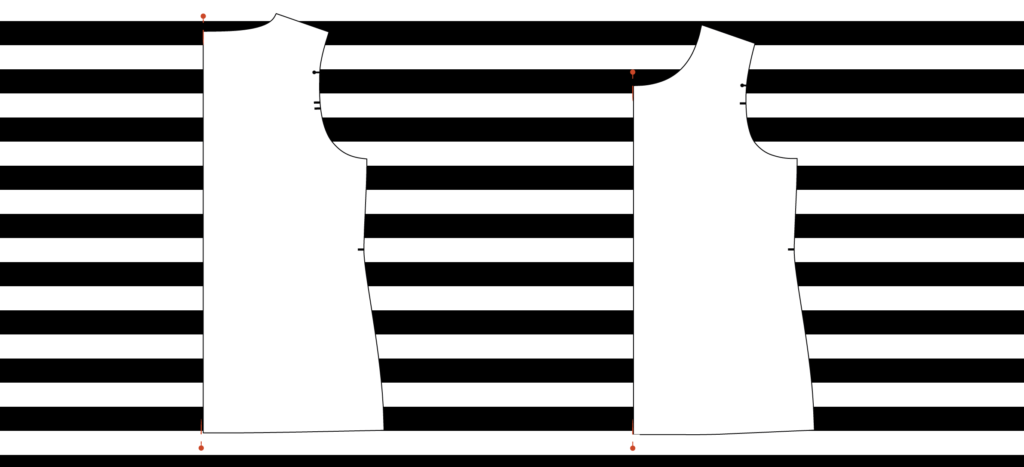
- Place the half pattern piece on the fabric.
- Mark the centre front and back with pins before cutting.
- Cut out the first half, stopping at the pins.
Step 2: Flip the fabric piece over and cut the second half
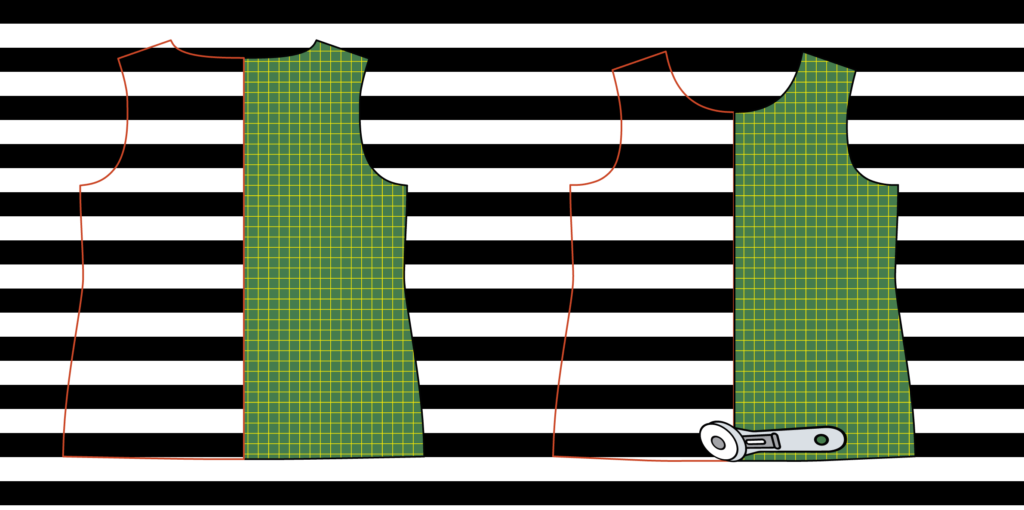
- Remove the pattern pieces.
- Flip the cut half over, using the pins as a guide.
- Remove the pins.
- Align the cut front and back pieces with the stripes on the other side and cut the second half.
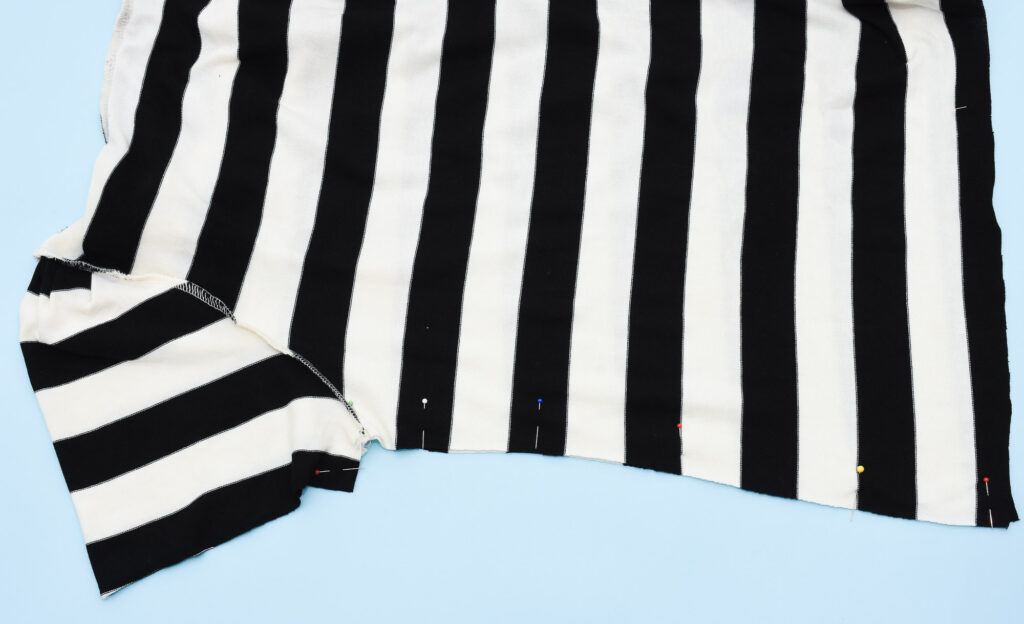
Aligning the stripes on the bodice
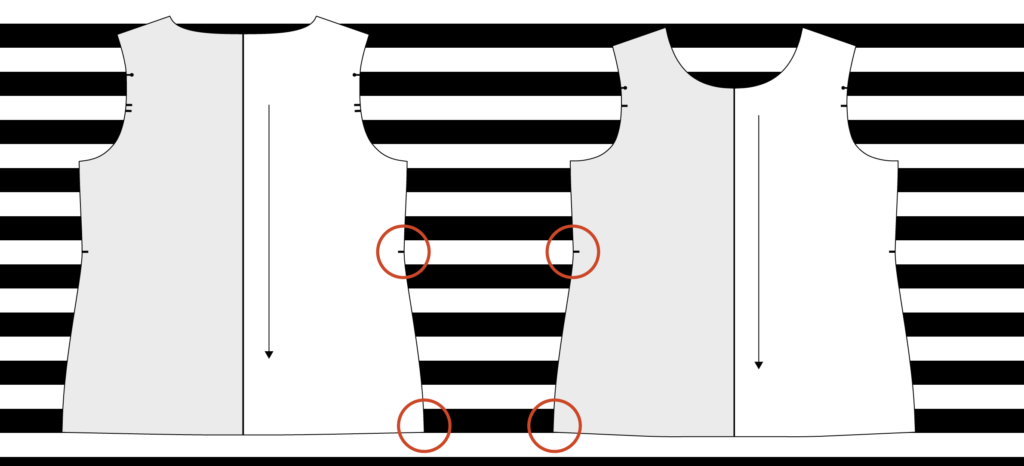
The single-layer cutting method makes aligning the stripes on the front and back pieces very easy. Start with figuring out how the hem should be placed in relation to the stripes. Remember that the Gurli Top has a 2 cm wide hem allowance that will be folded in, so it’s a good idea to consider where the hem stitches will end up on the stripes.
Another thing to figure out is if there is an ideal spot of the stripe that you want at the bottom hem.
The second crucial spot is the waist notch, as this will be the guiding marking when you sew together the side seams.
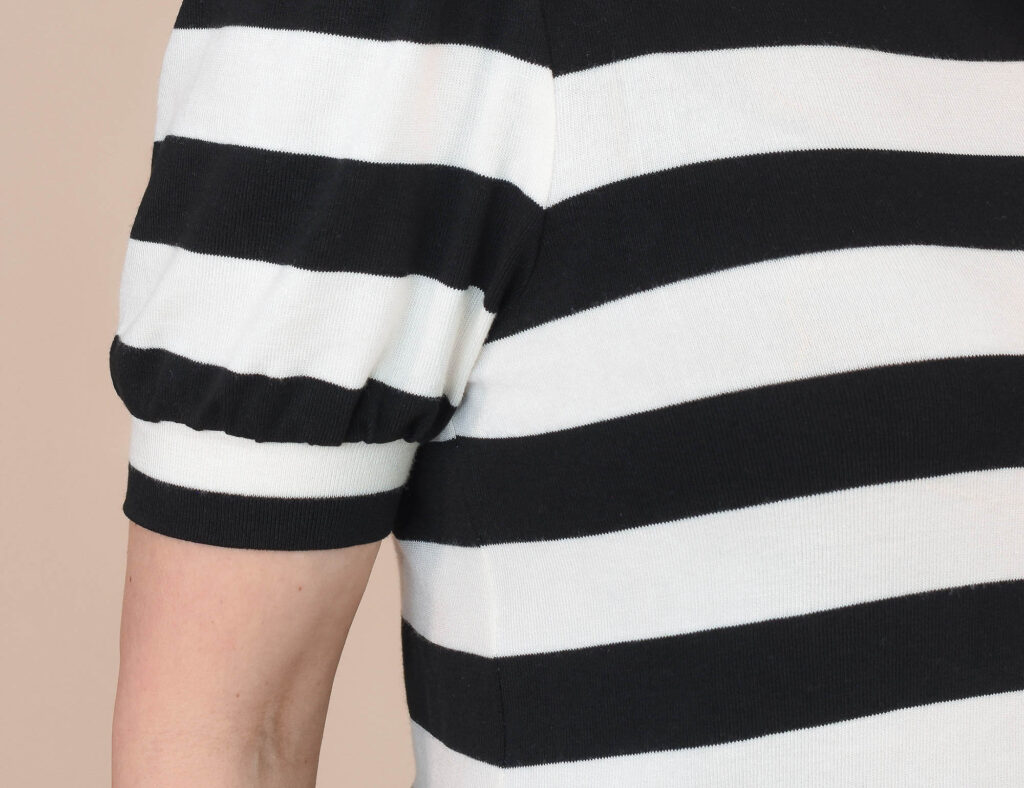
Aligning the stripes on the sleeves
Forget about achieving a perfect match on.every.single.stripe when you attach the sleeves to the armhole on a striped t-shirt. The armhole and cap are shaped differently and often have different lengths too. So pick one area where you want the stripes to match and relax about the rest.
Also, the Gurli Top has gathered sleeve caps, so this makes stripe matching even less cumbersome – the gathers are very forgiving.
With that said, here is how to align the stripes on the sleeve cap with the armhole:
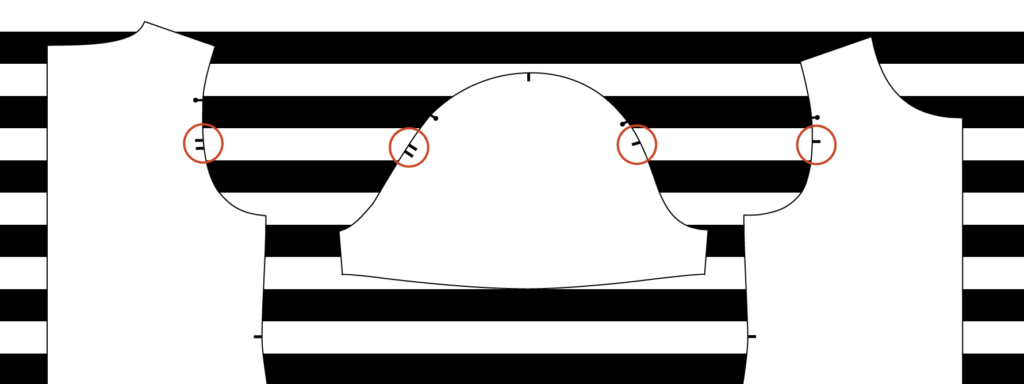
Pick a spot where the stripes should line up. If they are placed in a good spot, I usually recommend using the notches as a starting point. In this tutorial, I used the armhole and sleeve cap notches on the Gurli Top and that turned out really well.
Cutting the sleeves
Cut the first sleeve:
- Place the sleeve (a single layer) on the fabric so that the notches end up on the same spot on the stripe as the armhole notches.
- Cut out the first sleeve.
Cut the second (mirrored) sleeve piece:
- Remove the cut fabric piece
- Flip it over so that it is mirrored (very important). Otherwise, you’ll end up with two left (or right) sleeves.
- Place the cut piece over the fabric, align the stripes carefully and make sure the notches also end up on the exact same spot.
- Cut out the second sleeve.
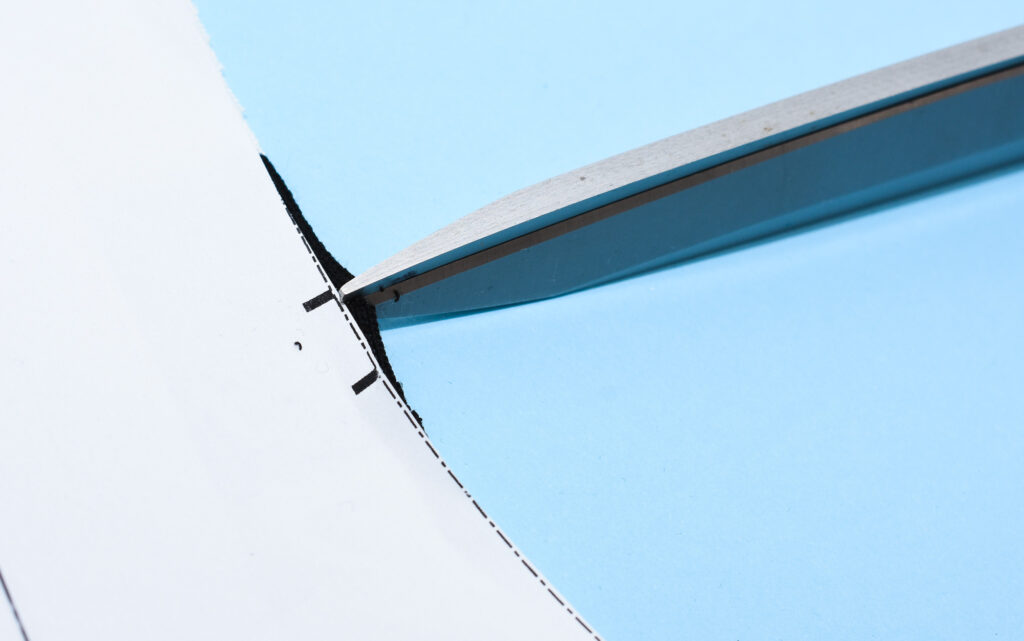
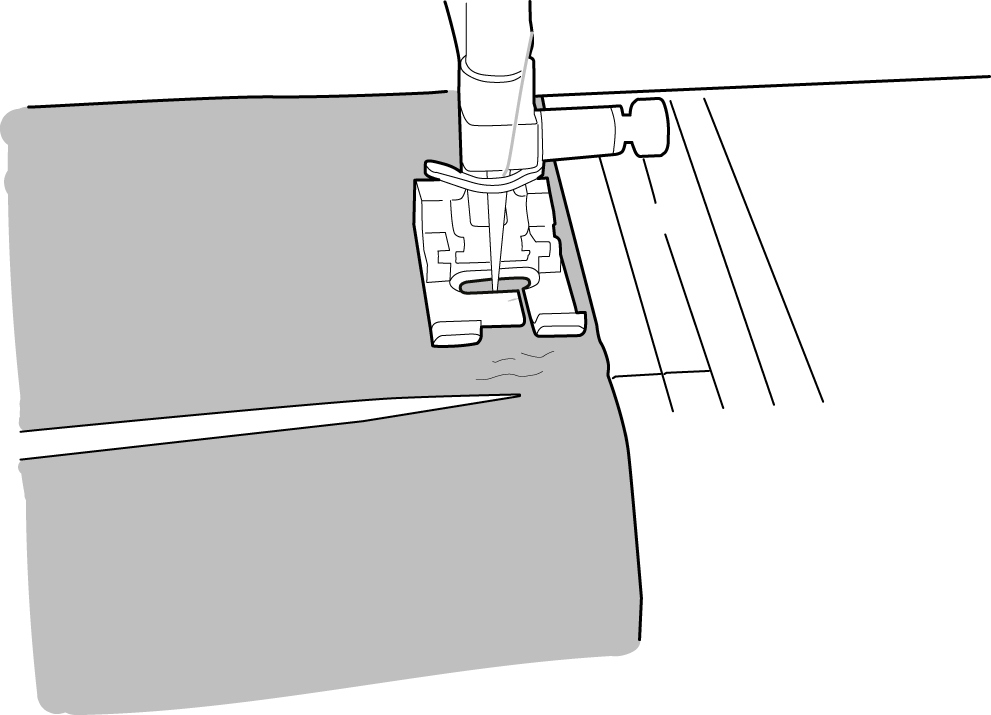
Time-saving tip: Use a sharp pair of scissors to cut tiny notches in the seam allowance. This saves a lot of time and works with most knit fabrics, unlike marking pens which sometimes don’t stick on knit fabrics.

Just cut tiny, tiny notches, no more than 3 mm (1/8″).
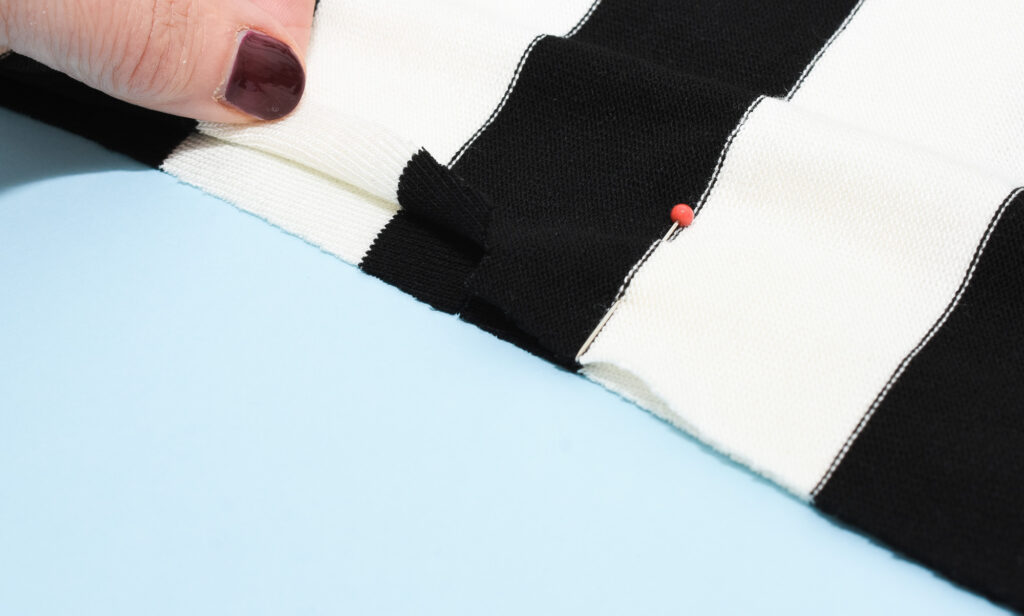
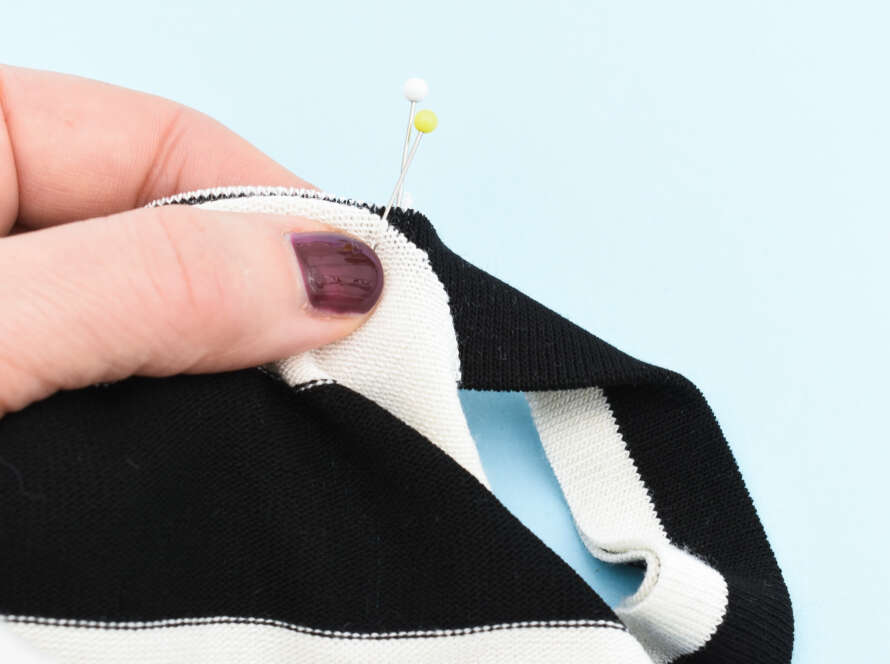
Aligning the stripes before sewing
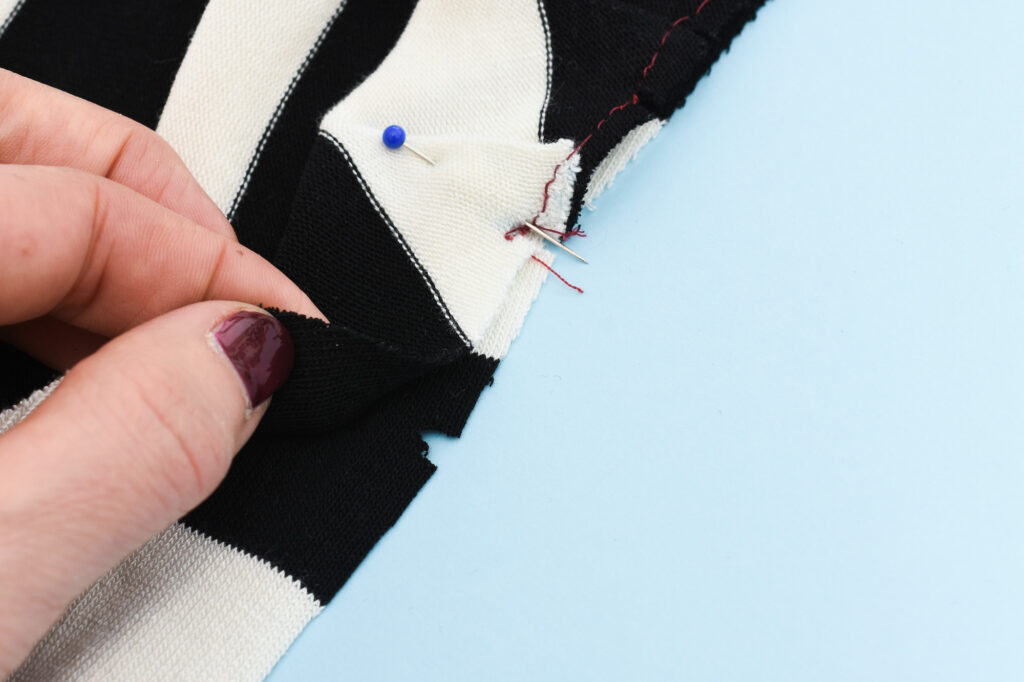
Once you are done cutting the pieces, match up the notches and stripes. Pin sparingly or hand-baste.
Sewing striped fabrics
Keeping the stripes aligned when sewing stretchy knits is no walk in the park, especially the first few times you are doing it. But here are some very simple tips that will make a big difference.
Four tips for sewing striped knits
1. Go slow, pause and realign the stripes regularly
Remember that the stripes should match at the seam line and not at the fabric edge. So you will need to lift the fabric and check.
2. Baste the pieces before sewing
Hand-basting along the seamline can be very helpful if you find it hard to prevent the layers from slipping. Pinning can distort the fabric layers so it’s very hard to get the stripes to line up exactly right with pins.
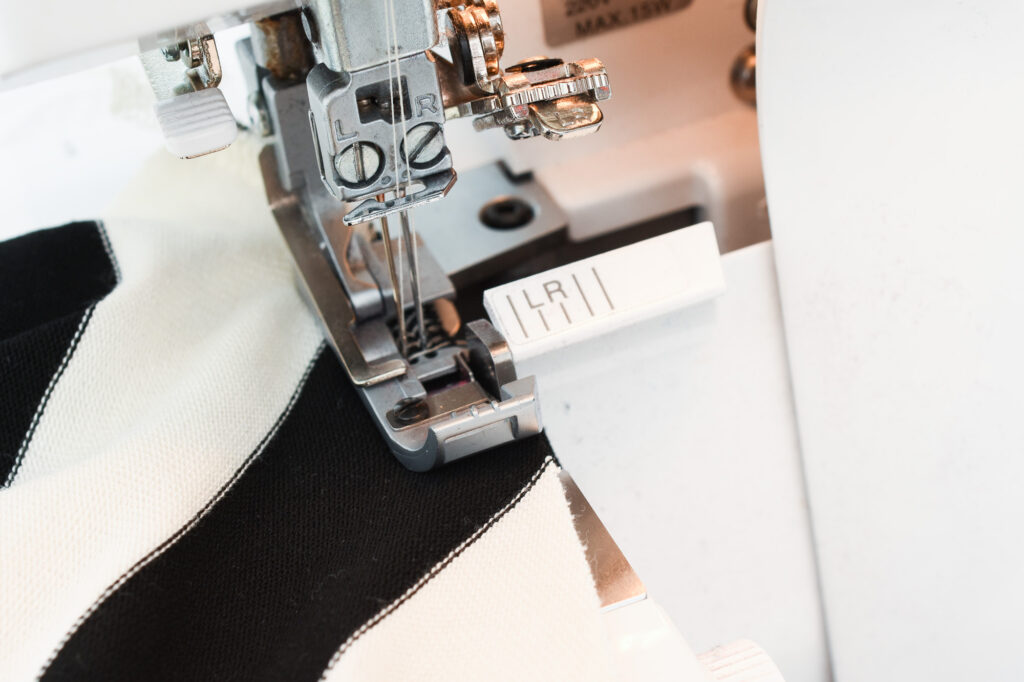
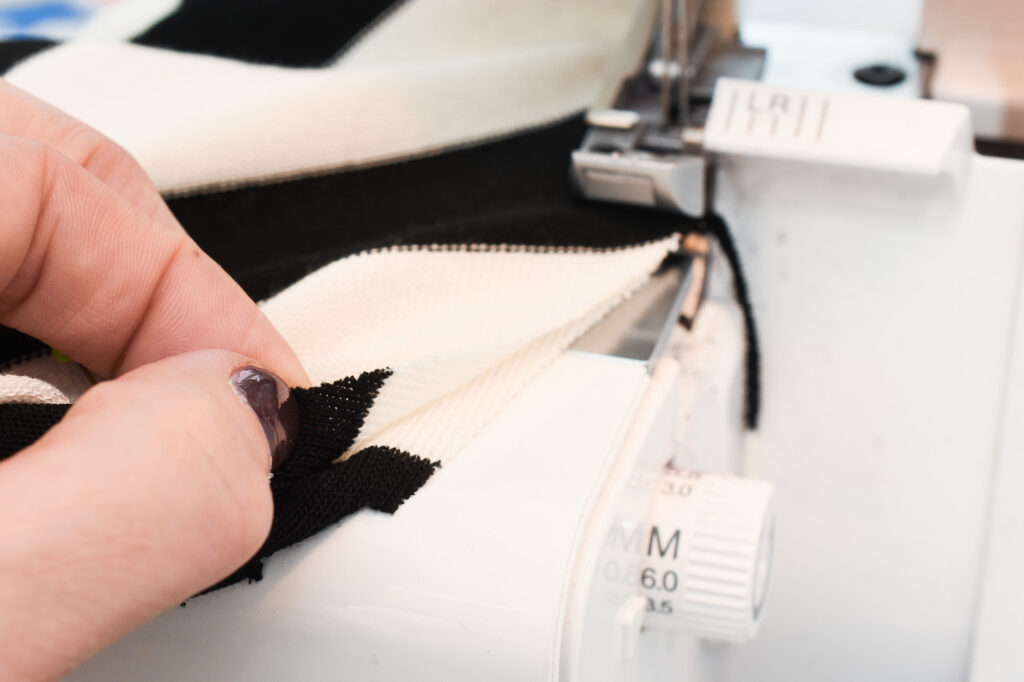
3. Keep the machine feeding even
If you are using a regular sewing machine, you’ll notice that it tends to push the upper layer forward, causing uneven feeding. Not great when sewing stripes!
Tips for sewing striped knits on a sewing machine
- Switch to a walking foot, if the foot works for the stretch stitch you are using.
- Reduce the presser foot pressure (if your machine has this option).
- Hand-baste the cut pieces before sewing.
- Use water-soluble wonder-tape (Amazon affiliate link). This magic tape is a miracle worker when sewing knits on a sewing machine.
- Use your fingers or an awl to gently push the upper layer towards the presser foot.
4. Experiment with the differential feed if using a serger
The differential feed on a serger controls the speed of the feed dogs. Sometimes a slight change in the settings can help prevent the stripes from getting misaligned.
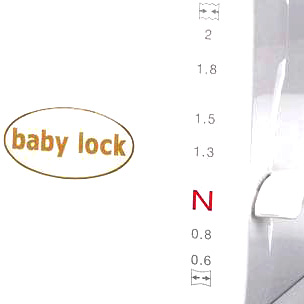
A quick primer on how differential feed settings works:
- When set at 1.0 or N the front and back feed dogs are moving at the same speed
- When the differential feed ratio is below 1.0, the front feed dogs move slower than the rear feed dogs.
- When the differential feed ratio is higher than 1.0, the front feed dogs move faster than the rear feed dogs.
Before sewing the side seams on a serger, do a few samples, testing the best diff. feed settings and also test if reducing the presser foot pressure can help too.
5. Never stretch the fabric during sewing
This might sound like a no-brainer, but it’s actually quite easy to accidentally pull the fabric as a way of “helping” the fabric through the machine. So check yourself and make a habit of always gently guiding the fabric through the machine, but never stretching or pulling it.

Hope you found this tutorial helpful! It’s a lot of info, so here is a quick summary of the top tips for how to get perfect matching stripes on knits.
Best 9 tips for sewing striped knits
- Cut each pattern piece as a single layer instead of on the fold
- Use the first cut fabric piece as the pattern when cutting the second piece
- Use notches and the hemlines as guides when aligning the stripes
- Pick one area on the sleeves where the stripes should match with the armhole
- Don’t use a bunch of pins, instead try hand-basting or wonder-tape if the fabric is slipping during sewing
- Sew slow, pause and realign the stripes regularly
- Experiment with presser foot pressure and/or the differential feed to prevent uneven feeding
- Try a walking foot if sewing striped knits on a regular sewing machine
- Never pull the fabric during sewing

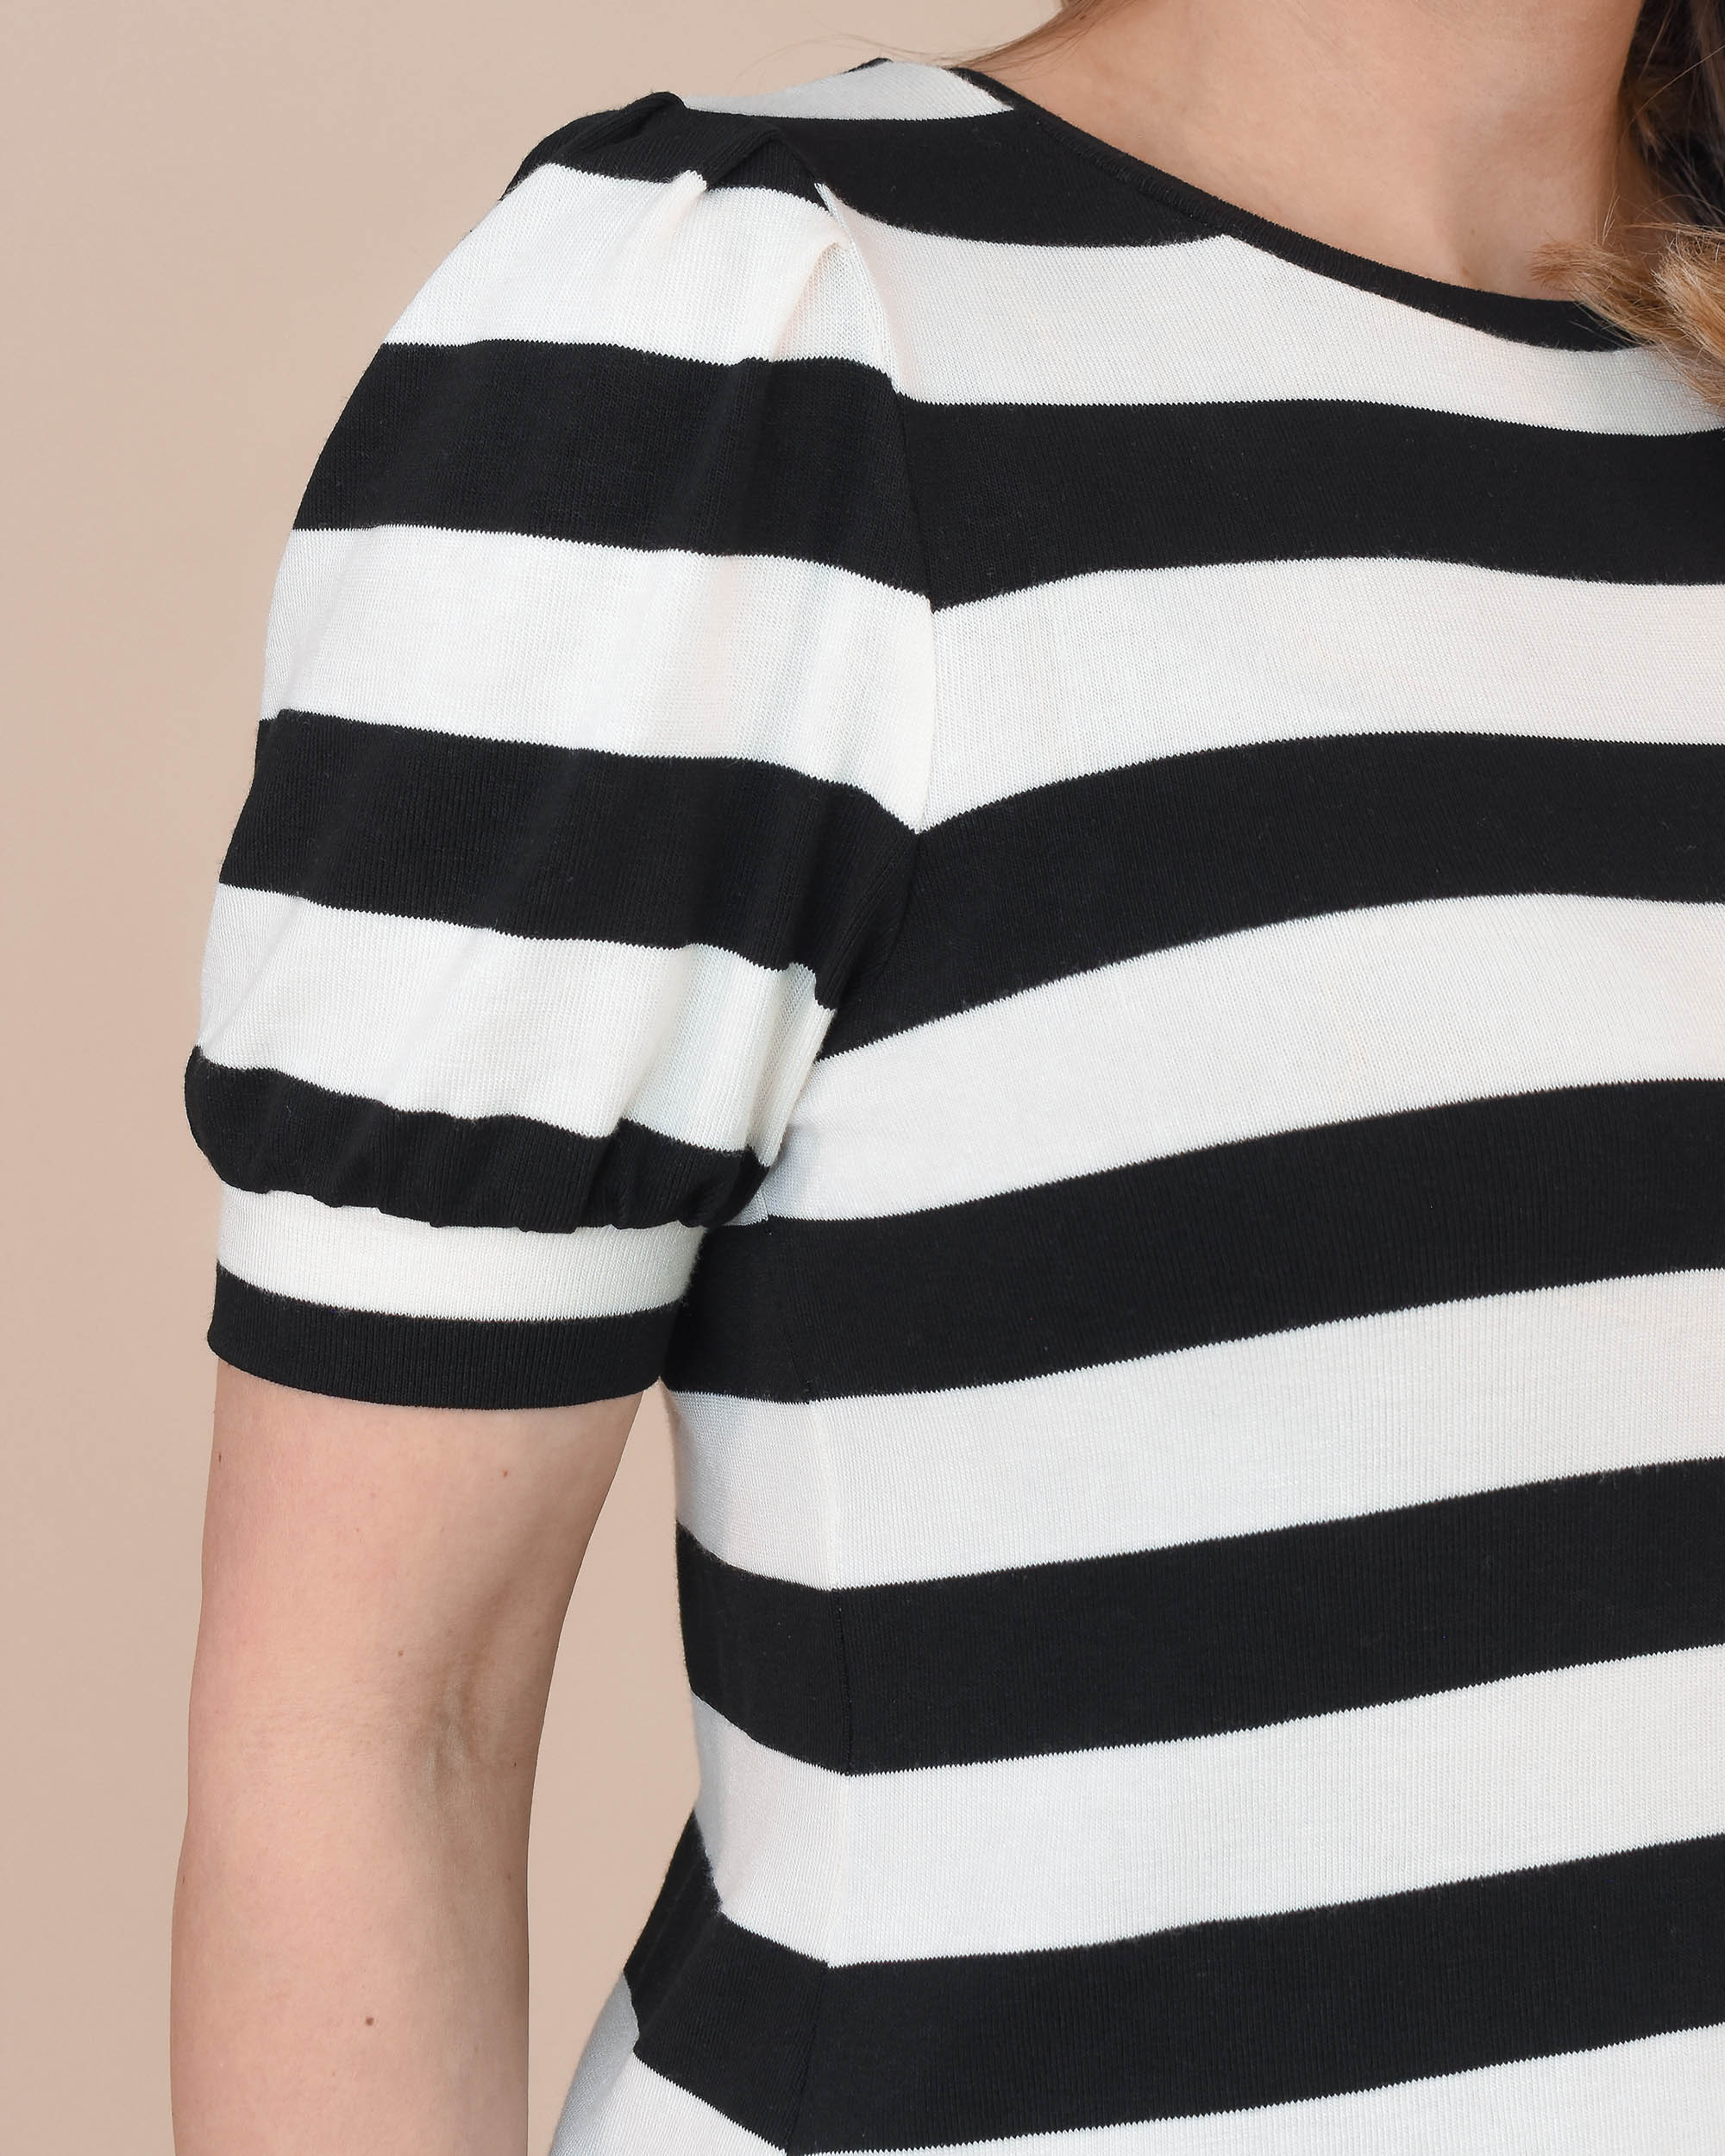
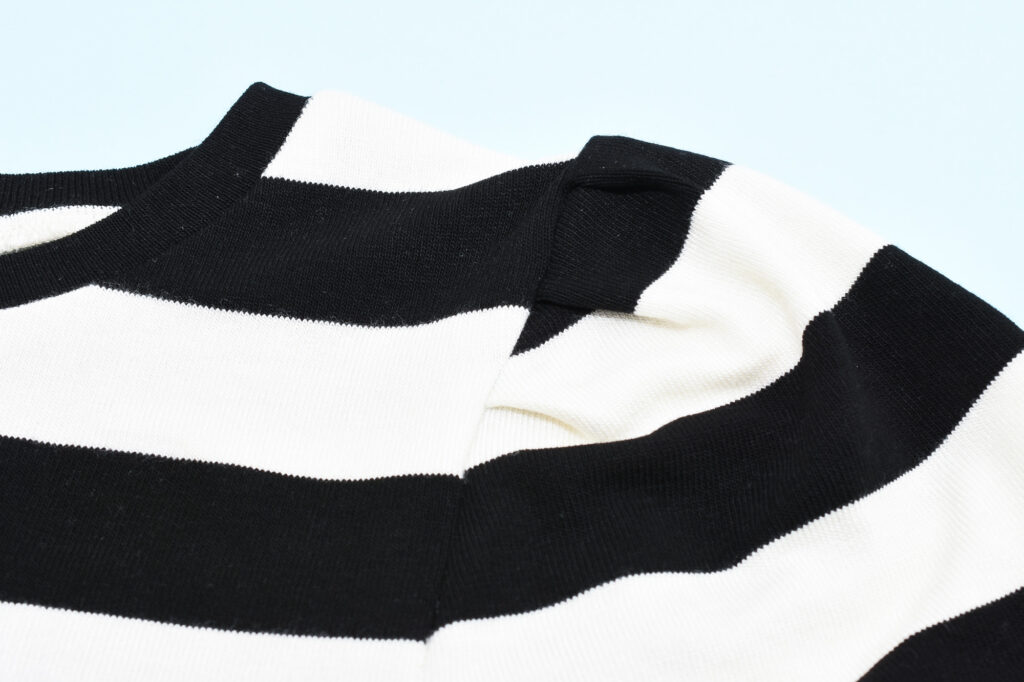
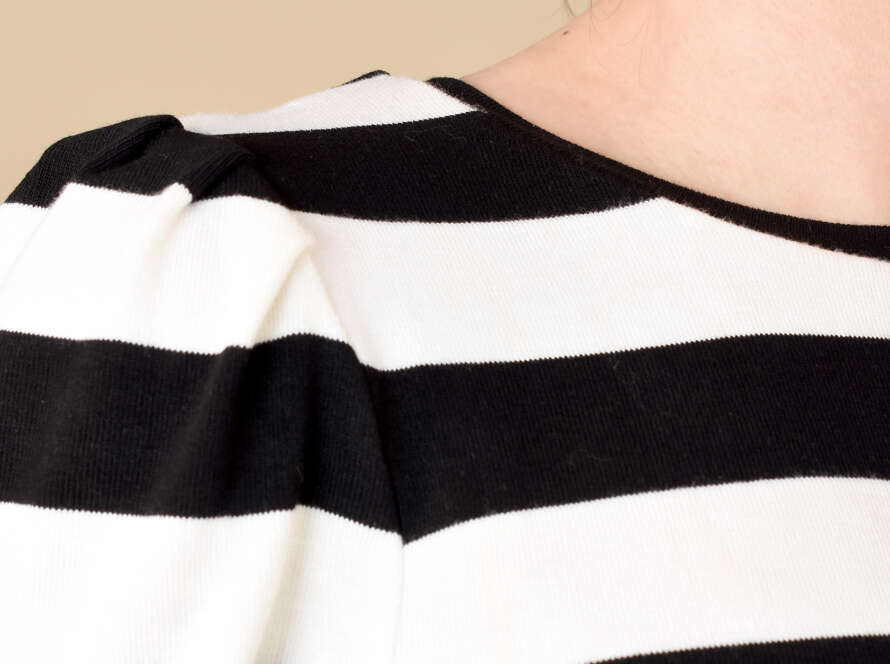
The finished Gurli Puff Sleeve Knit Top. Hope you got some good ideas on how to get perfectly matching stripes when sewing knits. Also, check out all the other tutorials in the Gurli Knit Top Sew-Along Series.
3 Comments
Diane
I never sew with stripes or plaids because l have always been afraid to try matching them. Your article gave me so much good information, l think l may try making a striped top!!! Do you also have information on matching plaids? I love plaids, but l am so afraid of them!!
Austragirl
Great article. One more tip: try Clover fork pins to keep stripes aligned when sewing. I find this even more effective than basting
Comments are closed.