Sewing a jeans buttonhole can feel a bit intimidating, but it is actually not that hard if you just use the right tools and techniques. In this step-by-step tutorial, I show an easy way to create professional-looking jeans buttonholes and buttons. No special tools needed!
Tools for sewing jeans buttonholes and buttons
- Topstitching thread and regular thread for the bobbin
- Marking pen
- Jeans or topstitching needles
- An awl
- Buttonhole cutter or seam ripper
- Buttonhole presser foot (but a regular one can work too)
- A jeans button with a nail
- Hammer or another button attaching tool
Learn more: 8 Great Tools and Notions for Sewing Jeans
This post contains Amazon affiliate links, meaning that a commission is earned from qualifying purchases.
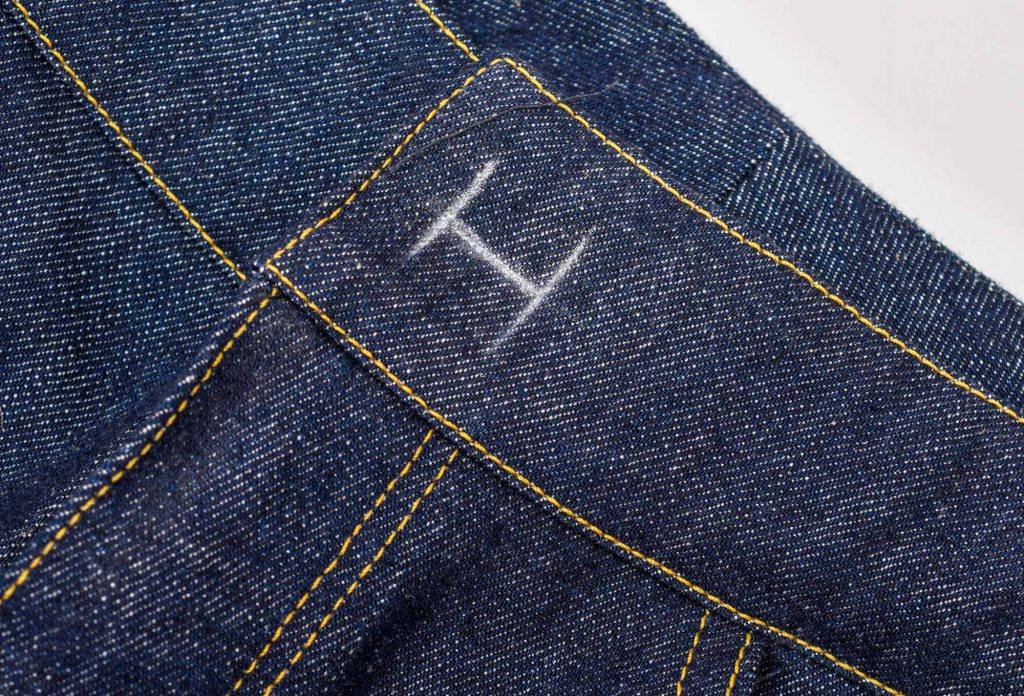
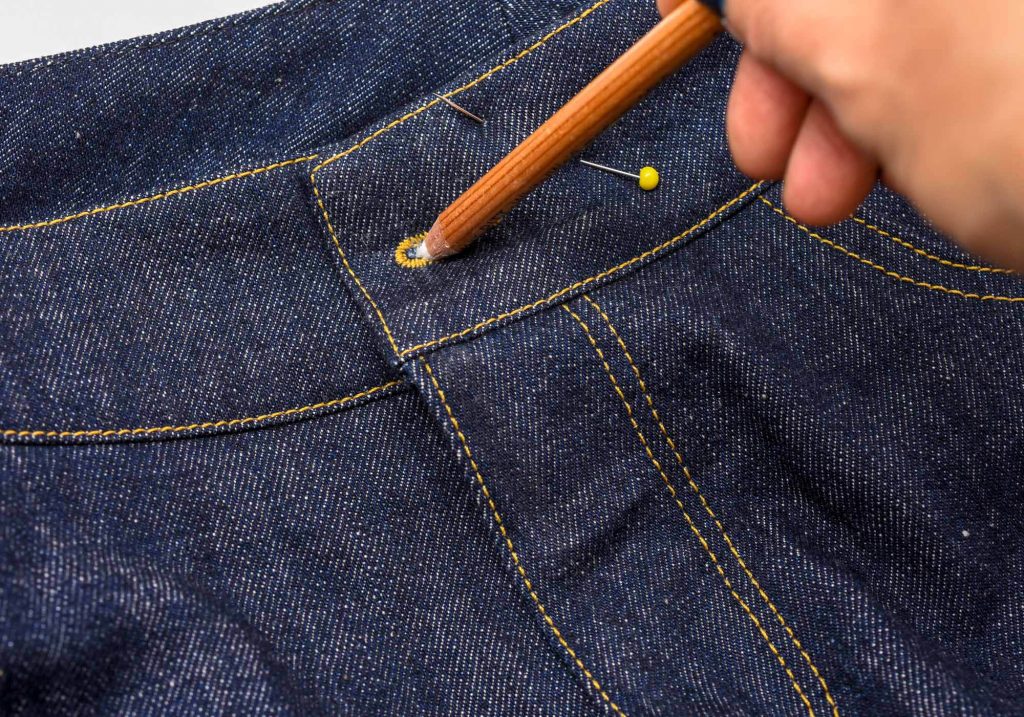
1. Mark the jeans buttonhole opening
I’m using the Clover Chaco liner with a little wheel that works very well on denim (Amazon affiliate link). There are many ways to figure out the right length of the buttonholes, but the basic principle is the diameter of the button + the height + the end tacks. I’ve gotten pretty good at gauging this, so I’m not super obsessed about getting every millimetre right. I also like to make the end markings really long. longer than the presser foot is wide since this makes it easier to line up when sewing.
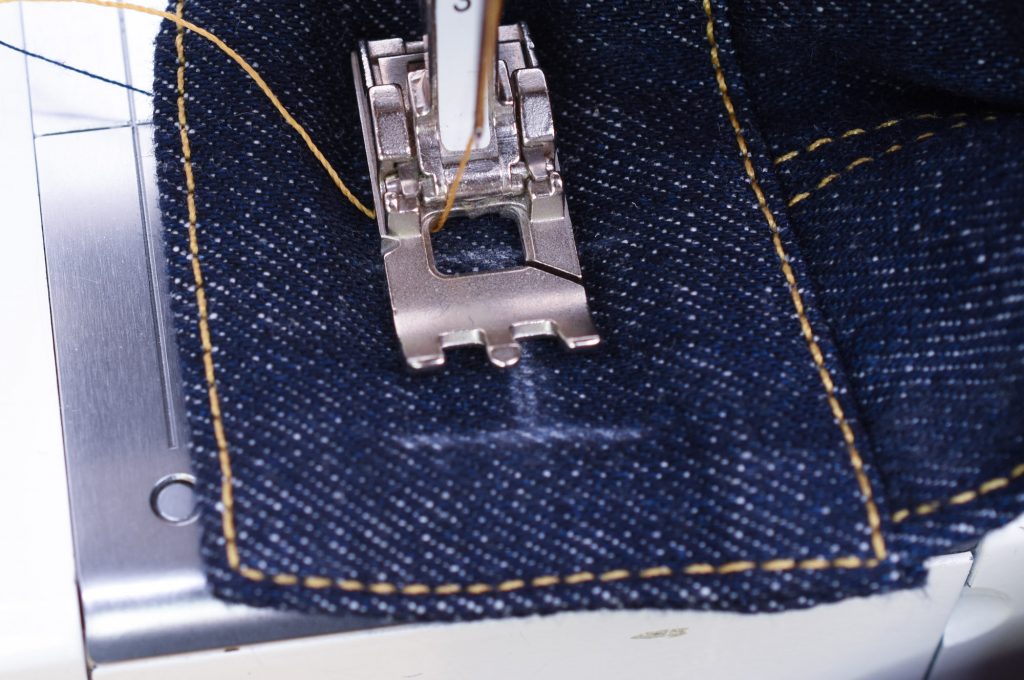
2. Sew the buttonhole opening
Increase the stitch length on the zigzag/buttonhole stitch. This will ensure that the stitching flows, without getting stuck. There are two reasons why this is important:
1. Heavy thread needs more space, if the stitch is to closely spaced, the sewing machine can’t feed properly
2. Thick materials can also cause problems with the feeding. By increasing the stitch length, you will mitigate this issue.
Don’t use an automatic buttonhole presser foot for denim. It will not feed as well as a regular buttonhole presser foot. I’m sure there are exceptions to this rule, but if you are having problems, skip the automatic buttonhole function and your buttonholes manually
Use heavy topstitching thread in the spool, but regular sewing machine thread in the bobbin. This will prevent the thread from getting jammed up.
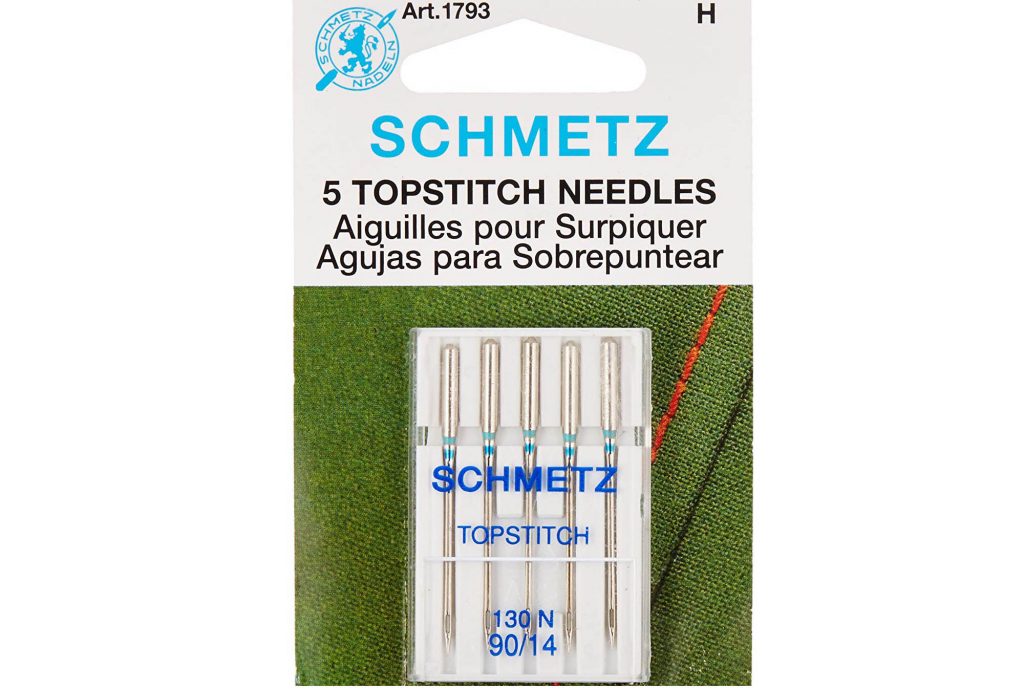
Use a topstitching needle for best result. They have larger eyes and are designed to cut through thick materials. My favourite is the Schmetz Topstitch Needle (affiliate link).
And last but not least: Always do a sample buttonhole first to gauge the right size and stitch settings.
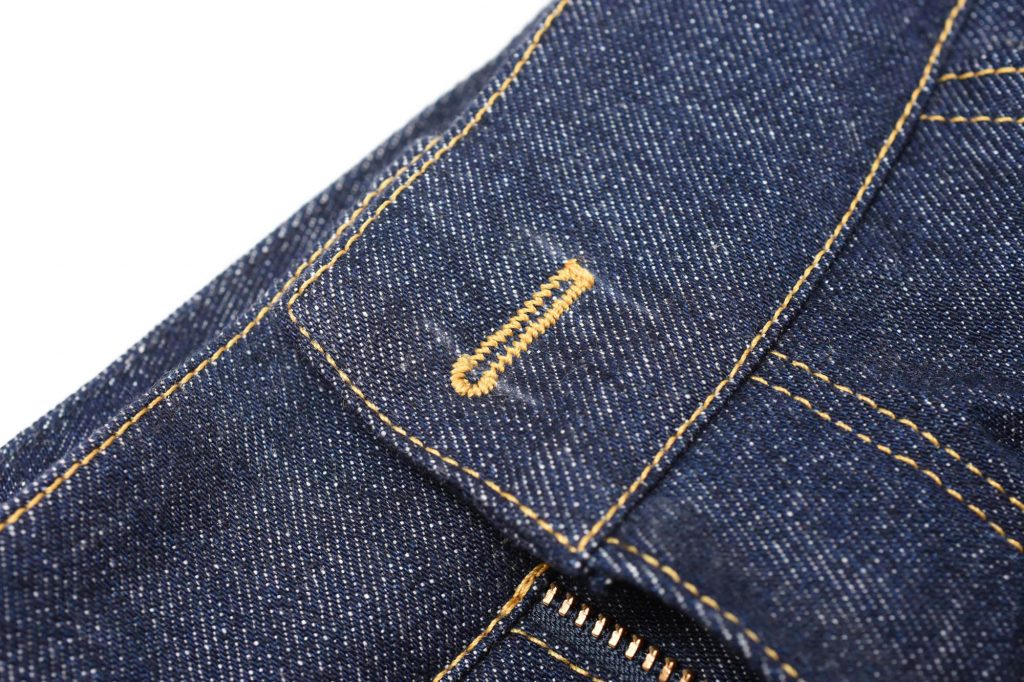
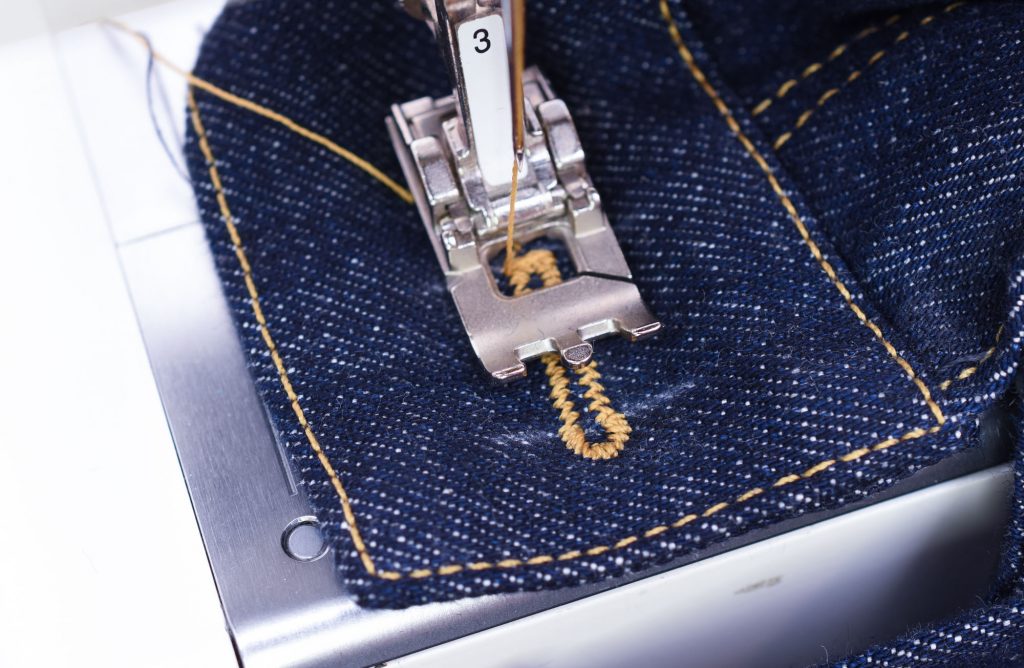
3. The finished buttonhole
Notice how the zigzag stitches have plenty of space in between. Increasing the stitch length is so important when sewing denim. Just check your regular RTW denim if you don’t believe me! I also always interface the waistband with fusible and this helps with fraying.
Learn more: 7 Time-Saving Tips For Sewing Jeans
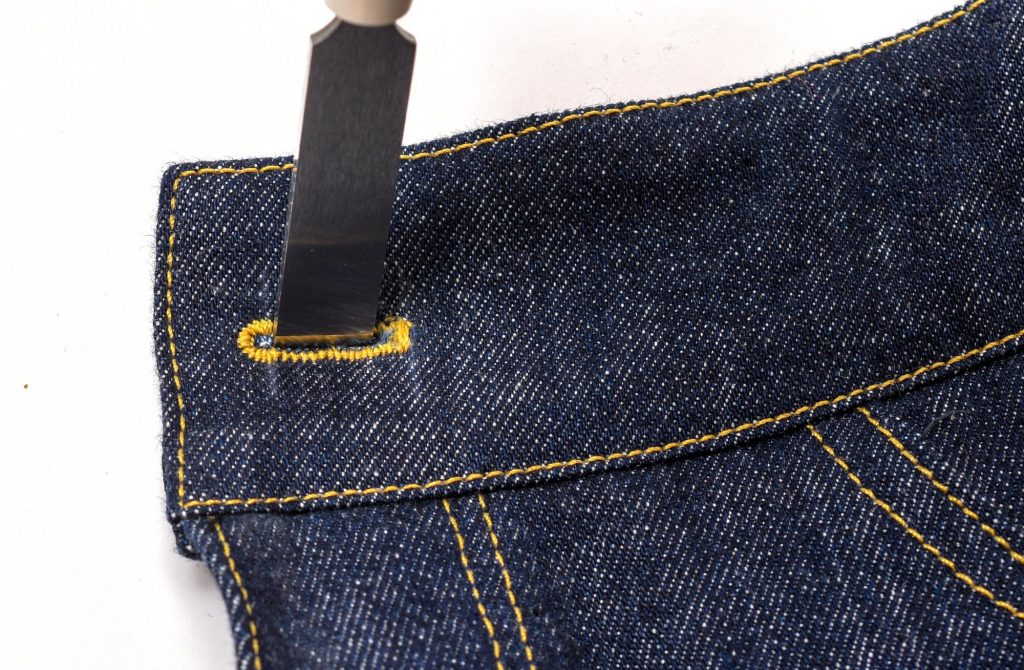
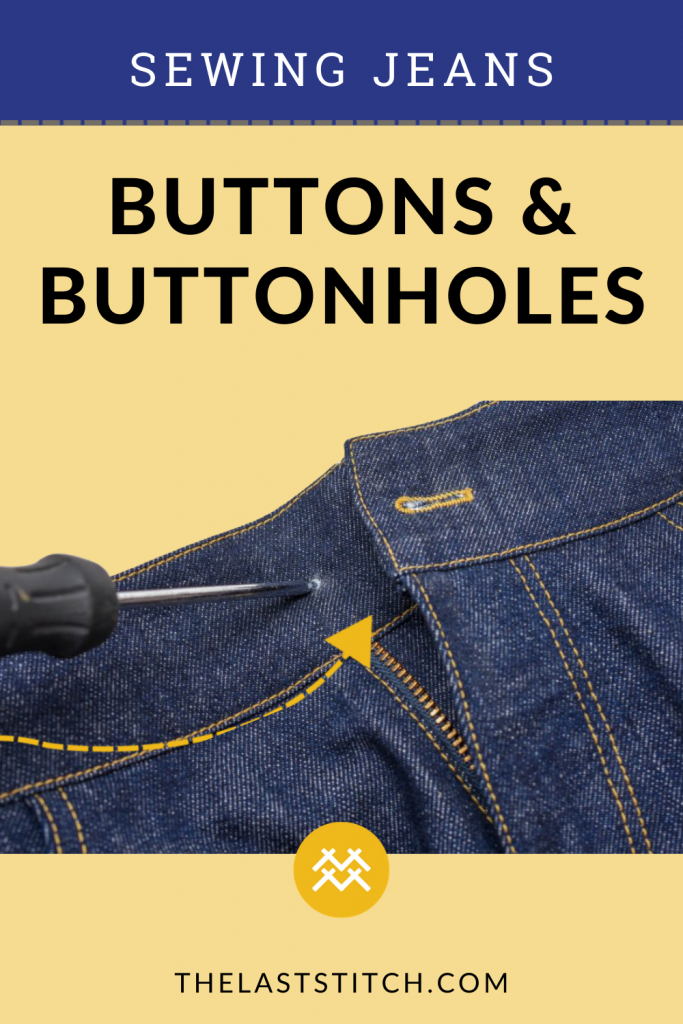
4. Open the buttonhole
I like to use a buttonhole cutter, but a good quality seam ripper will often suffice (Amazon affiliate links). The advantage of the cutter is that it is sharper, which is great when cutting thick denim open.
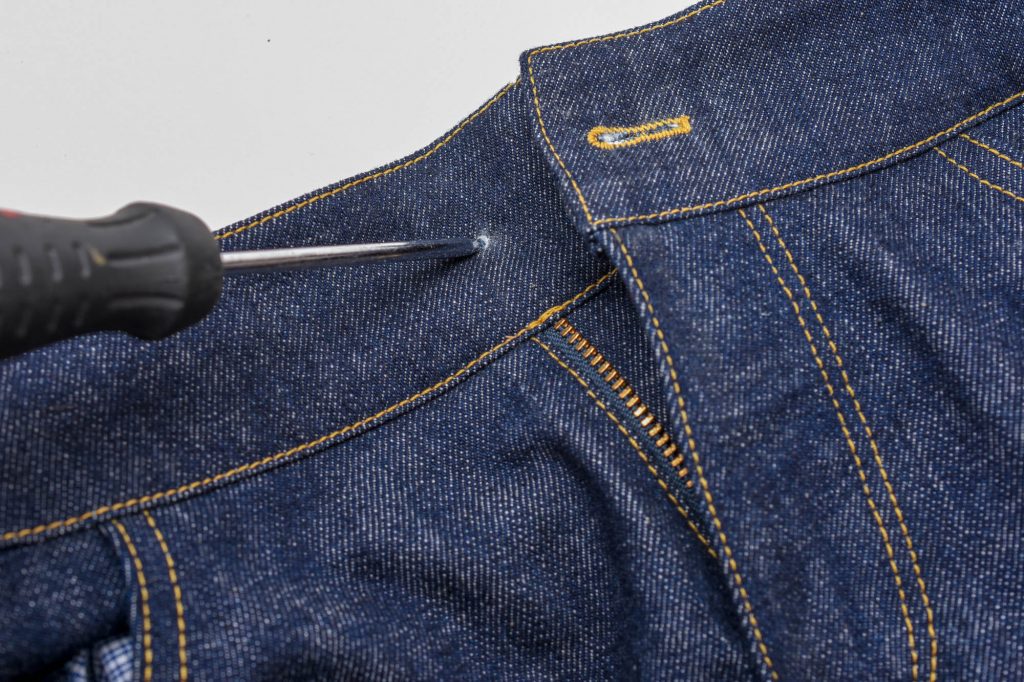
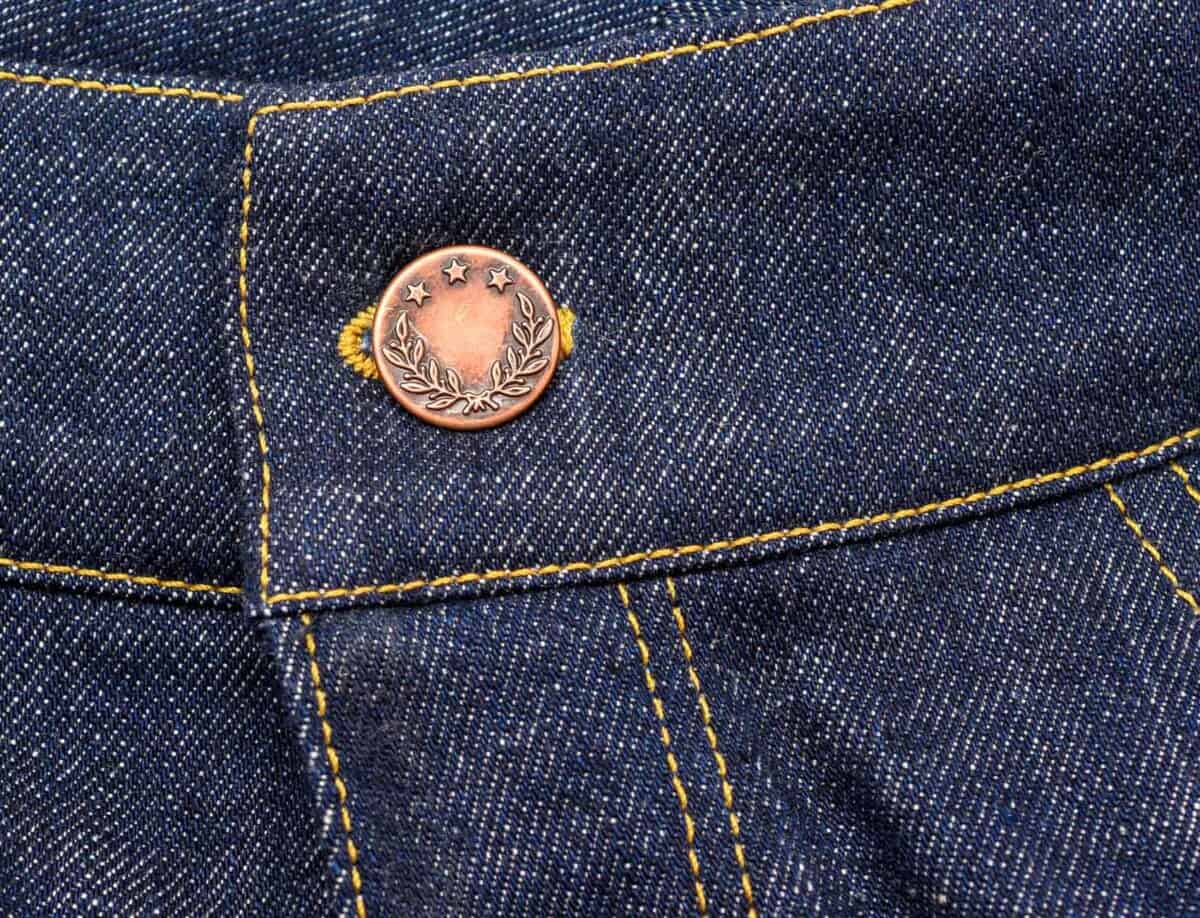
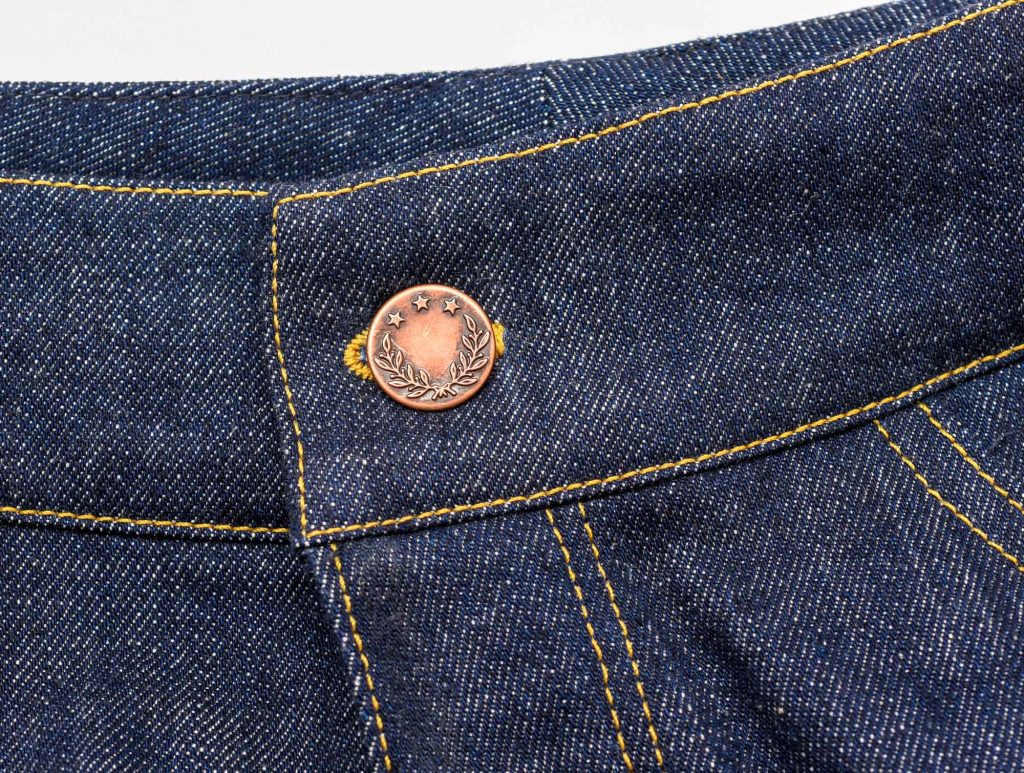
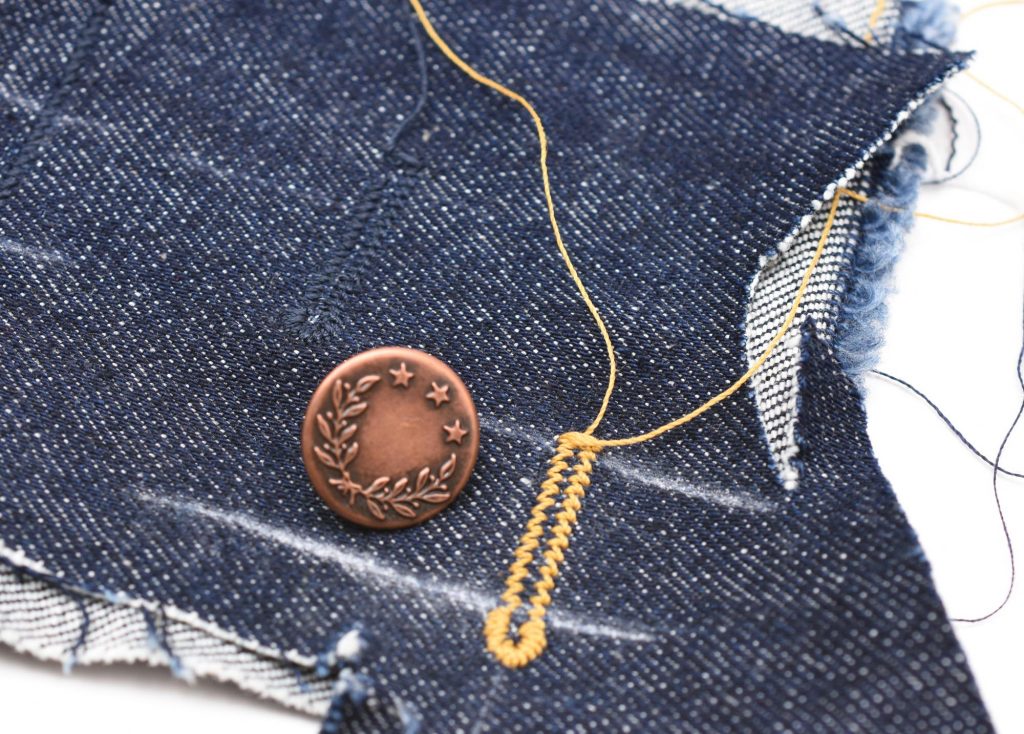
5. Mark the placement of the jeans button
I do this as a 2-step process. First I mark a dot with a pen. Then I pierce a hole with an awl, since a denim button is attached with a nail from the other side, so a little hole helps with this
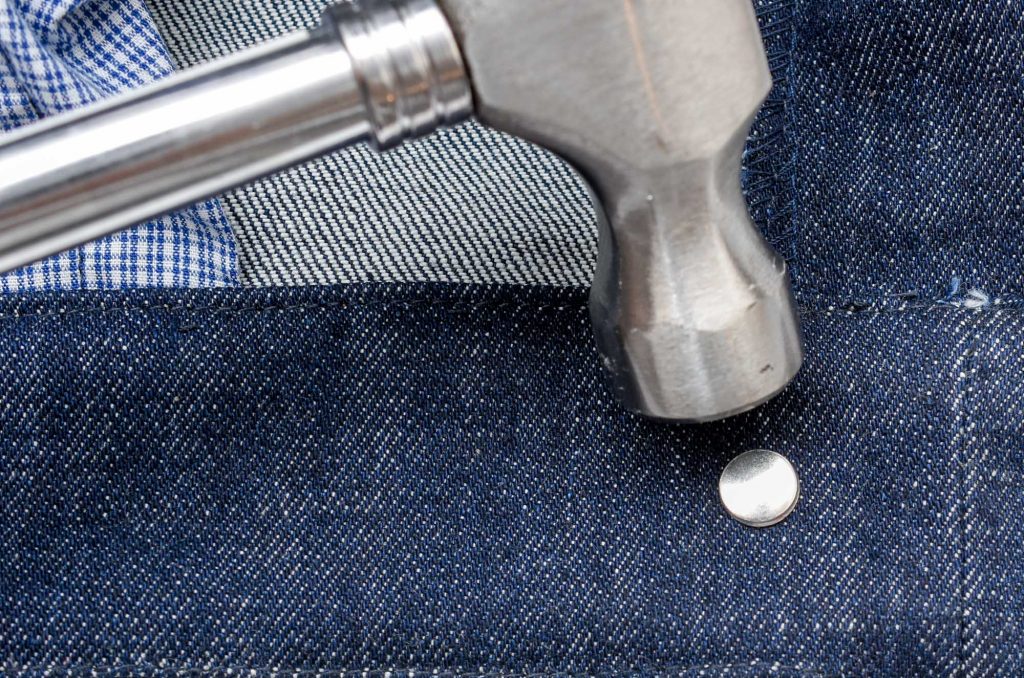
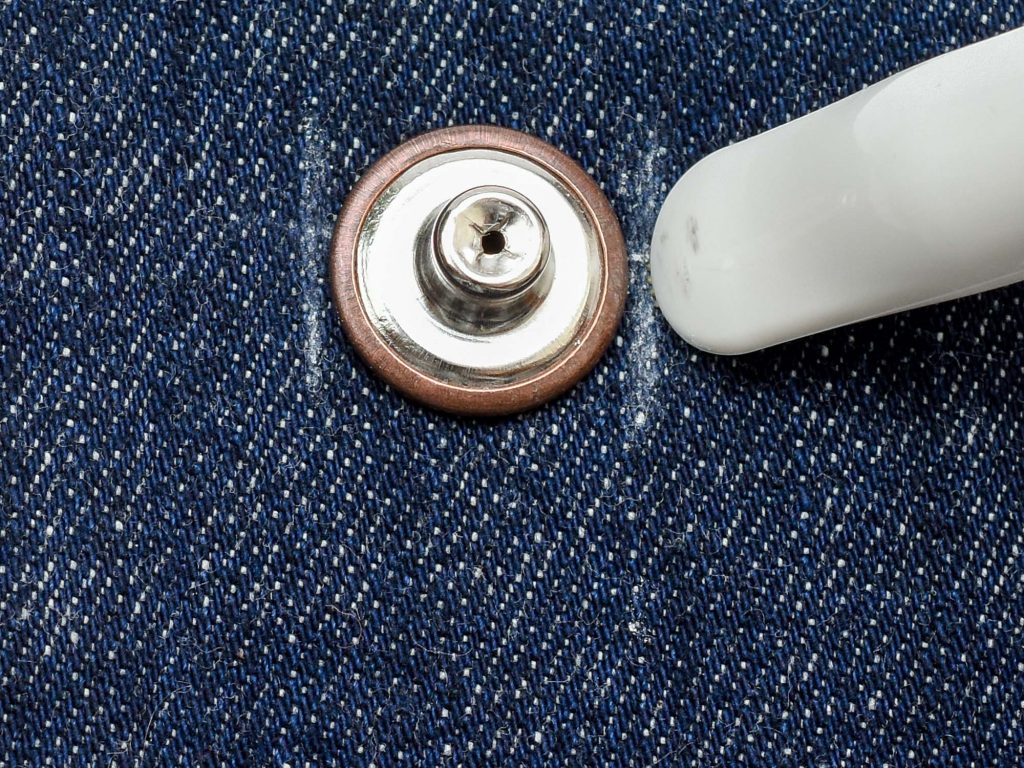
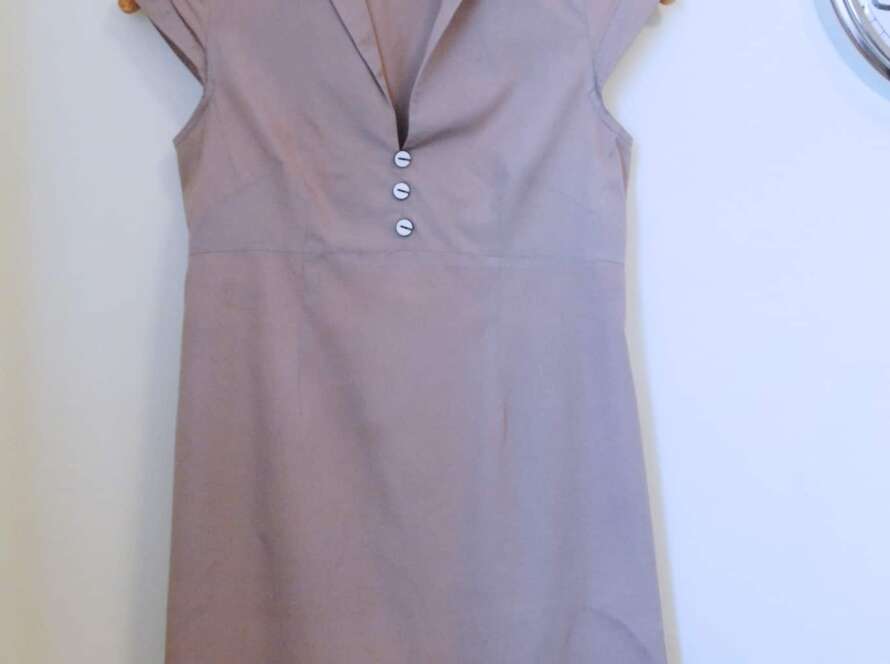
6. Attach the button
Most denim buttons available for us home sewists use a nail to attach the button. Just place the top button on the right side and then hammer in the nail from the reverse side, using the hole you did in the previous step as your guide.
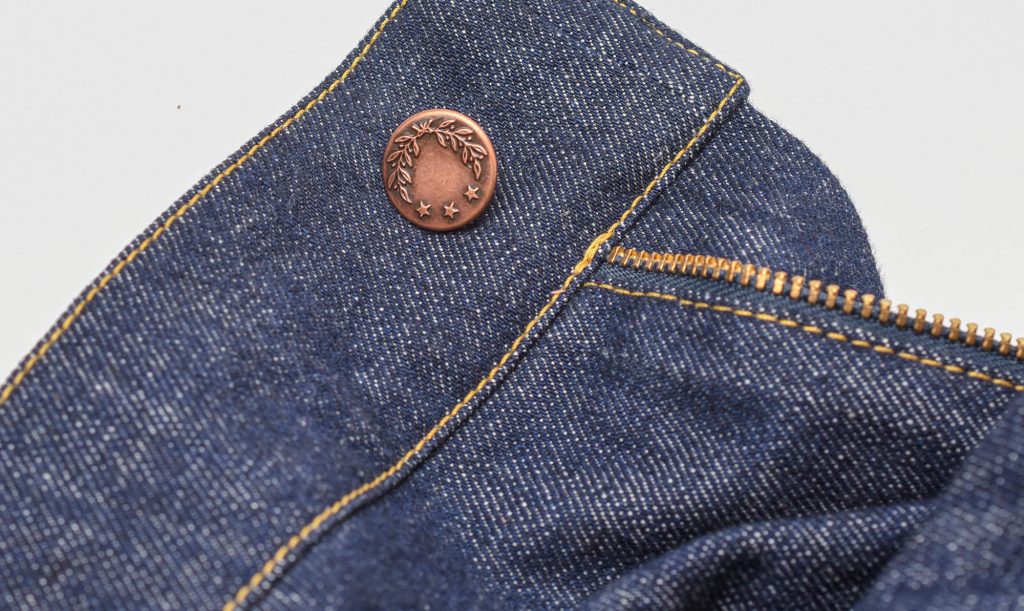
The finished button
This wasn’t too hard, was it? I think the most important thing is to follow all the principles I explain in step number two. If you do that, you should have no problem sewing buttonholes on denim.
Want to learn more jeans sewing techniques? Check out the other tutorials in my jeans making series.
This post contains Amazon affiliate links, meaning that a commission is earned from qualifying purchases.
10 Comments
Jewel
Thank you! I have such bad luck with buttonholes in heavier material. I am going to try this approach. Your tips and hints are most valuable.
Johanna Lundström
Thank you! I think the biggest issue when sewing buttonholes on thick materials is that we don’t do the necessary adjustments, and the tweaks I show in this tutorials really makes a big difference!
Pamela
Thank you! This is so helpful. I am currently making a denim skirt for my daughter with buttons all the way down the front and I was dreading making all those buttonholes. Definitely going to try your method!
Daniel Burgoyne
I am a new sewist and taking sewing classes. I have made a couple garments for my wife already and would love to tackle a pair of jeans for myself. However, I was wondering if I could sew buttonholes with a needle by hand like the tailors do for bespoke jackets. Would it look better than doing it by machine? I assume it might take more time but with a great result and no fraying. Would you agree?
Megan
I find this part daunting as the jeans are finished! One mistake and 😖
I think it’s also important to consider placement of the button. I make sure the shank is going to be towards the end of the buttonhole that is toward the midline of the body. That way it keeps the waistband where you want it, not looser than planned since it will stretch a bit anyway.
Dawn Redden
Thank you for sharing your knowledge. Are you open to answer questions concerning denim fabric in general?
Susan
Any suggestions if you can’t even get the buttonhole area under the presser foot? Hand stitch buttonhole? Thank you for any help
Comments are closed.