There are plenty of suggestions and rules when it comes to sewing with knits, but one thing that doesn’t always get talked about in sewing instructions are the importance of stabilising the shoulder seam. Yes this step might not make or break a garment, but it does make a huge difference when it comes to keep the shoulder seam in check. And if you look at even the cheapest ready to wear t-shirt, there is always some sort of shoulder stabiliser in place.
The most common options for shoulder stabilisation are:
- A piece of self fabric cut lengthwise (the direction that have the least amount of stretch)
- Fusible interfacing
- Shoulder seam band (which can be quite rigid as they don’t tend to have much stretch)
- Clear elastic
- Power net
Of these options I use clear elastic the most. Why you may ask? Well for a couple of reasons. One is that the elastic is so thin that it doesn’t create much bulk if any. Another reason is that it is so discrete due to its transparent nature (obviously!). A third reason is it that elastic really keeps its shape, even when stretched out. As for drawbacks, the main are that it can be tricky to sew, as it can slip or get stuck to the presser foot, so this method does take some practice.
So let’s take a look on how I used clear elastic for the shoulder seam on my knit cardigan:
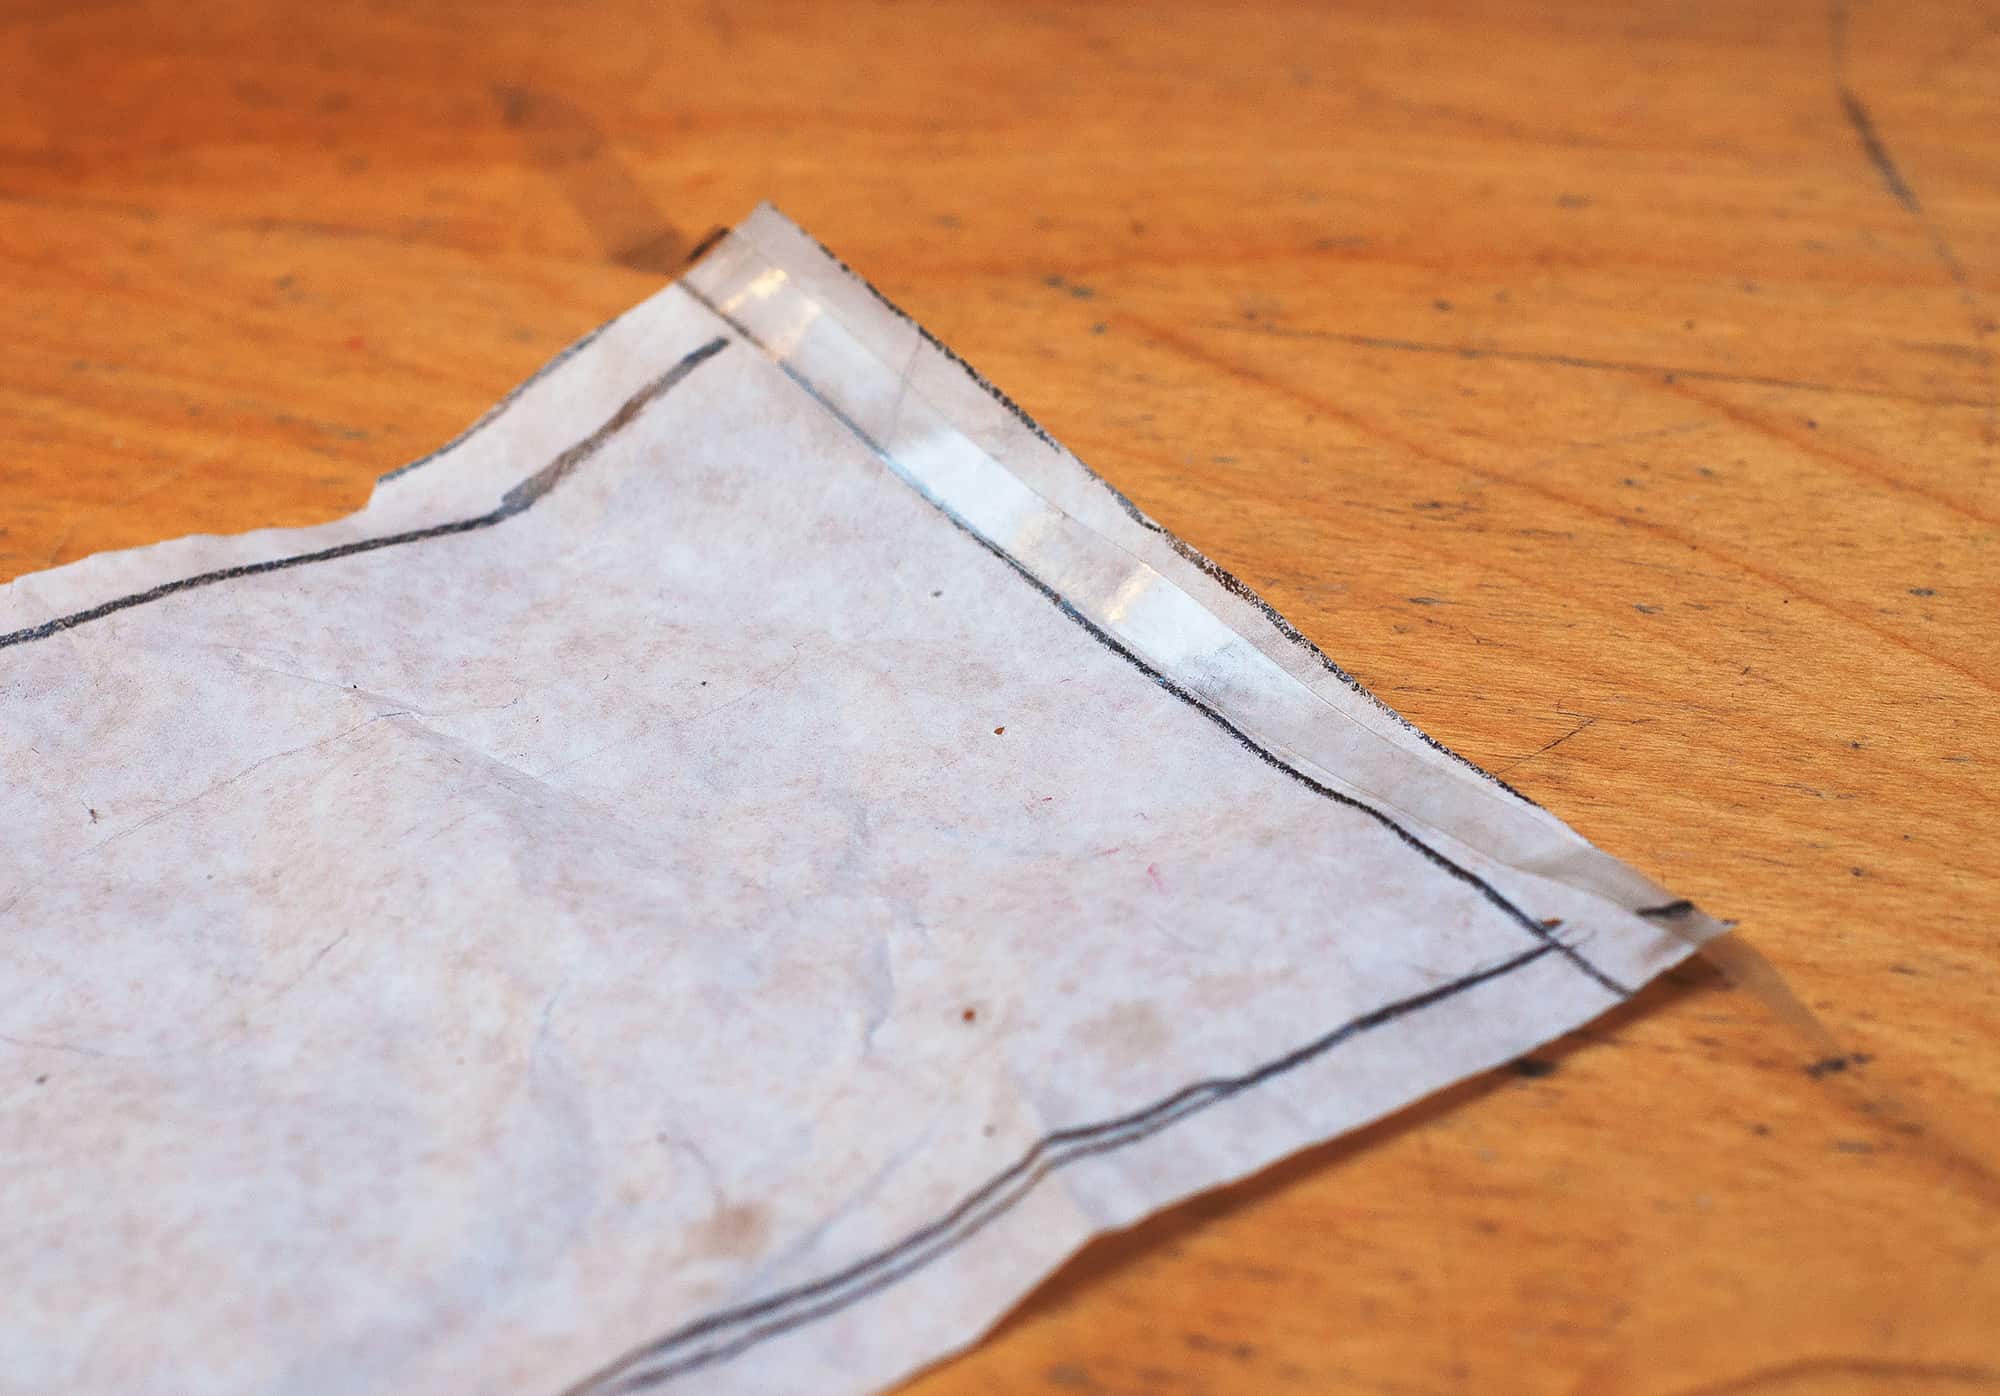
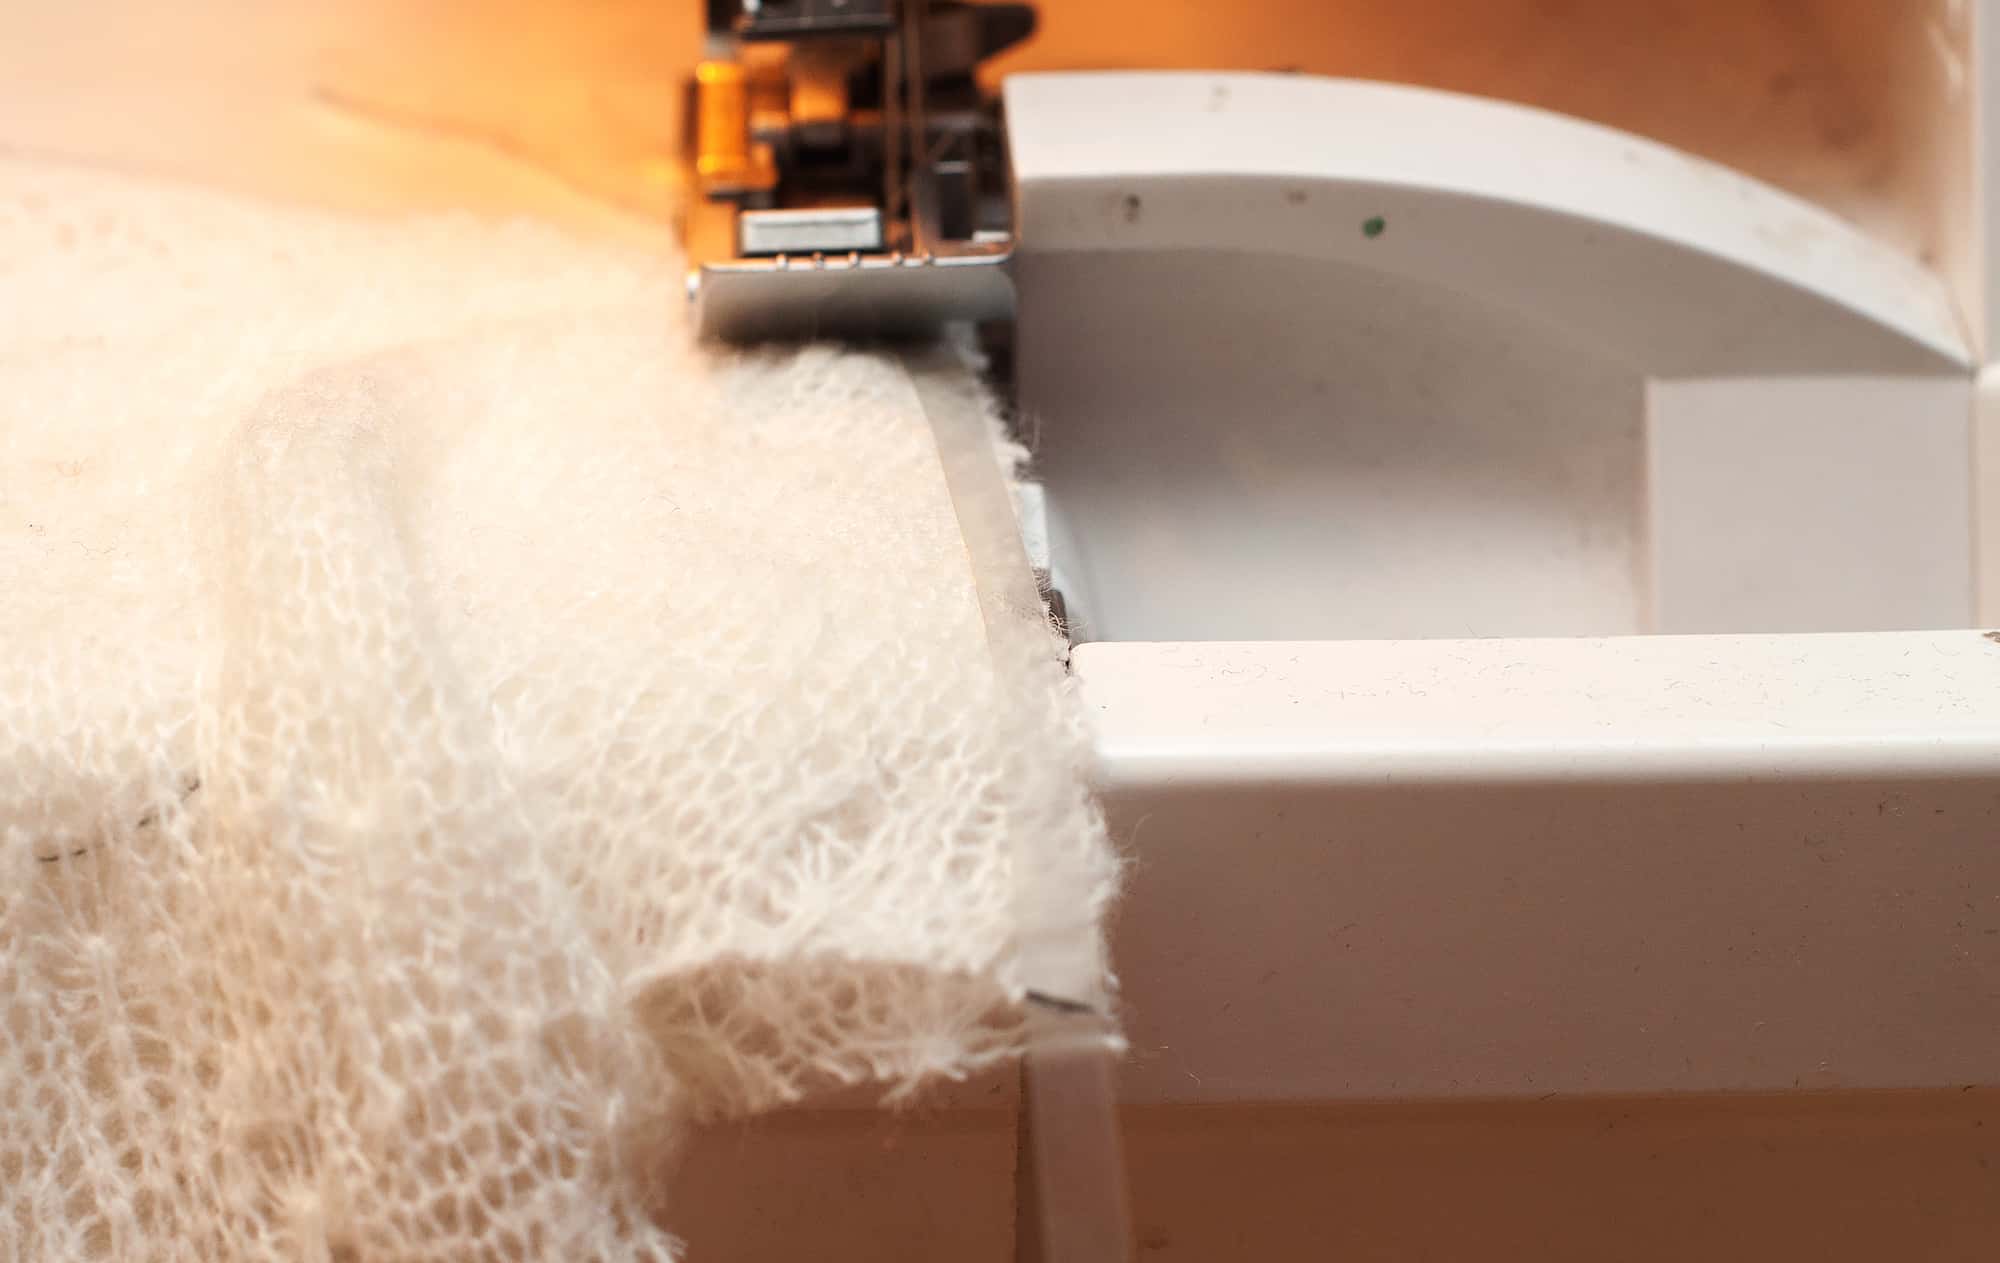
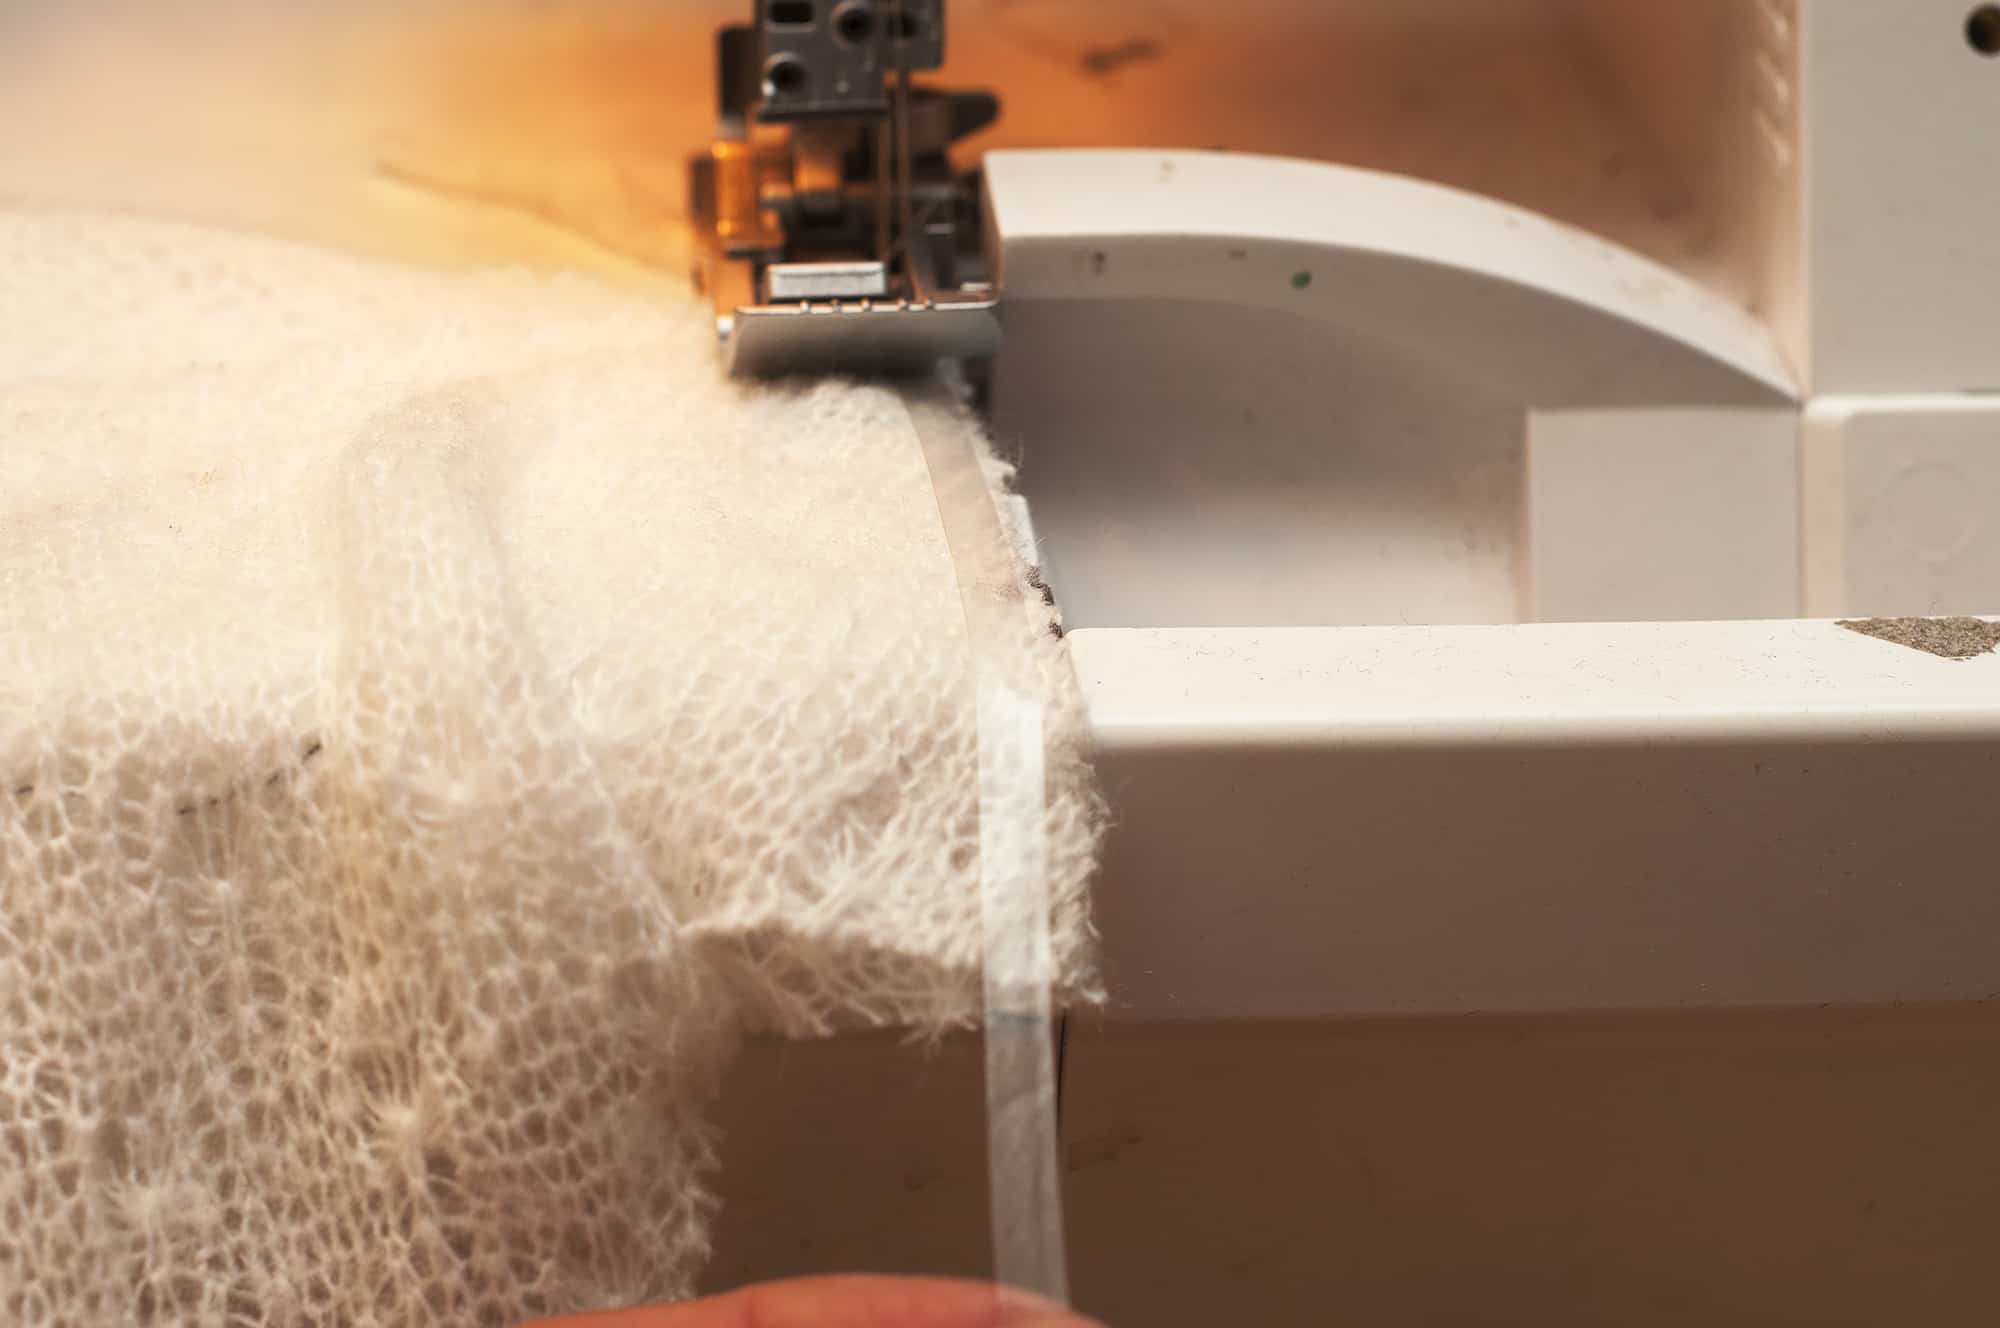
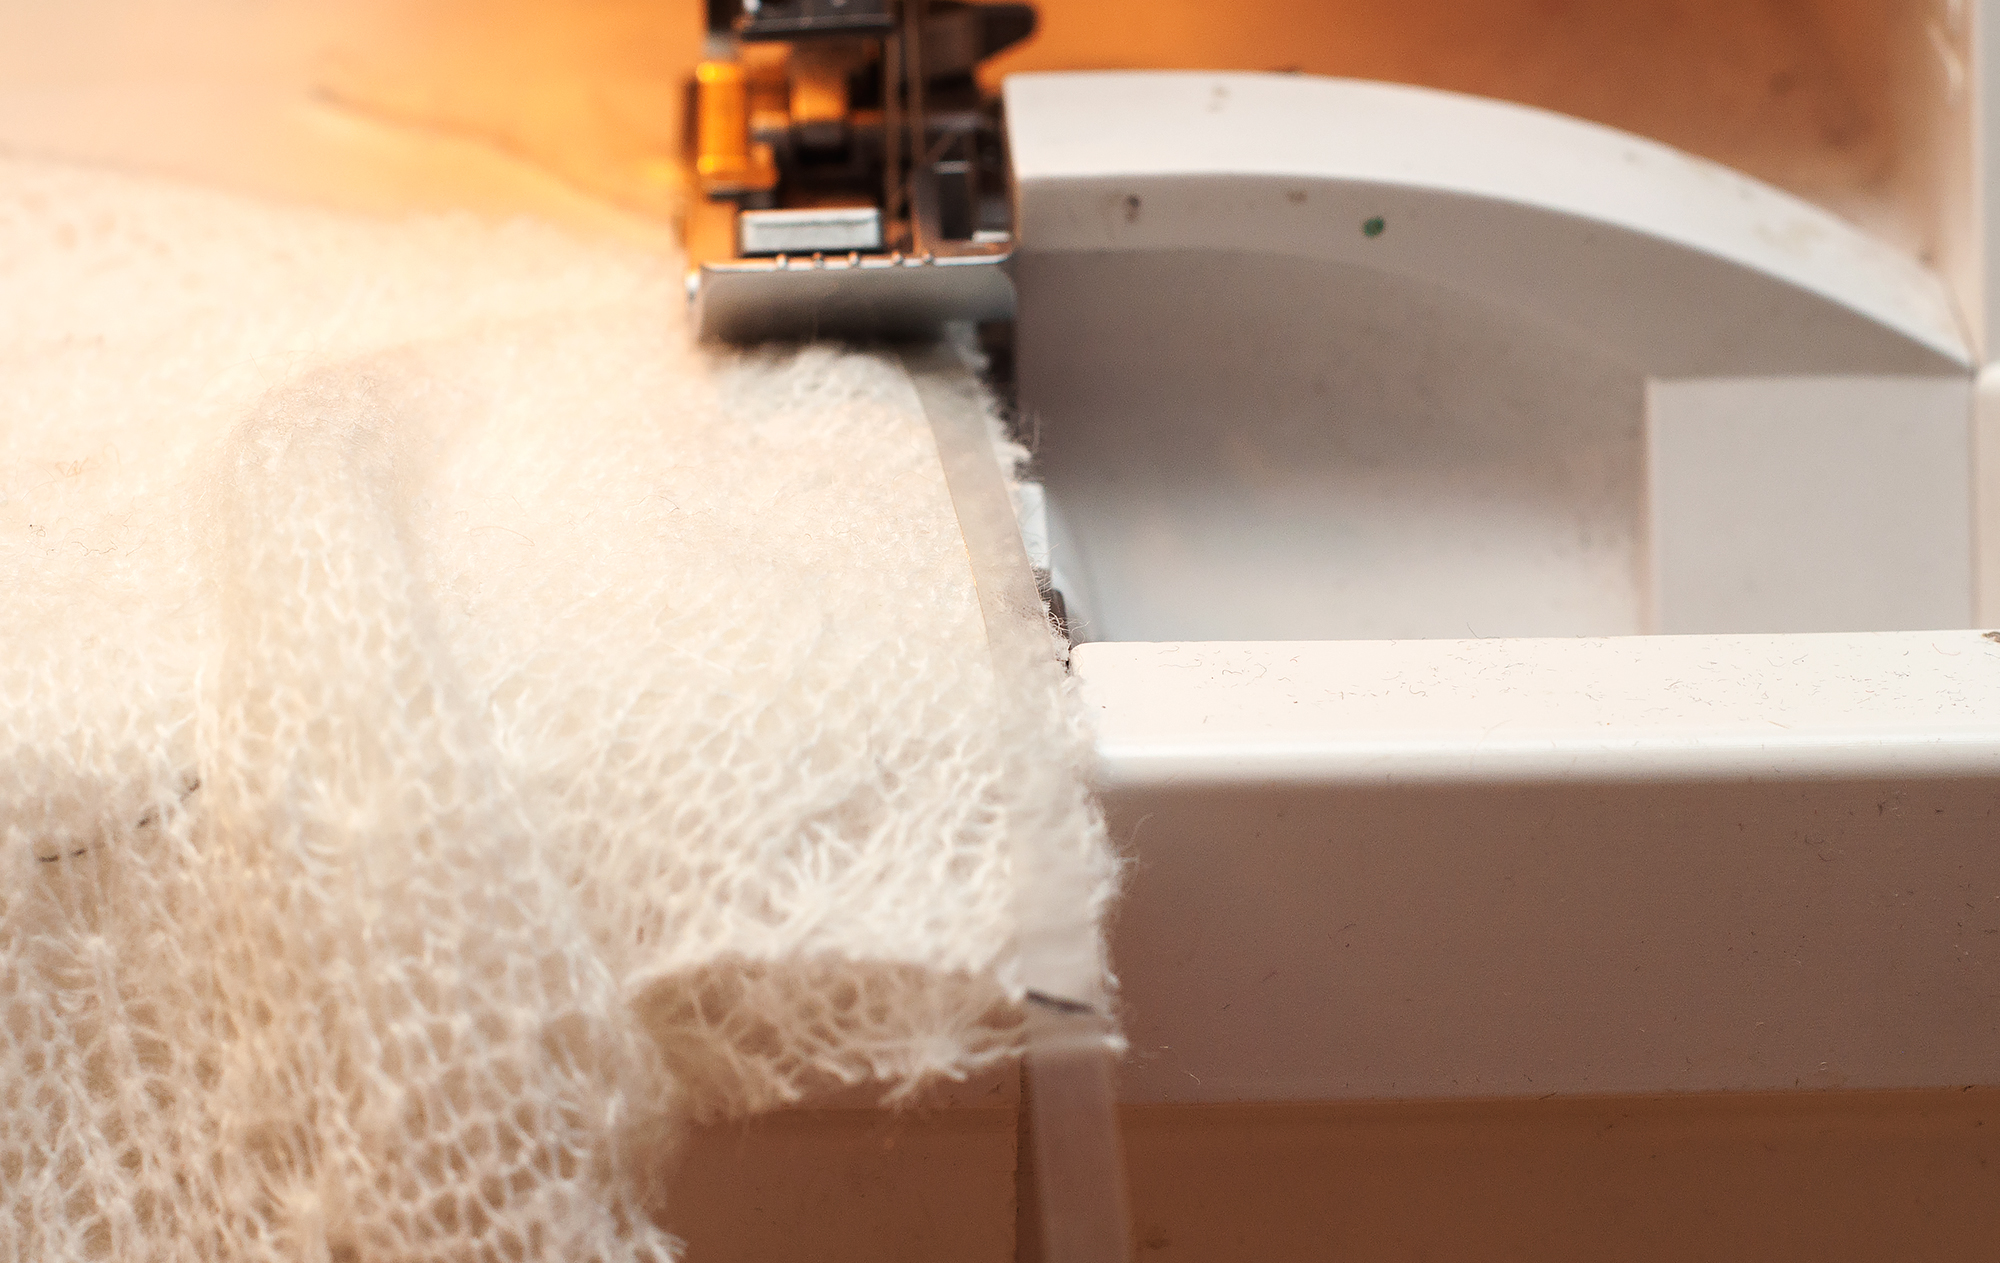
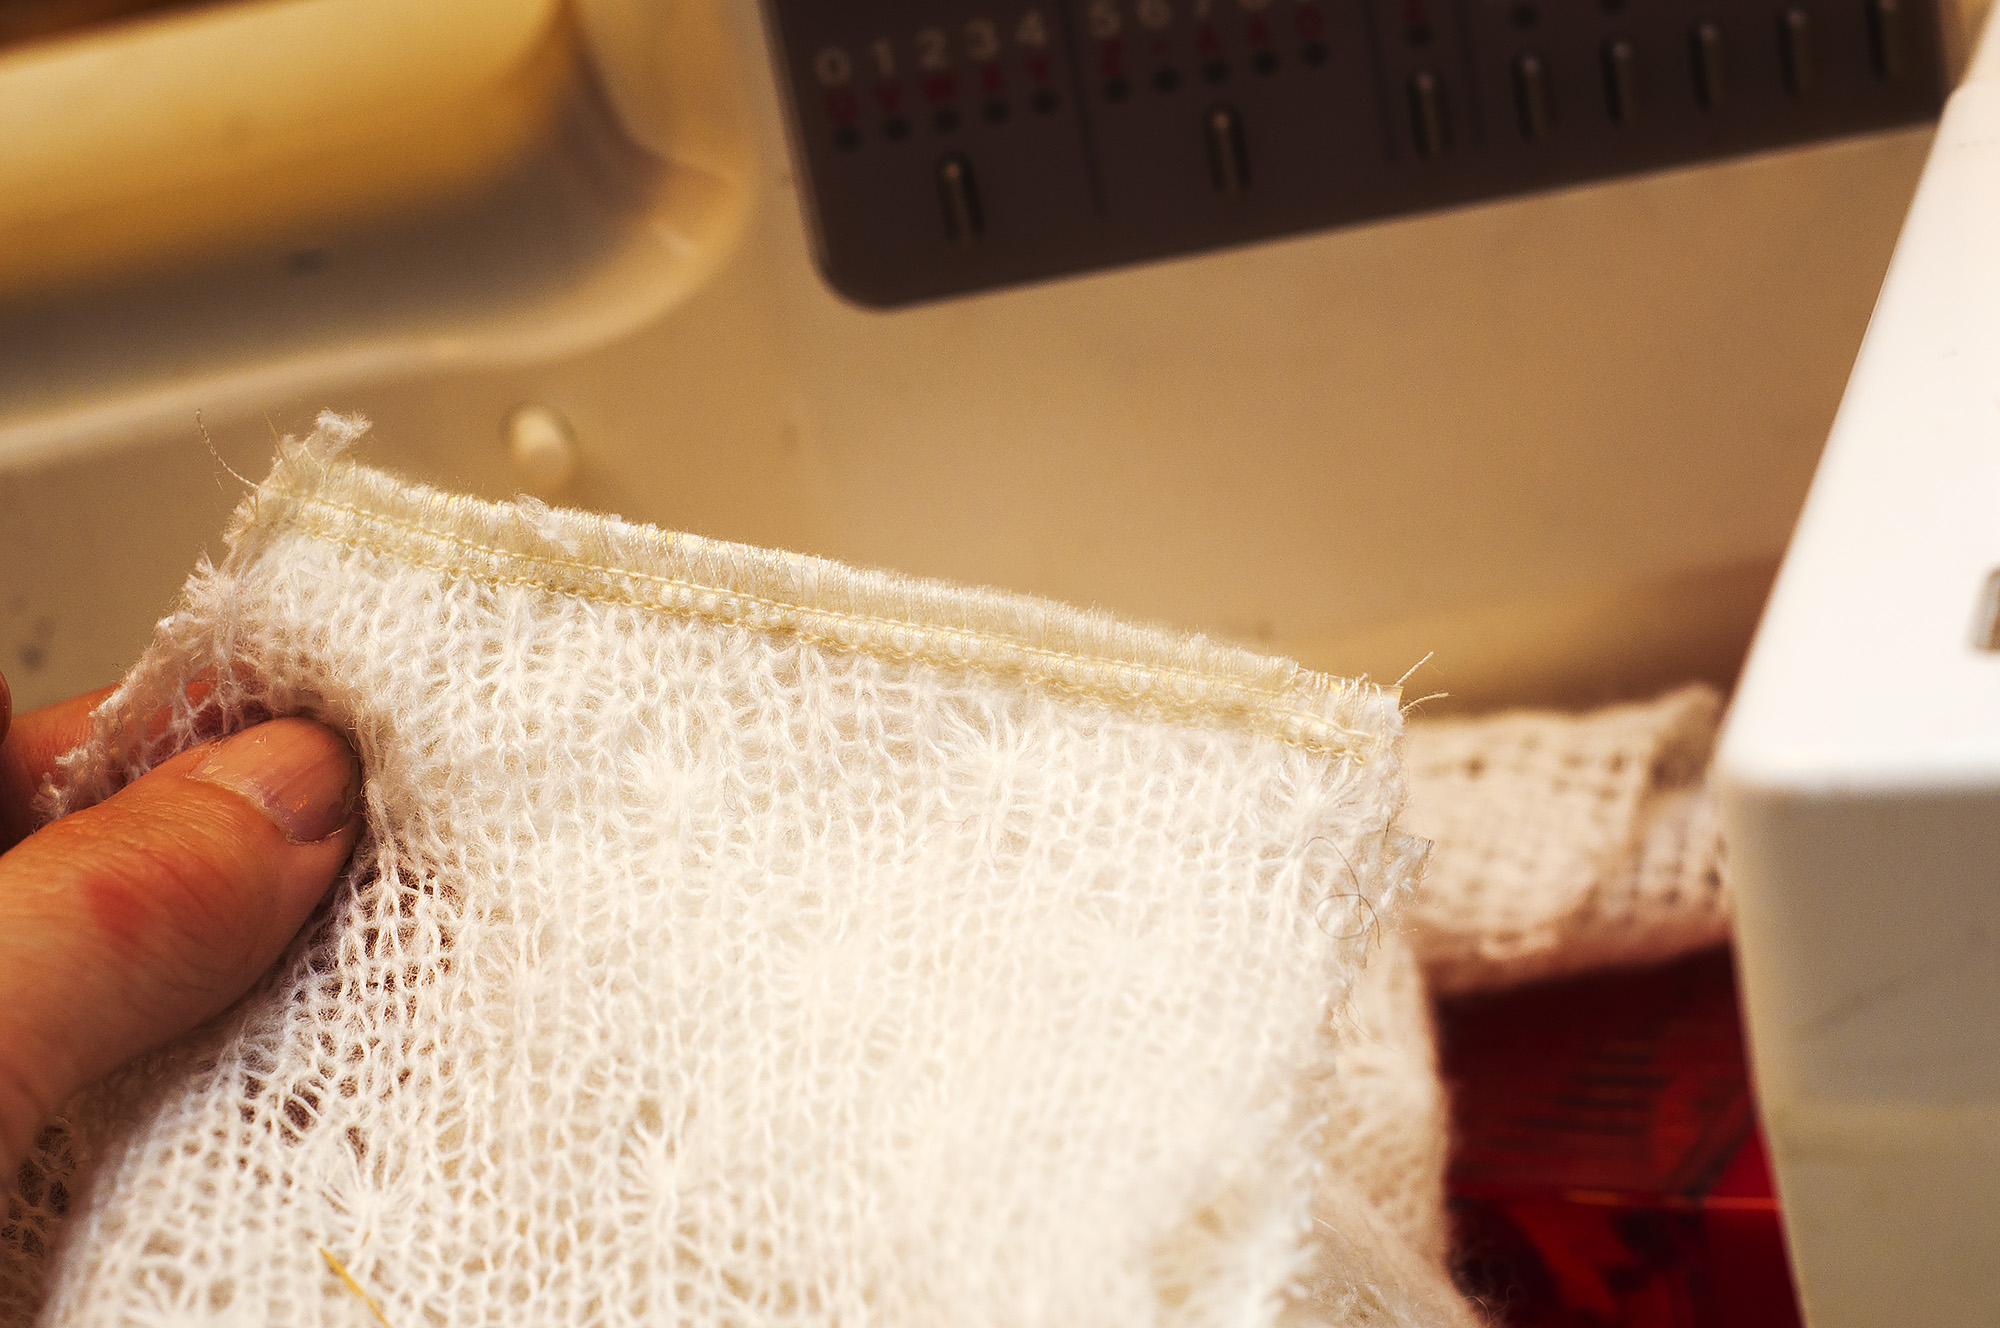
Since my cardigan knit fabric stretches the minute it leaves the cutting table I used the pattern piece as my guide. Then with a pencil I marked the corresponding notches on the elastic.
Step 2. Prepare the elastic so it won’t slip
Here are a few suggestions:
- Attach the elastic to the fabric with a few zigzag stitches at the start of the seam before sewing the shoulder seam with a serger (on the back piece, see below). A little hand stitching will also do.
- If you have a serger, the presser foot can sometimes have a slot for narrow elastic
- Use glue stick to keep the elastic in place
- Don’t cut the elastic before sewing, instead leave plenty of extra so that you can hold the elastic while sewing
- If all else fails, use a teflon coated presser foot, it will keep it from sticking.
Step 3. Sew the shoulder seam
The elastic should be attached on the back bodice piece, so that when you press the shoulder seam to the back you won’t see or feel the elastic. Hold the elastic to keep in place while sewing, but do not stretch.

Step 4. Enjoy the result
Okay, enjoy might not be the right word! But isn’t clear elastic a pretty great way to stabilise the shoulder in a really discreet way?
5 Comments
Donna
Hi so glad that I came across your article about elastic in the shoulder seam,when I place the elastic on the back bodice shoulder seam, do I place the elastic in the seam allowance,because if I place it on the seam allowance right at the edge, I would have to trim it down,so wouldn’t I be cutting off my elastic? I hope I didn’t make this sound confusing.Thank You For posting this.
Terry Ann Crofts
Ordered your ‘Sewing Activewear’ book which I love but now I am really struggling trying to sew clear elastic in the seams of a sports bra. You said in this article to use a glue stick but could I also use Wonder Tape?
Comments are closed.