Feeling intimidated by the sewing machine blind hem stitch. Or are you struggling to get it truly invisible? Then this thorough step-by-step tutorial is for you.
I’m a massive fan of this stitch and use it on everything, including many knit fabrics. In fact, this stitch works like a charm on pretty much anything except thin fabrics. You just need to use the right techniques and settings.
This post contains Amazon affiliate links, meaning that a commission is earned from qualifying purchases.

What is a blind hem stitch?
A blind hem stitch is a stitch that combines a straight stitch or a narrow zigzag stitch with a wide zigzag in even intervals. The wide zigzag catches the inside of the fabric, ideally just a thread, and this will secure the seam while also be practically invisible on the outside.

This post contains affiliate links.
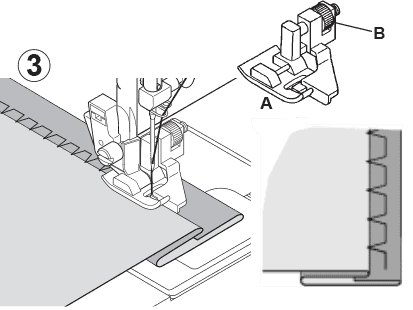
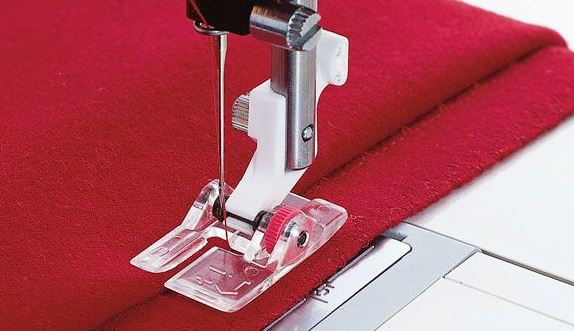
Blind hem presser foot
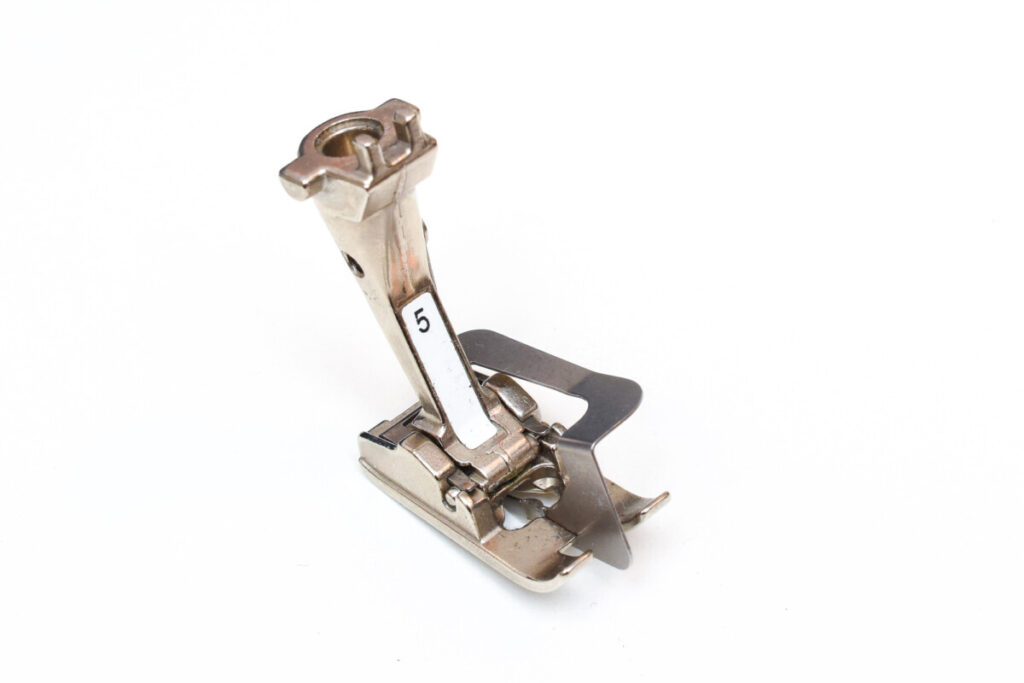
To perfect this stitch I highly recommend using a blind hem presser foot. Most, if not all sewing machine brands have this foot, and it’s often included in the toolbox that comes with the machine.
While they can look a bit different depending on the brand, the principle is the same; you align the folded fabric with the built-in edge guide which assures that the zigzag stitch catches the right amount of fabric on each stitch.
Fabrics and garments suitable for the blind stitch
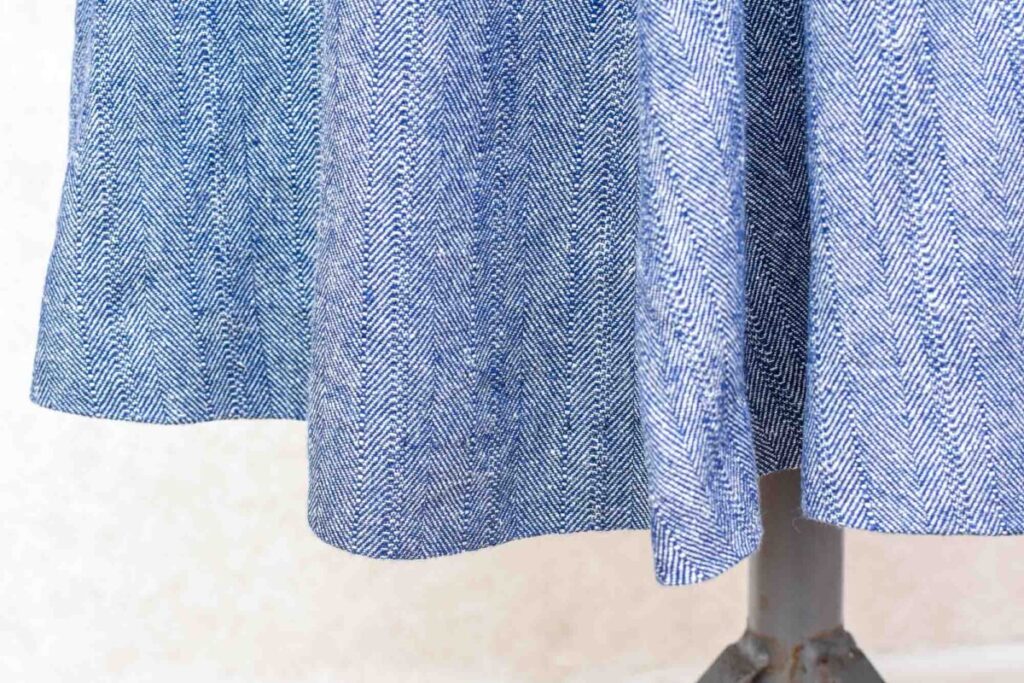
Works best on medium to heavier fabrics
- Twill
- Suiting
- Denim
- Double-faced fabric
- Coat fabric
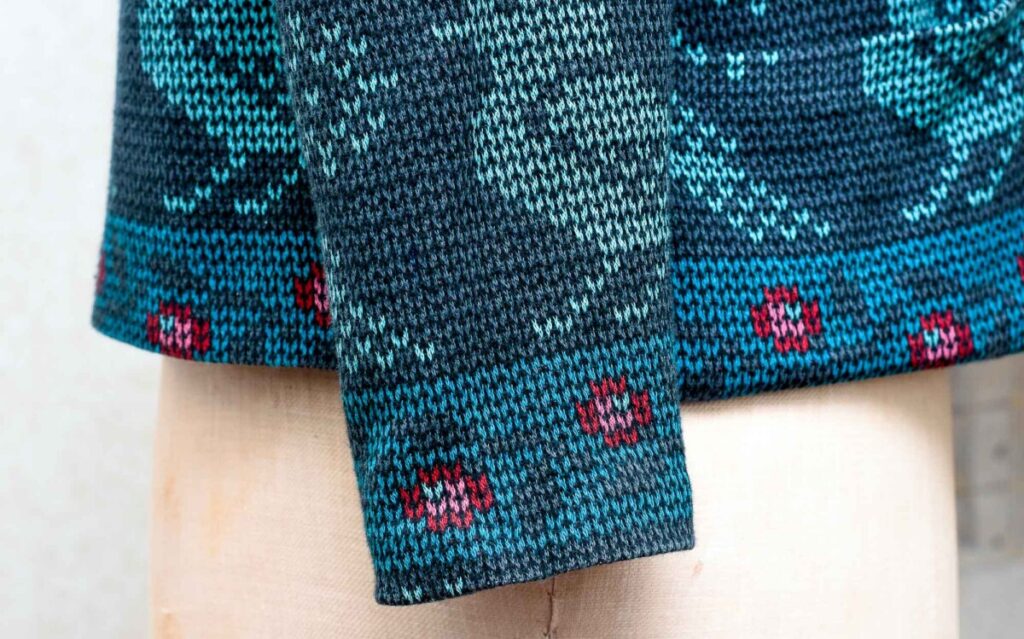
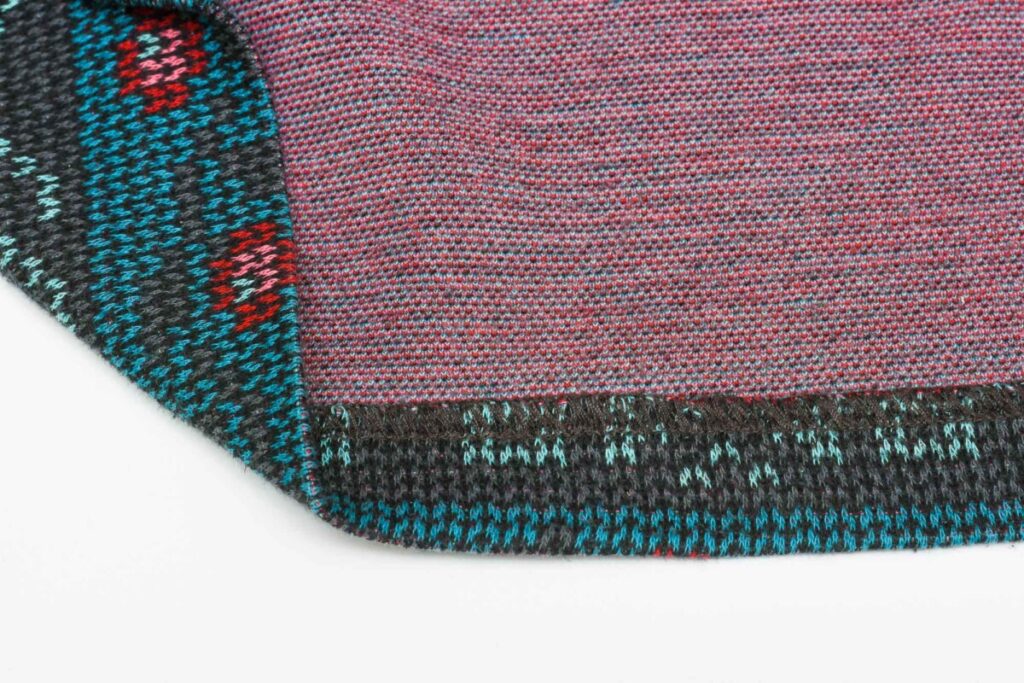
- Rib-knit
- Sweater knits
- Double knits
- Sweatshirts fabrics
Uses
- Tailored jackets
- Pants
- Skirts
- Dresses
- Curtains
- Sweaters
- Cardigans
Not suitable for
- Thin jersey knits
- Silk fabrics
- Shirting
- Blouse fabrics
- Chiffon
- Silk velvet (can work but you risk snagging the fabric)
Pros and cons with a blind hem stitch
Pros
- Durable
- Quick
- Can be completely invisible
- Can be used on knits
Cons
- Hard to get 100% invisible on certain fabrics
- Doesn’t work on thin fabrics
- Takes practise to fully master it (but that is true for most things in life)
How to stitch a blind hem on a sewing machine
You’ll need
- Blind hem presser foot
- A sewing machine that can sew a blind hem stitch
- A magnifying lamp (optional, but super helpful)
- Iron for pressing
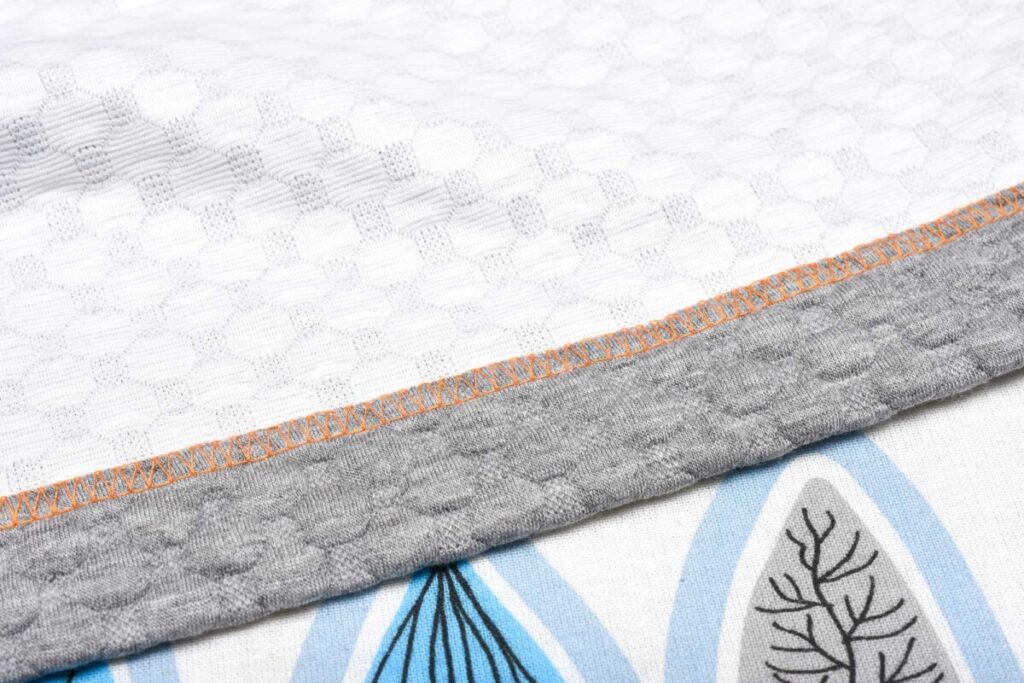
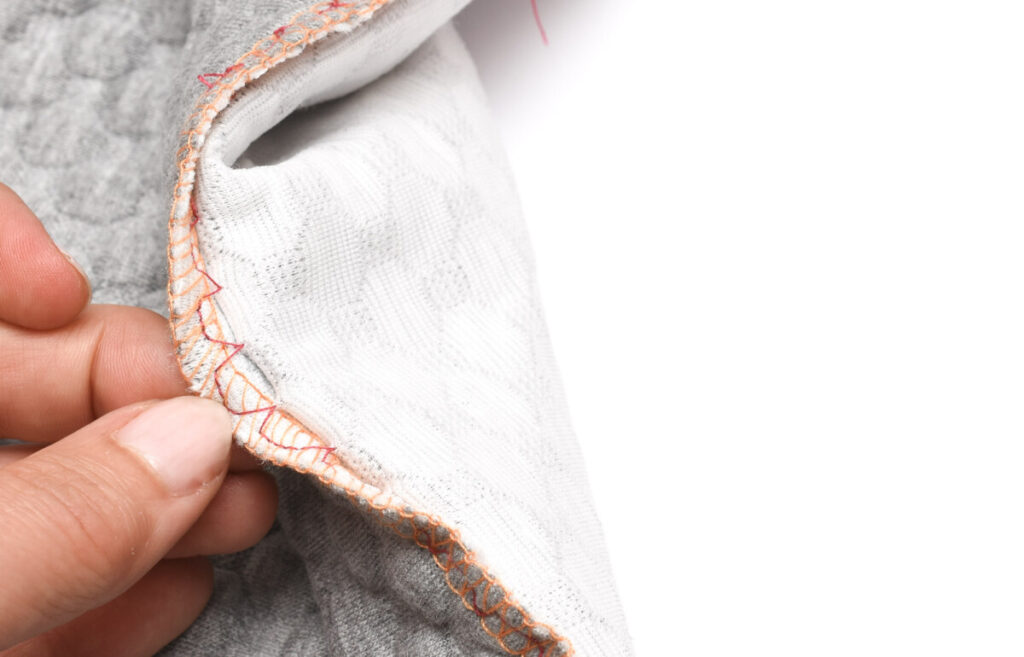
1. Overcast the edges
Use a regular zigzag or a 3-thread wide overlock if the fabric is prone to fraying since a regular blind hem stitch is not enough to overcast the seam. When hemming knits, you can skip overcasting. However, if you have a serger I highly recommend that you overcast the knit fabric hem 3-thread wide overlock and increase the differential feed slightly, this will prevent the fabric from stretching out.
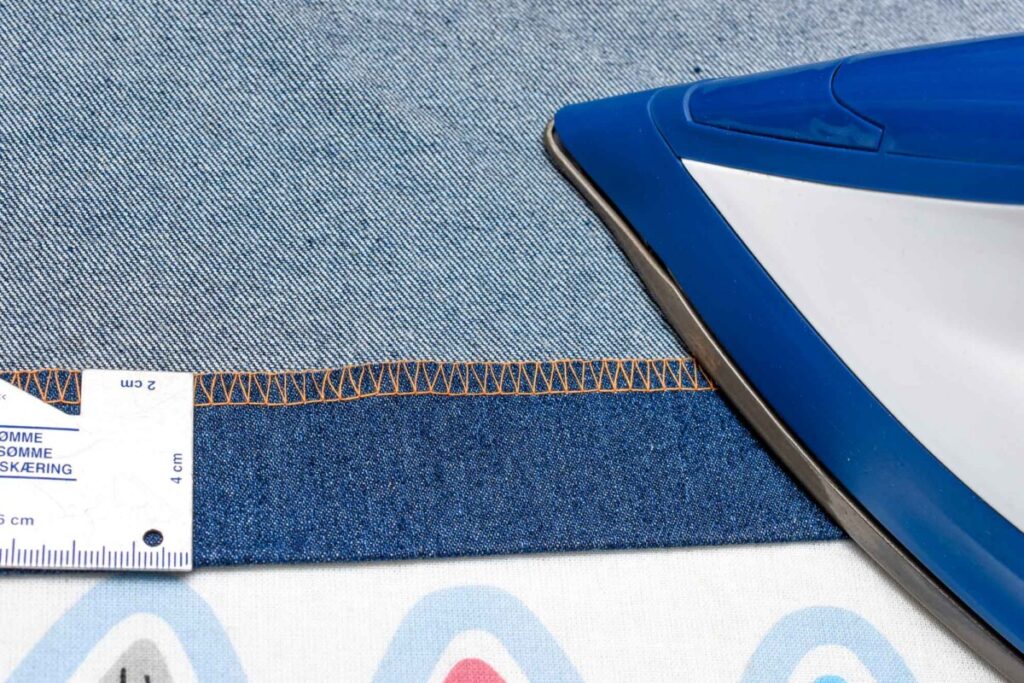
2. Press the hem
Fold and press the hem like you normally would, but remember that a blind hem stitch is best suited for wider hems, such as 25 mm (1’’) or more.
3. Fold open the outer layer hem
Fold the outer layer back so that only a 6 to 10 mm (¼–3/8) extension remains on the inner edge. This area is where the lower part of the blind hem stitch will be positioned.
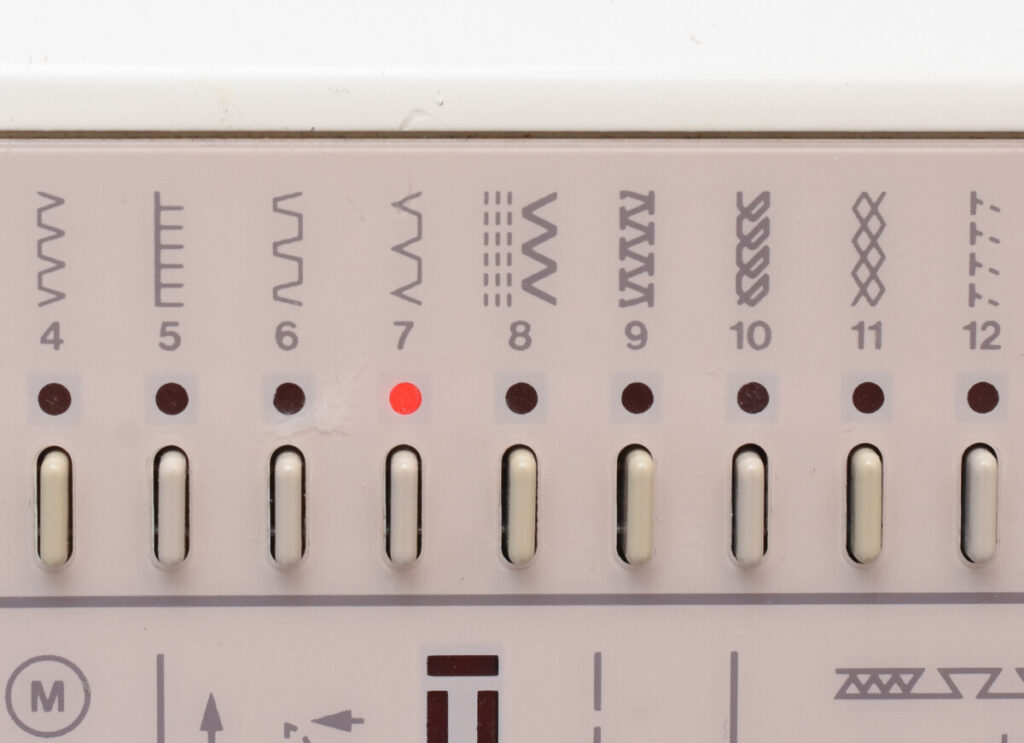
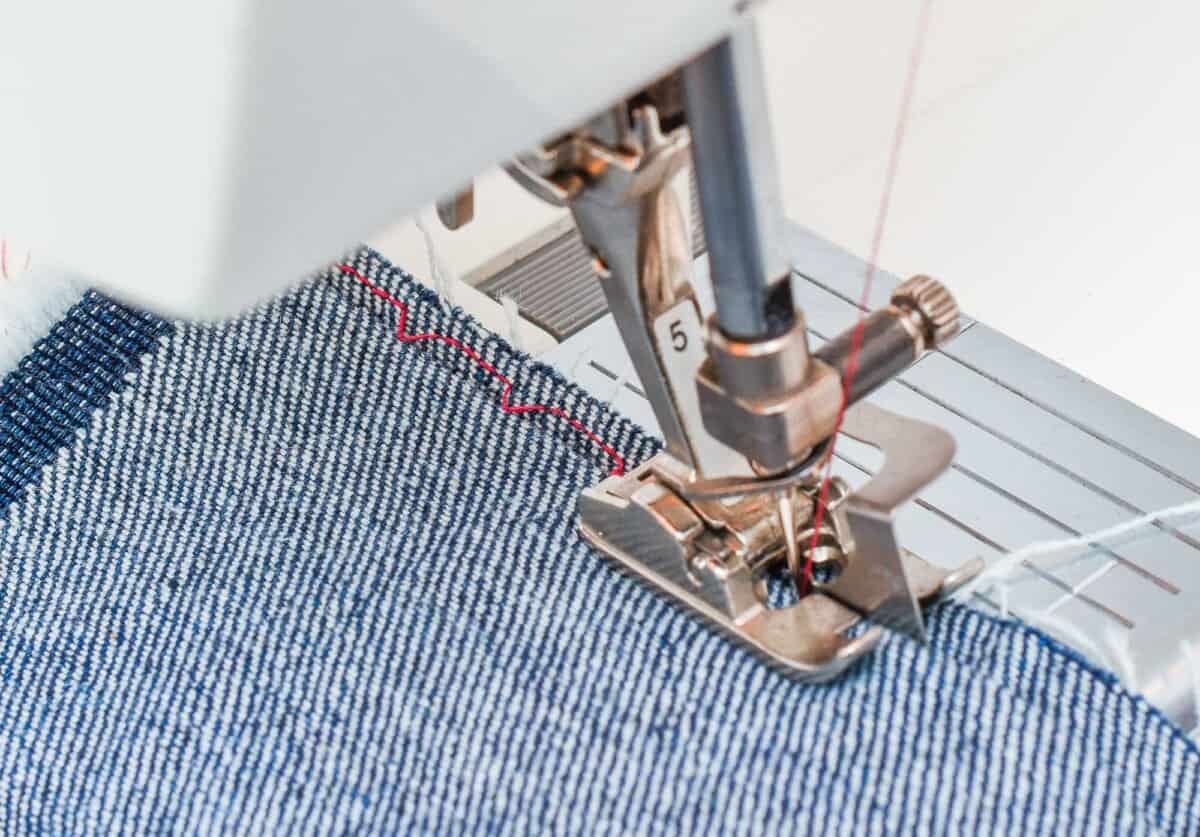
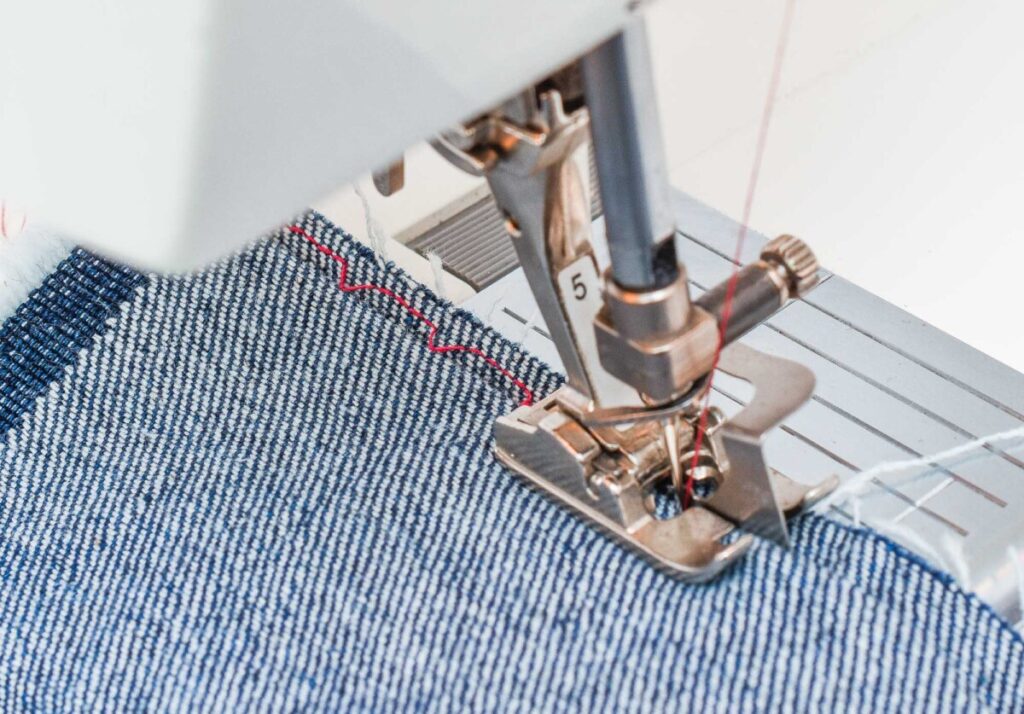
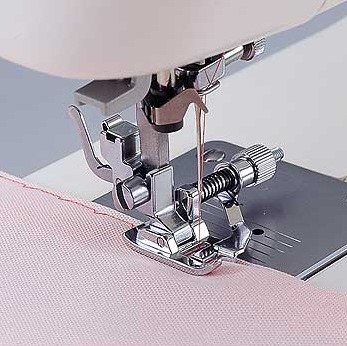
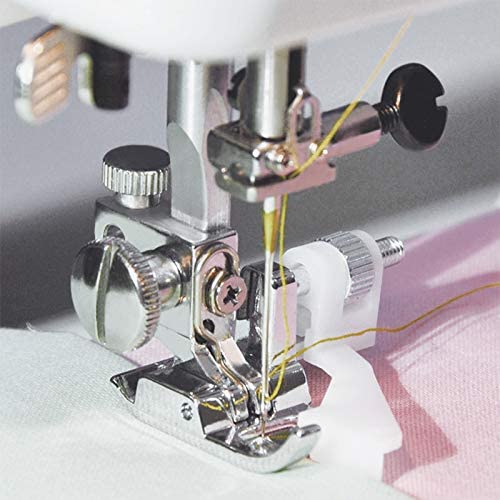
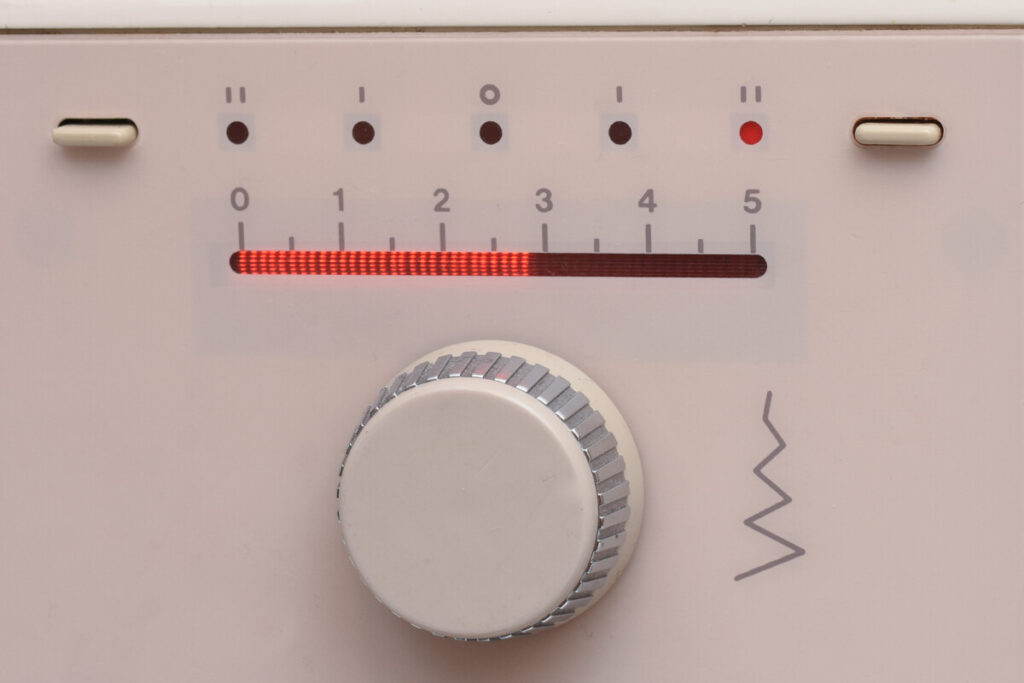
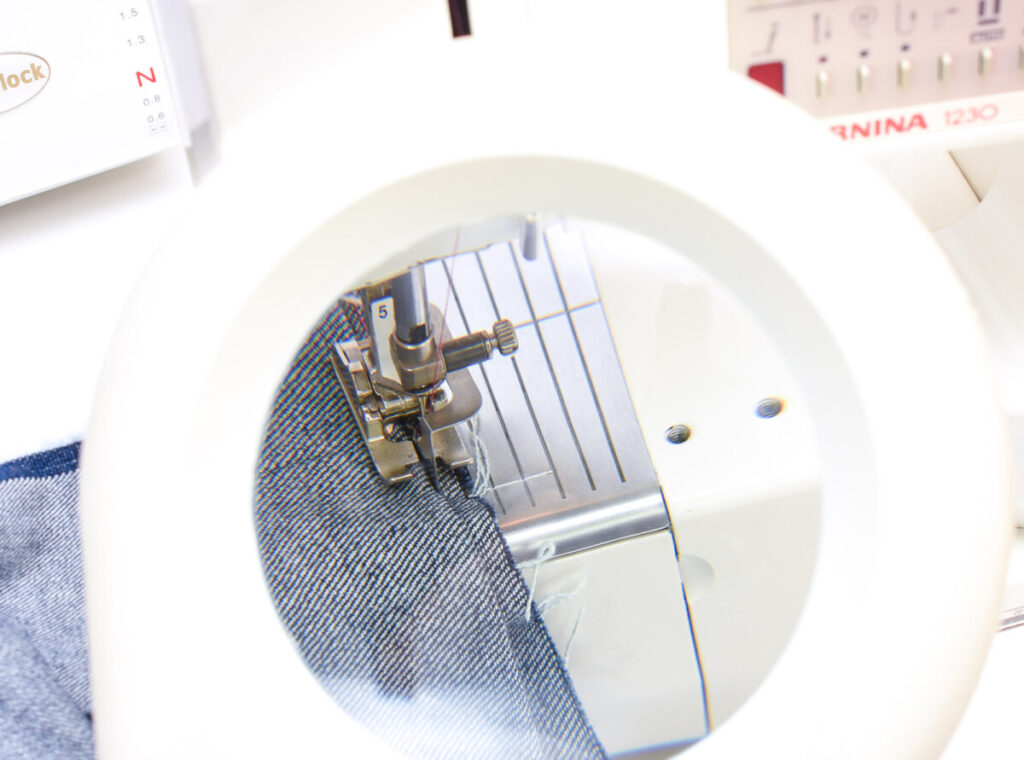
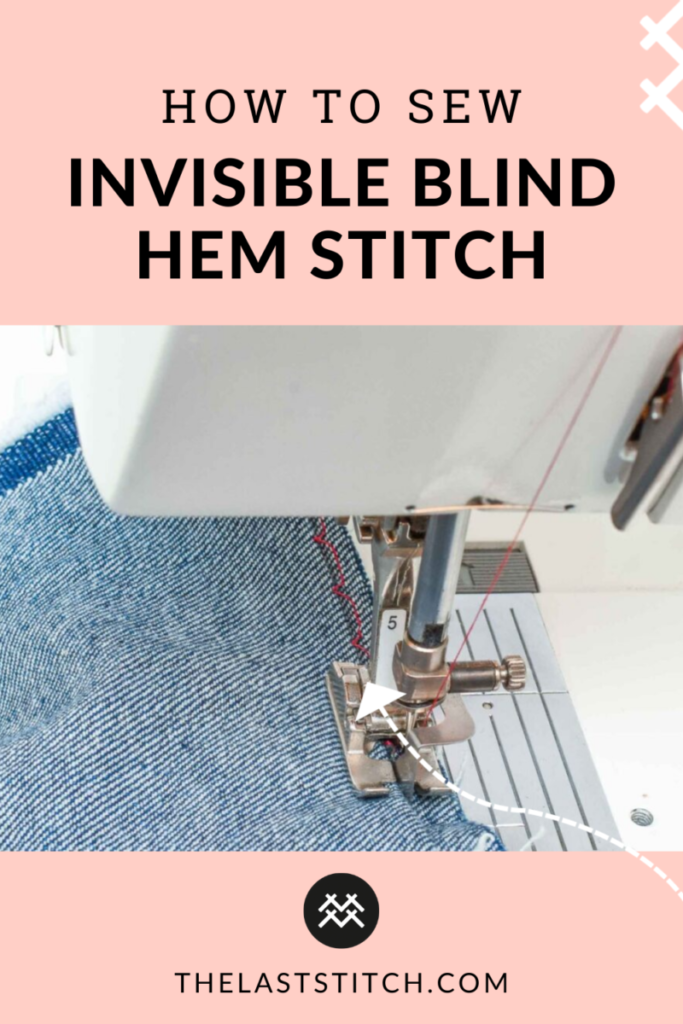
4. Set your machine up for blind hem stitching
Check your manual for recommended stitch settings, but be prepared to adjust them after you’ve done a sample. Insert the presser foot
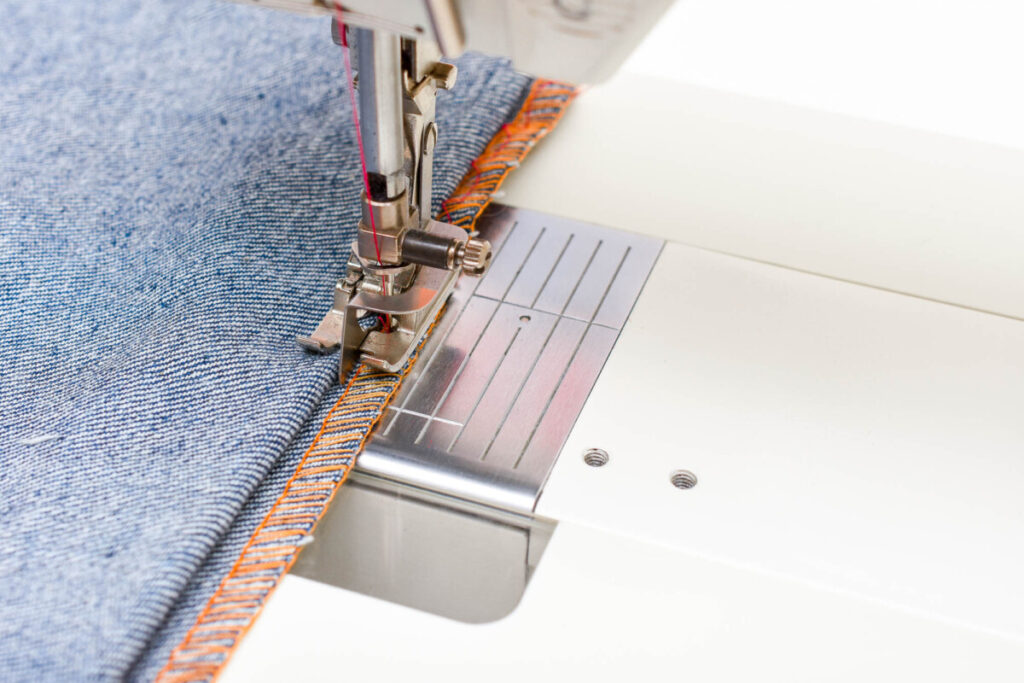
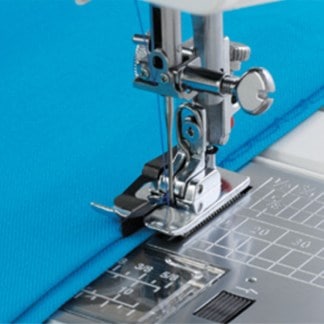
5. Align the fabric with the presser foot guide
The fold should align with the blade, make sure there is no gap or that the fabric is scrunched up towards the blade. It should rest along the blade, but not be pressed against.
Tip: If you use a narrow extension ( 6 mm/ ¼”) you can align the edge of the presser foot with the edge of the fabric. This way, the seam will be even more even
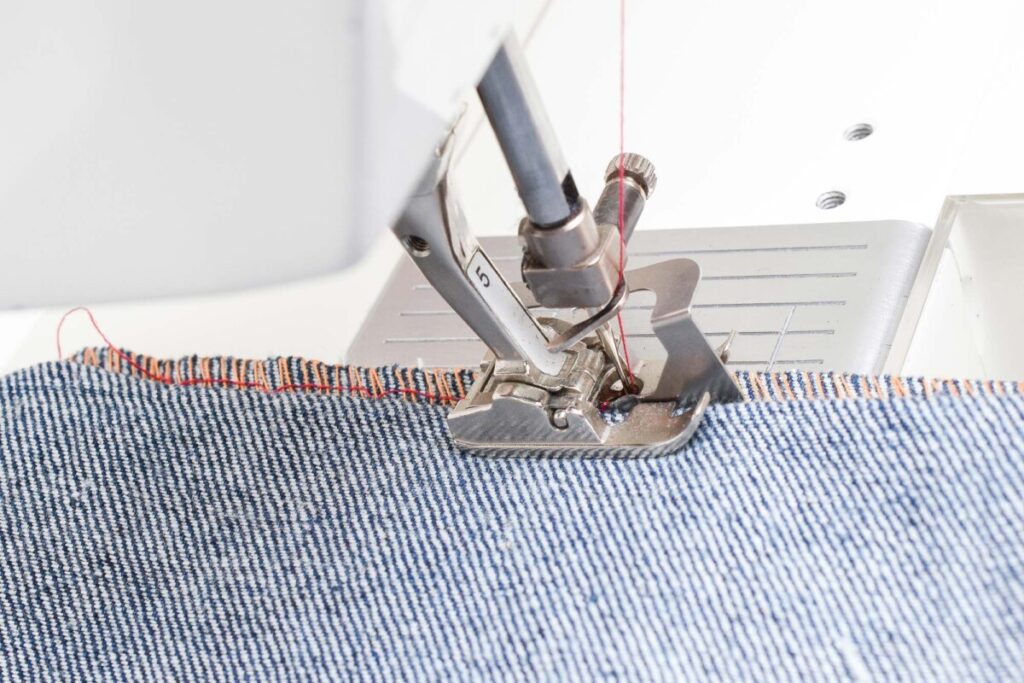
6. Do a sample to test the settings
This is so important since you can’t assume that the recommended settings will work for every type of fabric.
If the needle catches too much fabric: Decrease the stitch width (very minimally)
If the needle misses the fabric: Increase the stitch width

If you want a more durable hem: Decrease the stitch length so that more stitches catch the fabric
If the stitching on the right side is still visible despite your best effort: Increase the stitch length slightly so that the stitches are more spread out.
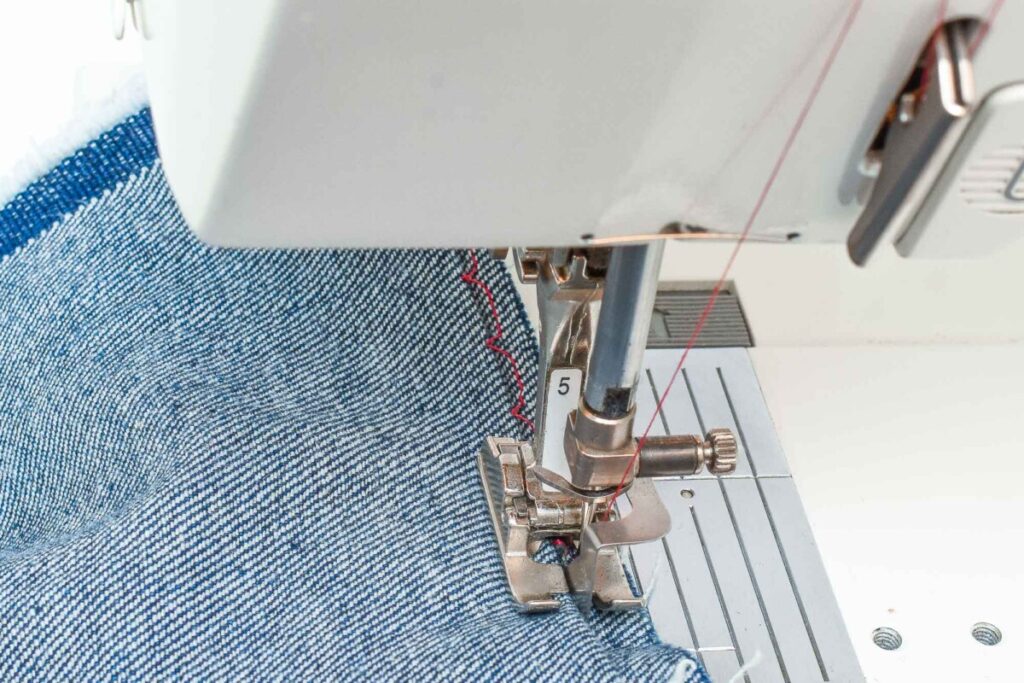
7. Start hemming your garment
Align the fabric according to the instructions in step 5. No need to backstitch if you are sewing on the round, let the stitch overlap and secure once the seam is finished.
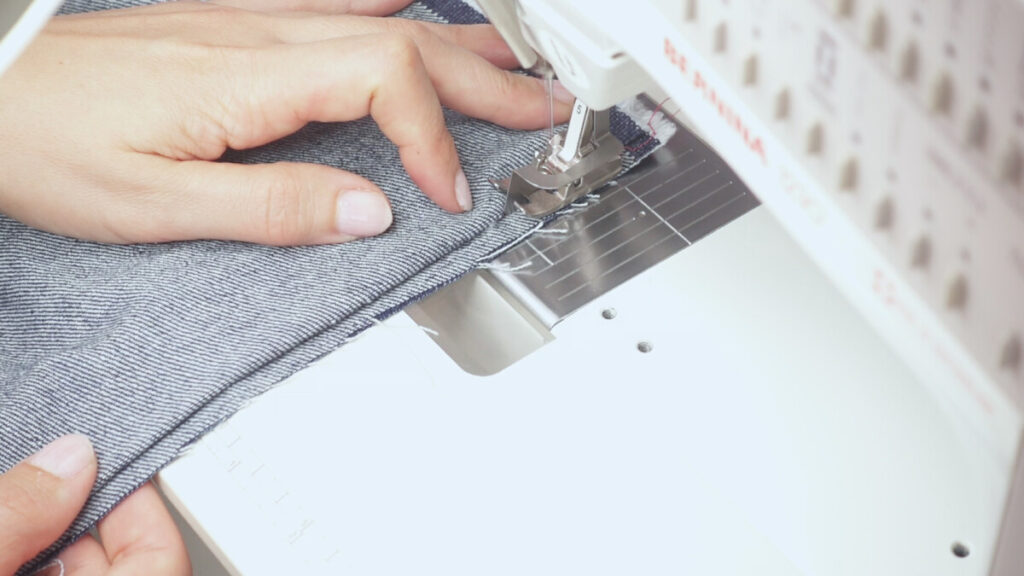
8. Use both hands to keep the fabric in check
Your left hand guides the fabric gently and use the right hand to pinch the fold.
9. Use a magnifying lamp for precision sewing
This is one of my best sewing investments, and it’s extremely useful when sewing a blind hem stitch. With this tool, you’ll be able to see every stitch up close, even on darker fabrics. Mine is from Prym (discontinued I think) but the magnifying lamps from Brightech (Amazon affiliate link) have gotten rave reviews so I feel confident recommending them as a substitute.
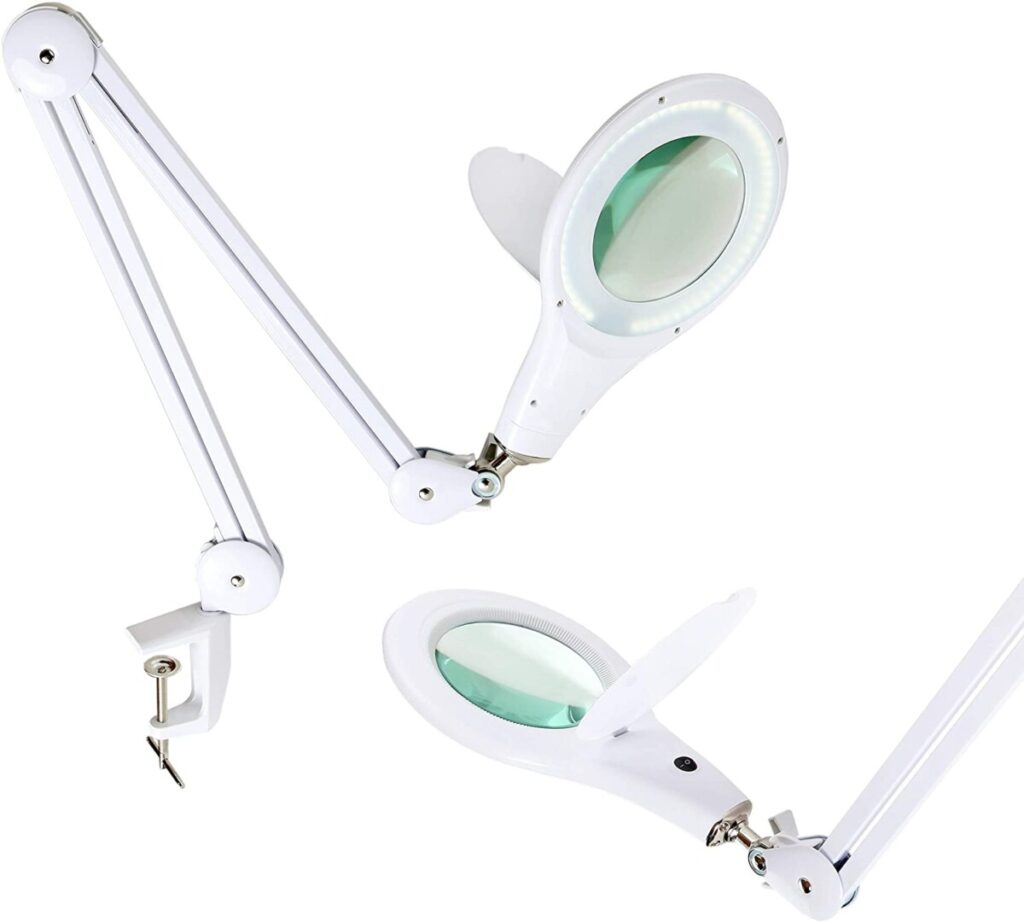
Magnifying lamp from Brightech (Amazon affiliate link)
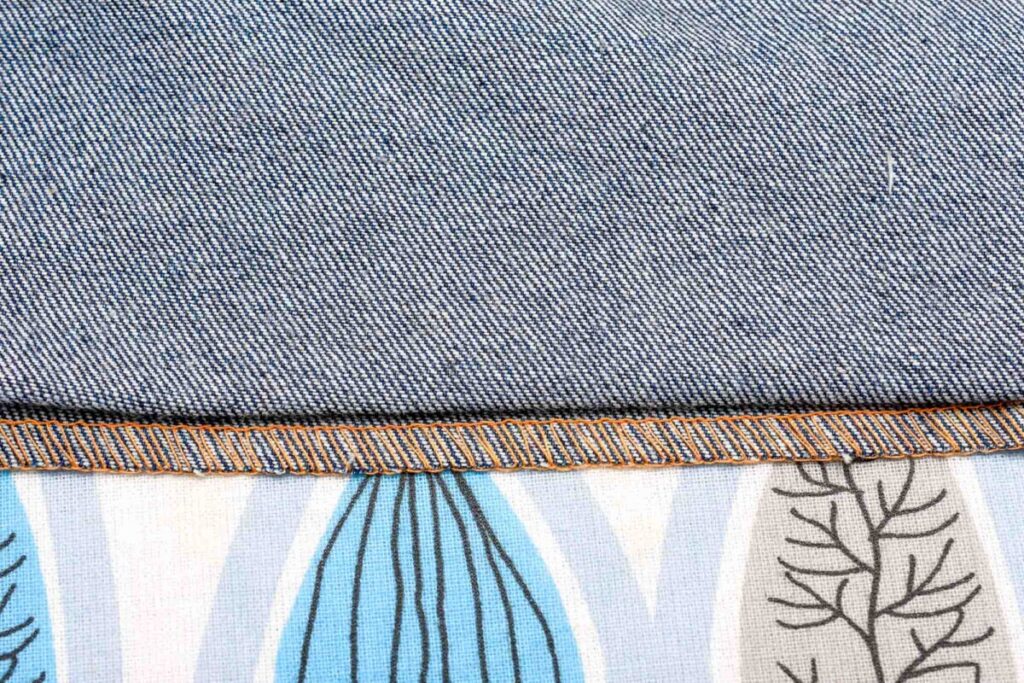
10. Inspect the hem
Check that the needle has caught the fabric around the entire hem. Pull to make sure it’s secure. If you missed a few spots, just restitch that area.
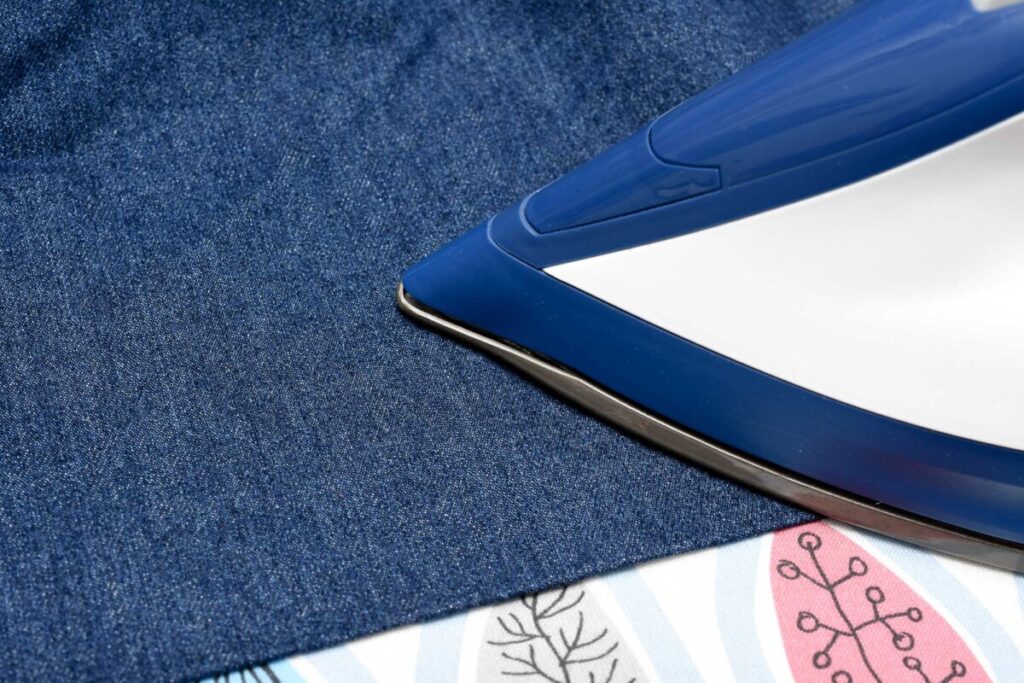
11. Press the hem to smoothen out the ridges
You’ll likely get some ridges/pits where the stitch caught the outer fabric. A pressing with the iron will usually smooth out that area.

Want to learn even more about how to perfect the blind hem stitch?
Then watch this video tutorial:
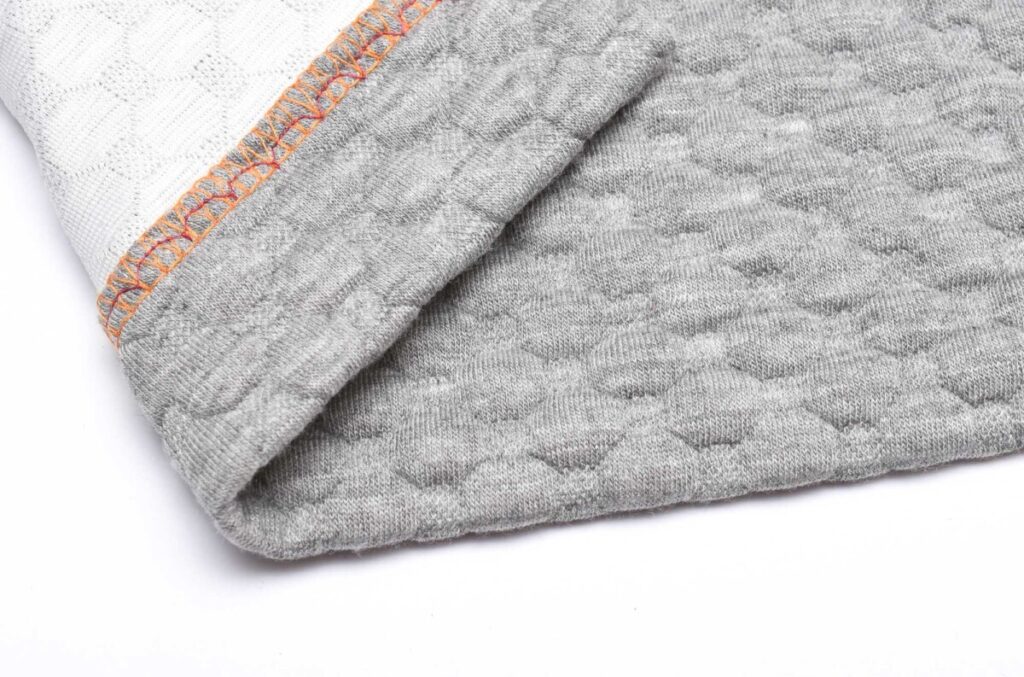
The finished hem
This hem was sewn with purple thread in the needle, but you have to look really close to see any signs of thread on the outside. That said, it can be hard to get the stitch 100% invisible over the entire hem but don’t sweat it. Just use a thread that matches the fabric and no one will ever notice.
Hope this tutorial was helpful in demystifying the processes of sewing machine blind hem stitch. The three key elements, in my opinion, are:
1. The right settings. 2. Focus (don’t let the fabric slip) and 3. Practise . If you can nail those you’ll have a great chance at achieving a truly invisible hem using your regular sewing machine.
This post contains Amazon affiliate links, meaning that a commission is earned from qualifying purchases.
11 Comments
Kerry
Thank you so much for that. When I made curtains I ended up sewing by hand. You have given me the lightbulb moment!
Corey
I think I went thru the same learning process to get good blind hems. I have the setting configured on 2 of bernina sewing machines. I only sew blind hems on my bernina’s since i can get accurate results every time. I have not had success on other machines (like my janome) since i don’t like the adjustable blind hem feet they have.
Audrey Kincaid
I just discovered the joining foot, which looks like the foot you are talking about. This looks fantastic! I’m going to try it. Thank You 😊 !
Barkat
Nice blind stitches. All fabric on blind Stitching good.
Cynthia G Doil
Thank you very much
Savllen
Would this work on anything that needs a invisible stich? I have a bag that needs 2 big invisible stiches on both handles, could this be a possible option to hand sewing a bag?
Comments are closed.