Adding lining to your knit hat is actually very easy. This step-by-step tutorial shows how to add a different lining fabric to my Brisa beanie and Ullvi knit hat sewing patterns or any other knit hat.
The trick is to make some tweaks to the pattern, which boils down to creating a separate outer piece with an extension and then a lining piece that is shorter than the outer piece. This will create an “inner hem” that will prevent the lining from showing, even if you fold your hat.
How to sew lining on a knit hat
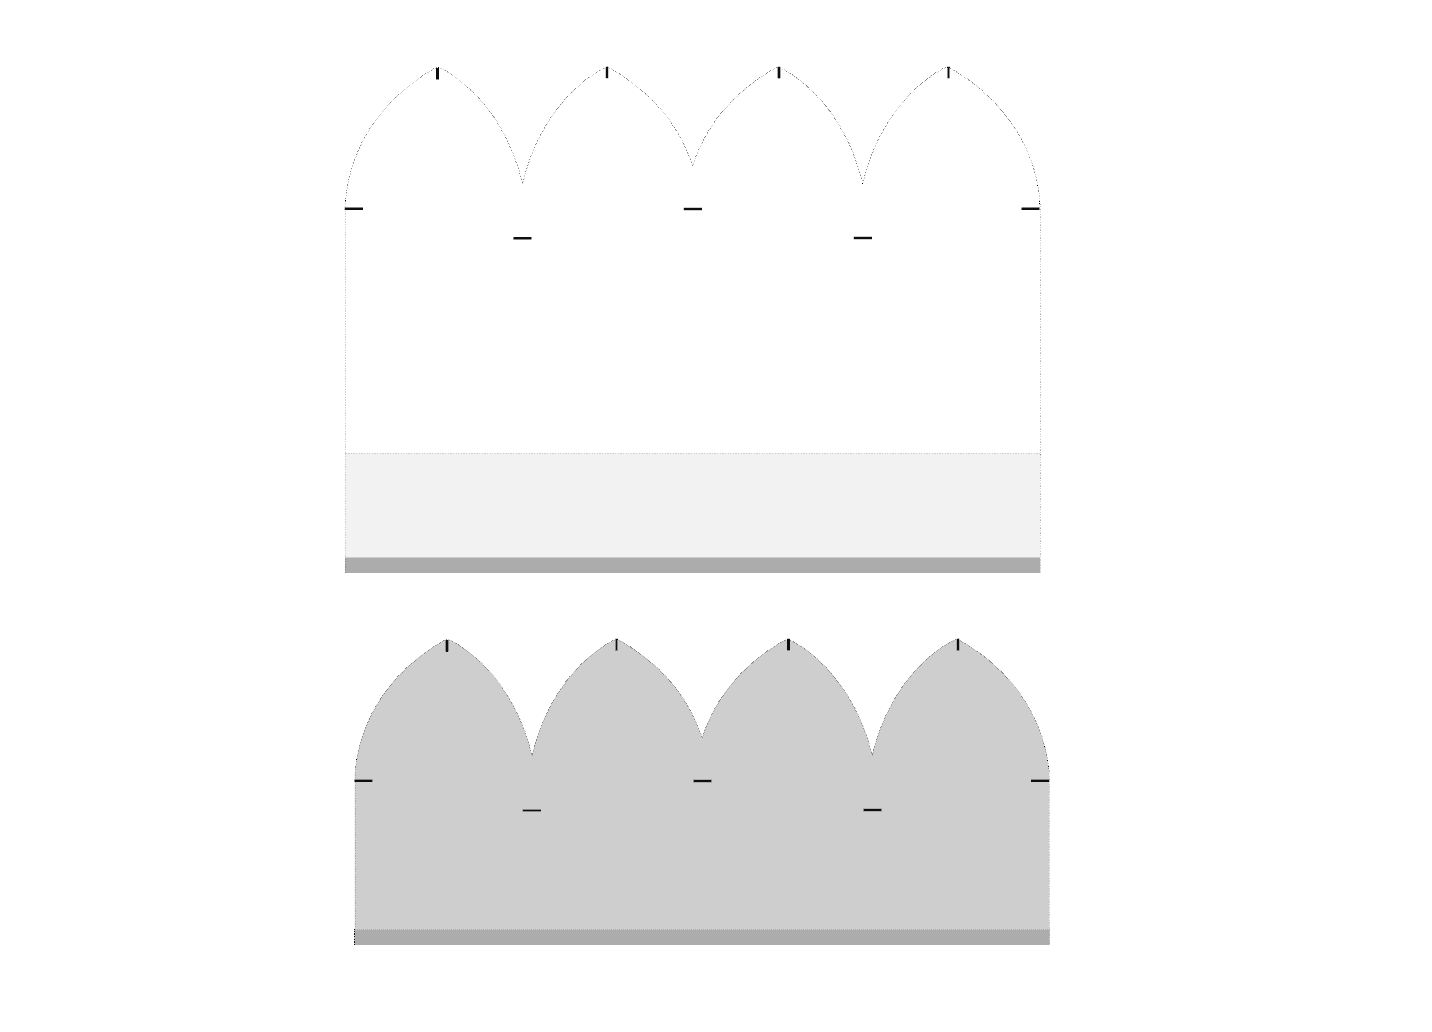
1. Create the pattern pieces
Draft two separate pattern pieces, one that is longer than the original pattern piece for the outer fabric. Then shorten the other piece for the lining fabric so that the combined pieces have the same length as the original pattern piece times two. Remember to add seam allowances to the base to both pieces.
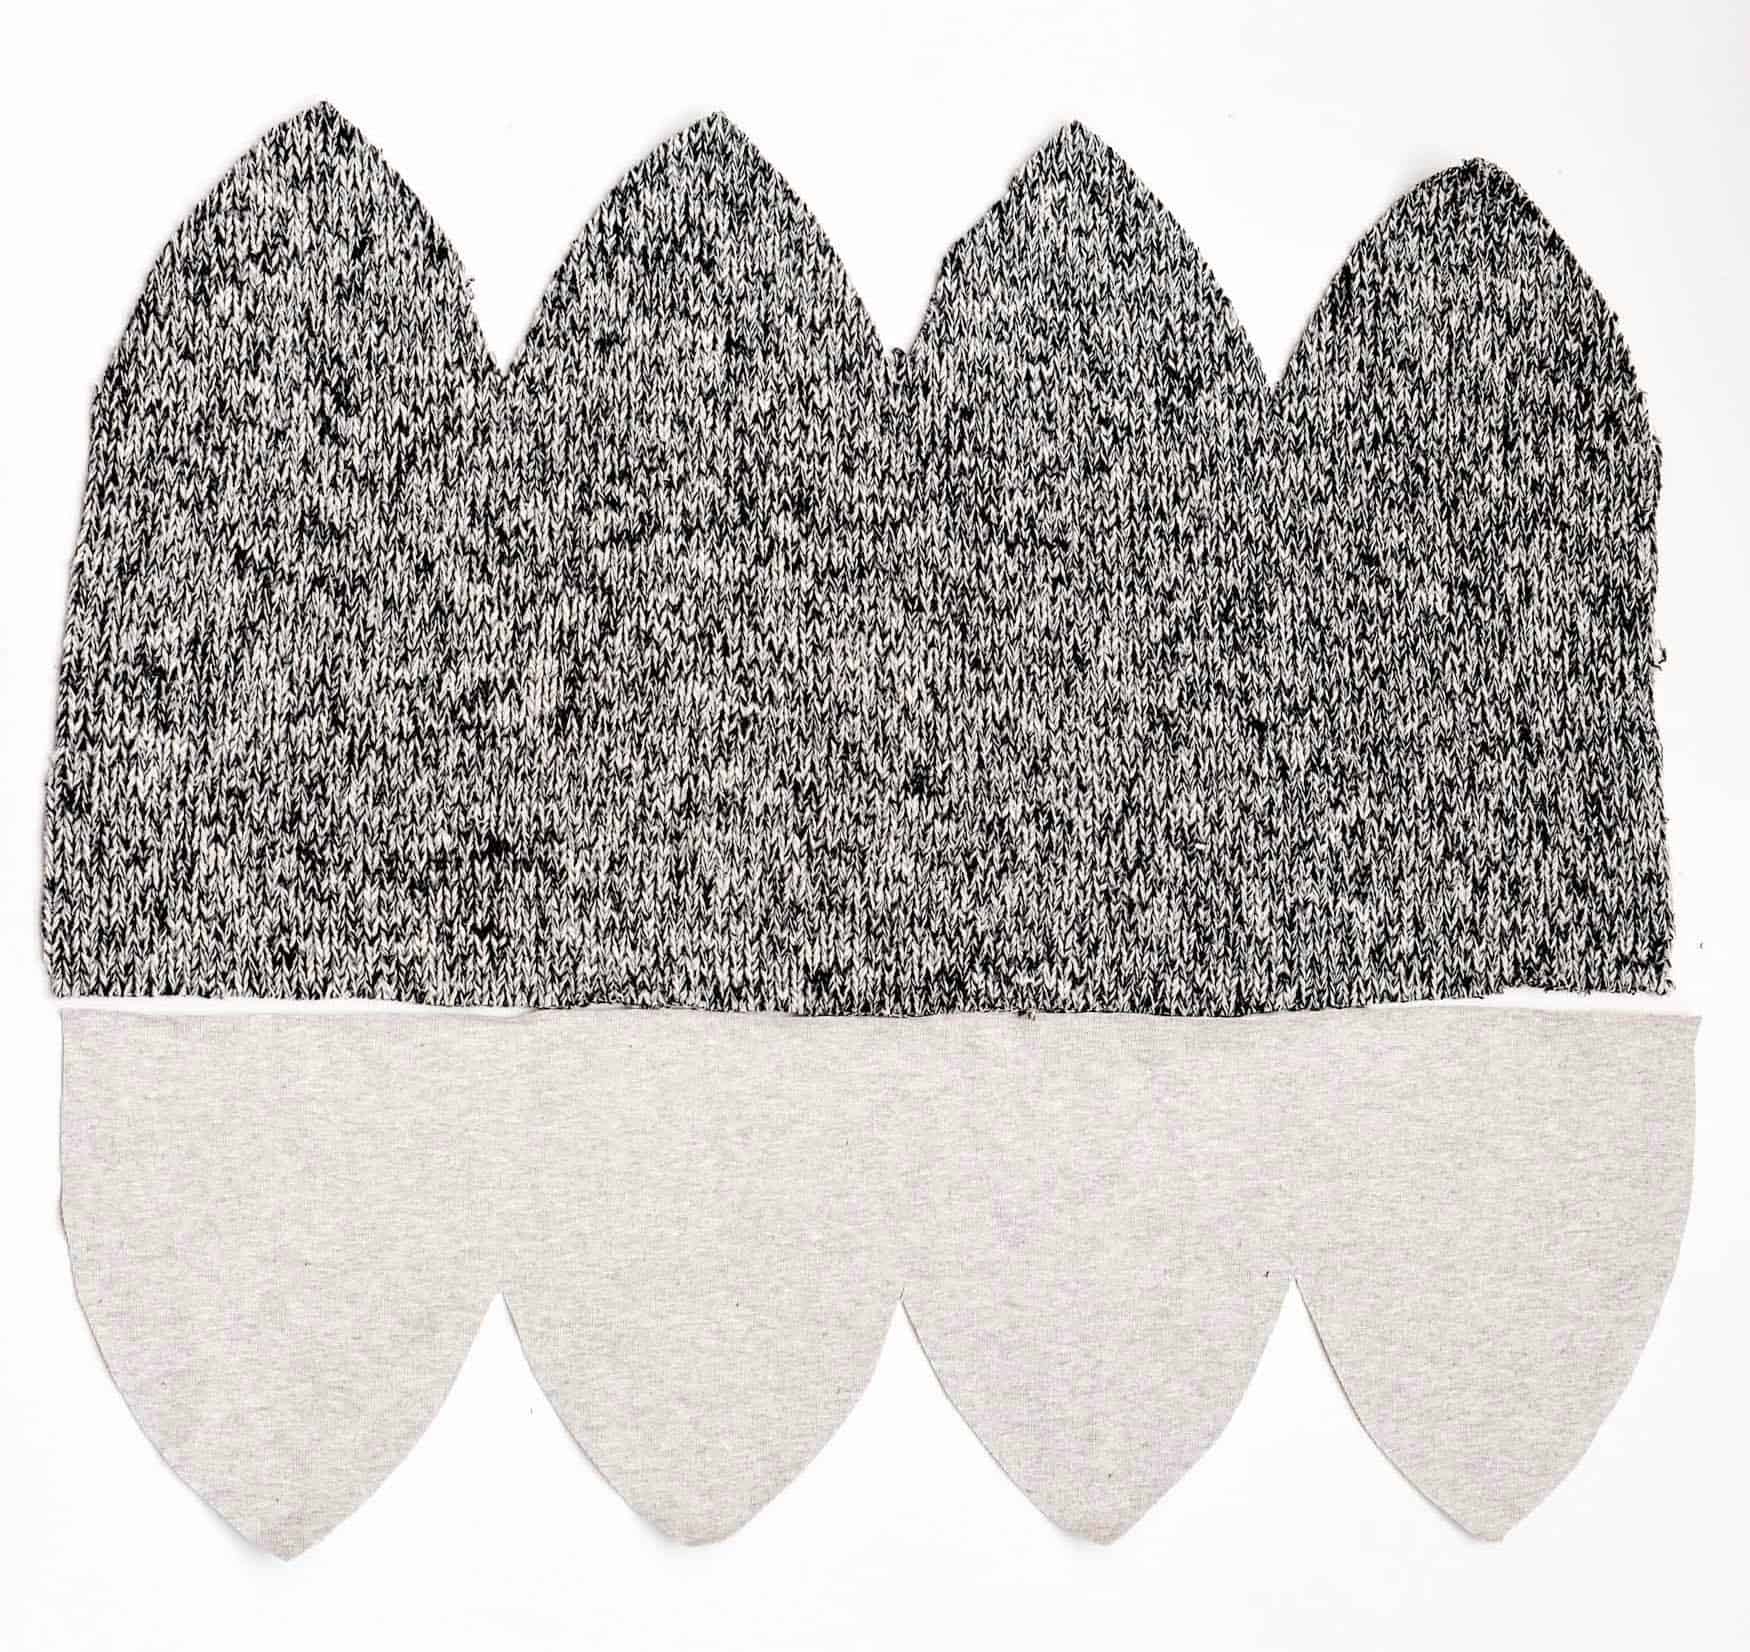
2. Cut the fabric
I like to line my hats with either cotton or wool knit or fleece (for extra warmth). In this tutorial, I’m using a cotton rib knit (and the outer fabric is from an old sweater!)

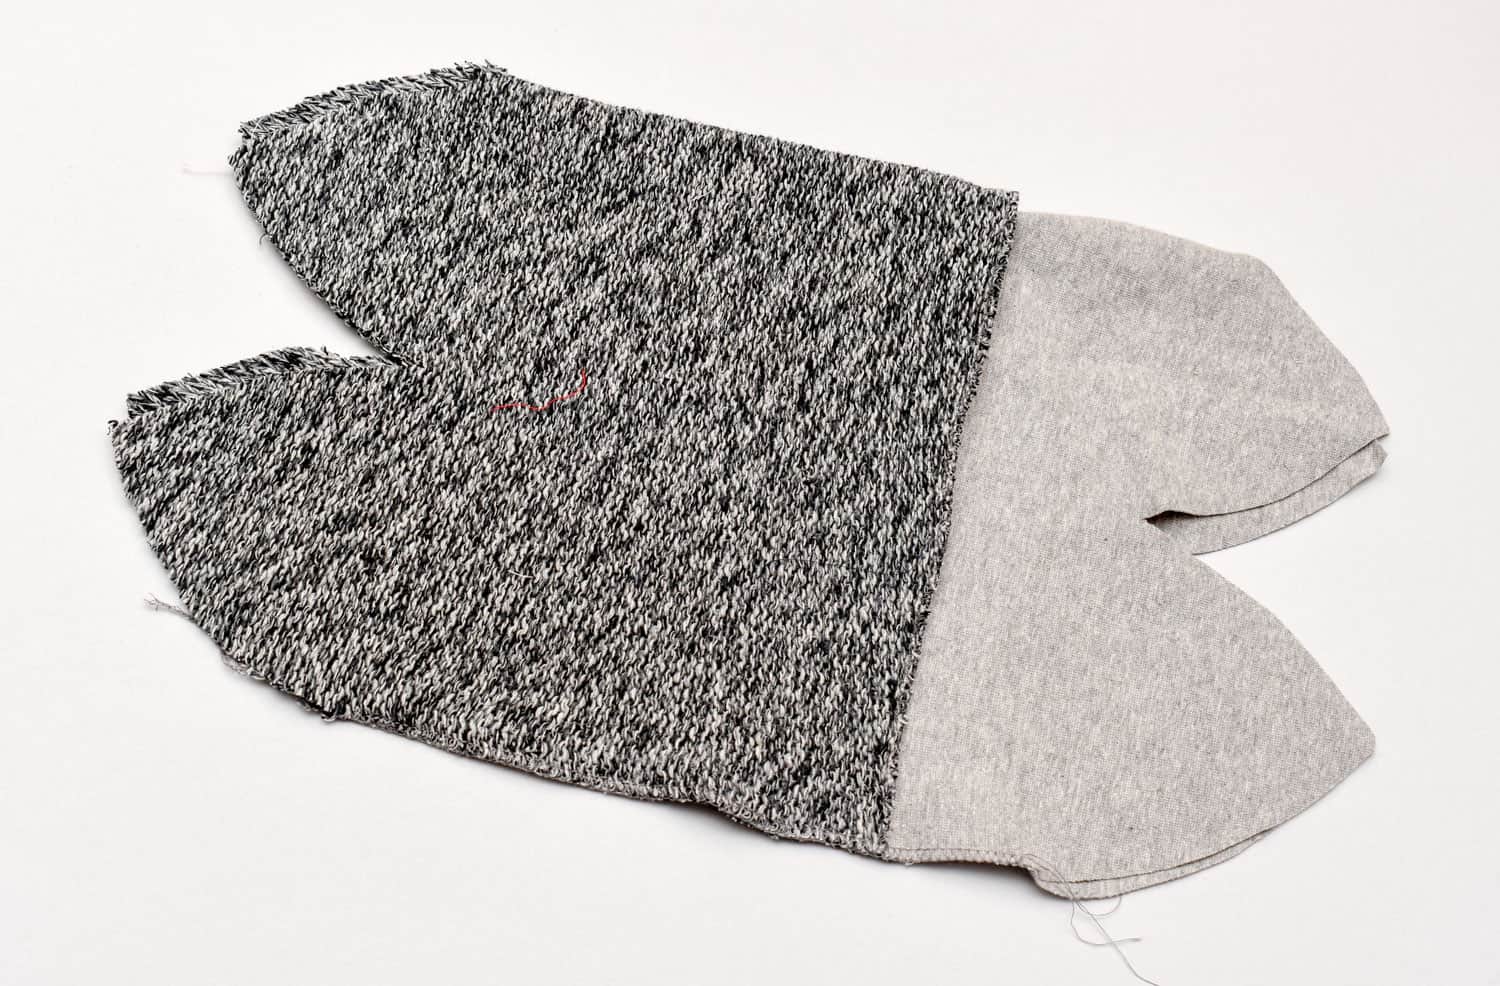
3. Stitch together the pieces
Right sides facing, join the lining piece with the outer fabric. I like to use the 3-thread narrow overlock with a longer stitching length to sew my hats.

4. Sew the knit hat
In the instructions for Brisa and Ullvi I show two assembly methods; no visible seams + the garment industry way. In this tutorial, I’m using the industrial way for clarity, in which you stitch all the layers in one go and the seams are visible on the inside.
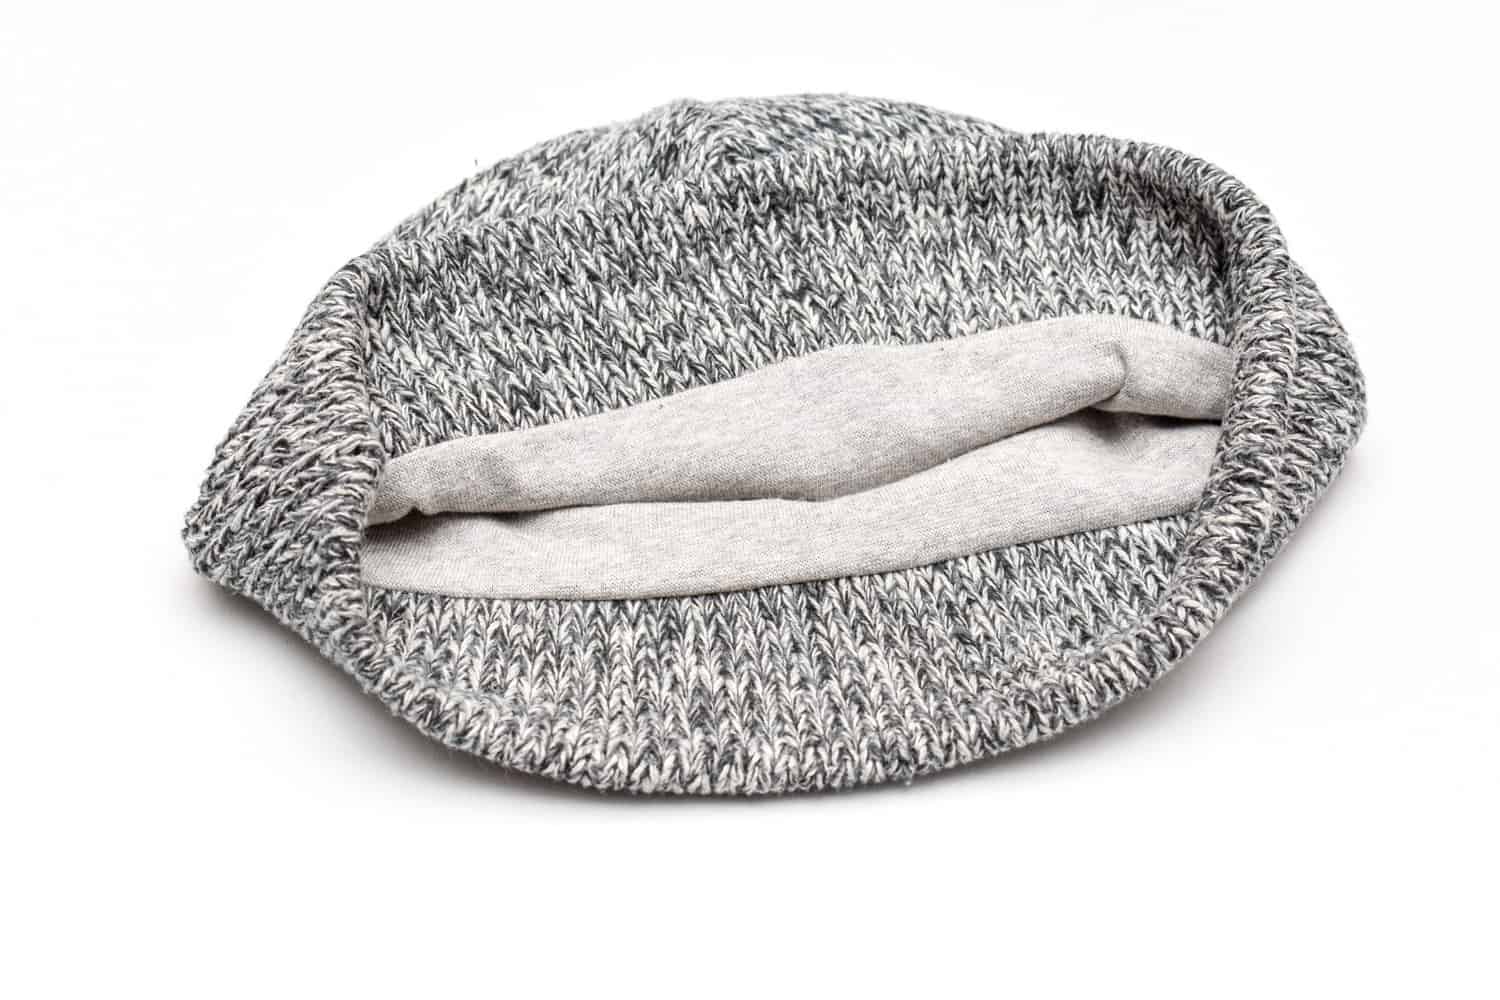
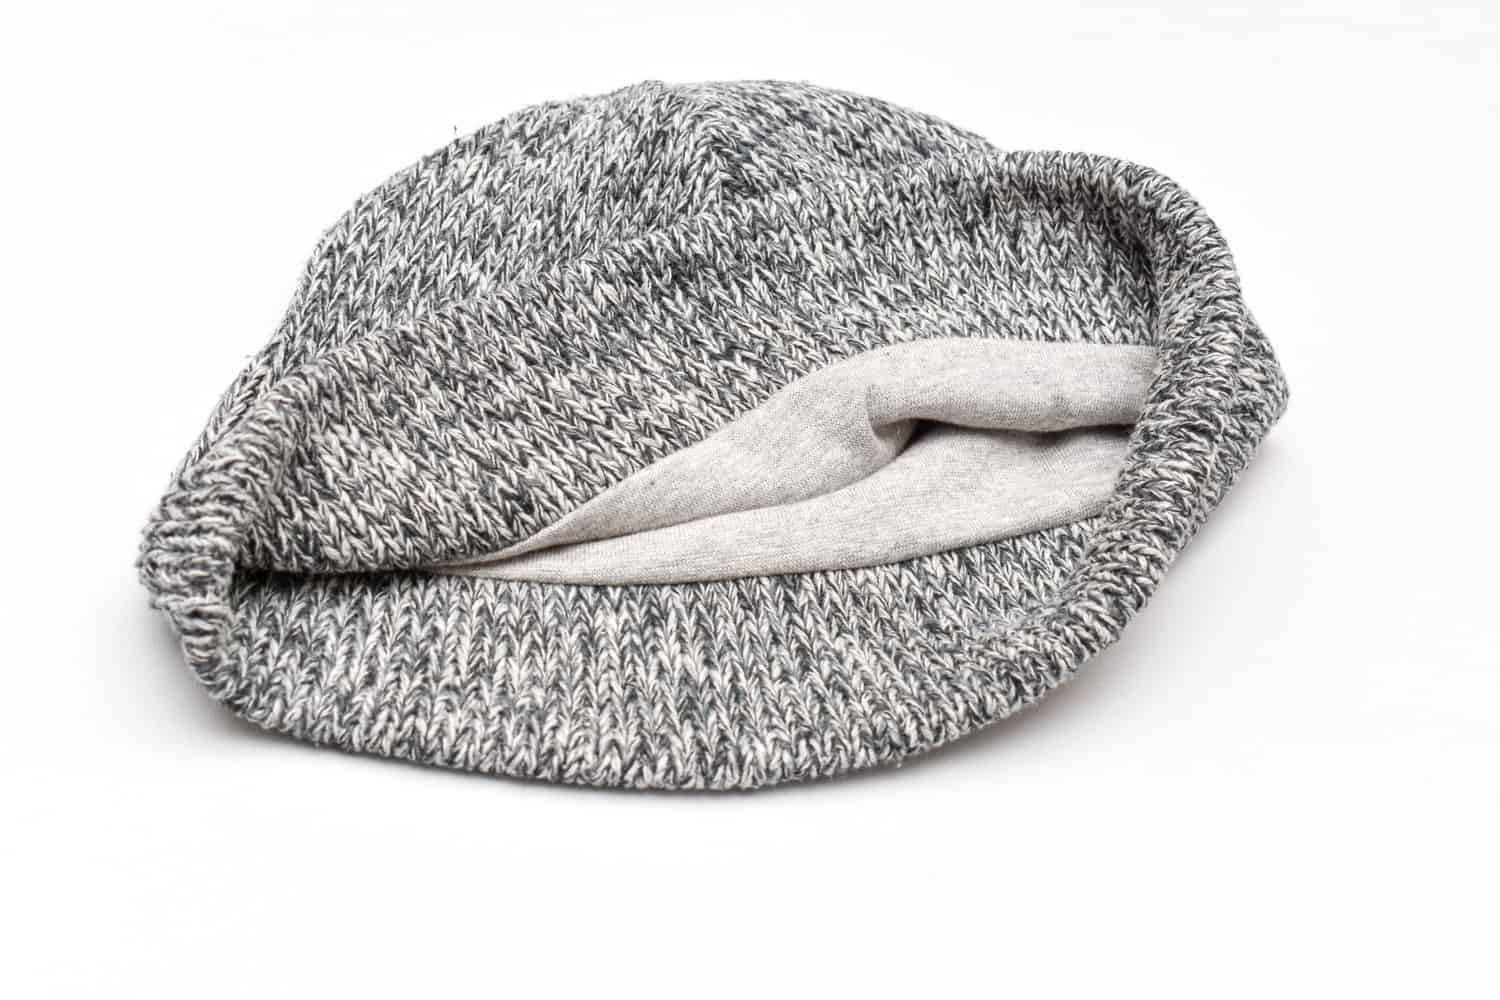
5. The finished hat
This was super easy, right? The only thing that one has to be thoughtful about when adding lining is adapting the pattern so that the lining and outer pieces match up. As you can see, I like a wide hem, since this gives me the option to fold up the hat rim without the lining showing.


2 Comments
COREY
Johanna, i made some additional comments on the jeans post. I would like you to look at
1. looking glass denim, he is sweden and makes jeans using our favorite sewing machine (viking green 21a sewing machine) you will appreciate his construction techniques and he sells his makes/brand
Vhttps://www.youtube.com/watch?v=8Zc91thUF9c
2. watch roman, put together jeans with an industrial sewing machine, he also drafted the pattern from scratch
https://www.youtube.com/watch?v=PLqzzRjVqJ8&t=198s
I think you will learn so much about jeans and denim and construction techniques. These 2 videos are the basis of how i construct jeans.
let me know if you have any question, and let me know what you think. all the best – Corey
Comments are closed.