Use this fail-proof method to construct a curved waistband that looks as beautiful on the inside as on the outside. And it’s all done on the machine, apart from one tiny area where I recommend hand-sewing for an extra beautiful finish.
Notions for sewing a curved waistband
- Fusible medium-weight interfacing.
I recommend using Vlieseline H250 (Amazon affiliate link) or a similar medium, but not stiff interfacing. - Narrow fusible or woven stay-tape, ideally around 1 cm (3/8″) wide (optional)
- Wonder-tape, i.e. a double-sided wash-away tape (optional) (Amazon affiliate link)
- Hand sewing needle for basting.
Preparing the pattern
Seam allowances
To make shaping and sewing easier use a narrower seam allowance on both the waistband and waistline on the pant pieces.
- Edges on waistband and waistline: 1 cm (3/8″)
- Side seams: 1.5 cm (5/8″)
- Front waistband ends (at fly): 1 cm (3/8″)

You might also need to add some extra length at the front waistband if sewing a lapped zipper, especially if using a fly shield.

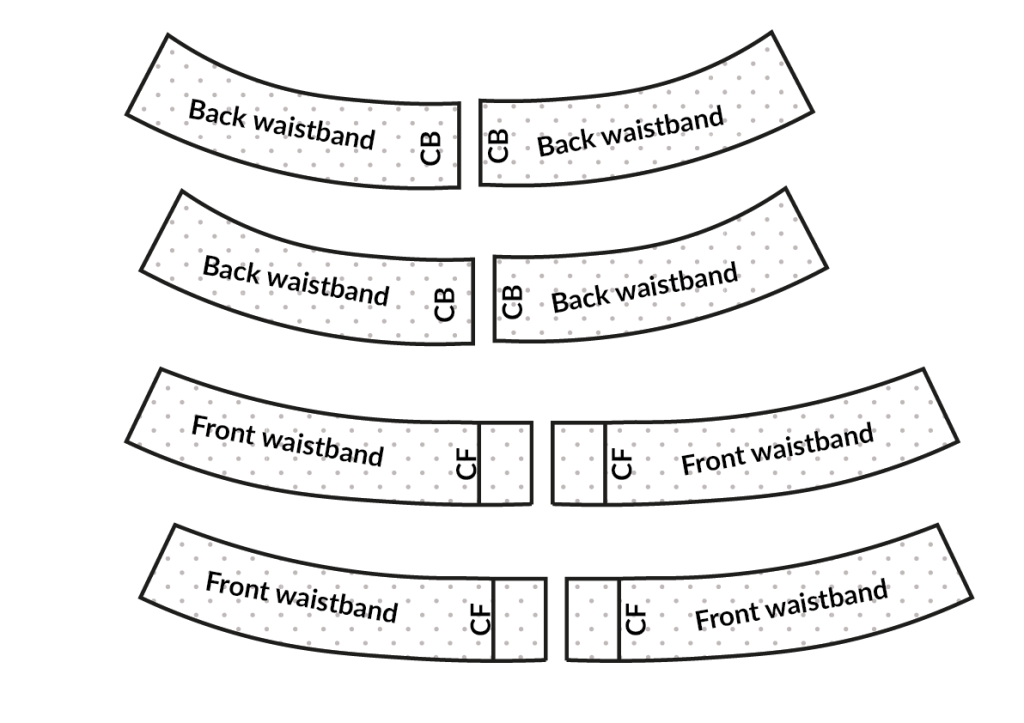
Cutting the pieces

Do not trim the shorter side until you’ve attached the waistband. Having that extra margin will save you a lot of hassle.
Interfacing
Interface every waistband piece
Interface every single waistband piece, not just the outside or inside. For a curved waistband, this is crucial, as it will be almost impossible to preserve the shape otherwise.
Interface or stay-stitch the waistline

Often the waistline will grow when handling the fabric. Which makes the waistline longer than the waistband, not a fun thing to happen when attaching the waistband! To prevent this either stay-stitch or use fusible or stitch on stay-tape. Since we use a smaller seam allowance here, the tape shouldn’t be wider than 1 cm (3/8″).
Sewing the waistband
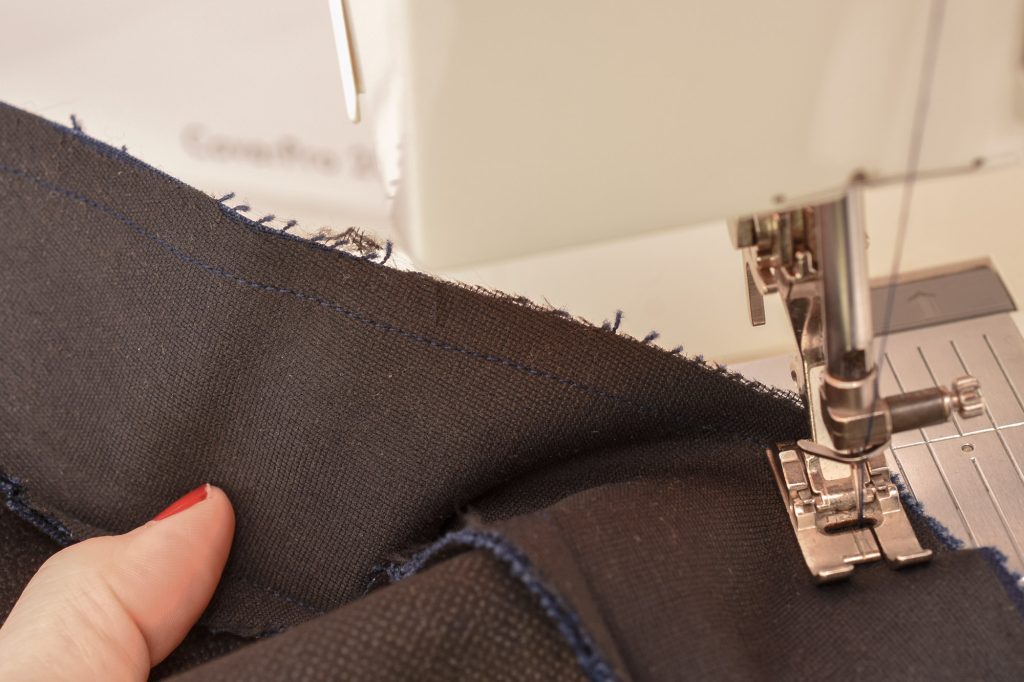
Sew the side seams

Right sides facing, stitch the centre back and side seams on the outer and inner waistband. Press open the seam allowances.
Join the inner and outer waistband

Right sides facing, place the inner waistband over the outer waistband. Pin along the edge.

Stitch along the upper edge to join.
Press the seam allowance and waistband

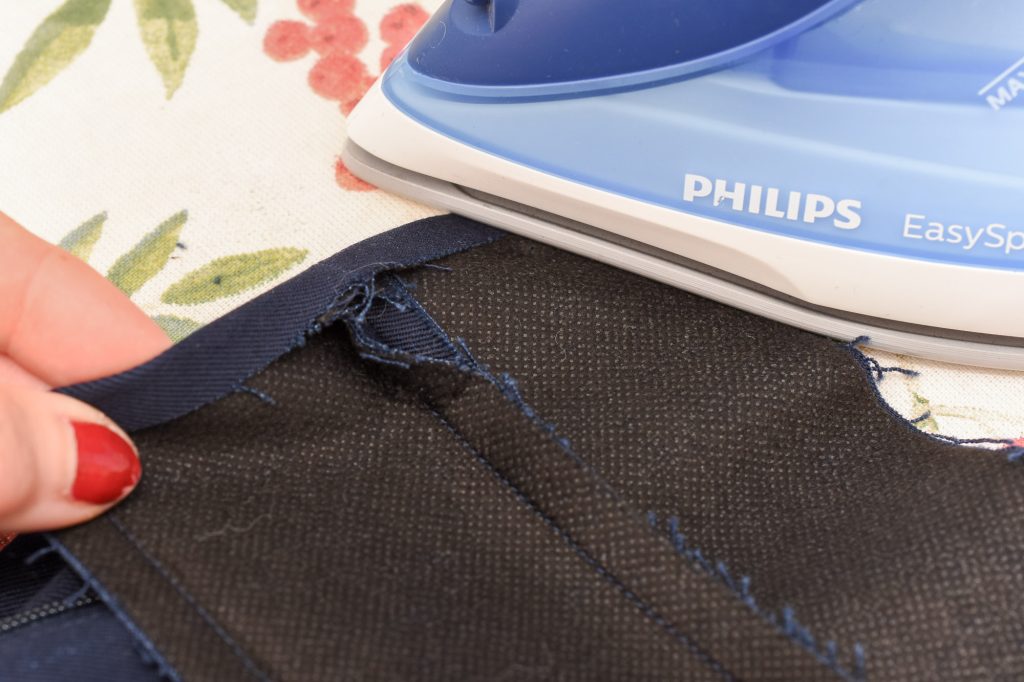
The upper waistband seam will look much flatter if you press open the seam allowance before folding over the layers.

Fold over the waistband and press a second time. Since you are pressing on the outside it’s best to use a pressing cloth to avoid heat marks. I didn’t, but I know you will 🙂
Stitch a folding line on the inner waistband
This is the secret to a perfectly shaped inner waistband, which is probably one of the trickiest bits when sewing waistbands. Since we are using a 1 cm (3/8″) seam allowance, the fold line should be almost the same, but ideally slightly narrower (0.8 cm). This will ensure that the stitching will catch the inner waistband and not end below. Use a regular straight stitch.
You can do this step before sewing the waistband, but if you do it afterwards it gives you a better idea of what the proper distance should be and allows for any fine-tuning.
Press in the fold

Press along the stitched line towards the inside. Having the straight in place makes this much easier than measuring or gauging.
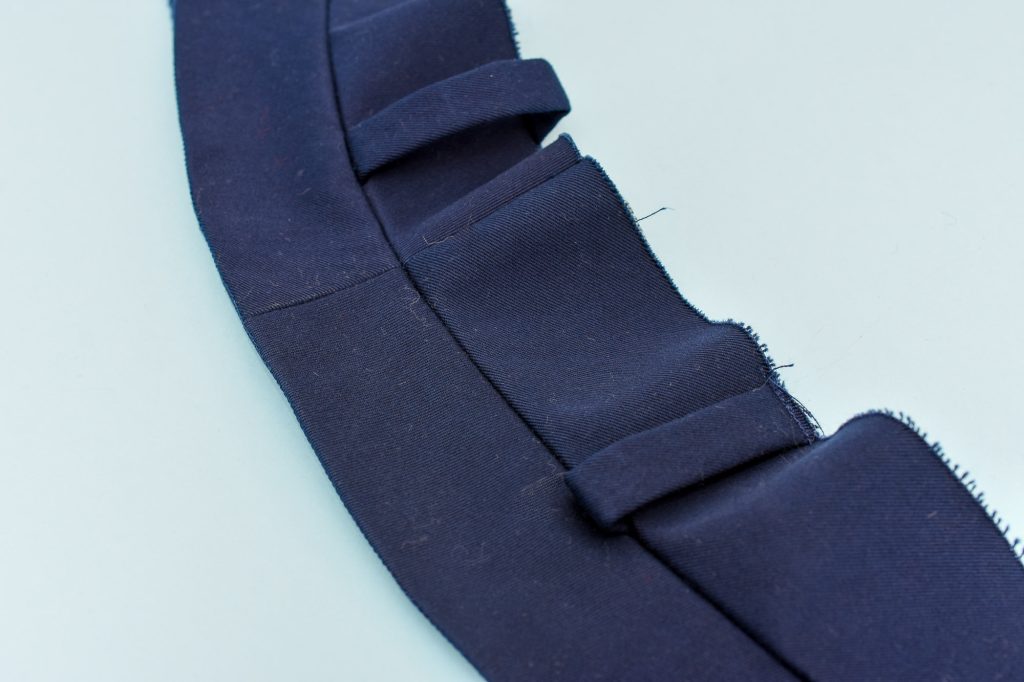
The inner waistband after pressing. The curve flows nicely and the fold is crisp.
Pin the waistband to the waist

Pin the outer waistband to the waistline, right sides facing. Align the side seams and any notches.
Turn in and press the waistband end at fly shield

Before you stitch the waistband, fold in the end seam allowance at the fly shield (see illustration below). Note that if you place the zipper on the opposite side, start with fly-shield end instead (see below)

This is the edge that you should turn inwards to align with the zipper shield’s outer edge.
Press to keep the fold in place.
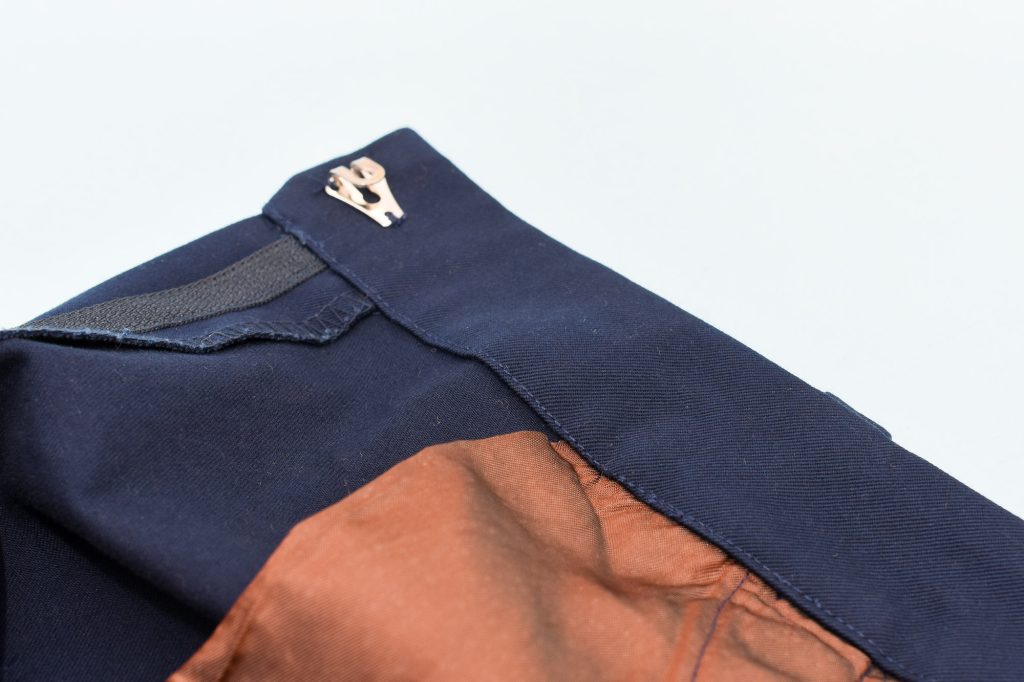
Wrap the fold around the fly shield

This trick covers the zipper area and makes the finished edge look pristine. You will repeat this on the other side, but not until after you’ve attached the waistband.

The other side of the waistband, after wrapping around the fly shield.

This is how the fold should look when sewing the waistband.
Stitch the waistband

Sew along the edge to attach the waistband to the waistline, with the waistband facing up, towards you. Start sewing from the folded edge.
Keep sewing until you reach the other end. You will fold in that side after sewing.
Trim the extra length at the end

If you followed my advice and kept the extra length at the waistband edge, it’s time to trim it.

Keep just 1 cm (3/8″) as seam allowance.

This is how it should look after trimming, at the end at the zipper fly edge.
Fold and press the ends

Fold in the seam allowance so that it aligns with the zip fly edge. Press with an iron.
Wrap seam allowance around the edge and stitch

After pressing, open up the folded seam allowance and wrap around the zip fly. Then stitch over the fold to secure.

Flip over the waistband and fold in the ends on both sides of the waistband. Overlap so that the folded ends cover the inner waistband fold.
Prepare to stitch the waistband

Fold over the inner waistband. Align the folded edge with the waistband seam. I recommend basting to prevent the waistband from slipping. For extra safety, you can add a few pins too.

You can also use Wonder-tape (Amazon affiliate link), which is a double-sided wash-away tape. Place it on the fold and press against the waistband seam.
Stitch the waistband

Either stitch close to the edge or on the seam ridge (stitch-in-the-ditch). I’m using the ditch method here because it hides the topstitching on the outer waistband.

Stop and check from time to time to ensure that the stitch ends up on the inner waistband and not below.
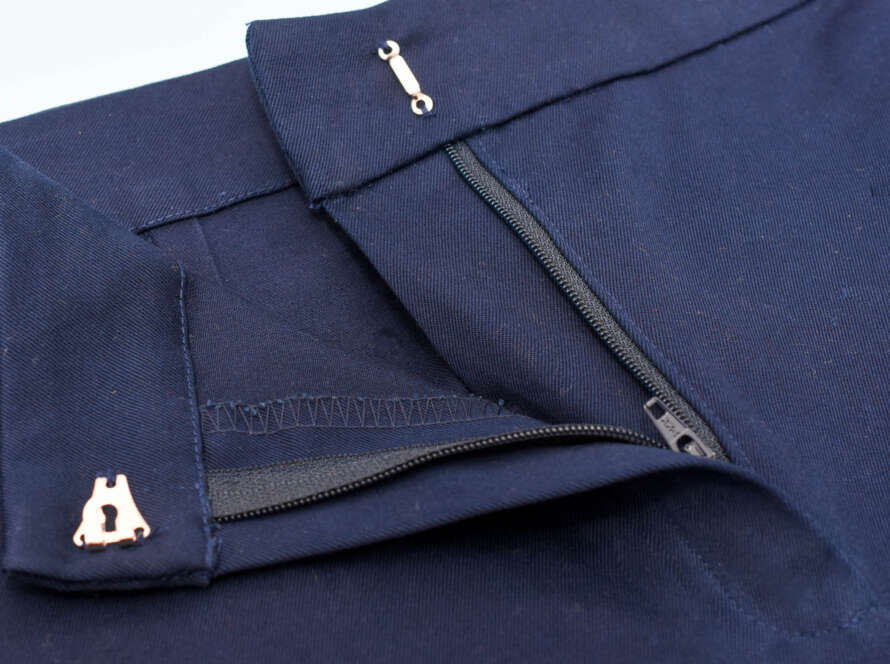
Finish the ends

You can either topstitch the ends or for an invisible finish, use slip-stitching (where you close the edges with almost invisible hand stitches). Using the fold method ensures a sharp 90-degree corner on the waistband, which you will struggle with if you stitch the ends from the inside (see below).

When you look inside a RTW waistband, you’ll hardly ever see a vertical stitch on the inside. Instead, the garment industry almost always uses some version of the fold method I’ve shown here.
If you want to learn more garment industry techniques, check out my book Sewing Jeans where I show how to sew waistbands on jeans using professional methods.

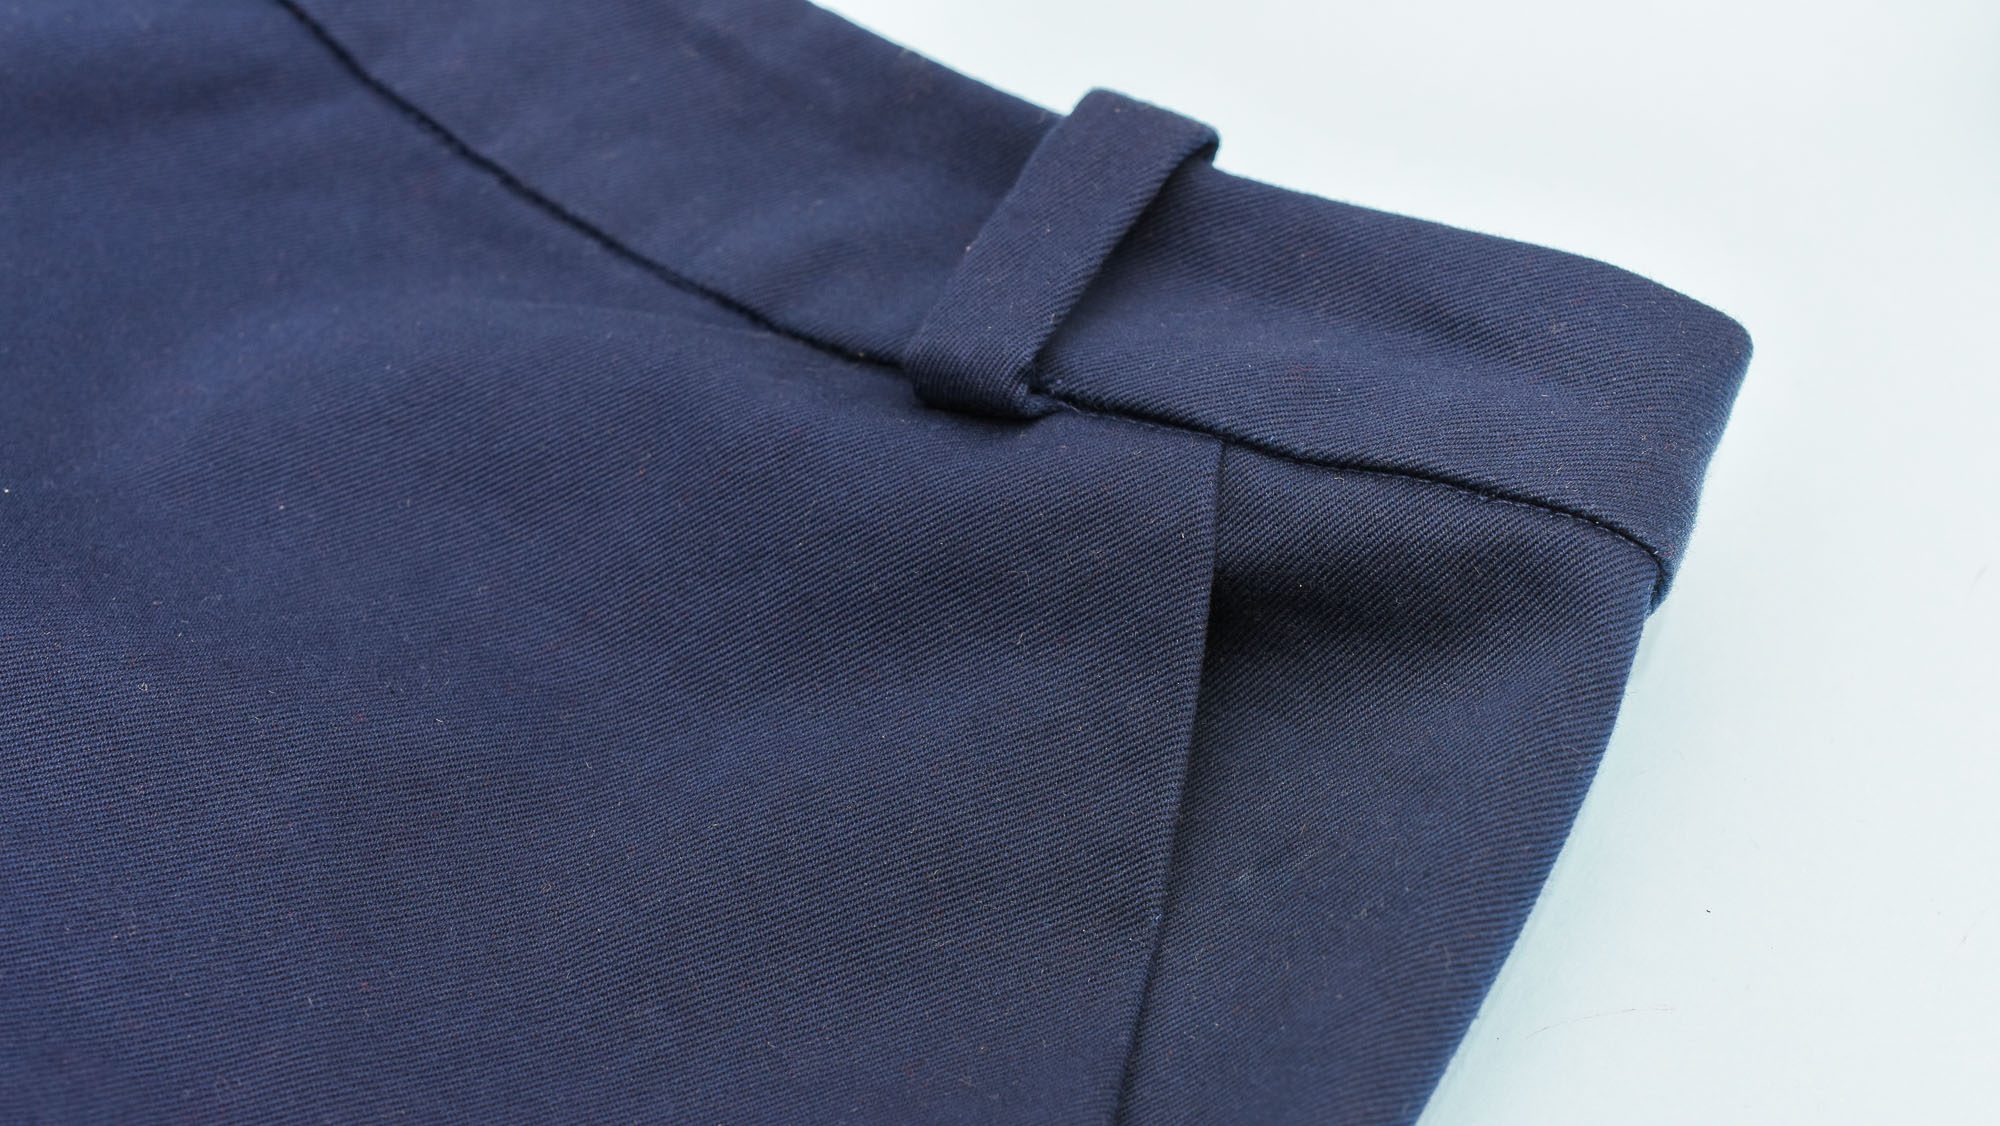
The finished edge. I think it looks pretty neat! My slip-stitching skills could be better, but you can’t tell unless you look up close 🙂
The finished waistband
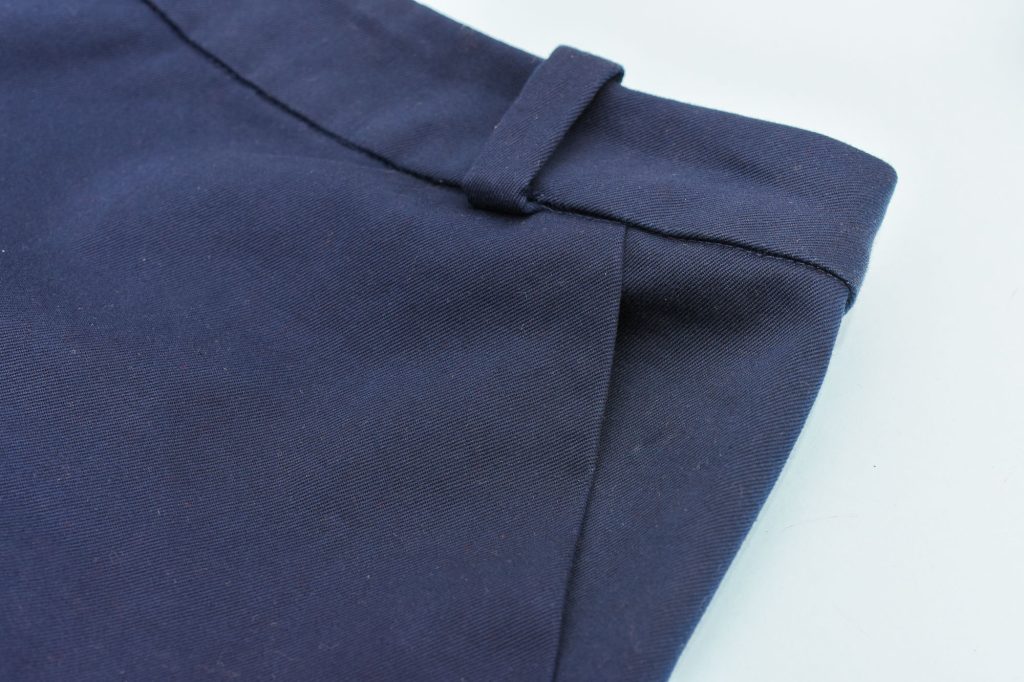
You have to look very closely to see the stitching in the seam ridge. This is the magic of stitching in the ditch!
And pretty on the inside too! Now stitching this precisely takes practice and I still struggle from time to time, but you will get better the more you sew waistbands, as long as you use the right methods.
Check out my other pants sewing tutorials to learn more professional techniques.


3 Comments
Tate Elliott
All those instructions and photos, but you don’t show the finished garment on a model.
Johanna Lundström
Fixed that for you
Comments are closed.