
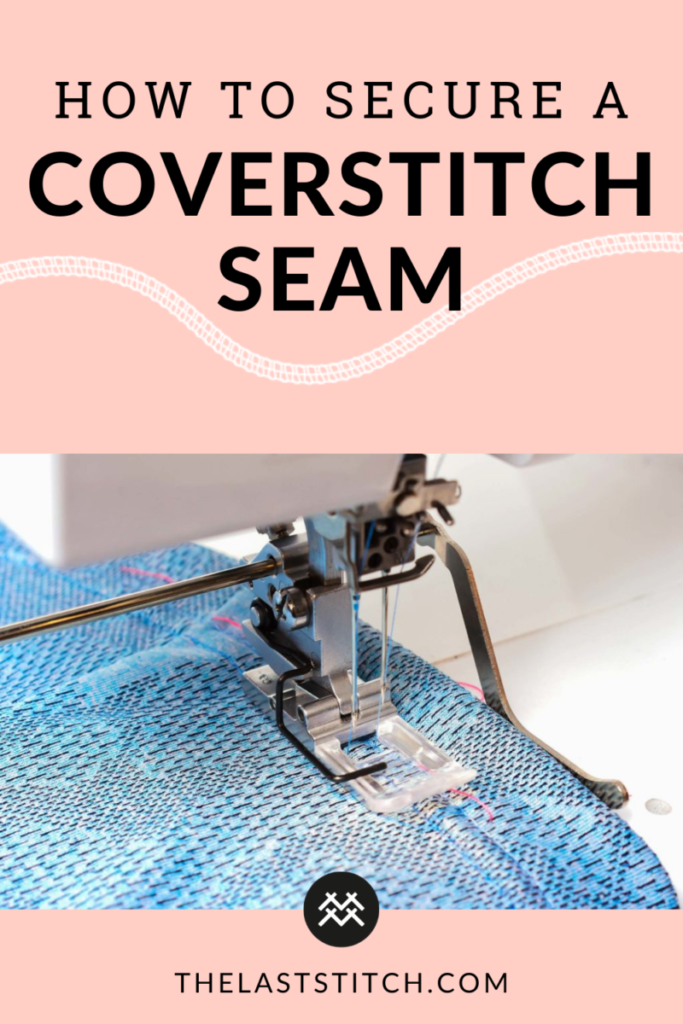
You need to properly secure a coverstitch seam, because, unlike a sewing machine, you cannot backstitch on a coverstitch machine. So if the thread ends are not secured, the seam will unravel quickly.
Fortunately, there are several ways to finish and secure a coverstitch seam, and it varies from machine to machine. Here is an overview of the two most common methods: The clip and pull and the secure-by-hand method.
The good news is that you only need to secure the ends of a seam. The beginning of the seam is automatically secured because the first stitch is fastened by the subsequent stitches.
Securing a coverstitch seam using the clip and pull method
This method pulls the end needle threads to the reverse side and automatically ties a knot. It’s a perfect choice when hemming a garment on the round, but you can use this method on flat, pieces too.
Tools needed to secure the coverstitch seam with a pull
- Tweezers, an awl, a crochet hook or some other narrow tool to pull the threads
- A pair of scissors or a thread clipper to cut the thread strands
A step-by-step tutorial on how to secure the coverstitch threads
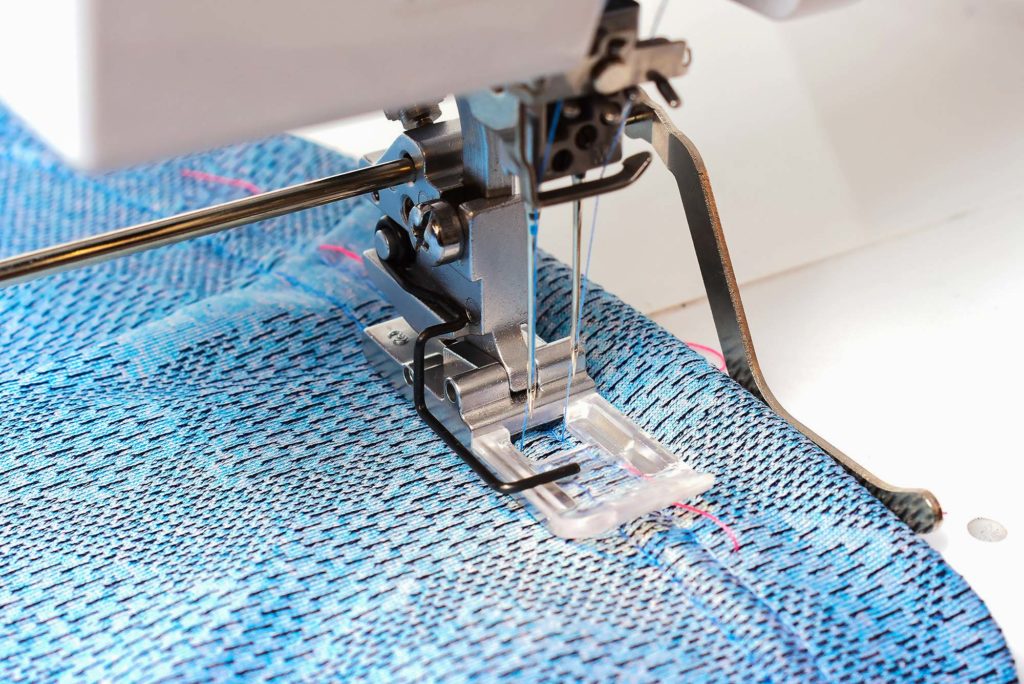
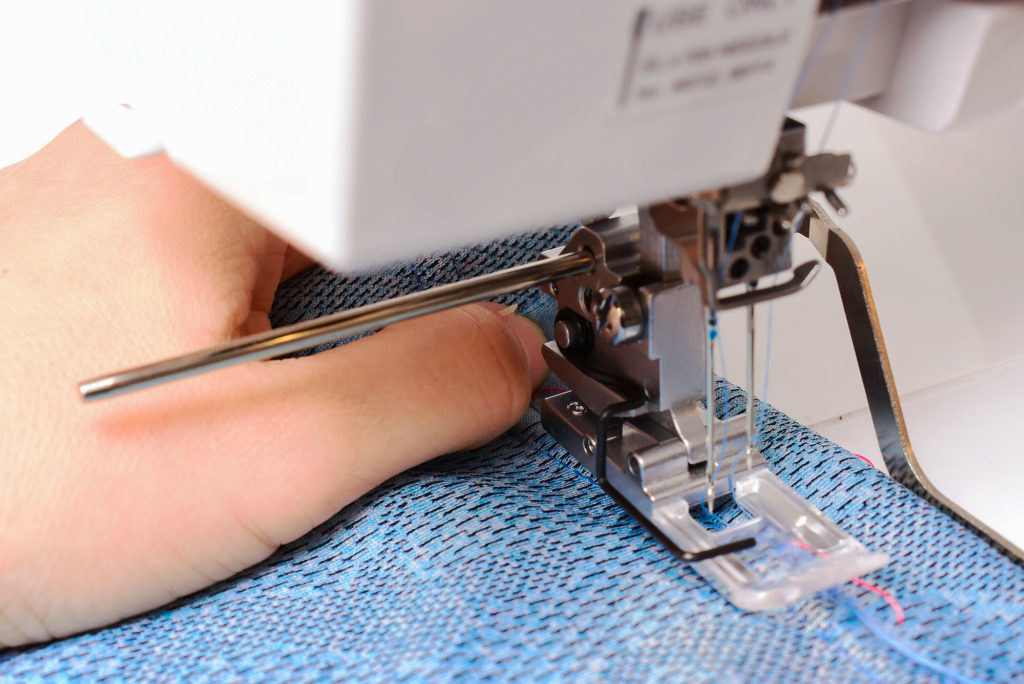
1. Prepare for securing the seam.
Close the seam by sewing over the beginning stitches for a few centimetres (an inch or less). Then sew the last stitch using the hand-wheel and stop at the highest point of the needle. The needle needs to be high up for this method to work properly.
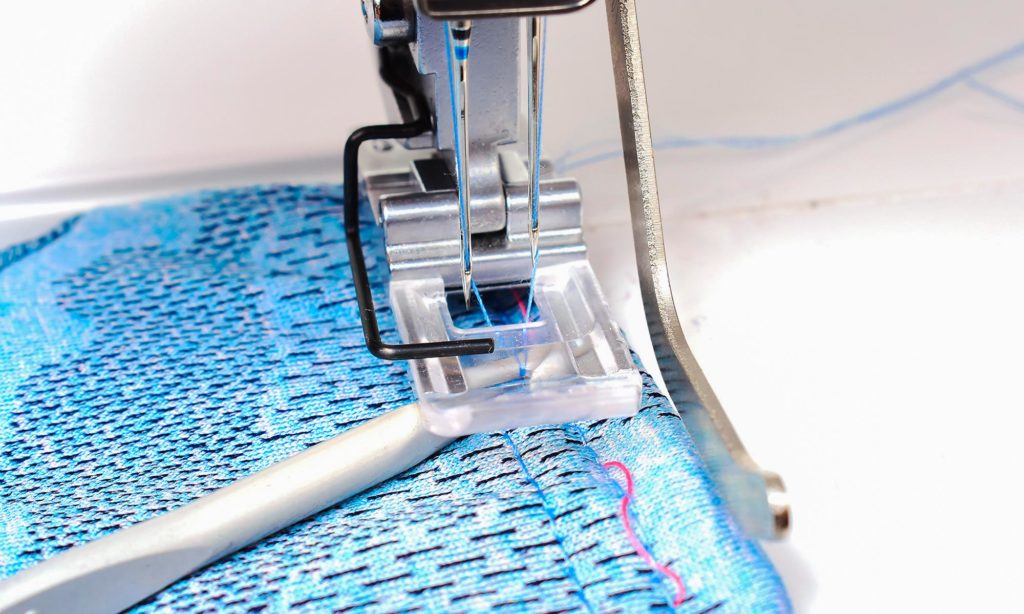

2. Pull the thread
Lift the presser foot. Then using a crochet hook, tweezers, or any other narrow tool, pull the needle threads towards you. Make the loop around 4 – 5 cm (2 in) long.
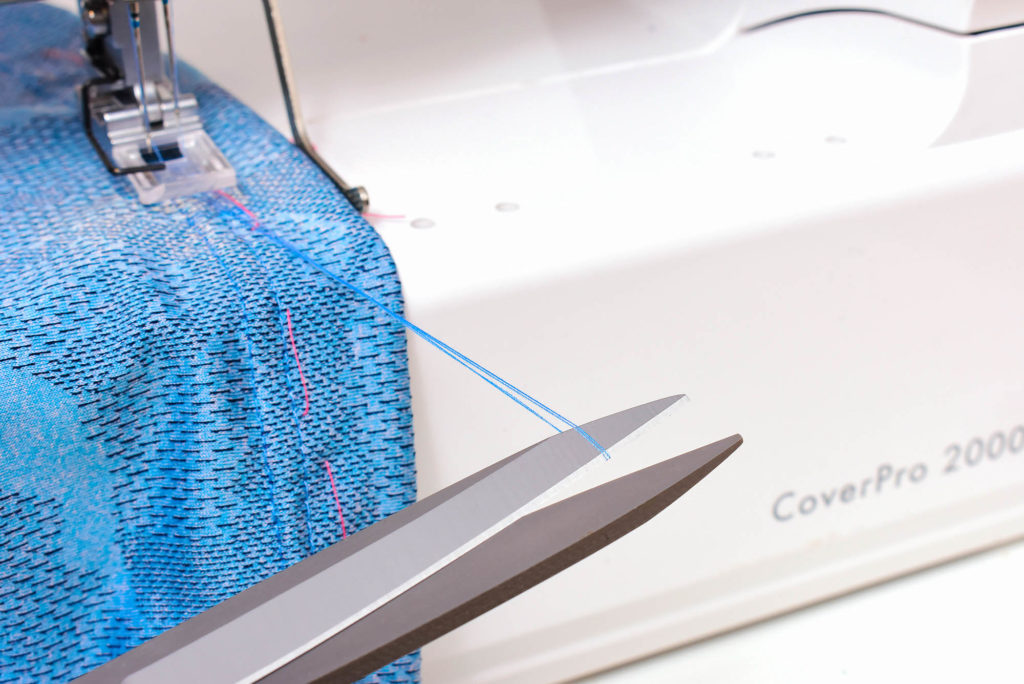
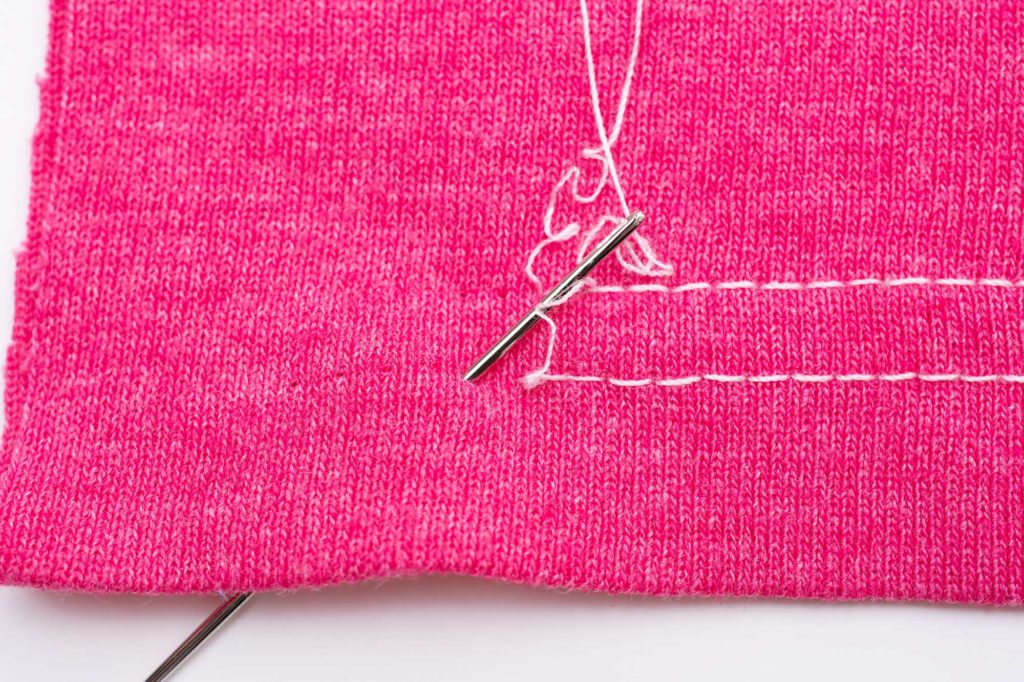
3. Clip the thread loop in the middle
This step is needed to open up the threads so that they can be pulled to the reverse.
4. Pinch the fabric
Grab the fabric behind the presser foot and pinch the seam between your thumb and your index and middle finger. Make sure you have a firm grip.
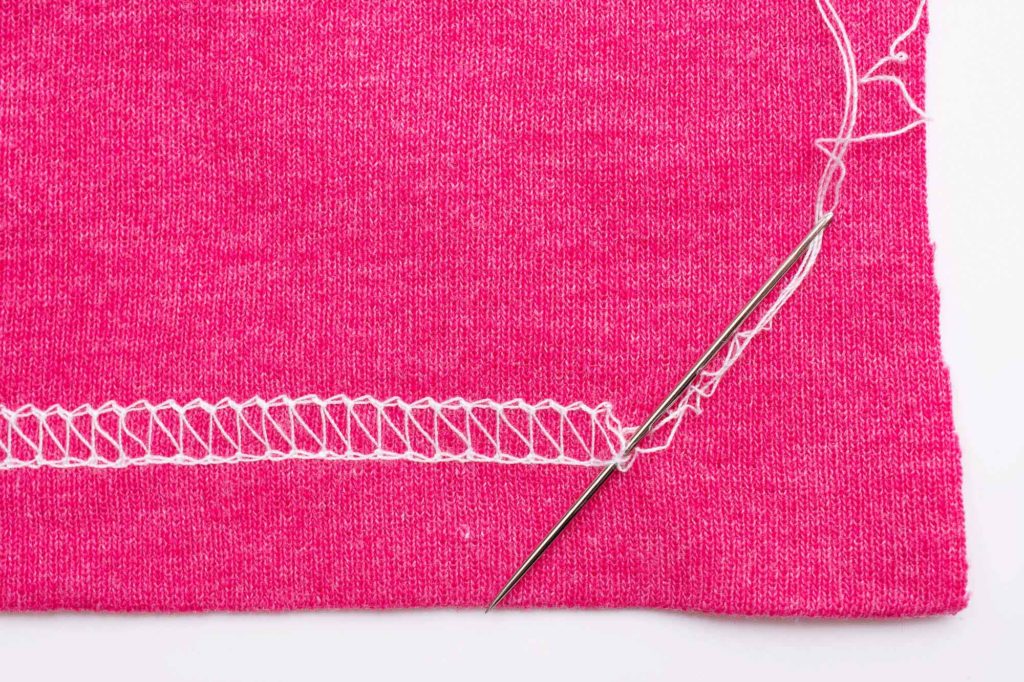
5. Pull the fabric
Pull the fabric firmly towards the back and then to the left or just pull it diagonally to the back. Test and see which direction works best for you. This pulls the needle threads to the reverse side and secures the stitch.
Pinching the seam with your fingers helps prevent tunnelling when the thread is pulled. If this is the first time doing this, it might not work 100%, but don’t worry, it’s just a matter of practising the pull motion. Just be firm and decisive, don’t do this method slowly and carefully and you’ll nail it in no time!
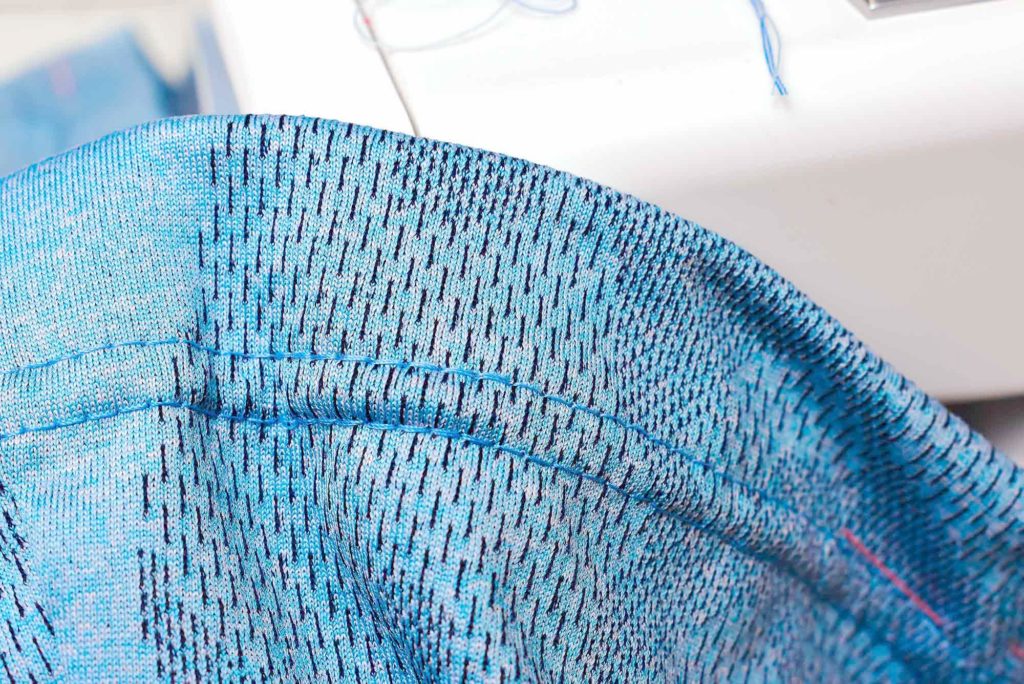
The secured seam
Notice how discreet it looks on the right side? As I mentioned in the previous step, there might be slight tunnelling happening when the threads are pulled, as you can see in the photo, but with a firm grip and some smoothing out afterwards, the effect will be pretty minimal.
Watch a video on how to secure a coverstitch seam using the pull method
Securing a coverstitch seam by hand using thread and needle
The following method requires a hand sewing needle and is particularly useful when sewing decorative coverstitch seams, such as reverse coverstitching.
Use a needle to pull the thread strands to the inside of the garment.
Attach the thread strands in the coverstitch seam by running them under a few stitches. For extra security finish by tying all threads as a knot.
If you are doing regular coverstitching, and not reverse, you can also follow Salome’s tip in the comment, which is to use a hook under your fabric instead of above it, which pulls the needle threads to the reverse side and makes it easier to then secure it without the use of sewing needle.
Now there are more options, of course, for instance, some machines can do a chain off like a serger so that you can keep sewing outside the fabric to create a long thread strand. Another option is to insert a fabric scrap and end the stitch on that one, and then secure the seam once you close the seam, such a sleeve or leggings hem.
If you mess things up, another resort is to use a sewing machine and sew a few straight stitches back and forth over the ends, this will also prevent the coverstitch from unravelling.
Want to learn even more about different ways of securing cover stitch seams? Then I highly recommend that you check out this video where I demonstrate three of the methods that I talk about in this tutorial. And of course, I also demonstrate these methods in my book Master the Coverstitch Machine.

5 Comments
Salome
Little tip: if you use the hook UNDER your fabric instead of above it, you’ll end up with all threads on the inside of the garment without pulling them with a needle.
Johanna Lundström
That’s a really good tip! I showed it in a more general manner since it depends if you do reverse coverstitching or not, but I will add your tip the post!
Candace Lee Pope
I pull my threads to the back, then snip. On a recent trip to my daughter’s, I noticed items sewn for my granddaughters all had coverstitch unraveling. Thanks for your tips. I will add a knot on the reverse side or straight stitches with regular sewing machine.
momwhosews
Thank you for tips. I am sewing over 4 stitches and than I pull them all on back side and add a knot. Will try your method. Im recently starting to sew with my Janome CoverPro and it doesn’t go as smooth as I would like. So I take it as a challenge to uncode how to 😀
Comments are closed.