
I have been obsessed with silk/rayon velvet since I was a little child. It all started with a small midnight blue velvet shawl that my grandfather had tied around a doll’s neck. The doll sat in the sofa bed where I used to sleep when visiting him and I remember stroking the shawl every night, being completely fascinated with the soft, almost watery hand.When I got into vintage clothing as a teenager I bought several pieces of silk/velvet rayon clothes – a dress, a skirt and a lovely, lovely jacket comes to mind. But apart from some brief refashion attempts I never tried sewing silky velvet.
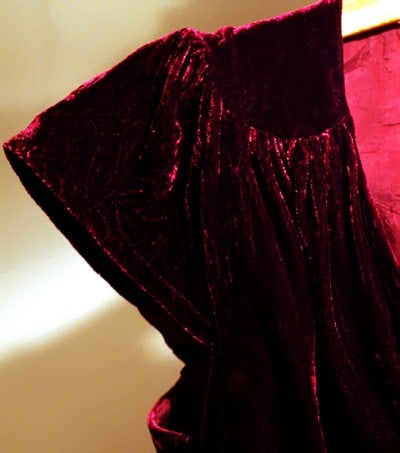
Mostly because I heard it was a really tricky fabric since it couldn’t withstand things like ironing, water or pinning.But a few years ago I caved in and bought 2 yards of a maroon silk/rayon velvet from an Ebay seller.
The fabric remained untouched until I saw the Burda dress – I knew it was the perfect match, but also a risky project due to velvet’s notorious properties.So now I will share some of the stuff I learned along the way:
Prewash in cold water
I found this advice and am very glad I followed it for several reasons:1. Velvet bleeds like crazy, it took me 10 minutes to get rid of all the excess colour.
2. Since I don’t want to dry clean I’m very glad to know that the dress will now withstand hand washing and won’t bleed or shrink any further.3. Water creates a slightly crushed surface (very subtle) which in turns hides some of the “damage” that water drips and holes from the needles causes.
Use a rotary cutter
I tried cutting the fabric with a scissor first and it was a terrible experience, uneven edges and the layers kept slipping. So I placed the fabric on my cutting mat instead, put some weights on the pattern pieces and used my rotary cutter. Suddenly it all went like a charm!
Ironing in the air

Pressing velvet against the iron board damages the pile. If you are prepared to fork up loads of $ you can buy a special pressing board with spikes to avoid that. I’ve seen US vendors carrying them, but no Swedish ones. I suppose I could have tried calling up a fakir, but instead I found this great tip in one of my vintage sewing books.You pin one side of the garment to the iron board and then hold out the rest of the garment while pressing gently with loads of steam. This is a very easy and effective method.I enlisted the help of various family members to hold the velvet which made it much easier. Don’t tug too much though since this stretches out the seams.
Also you need an iron that gives good steam. For small areas like the neckline I used a thick rolled terry cloth that I pressed the velvet against. Again no damage to the velvet.
How to keep the fabric in place while sewing
Velvet is super slippery and a walking foot is recommend. I don’t have one so I had to make do with my regular one. Allegedly a common problem is having the top layer stretching out while sewing. I didn’t have this problem much, but I’m pretty good at handling/stretching fabric while sewing which might have helped. My main problem was instead that the top layer wanted to slip sideways. To remedy that I put the top layer a few millimeters out from the under layer so when the presser foot went over the fabric the top layer aligned with the under layer. I didn’t baste the long straight seams because I was too lazy, but for the gathered bodice I did baste which helped a lot.
So what I’m trying to say here is that you CAN sew velvet without a walking foot
Apparently Sandra Betzina suggests using double adhesive tape when sewing velvet, I toyed with trying that idea during a particular desperate session, but never got around to it since I was again too lazy to go to the store.
I also used a wide seam allowance 1,5 cm/5/8 inches (the pile frays a lot) and a small needle – a Microtex 60 which left almost no detectable holes at all. I zigzagged all the seams and used a narrow hem for the skirt.
Repair with steam
Steam is a miracle worker when you need to heal small holes and crushed piles – they disappear in an instant. I just used the steam “puffer” function on my iron, but another of my vintage sewing books has great suggestions for treating larger areas.

Place the velvet over a pot of boiling water and brush the velvet gently against the pile direction. This will remove surface damage.

Another way of removing flattened pile is placing the pile side of velvet over a boiling pot and gently ironing on the wrong side.Also for more info on sewing silk/rayon velvet check out Debra H’s great tips over at Pattern Review.Several of the commenters asked if silk/rayon velvet is on my “never again” list after this experience.
Well the answer is (drumrolls….): I will definitely sew velvet again! But next time I will pick an easier project and I don’t think I’ll ever make a darted dress in silk velvet. That would just be too painful.


1 Comment
luckylibbet
Thanks! Your dress turned out so beautiful, I hope you wear it often – invent special occasions if necessary.
Comments are closed.